
The Cake That Started with a Crunch
My grandson Tommy once asked me, “Grandma, what’s the best cake in the whole world?” I didn’t even have to think. I pointed to this Oreo Cookie Cake sitting on the counter. Tommy’s eyes got as big as dinner plates. That cake didn’t last the afternoon. I still laugh at that memory. There is something about chocolate cake and Oreos together that makes people smile. This recipe came from a rainy Sunday when I had nothing else to do. I wanted to make something fun. Something a kid would remember forever. That is how this cake was born.Why Simple Ingredients Matter So Much
You will notice the cake part uses things you probably already have in your kitchen. Flour, sugar, eggs, milk. Nothing fancy. That is the beauty of it. Baking does not need to be complicated. Doesnt that smell amazing when it comes out of the oven? It fills your whole house. The secret is the boiling water. It makes the cake super moist. It helps the cocoa powder bloom and taste richer. Why this matters: you do not need a store-bought mix to make something special. You can do it yourself with a few simple steps.Making the Oreo Frosting Is the Best Part
Now we get to the frosting. You will crush up about eight or ten Oreo cookies. I like to put them in a zipper bag and whack them with a rolling pin. It is very fun. My kids used to fight over who got to do the smashing. You mix the butter, sugar, cream, and vanilla until it is fluffy. Then you stir in those cookie crumbs. *Fun fact: Oreo cookies were invented in 1912. That is over one hundred years ago. People have been crushing them up for cakes almost that long.* Why this matters: homemade frosting tastes way better than anything from a can. It is creamy and full of real vanilla. And it has actual cookie pieces in it. That makes every bite a little surprise.Putting the Cake Together
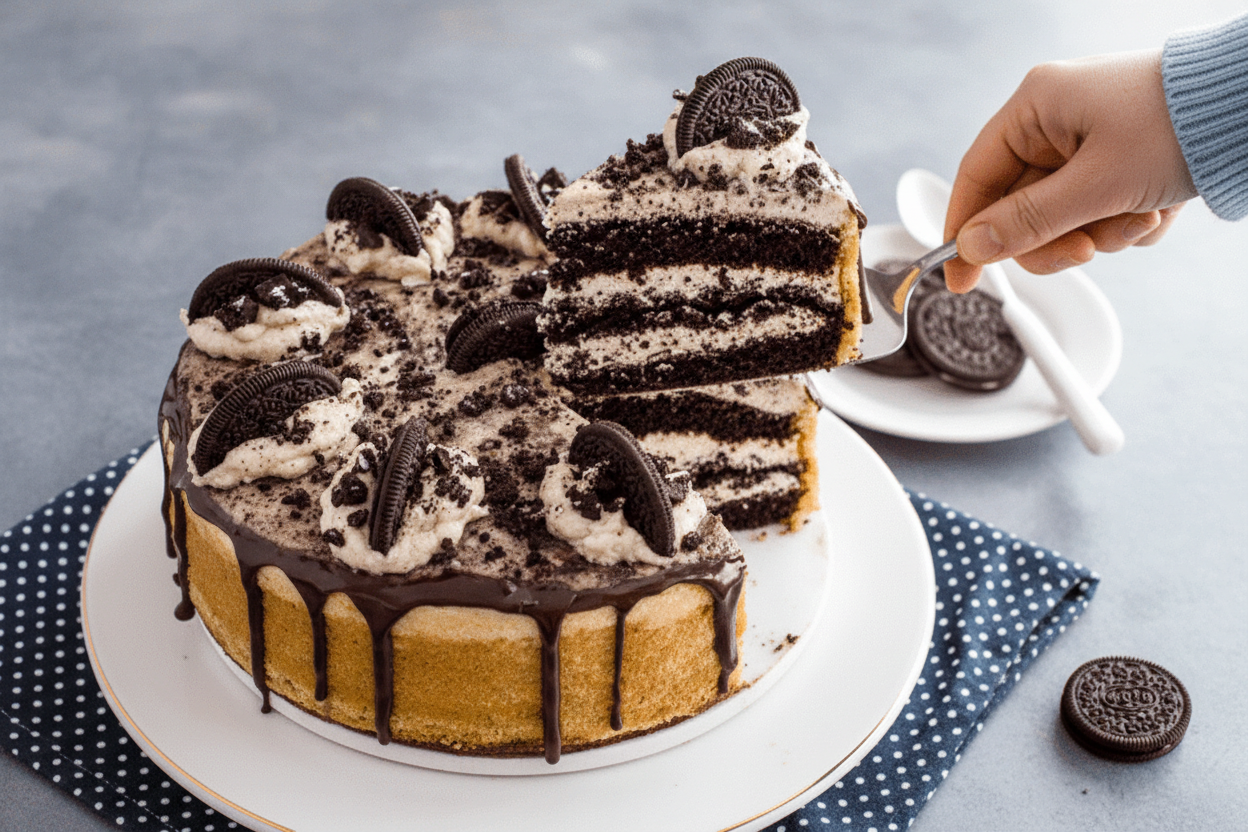
You will need two round cake pans. Make sure they are greased and floured. Pour the thin batter in and bake for about thirty minutes. Let them cool completely. I cannot say this enough. If the cake is warm, the frosting will melt into a puddle. Be patient. It is worth it. Once the cakes are cool, spread a thick layer of frosting on the bottom cake. Then stack the second one on top. Cover the whole thing with frosting. It does not have to be perfect. A messy cake is a happy cake. Have you ever tried frosting a cake with a kid? It gets everywhere. That is half the fun.Decorating and Serving
Now you get to be the artist. Stick whole Oreo cookies around the top edge. You can also drizzle chocolate ganache on top if you feel fancy. Ganache is just melted chocolate and cream. It makes the cake look like it came from a bakery. When you slice it, the frosting will have little black specks from the crushed cookies. That is how you know it is real. I like to serve it with a cold glass of milk. What is your favorite drink to have with chocolate cake? Tell me in a comment below.A Story from My Kitchen
Let’s Hear from You
Ingredients:
| Ingredient | Amount | Notes |
|---|---|---|
| All-purpose flour | 1 3/4 cups | For the chocolate cake |
| Unsweetened cocoa powder | 3/4 cup | For the chocolate cake |
| Granulated sugar | 2 cups | For the chocolate cake |
| Baking powder | 1 1/2 teaspoons | For the chocolate cake |
| Baking soda | 1 1/2 teaspoons | For the chocolate cake |
| Salt | 1 teaspoon | For the chocolate cake |
| Eggs | 2 large | For the chocolate cake |
| Whole milk | 1 cup | For the chocolate cake |
| Vegetable oil | 1/2 cup | For the chocolate cake |
| Vanilla extract | 2 teaspoons | For the chocolate cake |
| Boiling water | 1 cup | For the chocolate cake |
| Unsalted butter (softened) | 1 cup | For the Oreo frosting |
| Powdered sugar | 4 cups | For the Oreo frosting |
| Heavy cream | 1/2 cup | For the Oreo frosting |
| Vanilla extract | 1 teaspoon | For the Oreo frosting |
| Crushed Oreo cookies | 1 cup (8–10 cookies) | For the Oreo frosting |
| Whole Oreo cookies | As needed | For decoration |
| Chocolate ganache | Optional | For decoration |
My Oreo Cake Story
I remember the first time I made this cake. My grandson, Leo, was turning twelve. He begged for something with “the crunchy black cookies.”
I laughed so hard when he tried to sneak one from the bowl. Doesn’t that smell amazing? The chocolate, I mean. It fills the whole kitchen like a hug.
This recipe is simple enough for a young baker. But fancy enough to impress the grown-ups at the table. Let me walk you through it, step by step.
Step 1: Mix the dry stuff first. Combine your flour, cocoa powder, sugar, baking powder, baking soda, and salt in a big bowl. Whisk it all together so no clumps hide. (Hard-learned tip: Don’t skip sifting the cocoa powder. Little lumps ruin the smoothness!)
Step 2: Add the wet ingredients now. Crack in the eggs, pour in the milk, oil, and vanilla. Stir until it’s all one happy family. Then slowly pour in the boiling water. The batter will look very thin. Don’t panic! That is exactly right.
Step 3: Bake the cake layers. Divide the batter between two greased 9-inch pans. Bake at 350°F for about 30 to 35 minutes. If a toothpick comes out clean, you are golden. Let them cool completely on a rack. I once frosted a warm cake and it melted into a puddle. Learn from me, dear.
Step 4: Make the Oreo frosting. Beat the butter until it’s creamy and pale. Add the powdered sugar slowly, then the cream. Stir in a teaspoon of vanilla. Crush about 8 to 10 Oreos in a bag with a rolling pin. Fold them into the frosting. And maybe save a few to snack on. Do you crush your Oreos fine or chunky? Share below!
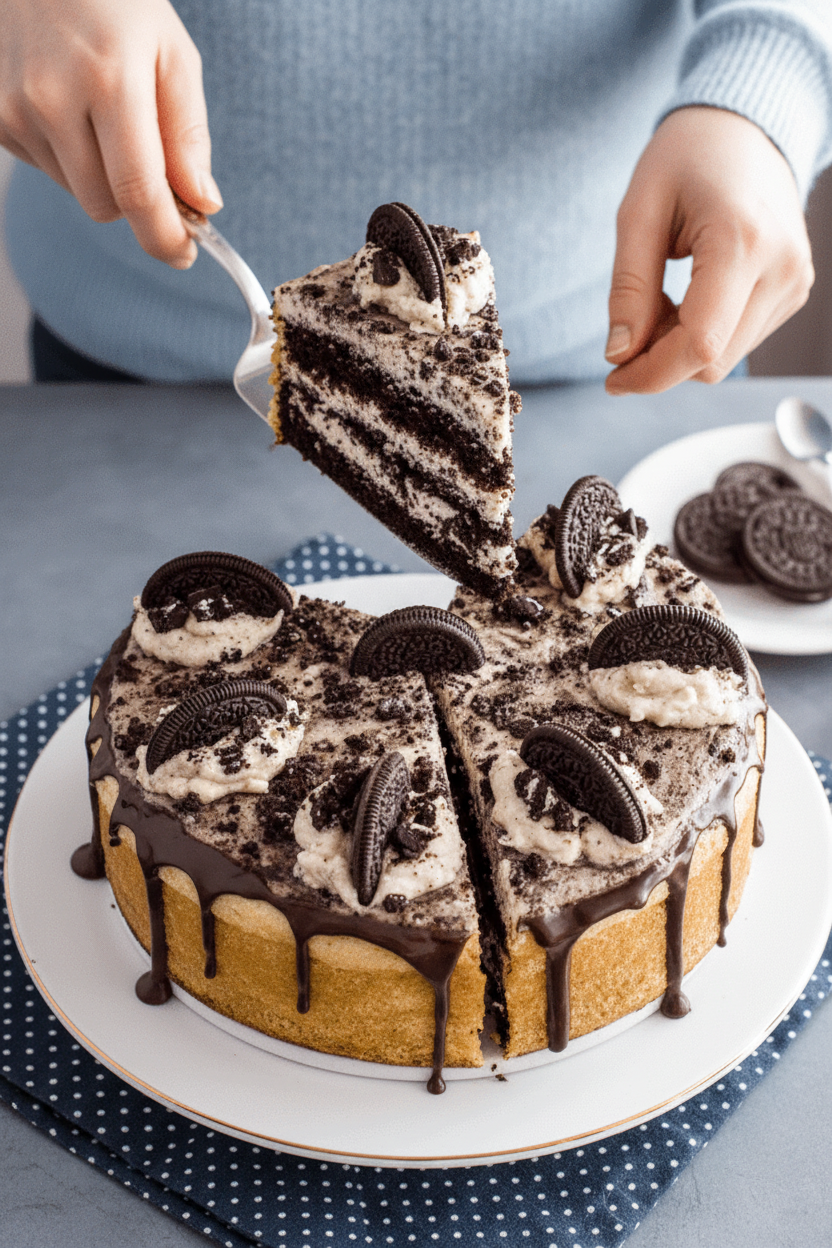
Step 5: Put it all together. Place one cake layer on a plate. Spread a thick layer of frosting on top. Gently set the second layer on. Cover the whole cake with the rest of the frosting. Decorate with whole Oreos on top. Add a drizzle of chocolate ganache if you feel fancy. Slice and serve. The laughter is guaranteed.
Cook Time: 30–35 minutes
Total Time: 1 hour 15 minutes
Yield: 12 servings
Category: Dessert, Cake
Three Fun Twists
Want to shake things up a little? You can take this cake in so many directions. It is like a blank canvas, only sweeter and crunchier.
Peppermint Crunch: Swap out the vanilla in the frosting for peppermint extract. Crush up some candy canes on top for a winter wonderland cake. It is so cool and refreshing.
Peanut Butter Dream: Add half a cup of creamy peanut butter to the frosting. Stir it in after you add the butter. The salty-sweet combo is completely irresistible. My neighbor calls it “the best thing on earth.”
Berry Swirl: Warm up half a cup of strawberry jam. Swirl it into the batter before baking. It makes pretty pink ribbons inside the dark chocolate cake. Very pretty for a spring picnic. Which one would you try first? Comment below!
How to Serve It
A tall glass of cold milk is the classic choice. It cuts through the rich chocolate so nicely. For grown-ups, a small cup of strong coffee works wonders. It brings out the deep cocoa flavor.
If you want to make it extra special, add a scoop of vanilla ice cream on the side. Or whip up some fresh cream with a tiny bit of sugar. Dollop it on top of each slice. It cools down the sweetness.
I sometimes sprinkle a pinch of flaky sea salt over my slice. Sounds funny, I know. But salt makes chocolate taste even more like chocolate. You just have to trust me on this one. Which would you choose tonight?
Storing Your Oreo Cookie Cake
This cake stays fresh for a few days. Keep it in a sealed container in the fridge. It will last up to four days that way. For longer storage, wrap slices in plastic wrap and put them in a freezer bag. They will keep for up to three months. To reheat, let a slice sit out for ten minutes. Or pop it in the microwave for ten seconds. I once froze a whole cake for a birthday surprise. When I took it out, it tasted just as good as fresh. Batch cooking this cake is great for busy weeks. You can bake the layers ahead of time and freeze them. Then just make the frosting when you need it. Why does this matter? It saves you time and stress. You always have a treat ready for guests or a hard day. Have you ever tried storing it this way? Share below!
Common Problems and Easy Fixes
Sometimes your cake layers come out lumpy. This happens when you do not mix the dry ingredients first. Always whisk flour, cocoa, and baking powder together before adding wet stuff. I remember my first chocolate cake had little flour lumps. It still tasted good, but the texture was off. Another problem is a dry cake. This means you baked it too long. Check it at 30 minutes with a toothpick. If it comes out clean, take it out right away. A third issue is frosting that is too runny. Just add more powdered sugar, one spoonful at a time. Why does fixing these things matter? It makes you a more confident baker. You learn what perfect cake feels like. Which of these problems have you run into before?
Your Top 5 Questions Answered
Q: Can I make this cake gluten-free? A: Yes, swap the flour with a 1-to-1 gluten-free baking blend. The taste is almost the same. Q: Can I make the frosting ahead of time? A: Yes, store it in the fridge for up to three days. Let it soften before spreading. Q: Can I use milk instead of heavy cream? A: Yes, but the frosting will be less thick. Use whole milk for best results. Q: Can I make just half the recipe? A: Yes, cut all ingredients in half. Use one 8-inch pan instead. Q: Can I skip the ganache? A: Yes, the cake is delicious without it. Just add extra Oreos on top. *Fun fact: Oreos are actually vegan, so this cake is easy to adapt.* Which tip will you try first?
A Warm Send-Off from Chloe
I hope this cake brings joy to your table. There is something special about a homemade dessert. It fills the house with warmth and happy memories. If you try this recipe, take a photo. Share it with your family or a friend. They will love seeing your creation. Have you tried this recipe? Tag us on Pinterest! I would love to see your versions. Every baker makes this cake a little different. That is the beauty of cooking. You are always adding your own love to it. Happy cooking! —Chloe Hartwell.


Leave a Reply