
Ingredients:
| Ingredient | Amount | Notes |
|---|---|---|
| Warm water (about 105°F/40°C) | 1 ½ cups (360 mL) | Ensure temperature is not too hot or it will kill the yeast |
| Instant yeast | 1 package (1 ¼ oz, 2 ¼ tsp, 7 g) | Can substitute active dry yeast if needed |
| Sugar | 1 Tbsp (15 g) | Helps activate the yeast |
| Salt | 1 tsp | Adds flavor |
| Olive oil | 1 Tbsp (15 mL) + extra for greasing | Extra oil for greasing bowl and pan |
| All-purpose flour | 3 ½ cups (450 g) | Can use bread flour for chewier texture |
The Best Pizza Dough for Little Hands (and Big Bellies)
I still remember the first time I made pizza dough with my grandson. Flour was everywhere. Even on the ceiling! That’s a happy memory now. This recipe is foolproof, which means even a twelve-year-old can do it. Doesn’t that smell amazing when it bakes?
You only need a few simple things from your kitchen. Warm water, yeast, sugar, salt, olive oil, and flour. That’s it. No fancy machines required. Just your hands and a big bowl. Let’s get started, friend.
First, we wake up the yeast. Think of it like a tiny bear coming out of a cave. It gets fizzy and happy. Then we add everything together and knead. That’s the fun part where you push and fold the dough.
Step 1: Pour the warm water into a small bowl. Sprinkle the yeast and sugar on top. Stir it gently, then wait five to ten minutes. You’ll see bubbles and foam. That means the yeast is alive. (Hard-learned tip: Never use water that’s too hot or it will kill the yeast. Lukewarm is perfect, like bath water.)
Step 2: Add the salt and olive oil to the frothy yeast mixture. Stir it with a fork. In a large bowl, dump in the flour. Pour the wet stuff into the flour. Mix with a wooden spoon until it gets too stiff. What do you think makes dough puff up like a soft pillow? … Share below!
Step 3: Dump the dough onto a floured counter. Push it away from you with the heel of your hand. Fold it over, then push again. Keep doing this for eight minutes. The dough will go from sticky to silky smooth. My grandma said it should feel like a baby’s cheek.
Step 4: Poke the dough with one finger. If it slowly springs back, you’re done kneading. Grease a clean bowl with olive oil and place the dough inside. Cover it with plastic wrap. Set it in a warm, draft-free spot for one to two hours. It needs to double in size, like a sleepy balloon.
Step 5: Punch the dough down gently. Cut it into two equal balls. Cover them with plastic wrap and let them rest for fifteen minutes. While you wait, preheat your oven to 475°F (250°C). Put your pizza pan inside the oven to get hot. A hot pan means a crispy crust. Trust me on this!
Step 6: Roll each dough ball onto floured parchment paper. Make it twelve inches for a classic pizza. Brush the top with olive oil. Add your favorite sauce, cheese, and toppings. Slide the pizza onto the hot pan. Bake on the lowest rack for ten to twelve minutes. Then move it to the top rack and broil for two minutes. Watch it so it doesn’t burn!
Cook Time: 12–14 minutes
Total Time: 2 hours 15 minutes
Yield: 2 medium pizzas (8 slices each)
Category: Dinner, Pizza
Three Fun Twists on Your Homemade Pizza
Plain cheese is delicious, but sometimes you want a change. I love trying new things with my dough. Here are three of my favorites.
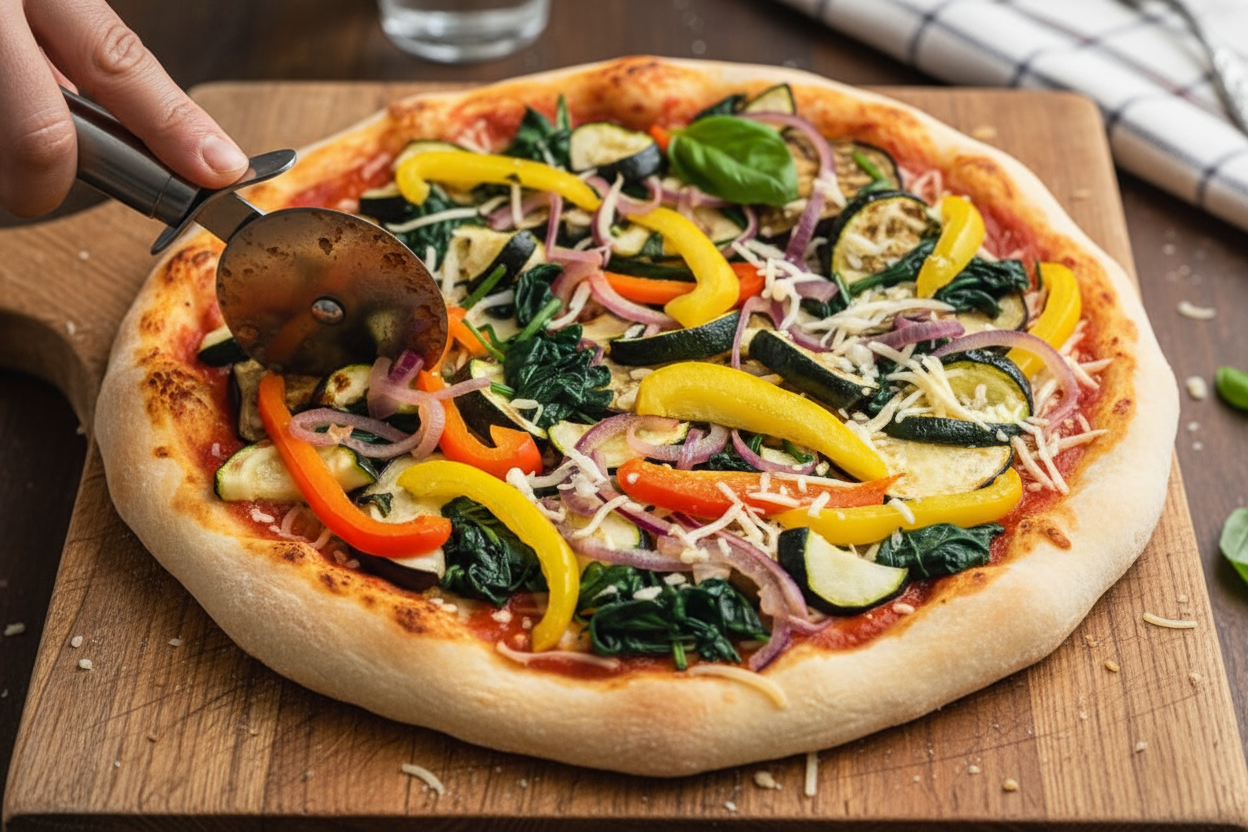
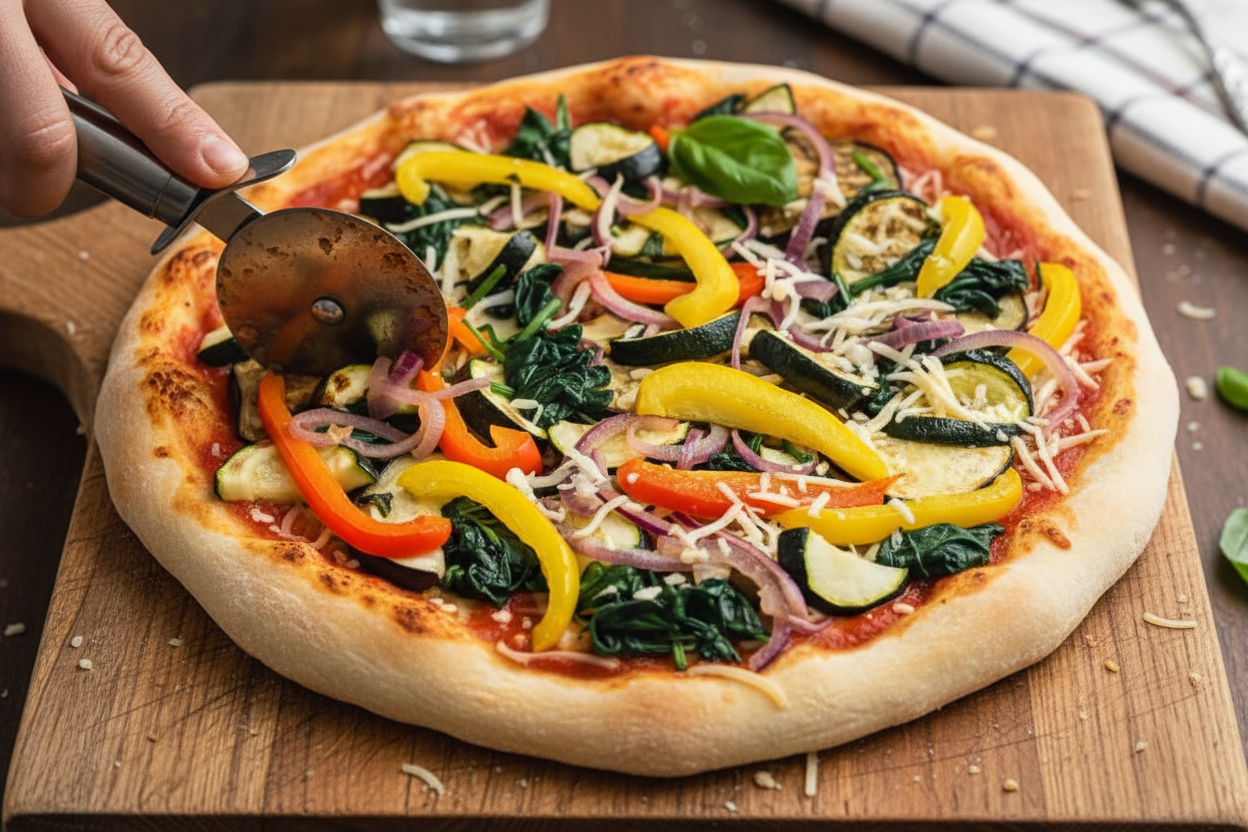
Garden Veggie Surprise: Top your pizza with colorful bell peppers, mushrooms, and black olives. Add a sprinkle of fresh basil after baking. It tastes like summer on a plate!
Spicy Sausage Fiesta: Crumble cooked Italian sausage over the sauce. Add red pepper flakes for a little kick. My nephew calls this the fire-breathing pizza. Which one would you try first? Comment below!
Apple Pie Dessert Pizza: Skip the tomato sauce. Spread softened cream cheese on the dough. Top with thinly sliced apples, cinnamon, and a drizzle of honey. Bake until golden. It’s like a pie you can eat with your hands.
What to Serve with Your Perfect Pizza
A good pizza needs good friends on the plate. I like to serve it with a simple green salad. Toss some lettuce, cherry tomatoes, and a splash of vinaigrette. It’s fresh and crunchy.
Another idea: cucumber sticks with ranch dip. They’re cool and crisp. Perfect for little fingers to grab between slices. You can also add a bowl of marinated olives for a salty bite.
For drinks, try a cold glass of lemonade. It’s bright and tangy. Grown-ups might enjoy a light red wine, like a Pinot Noir. Which would you choose tonight?

Storing Your Pizza Dough Like a Pro
Making pizza dough is fun. But what if you want pizza tonight and don’t have time? You can store the dough for later. That is the magic of planning ahead. Once your dough has risen, you can put it in the fridge. Wrap it tight in plastic wrap. It will stay good for up to three days. The cold slows down the yeast. This actually makes the flavor better. I remember my first time storing dough. I was nervous. But the next day, the pizza tasted even more like a pizzeria.
The freezer is your best friend for batch cooking. You can freeze the dough balls after they rest. Just wrap them in plastic, then put them in a freezer bag. They will keep for three months. When you want pizza, take a ball out. Let it thaw in the fridge overnight. Then let it sit on the counter for 30 minutes. This is why batch cooking matters. You have homemade pizza ready whenever a craving hits. No need to order out. Have you ever tried storing it this way? Share below!
Three Common Pizza Dough Problems and Fixes
Even the best cooks hit a snag. The first problem is dough that is too sticky. Do not panic. Just add flour one tablespoon at a time while you knead. The dough should be soft, not gluey. I once added too much water by accident. A little extra flour saved the day. The second problem is dough that will not rise. This happens when the water is too hot or too cold. The water should feel like a warm bath. If the yeast is old, it will not bubble. Always check the date on your yeast packet.
The third problem is a crust that is too hard. This often means you baked it too long. Remember the hot pan trick. It helps the bottom cook fast. Keep an eye on the oven. Why do these fixes matter? They save you from a sad pizza. They also teach you to trust your hands. You learn what good dough feels like. That confidence will follow you into every recipe. Which of these problems have you run into before?
Your Pizza Dough Questions Answered
Q: Can I use gluten-free flour? A: Yes. Use a gluten-free blend with xanthan gum. The dough will be stickier, so keep your hands wet.
Q: Can I make the dough the night before? A: Yes. Let it rise, then refrigerate it. The flavor gets better overnight.
Q: Can I swap white flour for whole wheat? A: Yes. Use half white and half whole wheat. Whole wheat dough needs a little more water.
Q: How do I scale the recipe for one pizza? A: Cut all ingredients in half. One ball makes one pizza.
Q: Can I add herbs to the dough? A: Yes. Mix in a teaspoon of dried oregano or garlic powder with the flour. *Fun fact: Italians sometimes add a pinch of sugar to help the crust brown.* Which tip will you try first?
A Warm Goodbye from Chloe
I hope you feel ready to make your own pizza dough. It is one of the kindest things you can do for your family. There is nothing like the smell of baking dough in your kitchen. It makes a house feel like a home. I would love to see your pizzas. Snap a picture of your creation. Share it with us. Have you tried this recipe? Tag us on Pinterest! Happy cooking! —Chloe Hartwell.

Foolproof Homemade Pizza Dough Recipe for Beginners
Description
Master the easiest foolproof homemade pizza dough recipe for beginners. Get crispy, chewy crust every time. Perfect for your next pizza night!
Ingredients
Instructions
- Proof yeast: Combine warm water with yeast and sugar. After 5 to 10 minutes, the mixture should be frothy. Mix in the salt and olive oil.
- Mix in flour: In a large bowl, mix the wet mixture into the flour. The dough will start to get difficult to mix with a spoon and eventually form a loose ball. Transfer the dough ball onto a lightly floured surface.
- Knead: Knead by hand (8 minutes) or with the bread hook of a standing mixer (5 minutes), adding more flour a tablespoon at a time if the dough is sticking to the surface. Pizza dough has been kneaded enough when it is smooth and passes the finger poke test (when you poke it with your finger, the dough should slowly spring back).
- Rise: Place dough in a lightly greased bowl and cover with plastic wrap. Set in a warm place and let rise for 1 to 2 hours, or until dough has doubled in size.
- Divide: Divide the dough into two balls, then cover with plastic wrap and let rest for 15 minutes. If you don’t plan on making 2 pizzas, you can freeze one of the balls now.
- Roll: Roll pizza dough directly onto lightly flour- or cornmeal-dusted parchment paper (12 inches for traditional crust, 14 for thin crust). Brush dough with olive oil, then top with your favorite ingredients.
- Bake: Preheat oven to 475°F (250°C). Place your empty pizza pan in the oven while it preheats to make it hot (hot pan = crispy crust). Bake on the lowest rack for 10 to 12 minutes, then move to the upper rack and broil for 2 minutes.
Notes
- Nutrition per serving (1 slice, 1/16 of recipe): Calories: 112 kcal, Carbohydrates: 22 g, Protein: 3 g, Fat: 1 g, Sodium: 148 mg
Ingredients:
| Ingredient | Amount | Notes |
|---|---|---|
| Warm water (about 105°F/40°C) | 1 ½ cups (360 mL) | Ensure temperature is not too hot or it will kill the yeast |
| Instant yeast | 1 package (1 ¼ oz, 2 ¼ tsp, 7 g) | Can substitute active dry yeast if needed |
| Sugar | 1 Tbsp (15 g) | Helps activate the yeast |
| Salt | 1 tsp | Adds flavor |
| Olive oil | 1 Tbsp (15 mL) + extra for greasing | Extra oil for greasing bowl and pan |
| All-purpose flour | 3 ½ cups (450 g) | Can use bread flour for chewier texture |
The Best Pizza Dough for Little Hands (and Big Bellies)
I still remember the first time I made pizza dough with my grandson. Flour was everywhere. Even on the ceiling! That’s a happy memory now. This recipe is foolproof, which means even a twelve-year-old can do it. Doesn’t that smell amazing when it bakes?
You only need a few simple things from your kitchen. Warm water, yeast, sugar, salt, olive oil, and flour. That’s it. No fancy machines required. Just your hands and a big bowl. Let’s get started, friend.
First, we wake up the yeast. Think of it like a tiny bear coming out of a cave. It gets fizzy and happy. Then we add everything together and knead. That’s the fun part where you push and fold the dough.
Step 1: Pour the warm water into a small bowl. Sprinkle the yeast and sugar on top. Stir it gently, then wait five to ten minutes. You’ll see bubbles and foam. That means the yeast is alive. (Hard-learned tip: Never use water that’s too hot or it will kill the yeast. Lukewarm is perfect, like bath water.)
Step 2: Add the salt and olive oil to the frothy yeast mixture. Stir it with a fork. In a large bowl, dump in the flour. Pour the wet stuff into the flour. Mix with a wooden spoon until it gets too stiff. What do you think makes dough puff up like a soft pillow? … Share below!
Step 3: Dump the dough onto a floured counter. Push it away from you with the heel of your hand. Fold it over, then push again. Keep doing this for eight minutes. The dough will go from sticky to silky smooth. My grandma said it should feel like a baby’s cheek.
Step 4: Poke the dough with one finger. If it slowly springs back, you’re done kneading. Grease a clean bowl with olive oil and place the dough inside. Cover it with plastic wrap. Set it in a warm, draft-free spot for one to two hours. It needs to double in size, like a sleepy balloon.
Step 5: Punch the dough down gently. Cut it into two equal balls. Cover them with plastic wrap and let them rest for fifteen minutes. While you wait, preheat your oven to 475°F (250°C). Put your pizza pan inside the oven to get hot. A hot pan means a crispy crust. Trust me on this!
Step 6: Roll each dough ball onto floured parchment paper. Make it twelve inches for a classic pizza. Brush the top with olive oil. Add your favorite sauce, cheese, and toppings. Slide the pizza onto the hot pan. Bake on the lowest rack for ten to twelve minutes. Then move it to the top rack and broil for two minutes. Watch it so it doesn’t burn!
Cook Time: 12–14 minutes
Total Time: 2 hours 15 minutes
Yield: 2 medium pizzas (8 slices each)
Category: Dinner, Pizza
Three Fun Twists on Your Homemade Pizza
Plain cheese is delicious, but sometimes you want a change. I love trying new things with my dough. Here are three of my favorites.
Garden Veggie Surprise: Top your pizza with colorful bell peppers, mushrooms, and black olives. Add a sprinkle of fresh basil after baking. It tastes like summer on a plate!
Spicy Sausage Fiesta: Crumble cooked Italian sausage over the sauce. Add red pepper flakes for a little kick. My nephew calls this the fire-breathing pizza. Which one would you try first? Comment below!
Apple Pie Dessert Pizza: Skip the tomato sauce. Spread softened cream cheese on the dough. Top with thinly sliced apples, cinnamon, and a drizzle of honey. Bake until golden. It’s like a pie you can eat with your hands.
What to Serve with Your Perfect Pizza
A good pizza needs good friends on the plate. I like to serve it with a simple green salad. Toss some lettuce, cherry tomatoes, and a splash of vinaigrette. It’s fresh and crunchy.
Another idea: cucumber sticks with ranch dip. They’re cool and crisp. Perfect for little fingers to grab between slices. You can also add a bowl of marinated olives for a salty bite.
For drinks, try a cold glass of lemonade. It’s bright and tangy. Grown-ups might enjoy a light red wine, like a Pinot Noir. Which would you choose tonight?
Storing Your Pizza Dough Like a Pro
Making pizza dough is fun. But what if you want pizza tonight and don’t have time? You can store the dough for later. That is the magic of planning ahead. Once your dough has risen, you can put it in the fridge. Wrap it tight in plastic wrap. It will stay good for up to three days. The cold slows down the yeast. This actually makes the flavor better. I remember my first time storing dough. I was nervous. But the next day, the pizza tasted even more like a pizzeria.
The freezer is your best friend for batch cooking. You can freeze the dough balls after they rest. Just wrap them in plastic, then put them in a freezer bag. They will keep for three months. When you want pizza, take a ball out. Let it thaw in the fridge overnight. Then let it sit on the counter for 30 minutes. This is why batch cooking matters. You have homemade pizza ready whenever a craving hits. No need to order out. Have you ever tried storing it this way? Share below!
Three Common Pizza Dough Problems and Fixes
Even the best cooks hit a snag. The first problem is dough that is too sticky. Do not panic. Just add flour one tablespoon at a time while you knead. The dough should be soft, not gluey. I once added too much water by accident. A little extra flour saved the day. The second problem is dough that will not rise. This happens when the water is too hot or too cold. The water should feel like a warm bath. If the yeast is old, it will not bubble. Always check the date on your yeast packet.
The third problem is a crust that is too hard. This often means you baked it too long. Remember the hot pan trick. It helps the bottom cook fast. Keep an eye on the oven. Why do these fixes matter? They save you from a sad pizza. They also teach you to trust your hands. You learn what good dough feels like. That confidence will follow you into every recipe. Which of these problems have you run into before?
Your Pizza Dough Questions Answered
Q: Can I use gluten-free flour? A: Yes. Use a gluten-free blend with xanthan gum. The dough will be stickier, so keep your hands wet.
Q: Can I make the dough the night before? A: Yes. Let it rise, then refrigerate it. The flavor gets better overnight.
Q: Can I swap white flour for whole wheat? A: Yes. Use half white and half whole wheat. Whole wheat dough needs a little more water.
Q: How do I scale the recipe for one pizza? A: Cut all ingredients in half. One ball makes one pizza.
Q: Can I add herbs to the dough? A: Yes. Mix in a teaspoon of dried oregano or garlic powder with the flour. *Fun fact: Italians sometimes add a pinch of sugar to help the crust brown.* Which tip will you try first?
A Warm Goodbye from Chloe
I hope you feel ready to make your own pizza dough. It is one of the kindest things you can do for your family. There is nothing like the smell of baking dough in your kitchen. It makes a house feel like a home. I would love to see your pizzas. Snap a picture of your creation. Share it with us. Have you tried this recipe? Tag us on Pinterest! Happy cooking! —Chloe Hartwell.
Ingredients:
| Ingredient | Amount | Notes |
|---|---|---|
| Warm water (about 105°F/40°C) | 1 ½ cups (360 mL) | Ensure temperature is not too hot or it will kill the yeast |
| Instant yeast | 1 package (1 ¼ oz, 2 ¼ tsp, 7 g) | Can substitute active dry yeast if needed |
| Sugar | 1 Tbsp (15 g) | Helps activate the yeast |
| Salt | 1 tsp | Adds flavor |
| Olive oil | 1 Tbsp (15 mL) + extra for greasing | Extra oil for greasing bowl and pan |
| All-purpose flour | 3 ½ cups (450 g) | Can use bread flour for chewier texture |
The Best Pizza Dough for Little Hands (and Big Bellies)
I still remember the first time I made pizza dough with my grandson. Flour was everywhere. Even on the ceiling! That’s a happy memory now. This recipe is foolproof, which means even a twelve-year-old can do it. Doesn’t that smell amazing when it bakes?
You only need a few simple things from your kitchen. Warm water, yeast, sugar, salt, olive oil, and flour. That’s it. No fancy machines required. Just your hands and a big bowl. Let’s get started, friend.
First, we wake up the yeast. Think of it like a tiny bear coming out of a cave. It gets fizzy and happy. Then we add everything together and knead. That’s the fun part where you push and fold the dough.
Step 1: Pour the warm water into a small bowl. Sprinkle the yeast and sugar on top. Stir it gently, then wait five to ten minutes. You’ll see bubbles and foam. That means the yeast is alive. (Hard-learned tip: Never use water that’s too hot or it will kill the yeast. Lukewarm is perfect, like bath water.)
Step 2: Add the salt and olive oil to the frothy yeast mixture. Stir it with a fork. In a large bowl, dump in the flour. Pour the wet stuff into the flour. Mix with a wooden spoon until it gets too stiff. What do you think makes dough puff up like a soft pillow? … Share below!
Step 3: Dump the dough onto a floured counter. Push it away from you with the heel of your hand. Fold it over, then push again. Keep doing this for eight minutes. The dough will go from sticky to silky smooth. My grandma said it should feel like a baby’s cheek.
Step 4: Poke the dough with one finger. If it slowly springs back, you’re done kneading. Grease a clean bowl with olive oil and place the dough inside. Cover it with plastic wrap. Set it in a warm, draft-free spot for one to two hours. It needs to double in size, like a sleepy balloon.
Step 5: Punch the dough down gently. Cut it into two equal balls. Cover them with plastic wrap and let them rest for fifteen minutes. While you wait, preheat your oven to 475°F (250°C). Put your pizza pan inside the oven to get hot. A hot pan means a crispy crust. Trust me on this!
Step 6: Roll each dough ball onto floured parchment paper. Make it twelve inches for a classic pizza. Brush the top with olive oil. Add your favorite sauce, cheese, and toppings. Slide the pizza onto the hot pan. Bake on the lowest rack for ten to twelve minutes. Then move it to the top rack and broil for two minutes. Watch it so it doesn’t burn!
Cook Time: 12–14 minutes
Total Time: 2 hours 15 minutes
Yield: 2 medium pizzas (8 slices each)
Category: Dinner, Pizza
Three Fun Twists on Your Homemade Pizza
Plain cheese is delicious, but sometimes you want a change. I love trying new things with my dough. Here are three of my favorites.
Garden Veggie Surprise: Top your pizza with colorful bell peppers, mushrooms, and black olives. Add a sprinkle of fresh basil after baking. It tastes like summer on a plate!
Spicy Sausage Fiesta: Crumble cooked Italian sausage over the sauce. Add red pepper flakes for a little kick. My nephew calls this the fire-breathing pizza. Which one would you try first? Comment below!
Apple Pie Dessert Pizza: Skip the tomato sauce. Spread softened cream cheese on the dough. Top with thinly sliced apples, cinnamon, and a drizzle of honey. Bake until golden. It’s like a pie you can eat with your hands.
What to Serve with Your Perfect Pizza
A good pizza needs good friends on the plate. I like to serve it with a simple green salad. Toss some lettuce, cherry tomatoes, and a splash of vinaigrette. It’s fresh and crunchy.
Another idea: cucumber sticks with ranch dip. They’re cool and crisp. Perfect for little fingers to grab between slices. You can also add a bowl of marinated olives for a salty bite.
For drinks, try a cold glass of lemonade. It’s bright and tangy. Grown-ups might enjoy a light red wine, like a Pinot Noir. Which would you choose tonight?
Storing Your Pizza Dough Like a Pro
Making pizza dough is fun. But what if you want pizza tonight and don’t have time? You can store the dough for later. That is the magic of planning ahead. Once your dough has risen, you can put it in the fridge. Wrap it tight in plastic wrap. It will stay good for up to three days. The cold slows down the yeast. This actually makes the flavor better. I remember my first time storing dough. I was nervous. But the next day, the pizza tasted even more like a pizzeria.
The freezer is your best friend for batch cooking. You can freeze the dough balls after they rest. Just wrap them in plastic, then put them in a freezer bag. They will keep for three months. When you want pizza, take a ball out. Let it thaw in the fridge overnight. Then let it sit on the counter for 30 minutes. This is why batch cooking matters. You have homemade pizza ready whenever a craving hits. No need to order out. Have you ever tried storing it this way? Share below!
Three Common Pizza Dough Problems and Fixes
Even the best cooks hit a snag. The first problem is dough that is too sticky. Do not panic. Just add flour one tablespoon at a time while you knead. The dough should be soft, not gluey. I once added too much water by accident. A little extra flour saved the day. The second problem is dough that will not rise. This happens when the water is too hot or too cold. The water should feel like a warm bath. If the yeast is old, it will not bubble. Always check the date on your yeast packet.
The third problem is a crust that is too hard. This often means you baked it too long. Remember the hot pan trick. It helps the bottom cook fast. Keep an eye on the oven. Why do these fixes matter? They save you from a sad pizza. They also teach you to trust your hands. You learn what good dough feels like. That confidence will follow you into every recipe. Which of these problems have you run into before?
Your Pizza Dough Questions Answered
Q: Can I use gluten-free flour? A: Yes. Use a gluten-free blend with xanthan gum. The dough will be stickier, so keep your hands wet.
Q: Can I make the dough the night before? A: Yes. Let it rise, then refrigerate it. The flavor gets better overnight.
Q: Can I swap white flour for whole wheat? A: Yes. Use half white and half whole wheat. Whole wheat dough needs a little more water.
Q: How do I scale the recipe for one pizza? A: Cut all ingredients in half. One ball makes one pizza.
Q: Can I add herbs to the dough? A: Yes. Mix in a teaspoon of dried oregano or garlic powder with the flour. *Fun fact: Italians sometimes add a pinch of sugar to help the crust brown.* Which tip will you try first?
A Warm Goodbye from Chloe
I hope you feel ready to make your own pizza dough. It is one of the kindest things you can do for your family. There is nothing like the smell of baking dough in your kitchen. It makes a house feel like a home. I would love to see your pizzas. Snap a picture of your creation. Share it with us. Have you tried this recipe? Tag us on Pinterest! Happy cooking! —Chloe Hartwell.
Ingredients:
| Ingredient | Amount | Notes |
|---|---|---|
| Warm water (about 105°F/40°C) | 1 ½ cups (360 mL) | Ensure temperature is not too hot or it will kill the yeast |
| Instant yeast | 1 package (1 ¼ oz, 2 ¼ tsp, 7 g) | Can substitute active dry yeast if needed |
| Sugar | 1 Tbsp (15 g) | Helps activate the yeast |
| Salt | 1 tsp | Adds flavor |
| Olive oil | 1 Tbsp (15 mL) + extra for greasing | Extra oil for greasing bowl and pan |
| All-purpose flour | 3 ½ cups (450 g) | Can use bread flour for chewier texture |
The Best Pizza Dough for Little Hands (and Big Bellies)
I still remember the first time I made pizza dough with my grandson. Flour was everywhere. Even on the ceiling! That’s a happy memory now. This recipe is foolproof, which means even a twelve-year-old can do it. Doesn’t that smell amazing when it bakes?
You only need a few simple things from your kitchen. Warm water, yeast, sugar, salt, olive oil, and flour. That’s it. No fancy machines required. Just your hands and a big bowl. Let’s get started, friend.
First, we wake up the yeast. Think of it like a tiny bear coming out of a cave. It gets fizzy and happy. Then we add everything together and knead. That’s the fun part where you push and fold the dough.
Step 1: Pour the warm water into a small bowl. Sprinkle the yeast and sugar on top. Stir it gently, then wait five to ten minutes. You’ll see bubbles and foam. That means the yeast is alive. (Hard-learned tip: Never use water that’s too hot or it will kill the yeast. Lukewarm is perfect, like bath water.)
Step 2: Add the salt and olive oil to the frothy yeast mixture. Stir it with a fork. In a large bowl, dump in the flour. Pour the wet stuff into the flour. Mix with a wooden spoon until it gets too stiff. What do you think makes dough puff up like a soft pillow? … Share below!
Step 3: Dump the dough onto a floured counter. Push it away from you with the heel of your hand. Fold it over, then push again. Keep doing this for eight minutes. The dough will go from sticky to silky smooth. My grandma said it should feel like a baby’s cheek.
Step 4: Poke the dough with one finger. If it slowly springs back, you’re done kneading. Grease a clean bowl with olive oil and place the dough inside. Cover it with plastic wrap. Set it in a warm, draft-free spot for one to two hours. It needs to double in size, like a sleepy balloon.
Step 5: Punch the dough down gently. Cut it into two equal balls. Cover them with plastic wrap and let them rest for fifteen minutes. While you wait, preheat your oven to 475°F (250°C). Put your pizza pan inside the oven to get hot. A hot pan means a crispy crust. Trust me on this!
Step 6: Roll each dough ball onto floured parchment paper. Make it twelve inches for a classic pizza. Brush the top with olive oil. Add your favorite sauce, cheese, and toppings. Slide the pizza onto the hot pan. Bake on the lowest rack for ten to twelve minutes. Then move it to the top rack and broil for two minutes. Watch it so it doesn’t burn!
Cook Time: 12–14 minutes
Total Time: 2 hours 15 minutes
Yield: 2 medium pizzas (8 slices each)
Category: Dinner, Pizza
Three Fun Twists on Your Homemade Pizza
Plain cheese is delicious, but sometimes you want a change. I love trying new things with my dough. Here are three of my favorites.
Garden Veggie Surprise: Top your pizza with colorful bell peppers, mushrooms, and black olives. Add a sprinkle of fresh basil after baking. It tastes like summer on a plate!
Spicy Sausage Fiesta: Crumble cooked Italian sausage over the sauce. Add red pepper flakes for a little kick. My nephew calls this the fire-breathing pizza. Which one would you try first? Comment below!
Apple Pie Dessert Pizza: Skip the tomato sauce. Spread softened cream cheese on the dough. Top with thinly sliced apples, cinnamon, and a drizzle of honey. Bake until golden. It’s like a pie you can eat with your hands.
What to Serve with Your Perfect Pizza
A good pizza needs good friends on the plate. I like to serve it with a simple green salad. Toss some lettuce, cherry tomatoes, and a splash of vinaigrette. It’s fresh and crunchy.
Another idea: cucumber sticks with ranch dip. They’re cool and crisp. Perfect for little fingers to grab between slices. You can also add a bowl of marinated olives for a salty bite.
For drinks, try a cold glass of lemonade. It’s bright and tangy. Grown-ups might enjoy a light red wine, like a Pinot Noir. Which would you choose tonight?
Storing Your Pizza Dough Like a Pro
Making pizza dough is fun. But what if you want pizza tonight and don’t have time? You can store the dough for later. That is the magic of planning ahead. Once your dough has risen, you can put it in the fridge. Wrap it tight in plastic wrap. It will stay good for up to three days. The cold slows down the yeast. This actually makes the flavor better. I remember my first time storing dough. I was nervous. But the next day, the pizza tasted even more like a pizzeria.
The freezer is your best friend for batch cooking. You can freeze the dough balls after they rest. Just wrap them in plastic, then put them in a freezer bag. They will keep for three months. When you want pizza, take a ball out. Let it thaw in the fridge overnight. Then let it sit on the counter for 30 minutes. This is why batch cooking matters. You have homemade pizza ready whenever a craving hits. No need to order out. Have you ever tried storing it this way? Share below!
Three Common Pizza Dough Problems and Fixes
Even the best cooks hit a snag. The first problem is dough that is too sticky. Do not panic. Just add flour one tablespoon at a time while you knead. The dough should be soft, not gluey. I once added too much water by accident. A little extra flour saved the day. The second problem is dough that will not rise. This happens when the water is too hot or too cold. The water should feel like a warm bath. If the yeast is old, it will not bubble. Always check the date on your yeast packet.
The third problem is a crust that is too hard. This often means you baked it too long. Remember the hot pan trick. It helps the bottom cook fast. Keep an eye on the oven. Why do these fixes matter? They save you from a sad pizza. They also teach you to trust your hands. You learn what good dough feels like. That confidence will follow you into every recipe. Which of these problems have you run into before?
Your Pizza Dough Questions Answered
Q: Can I use gluten-free flour? A: Yes. Use a gluten-free blend with xanthan gum. The dough will be stickier, so keep your hands wet.
Q: Can I make the dough the night before? A: Yes. Let it rise, then refrigerate it. The flavor gets better overnight.
Q: Can I swap white flour for whole wheat? A: Yes. Use half white and half whole wheat. Whole wheat dough needs a little more water.
Q: How do I scale the recipe for one pizza? A: Cut all ingredients in half. One ball makes one pizza.
Q: Can I add herbs to the dough? A: Yes. Mix in a teaspoon of dried oregano or garlic powder with the flour. *Fun fact: Italians sometimes add a pinch of sugar to help the crust brown.* Which tip will you try first?
A Warm Goodbye from Chloe
I hope you feel ready to make your own pizza dough. It is one of the kindest things you can do for your family. There is nothing like the smell of baking dough in your kitchen. It makes a house feel like a home. I would love to see your pizzas. Snap a picture of your creation. Share it with us. Have you tried this recipe? Tag us on Pinterest! Happy cooking! —Chloe Hartwell.
Ingredients:
| Ingredient | Amount | Notes |
|---|---|---|
| Warm water (about 105°F/40°C) | 1 ½ cups (360 mL) | Ensure temperature is not too hot or it will kill the yeast |
| Instant yeast | 1 package (1 ¼ oz, 2 ¼ tsp, 7 g) | Can substitute active dry yeast if needed |
| Sugar | 1 Tbsp (15 g) | Helps activate the yeast |
| Salt | 1 tsp | Adds flavor |
| Olive oil | 1 Tbsp (15 mL) + extra for greasing | Extra oil for greasing bowl and pan |
| All-purpose flour | 3 ½ cups (450 g) | Can use bread flour for chewier texture |
The Best Pizza Dough for Little Hands (and Big Bellies)
I still remember the first time I made pizza dough with my grandson. Flour was everywhere. Even on the ceiling! That’s a happy memory now. This recipe is foolproof, which means even a twelve-year-old can do it. Doesn’t that smell amazing when it bakes?
You only need a few simple things from your kitchen. Warm water, yeast, sugar, salt, olive oil, and flour. That’s it. No fancy machines required. Just your hands and a big bowl. Let’s get started, friend.
First, we wake up the yeast. Think of it like a tiny bear coming out of a cave. It gets fizzy and happy. Then we add everything together and knead. That’s the fun part where you push and fold the dough.
Step 1: Pour the warm water into a small bowl. Sprinkle the yeast and sugar on top. Stir it gently, then wait five to ten minutes. You’ll see bubbles and foam. That means the yeast is alive. (Hard-learned tip: Never use water that’s too hot or it will kill the yeast. Lukewarm is perfect, like bath water.)
Step 2: Add the salt and olive oil to the frothy yeast mixture. Stir it with a fork. In a large bowl, dump in the flour. Pour the wet stuff into the flour. Mix with a wooden spoon until it gets too stiff. What do you think makes dough puff up like a soft pillow? … Share below!
Step 3: Dump the dough onto a floured counter. Push it away from you with the heel of your hand. Fold it over, then push again. Keep doing this for eight minutes. The dough will go from sticky to silky smooth. My grandma said it should feel like a baby’s cheek.
Step 4: Poke the dough with one finger. If it slowly springs back, you’re done kneading. Grease a clean bowl with olive oil and place the dough inside. Cover it with plastic wrap. Set it in a warm, draft-free spot for one to two hours. It needs to double in size, like a sleepy balloon.
Step 5: Punch the dough down gently. Cut it into two equal balls. Cover them with plastic wrap and let them rest for fifteen minutes. While you wait, preheat your oven to 475°F (250°C). Put your pizza pan inside the oven to get hot. A hot pan means a crispy crust. Trust me on this!
Step 6: Roll each dough ball onto floured parchment paper. Make it twelve inches for a classic pizza. Brush the top with olive oil. Add your favorite sauce, cheese, and toppings. Slide the pizza onto the hot pan. Bake on the lowest rack for ten to twelve minutes. Then move it to the top rack and broil for two minutes. Watch it so it doesn’t burn!
Cook Time: 12–14 minutes
Total Time: 2 hours 15 minutes
Yield: 2 medium pizzas (8 slices each)
Category: Dinner, Pizza
Three Fun Twists on Your Homemade Pizza
Plain cheese is delicious, but sometimes you want a change. I love trying new things with my dough. Here are three of my favorites.
Garden Veggie Surprise: Top your pizza with colorful bell peppers, mushrooms, and black olives. Add a sprinkle of fresh basil after baking. It tastes like summer on a plate!
Spicy Sausage Fiesta: Crumble cooked Italian sausage over the sauce. Add red pepper flakes for a little kick. My nephew calls this the fire-breathing pizza. Which one would you try first? Comment below!
Apple Pie Dessert Pizza: Skip the tomato sauce. Spread softened cream cheese on the dough. Top with thinly sliced apples, cinnamon, and a drizzle of honey. Bake until golden. It’s like a pie you can eat with your hands.
What to Serve with Your Perfect Pizza
A good pizza needs good friends on the plate. I like to serve it with a simple green salad. Toss some lettuce, cherry tomatoes, and a splash of vinaigrette. It’s fresh and crunchy.
Another idea: cucumber sticks with ranch dip. They’re cool and crisp. Perfect for little fingers to grab between slices. You can also add a bowl of marinated olives for a salty bite.
For drinks, try a cold glass of lemonade. It’s bright and tangy. Grown-ups might enjoy a light red wine, like a Pinot Noir. Which would you choose tonight?
Storing Your Pizza Dough Like a Pro
Making pizza dough is fun. But what if you want pizza tonight and don’t have time? You can store the dough for later. That is the magic of planning ahead. Once your dough has risen, you can put it in the fridge. Wrap it tight in plastic wrap. It will stay good for up to three days. The cold slows down the yeast. This actually makes the flavor better. I remember my first time storing dough. I was nervous. But the next day, the pizza tasted even more like a pizzeria.
The freezer is your best friend for batch cooking. You can freeze the dough balls after they rest. Just wrap them in plastic, then put them in a freezer bag. They will keep for three months. When you want pizza, take a ball out. Let it thaw in the fridge overnight. Then let it sit on the counter for 30 minutes. This is why batch cooking matters. You have homemade pizza ready whenever a craving hits. No need to order out. Have you ever tried storing it this way? Share below!
Three Common Pizza Dough Problems and Fixes
Even the best cooks hit a snag. The first problem is dough that is too sticky. Do not panic. Just add flour one tablespoon at a time while you knead. The dough should be soft, not gluey. I once added too much water by accident. A little extra flour saved the day. The second problem is dough that will not rise. This happens when the water is too hot or too cold. The water should feel like a warm bath. If the yeast is old, it will not bubble. Always check the date on your yeast packet.
The third problem is a crust that is too hard. This often means you baked it too long. Remember the hot pan trick. It helps the bottom cook fast. Keep an eye on the oven. Why do these fixes matter? They save you from a sad pizza. They also teach you to trust your hands. You learn what good dough feels like. That confidence will follow you into every recipe. Which of these problems have you run into before?
Your Pizza Dough Questions Answered
Q: Can I use gluten-free flour? A: Yes. Use a gluten-free blend with xanthan gum. The dough will be stickier, so keep your hands wet.
Q: Can I make the dough the night before? A: Yes. Let it rise, then refrigerate it. The flavor gets better overnight.
Q: Can I swap white flour for whole wheat? A: Yes. Use half white and half whole wheat. Whole wheat dough needs a little more water.
Q: How do I scale the recipe for one pizza? A: Cut all ingredients in half. One ball makes one pizza.
Q: Can I add herbs to the dough? A: Yes. Mix in a teaspoon of dried oregano or garlic powder with the flour. *Fun fact: Italians sometimes add a pinch of sugar to help the crust brown.* Which tip will you try first?
A Warm Goodbye from Chloe
I hope you feel ready to make your own pizza dough. It is one of the kindest things you can do for your family. There is nothing like the smell of baking dough in your kitchen. It makes a house feel like a home. I would love to see your pizzas. Snap a picture of your creation. Share it with us. Have you tried this recipe? Tag us on Pinterest! Happy cooking! —Chloe Hartwell.
Ingredients:
| Ingredient | Amount | Notes |
|---|---|---|
| Warm water (about 105°F/40°C) | 1 ½ cups (360 mL) | Ensure temperature is not too hot or it will kill the yeast |
| Instant yeast | 1 package (1 ¼ oz, 2 ¼ tsp, 7 g) | Can substitute active dry yeast if needed |
| Sugar | 1 Tbsp (15 g) | Helps activate the yeast |
| Salt | 1 tsp | Adds flavor |
| Olive oil | 1 Tbsp (15 mL) + extra for greasing | Extra oil for greasing bowl and pan |
| All-purpose flour | 3 ½ cups (450 g) | Can use bread flour for chewier texture |
The Best Pizza Dough for Little Hands (and Big Bellies)
I still remember the first time I made pizza dough with my grandson. Flour was everywhere. Even on the ceiling! That’s a happy memory now. This recipe is foolproof, which means even a twelve-year-old can do it. Doesn’t that smell amazing when it bakes?
You only need a few simple things from your kitchen. Warm water, yeast, sugar, salt, olive oil, and flour. That’s it. No fancy machines required. Just your hands and a big bowl. Let’s get started, friend.
First, we wake up the yeast. Think of it like a tiny bear coming out of a cave. It gets fizzy and happy. Then we add everything together and knead. That’s the fun part where you push and fold the dough.
Step 1: Pour the warm water into a small bowl. Sprinkle the yeast and sugar on top. Stir it gently, then wait five to ten minutes. You’ll see bubbles and foam. That means the yeast is alive. (Hard-learned tip: Never use water that’s too hot or it will kill the yeast. Lukewarm is perfect, like bath water.)
Step 2: Add the salt and olive oil to the frothy yeast mixture. Stir it with a fork. In a large bowl, dump in the flour. Pour the wet stuff into the flour. Mix with a wooden spoon until it gets too stiff. What do you think makes dough puff up like a soft pillow? … Share below!
Step 3: Dump the dough onto a floured counter. Push it away from you with the heel of your hand. Fold it over, then push again. Keep doing this for eight minutes. The dough will go from sticky to silky smooth. My grandma said it should feel like a baby’s cheek.
Step 4: Poke the dough with one finger. If it slowly springs back, you’re done kneading. Grease a clean bowl with olive oil and place the dough inside. Cover it with plastic wrap. Set it in a warm, draft-free spot for one to two hours. It needs to double in size, like a sleepy balloon.
Step 5: Punch the dough down gently. Cut it into two equal balls. Cover them with plastic wrap and let them rest for fifteen minutes. While you wait, preheat your oven to 475°F (250°C). Put your pizza pan inside the oven to get hot. A hot pan means a crispy crust. Trust me on this!
Step 6: Roll each dough ball onto floured parchment paper. Make it twelve inches for a classic pizza. Brush the top with olive oil. Add your favorite sauce, cheese, and toppings. Slide the pizza onto the hot pan. Bake on the lowest rack for ten to twelve minutes. Then move it to the top rack and broil for two minutes. Watch it so it doesn’t burn!
Cook Time: 12–14 minutes
Total Time: 2 hours 15 minutes
Yield: 2 medium pizzas (8 slices each)
Category: Dinner, Pizza
Three Fun Twists on Your Homemade Pizza
Plain cheese is delicious, but sometimes you want a change. I love trying new things with my dough. Here are three of my favorites.
Garden Veggie Surprise: Top your pizza with colorful bell peppers, mushrooms, and black olives. Add a sprinkle of fresh basil after baking. It tastes like summer on a plate!
Spicy Sausage Fiesta: Crumble cooked Italian sausage over the sauce. Add red pepper flakes for a little kick. My nephew calls this the fire-breathing pizza. Which one would you try first? Comment below!
Apple Pie Dessert Pizza: Skip the tomato sauce. Spread softened cream cheese on the dough. Top with thinly sliced apples, cinnamon, and a drizzle of honey. Bake until golden. It’s like a pie you can eat with your hands.
What to Serve with Your Perfect Pizza
A good pizza needs good friends on the plate. I like to serve it with a simple green salad. Toss some lettuce, cherry tomatoes, and a splash of vinaigrette. It’s fresh and crunchy.
Another idea: cucumber sticks with ranch dip. They’re cool and crisp. Perfect for little fingers to grab between slices. You can also add a bowl of marinated olives for a salty bite.
For drinks, try a cold glass of lemonade. It’s bright and tangy. Grown-ups might enjoy a light red wine, like a Pinot Noir. Which would you choose tonight?
Storing Your Pizza Dough Like a Pro
Making pizza dough is fun. But what if you want pizza tonight and don’t have time? You can store the dough for later. That is the magic of planning ahead. Once your dough has risen, you can put it in the fridge. Wrap it tight in plastic wrap. It will stay good for up to three days. The cold slows down the yeast. This actually makes the flavor better. I remember my first time storing dough. I was nervous. But the next day, the pizza tasted even more like a pizzeria.
The freezer is your best friend for batch cooking. You can freeze the dough balls after they rest. Just wrap them in plastic, then put them in a freezer bag. They will keep for three months. When you want pizza, take a ball out. Let it thaw in the fridge overnight. Then let it sit on the counter for 30 minutes. This is why batch cooking matters. You have homemade pizza ready whenever a craving hits. No need to order out. Have you ever tried storing it this way? Share below!
Three Common Pizza Dough Problems and Fixes
Even the best cooks hit a snag. The first problem is dough that is too sticky. Do not panic. Just add flour one tablespoon at a time while you knead. The dough should be soft, not gluey. I once added too much water by accident. A little extra flour saved the day. The second problem is dough that will not rise. This happens when the water is too hot or too cold. The water should feel like a warm bath. If the yeast is old, it will not bubble. Always check the date on your yeast packet.
The third problem is a crust that is too hard. This often means you baked it too long. Remember the hot pan trick. It helps the bottom cook fast. Keep an eye on the oven. Why do these fixes matter? They save you from a sad pizza. They also teach you to trust your hands. You learn what good dough feels like. That confidence will follow you into every recipe. Which of these problems have you run into before?
Your Pizza Dough Questions Answered
Q: Can I use gluten-free flour? A: Yes. Use a gluten-free blend with xanthan gum. The dough will be stickier, so keep your hands wet.
Q: Can I make the dough the night before? A: Yes. Let it rise, then refrigerate it. The flavor gets better overnight.
Q: Can I swap white flour for whole wheat? A: Yes. Use half white and half whole wheat. Whole wheat dough needs a little more water.
Q: How do I scale the recipe for one pizza? A: Cut all ingredients in half. One ball makes one pizza.
Q: Can I add herbs to the dough? A: Yes. Mix in a teaspoon of dried oregano or garlic powder with the flour. *Fun fact: Italians sometimes add a pinch of sugar to help the crust brown.* Which tip will you try first?
A Warm Goodbye from Chloe
I hope you feel ready to make your own pizza dough. It is one of the kindest things you can do for your family. There is nothing like the smell of baking dough in your kitchen. It makes a house feel like a home. I would love to see your pizzas. Snap a picture of your creation. Share it with us. Have you tried this recipe? Tag us on Pinterest! Happy cooking! —Chloe Hartwell.
The Hot Oven Secret
Turn your oven up high, to 475 degrees. That is really hot. Put your empty pizza pan in the oven while it heats up. This is the secret to a crispy crust. A hot pan cooks the bottom fast. Slide your pizza onto that screaming hot pan and bake for ten to twelve minutes. At the very end, move the pizza to the top rack and turn on the broiler. Watch it closely. In two minutes, the cheese gets bubbly and brown. That is the perfect finish. The crust is crispy, the cheese is melty. I still get excited when I hear that sizzle. It sounds like dinner is ready. Which do you like better: thick crust or thin crust? Take a little poll with your family tonight.Ingredients:
| Ingredient | Amount | Notes |
|---|---|---|
| Warm water (about 105°F/40°C) | 1 ½ cups (360 mL) | Ensure temperature is not too hot or it will kill the yeast |
| Instant yeast | 1 package (1 ¼ oz, 2 ¼ tsp, 7 g) | Can substitute active dry yeast if needed |
| Sugar | 1 Tbsp (15 g) | Helps activate the yeast |
| Salt | 1 tsp | Adds flavor |
| Olive oil | 1 Tbsp (15 mL) + extra for greasing | Extra oil for greasing bowl and pan |
| All-purpose flour | 3 ½ cups (450 g) | Can use bread flour for chewier texture |
The Best Pizza Dough for Little Hands (and Big Bellies)
I still remember the first time I made pizza dough with my grandson. Flour was everywhere. Even on the ceiling! That’s a happy memory now. This recipe is foolproof, which means even a twelve-year-old can do it. Doesn’t that smell amazing when it bakes?
You only need a few simple things from your kitchen. Warm water, yeast, sugar, salt, olive oil, and flour. That’s it. No fancy machines required. Just your hands and a big bowl. Let’s get started, friend.
First, we wake up the yeast. Think of it like a tiny bear coming out of a cave. It gets fizzy and happy. Then we add everything together and knead. That’s the fun part where you push and fold the dough.
Step 1: Pour the warm water into a small bowl. Sprinkle the yeast and sugar on top. Stir it gently, then wait five to ten minutes. You’ll see bubbles and foam. That means the yeast is alive. (Hard-learned tip: Never use water that’s too hot or it will kill the yeast. Lukewarm is perfect, like bath water.)
Step 2: Add the salt and olive oil to the frothy yeast mixture. Stir it with a fork. In a large bowl, dump in the flour. Pour the wet stuff into the flour. Mix with a wooden spoon until it gets too stiff. What do you think makes dough puff up like a soft pillow? … Share below!
Step 3: Dump the dough onto a floured counter. Push it away from you with the heel of your hand. Fold it over, then push again. Keep doing this for eight minutes. The dough will go from sticky to silky smooth. My grandma said it should feel like a baby’s cheek.
Step 4: Poke the dough with one finger. If it slowly springs back, you’re done kneading. Grease a clean bowl with olive oil and place the dough inside. Cover it with plastic wrap. Set it in a warm, draft-free spot for one to two hours. It needs to double in size, like a sleepy balloon.
Step 5: Punch the dough down gently. Cut it into two equal balls. Cover them with plastic wrap and let them rest for fifteen minutes. While you wait, preheat your oven to 475°F (250°C). Put your pizza pan inside the oven to get hot. A hot pan means a crispy crust. Trust me on this!
Step 6: Roll each dough ball onto floured parchment paper. Make it twelve inches for a classic pizza. Brush the top with olive oil. Add your favorite sauce, cheese, and toppings. Slide the pizza onto the hot pan. Bake on the lowest rack for ten to twelve minutes. Then move it to the top rack and broil for two minutes. Watch it so it doesn’t burn!
Cook Time: 12–14 minutes
Total Time: 2 hours 15 minutes
Yield: 2 medium pizzas (8 slices each)
Category: Dinner, Pizza
Three Fun Twists on Your Homemade Pizza
Plain cheese is delicious, but sometimes you want a change. I love trying new things with my dough. Here are three of my favorites.
Garden Veggie Surprise: Top your pizza with colorful bell peppers, mushrooms, and black olives. Add a sprinkle of fresh basil after baking. It tastes like summer on a plate!
Spicy Sausage Fiesta: Crumble cooked Italian sausage over the sauce. Add red pepper flakes for a little kick. My nephew calls this the fire-breathing pizza. Which one would you try first? Comment below!
Apple Pie Dessert Pizza: Skip the tomato sauce. Spread softened cream cheese on the dough. Top with thinly sliced apples, cinnamon, and a drizzle of honey. Bake until golden. It’s like a pie you can eat with your hands.
What to Serve with Your Perfect Pizza
A good pizza needs good friends on the plate. I like to serve it with a simple green salad. Toss some lettuce, cherry tomatoes, and a splash of vinaigrette. It’s fresh and crunchy.
Another idea: cucumber sticks with ranch dip. They’re cool and crisp. Perfect for little fingers to grab between slices. You can also add a bowl of marinated olives for a salty bite.
For drinks, try a cold glass of lemonade. It’s bright and tangy. Grown-ups might enjoy a light red wine, like a Pinot Noir. Which would you choose tonight?
Storing Your Pizza Dough Like a Pro
Making pizza dough is fun. But what if you want pizza tonight and don’t have time? You can store the dough for later. That is the magic of planning ahead. Once your dough has risen, you can put it in the fridge. Wrap it tight in plastic wrap. It will stay good for up to three days. The cold slows down the yeast. This actually makes the flavor better. I remember my first time storing dough. I was nervous. But the next day, the pizza tasted even more like a pizzeria.
The freezer is your best friend for batch cooking. You can freeze the dough balls after they rest. Just wrap them in plastic, then put them in a freezer bag. They will keep for three months. When you want pizza, take a ball out. Let it thaw in the fridge overnight. Then let it sit on the counter for 30 minutes. This is why batch cooking matters. You have homemade pizza ready whenever a craving hits. No need to order out. Have you ever tried storing it this way? Share below!
Three Common Pizza Dough Problems and Fixes
Even the best cooks hit a snag. The first problem is dough that is too sticky. Do not panic. Just add flour one tablespoon at a time while you knead. The dough should be soft, not gluey. I once added too much water by accident. A little extra flour saved the day. The second problem is dough that will not rise. This happens when the water is too hot or too cold. The water should feel like a warm bath. If the yeast is old, it will not bubble. Always check the date on your yeast packet.
The third problem is a crust that is too hard. This often means you baked it too long. Remember the hot pan trick. It helps the bottom cook fast. Keep an eye on the oven. Why do these fixes matter? They save you from a sad pizza. They also teach you to trust your hands. You learn what good dough feels like. That confidence will follow you into every recipe. Which of these problems have you run into before?
Your Pizza Dough Questions Answered
Q: Can I use gluten-free flour? A: Yes. Use a gluten-free blend with xanthan gum. The dough will be stickier, so keep your hands wet.
Q: Can I make the dough the night before? A: Yes. Let it rise, then refrigerate it. The flavor gets better overnight.
Q: Can I swap white flour for whole wheat? A: Yes. Use half white and half whole wheat. Whole wheat dough needs a little more water.
Q: How do I scale the recipe for one pizza? A: Cut all ingredients in half. One ball makes one pizza.
Q: Can I add herbs to the dough? A: Yes. Mix in a teaspoon of dried oregano or garlic powder with the flour. *Fun fact: Italians sometimes add a pinch of sugar to help the crust brown.* Which tip will you try first?
A Warm Goodbye from Chloe
I hope you feel ready to make your own pizza dough. It is one of the kindest things you can do for your family. There is nothing like the smell of baking dough in your kitchen. It makes a house feel like a home. I would love to see your pizzas. Snap a picture of your creation. Share it with us. Have you tried this recipe? Tag us on Pinterest! Happy cooking! —Chloe Hartwell.
The Hot Oven Secret
Turn your oven up high, to 475 degrees. That is really hot. Put your empty pizza pan in the oven while it heats up. This is the secret to a crispy crust. A hot pan cooks the bottom fast. Slide your pizza onto that screaming hot pan and bake for ten to twelve minutes. At the very end, move the pizza to the top rack and turn on the broiler. Watch it closely. In two minutes, the cheese gets bubbly and brown. That is the perfect finish. The crust is crispy, the cheese is melty. I still get excited when I hear that sizzle. It sounds like dinner is ready. Which do you like better: thick crust or thin crust? Take a little poll with your family tonight.Ingredients:
| Ingredient | Amount | Notes |
|---|---|---|
| Warm water (about 105°F/40°C) | 1 ½ cups (360 mL) | Ensure temperature is not too hot or it will kill the yeast |
| Instant yeast | 1 package (1 ¼ oz, 2 ¼ tsp, 7 g) | Can substitute active dry yeast if needed |
| Sugar | 1 Tbsp (15 g) | Helps activate the yeast |
| Salt | 1 tsp | Adds flavor |
| Olive oil | 1 Tbsp (15 mL) + extra for greasing | Extra oil for greasing bowl and pan |
| All-purpose flour | 3 ½ cups (450 g) | Can use bread flour for chewier texture |
The Best Pizza Dough for Little Hands (and Big Bellies)
I still remember the first time I made pizza dough with my grandson. Flour was everywhere. Even on the ceiling! That’s a happy memory now. This recipe is foolproof, which means even a twelve-year-old can do it. Doesn’t that smell amazing when it bakes?
You only need a few simple things from your kitchen. Warm water, yeast, sugar, salt, olive oil, and flour. That’s it. No fancy machines required. Just your hands and a big bowl. Let’s get started, friend.
First, we wake up the yeast. Think of it like a tiny bear coming out of a cave. It gets fizzy and happy. Then we add everything together and knead. That’s the fun part where you push and fold the dough.
Step 1: Pour the warm water into a small bowl. Sprinkle the yeast and sugar on top. Stir it gently, then wait five to ten minutes. You’ll see bubbles and foam. That means the yeast is alive. (Hard-learned tip: Never use water that’s too hot or it will kill the yeast. Lukewarm is perfect, like bath water.)
Step 2: Add the salt and olive oil to the frothy yeast mixture. Stir it with a fork. In a large bowl, dump in the flour. Pour the wet stuff into the flour. Mix with a wooden spoon until it gets too stiff. What do you think makes dough puff up like a soft pillow? … Share below!
Step 3: Dump the dough onto a floured counter. Push it away from you with the heel of your hand. Fold it over, then push again. Keep doing this for eight minutes. The dough will go from sticky to silky smooth. My grandma said it should feel like a baby’s cheek.
Step 4: Poke the dough with one finger. If it slowly springs back, you’re done kneading. Grease a clean bowl with olive oil and place the dough inside. Cover it with plastic wrap. Set it in a warm, draft-free spot for one to two hours. It needs to double in size, like a sleepy balloon.
Step 5: Punch the dough down gently. Cut it into two equal balls. Cover them with plastic wrap and let them rest for fifteen minutes. While you wait, preheat your oven to 475°F (250°C). Put your pizza pan inside the oven to get hot. A hot pan means a crispy crust. Trust me on this!
Step 6: Roll each dough ball onto floured parchment paper. Make it twelve inches for a classic pizza. Brush the top with olive oil. Add your favorite sauce, cheese, and toppings. Slide the pizza onto the hot pan. Bake on the lowest rack for ten to twelve minutes. Then move it to the top rack and broil for two minutes. Watch it so it doesn’t burn!
Cook Time: 12–14 minutes
Total Time: 2 hours 15 minutes
Yield: 2 medium pizzas (8 slices each)
Category: Dinner, Pizza
Three Fun Twists on Your Homemade Pizza
Plain cheese is delicious, but sometimes you want a change. I love trying new things with my dough. Here are three of my favorites.
Garden Veggie Surprise: Top your pizza with colorful bell peppers, mushrooms, and black olives. Add a sprinkle of fresh basil after baking. It tastes like summer on a plate!
Spicy Sausage Fiesta: Crumble cooked Italian sausage over the sauce. Add red pepper flakes for a little kick. My nephew calls this the fire-breathing pizza. Which one would you try first? Comment below!
Apple Pie Dessert Pizza: Skip the tomato sauce. Spread softened cream cheese on the dough. Top with thinly sliced apples, cinnamon, and a drizzle of honey. Bake until golden. It’s like a pie you can eat with your hands.
What to Serve with Your Perfect Pizza
A good pizza needs good friends on the plate. I like to serve it with a simple green salad. Toss some lettuce, cherry tomatoes, and a splash of vinaigrette. It’s fresh and crunchy.
Another idea: cucumber sticks with ranch dip. They’re cool and crisp. Perfect for little fingers to grab between slices. You can also add a bowl of marinated olives for a salty bite.
For drinks, try a cold glass of lemonade. It’s bright and tangy. Grown-ups might enjoy a light red wine, like a Pinot Noir. Which would you choose tonight?
Storing Your Pizza Dough Like a Pro
Making pizza dough is fun. But what if you want pizza tonight and don’t have time? You can store the dough for later. That is the magic of planning ahead. Once your dough has risen, you can put it in the fridge. Wrap it tight in plastic wrap. It will stay good for up to three days. The cold slows down the yeast. This actually makes the flavor better. I remember my first time storing dough. I was nervous. But the next day, the pizza tasted even more like a pizzeria.
The freezer is your best friend for batch cooking. You can freeze the dough balls after they rest. Just wrap them in plastic, then put them in a freezer bag. They will keep for three months. When you want pizza, take a ball out. Let it thaw in the fridge overnight. Then let it sit on the counter for 30 minutes. This is why batch cooking matters. You have homemade pizza ready whenever a craving hits. No need to order out. Have you ever tried storing it this way? Share below!
Three Common Pizza Dough Problems and Fixes
Even the best cooks hit a snag. The first problem is dough that is too sticky. Do not panic. Just add flour one tablespoon at a time while you knead. The dough should be soft, not gluey. I once added too much water by accident. A little extra flour saved the day. The second problem is dough that will not rise. This happens when the water is too hot or too cold. The water should feel like a warm bath. If the yeast is old, it will not bubble. Always check the date on your yeast packet.
The third problem is a crust that is too hard. This often means you baked it too long. Remember the hot pan trick. It helps the bottom cook fast. Keep an eye on the oven. Why do these fixes matter? They save you from a sad pizza. They also teach you to trust your hands. You learn what good dough feels like. That confidence will follow you into every recipe. Which of these problems have you run into before?
Your Pizza Dough Questions Answered
Q: Can I use gluten-free flour? A: Yes. Use a gluten-free blend with xanthan gum. The dough will be stickier, so keep your hands wet.
Q: Can I make the dough the night before? A: Yes. Let it rise, then refrigerate it. The flavor gets better overnight.
Q: Can I swap white flour for whole wheat? A: Yes. Use half white and half whole wheat. Whole wheat dough needs a little more water.
Q: How do I scale the recipe for one pizza? A: Cut all ingredients in half. One ball makes one pizza.
Q: Can I add herbs to the dough? A: Yes. Mix in a teaspoon of dried oregano or garlic powder with the flour. *Fun fact: Italians sometimes add a pinch of sugar to help the crust brown.* Which tip will you try first?
A Warm Goodbye from Chloe
I hope you feel ready to make your own pizza dough. It is one of the kindest things you can do for your family. There is nothing like the smell of baking dough in your kitchen. It makes a house feel like a home. I would love to see your pizzas. Snap a picture of your creation. Share it with us. Have you tried this recipe? Tag us on Pinterest! Happy cooking! —Chloe Hartwell.
The Hot Oven Secret
Turn your oven up high, to 475 degrees. That is really hot. Put your empty pizza pan in the oven while it heats up. This is the secret to a crispy crust. A hot pan cooks the bottom fast. Slide your pizza onto that screaming hot pan and bake for ten to twelve minutes. At the very end, move the pizza to the top rack and turn on the broiler. Watch it closely. In two minutes, the cheese gets bubbly and brown. That is the perfect finish. The crust is crispy, the cheese is melty. I still get excited when I hear that sizzle. It sounds like dinner is ready. Which do you like better: thick crust or thin crust? Take a little poll with your family tonight.Ingredients:
| Ingredient | Amount | Notes |
|---|---|---|
| Warm water (about 105°F/40°C) | 1 ½ cups (360 mL) | Ensure temperature is not too hot or it will kill the yeast |
| Instant yeast | 1 package (1 ¼ oz, 2 ¼ tsp, 7 g) | Can substitute active dry yeast if needed |
| Sugar | 1 Tbsp (15 g) | Helps activate the yeast |
| Salt | 1 tsp | Adds flavor |
| Olive oil | 1 Tbsp (15 mL) + extra for greasing | Extra oil for greasing bowl and pan |
| All-purpose flour | 3 ½ cups (450 g) | Can use bread flour for chewier texture |
The Best Pizza Dough for Little Hands (and Big Bellies)
I still remember the first time I made pizza dough with my grandson. Flour was everywhere. Even on the ceiling! That’s a happy memory now. This recipe is foolproof, which means even a twelve-year-old can do it. Doesn’t that smell amazing when it bakes?
You only need a few simple things from your kitchen. Warm water, yeast, sugar, salt, olive oil, and flour. That’s it. No fancy machines required. Just your hands and a big bowl. Let’s get started, friend.
First, we wake up the yeast. Think of it like a tiny bear coming out of a cave. It gets fizzy and happy. Then we add everything together and knead. That’s the fun part where you push and fold the dough.
Step 1: Pour the warm water into a small bowl. Sprinkle the yeast and sugar on top. Stir it gently, then wait five to ten minutes. You’ll see bubbles and foam. That means the yeast is alive. (Hard-learned tip: Never use water that’s too hot or it will kill the yeast. Lukewarm is perfect, like bath water.)
Step 2: Add the salt and olive oil to the frothy yeast mixture. Stir it with a fork. In a large bowl, dump in the flour. Pour the wet stuff into the flour. Mix with a wooden spoon until it gets too stiff. What do you think makes dough puff up like a soft pillow? … Share below!
Step 3: Dump the dough onto a floured counter. Push it away from you with the heel of your hand. Fold it over, then push again. Keep doing this for eight minutes. The dough will go from sticky to silky smooth. My grandma said it should feel like a baby’s cheek.
Step 4: Poke the dough with one finger. If it slowly springs back, you’re done kneading. Grease a clean bowl with olive oil and place the dough inside. Cover it with plastic wrap. Set it in a warm, draft-free spot for one to two hours. It needs to double in size, like a sleepy balloon.
Step 5: Punch the dough down gently. Cut it into two equal balls. Cover them with plastic wrap and let them rest for fifteen minutes. While you wait, preheat your oven to 475°F (250°C). Put your pizza pan inside the oven to get hot. A hot pan means a crispy crust. Trust me on this!
Step 6: Roll each dough ball onto floured parchment paper. Make it twelve inches for a classic pizza. Brush the top with olive oil. Add your favorite sauce, cheese, and toppings. Slide the pizza onto the hot pan. Bake on the lowest rack for ten to twelve minutes. Then move it to the top rack and broil for two minutes. Watch it so it doesn’t burn!
Cook Time: 12–14 minutes
Total Time: 2 hours 15 minutes
Yield: 2 medium pizzas (8 slices each)
Category: Dinner, Pizza
Three Fun Twists on Your Homemade Pizza
Plain cheese is delicious, but sometimes you want a change. I love trying new things with my dough. Here are three of my favorites.
Garden Veggie Surprise: Top your pizza with colorful bell peppers, mushrooms, and black olives. Add a sprinkle of fresh basil after baking. It tastes like summer on a plate!
Spicy Sausage Fiesta: Crumble cooked Italian sausage over the sauce. Add red pepper flakes for a little kick. My nephew calls this the fire-breathing pizza. Which one would you try first? Comment below!
Apple Pie Dessert Pizza: Skip the tomato sauce. Spread softened cream cheese on the dough. Top with thinly sliced apples, cinnamon, and a drizzle of honey. Bake until golden. It’s like a pie you can eat with your hands.
What to Serve with Your Perfect Pizza
A good pizza needs good friends on the plate. I like to serve it with a simple green salad. Toss some lettuce, cherry tomatoes, and a splash of vinaigrette. It’s fresh and crunchy.
Another idea: cucumber sticks with ranch dip. They’re cool and crisp. Perfect for little fingers to grab between slices. You can also add a bowl of marinated olives for a salty bite.
For drinks, try a cold glass of lemonade. It’s bright and tangy. Grown-ups might enjoy a light red wine, like a Pinot Noir. Which would you choose tonight?
Storing Your Pizza Dough Like a Pro
Making pizza dough is fun. But what if you want pizza tonight and don’t have time? You can store the dough for later. That is the magic of planning ahead. Once your dough has risen, you can put it in the fridge. Wrap it tight in plastic wrap. It will stay good for up to three days. The cold slows down the yeast. This actually makes the flavor better. I remember my first time storing dough. I was nervous. But the next day, the pizza tasted even more like a pizzeria.
The freezer is your best friend for batch cooking. You can freeze the dough balls after they rest. Just wrap them in plastic, then put them in a freezer bag. They will keep for three months. When you want pizza, take a ball out. Let it thaw in the fridge overnight. Then let it sit on the counter for 30 minutes. This is why batch cooking matters. You have homemade pizza ready whenever a craving hits. No need to order out. Have you ever tried storing it this way? Share below!
Three Common Pizza Dough Problems and Fixes
Even the best cooks hit a snag. The first problem is dough that is too sticky. Do not panic. Just add flour one tablespoon at a time while you knead. The dough should be soft, not gluey. I once added too much water by accident. A little extra flour saved the day. The second problem is dough that will not rise. This happens when the water is too hot or too cold. The water should feel like a warm bath. If the yeast is old, it will not bubble. Always check the date on your yeast packet.
The third problem is a crust that is too hard. This often means you baked it too long. Remember the hot pan trick. It helps the bottom cook fast. Keep an eye on the oven. Why do these fixes matter? They save you from a sad pizza. They also teach you to trust your hands. You learn what good dough feels like. That confidence will follow you into every recipe. Which of these problems have you run into before?
Your Pizza Dough Questions Answered
Q: Can I use gluten-free flour? A: Yes. Use a gluten-free blend with xanthan gum. The dough will be stickier, so keep your hands wet.
Q: Can I make the dough the night before? A: Yes. Let it rise, then refrigerate it. The flavor gets better overnight.
Q: Can I swap white flour for whole wheat? A: Yes. Use half white and half whole wheat. Whole wheat dough needs a little more water.
Q: How do I scale the recipe for one pizza? A: Cut all ingredients in half. One ball makes one pizza.
Q: Can I add herbs to the dough? A: Yes. Mix in a teaspoon of dried oregano or garlic powder with the flour. *Fun fact: Italians sometimes add a pinch of sugar to help the crust brown.* Which tip will you try first?
A Warm Goodbye from Chloe
I hope you feel ready to make your own pizza dough. It is one of the kindest things you can do for your family. There is nothing like the smell of baking dough in your kitchen. It makes a house feel like a home. I would love to see your pizzas. Snap a picture of your creation. Share it with us. Have you tried this recipe? Tag us on Pinterest! Happy cooking! —Chloe Hartwell.
The Hot Oven Secret
Turn your oven up high, to 475 degrees. That is really hot. Put your empty pizza pan in the oven while it heats up. This is the secret to a crispy crust. A hot pan cooks the bottom fast. Slide your pizza onto that screaming hot pan and bake for ten to twelve minutes. At the very end, move the pizza to the top rack and turn on the broiler. Watch it closely. In two minutes, the cheese gets bubbly and brown. That is the perfect finish. The crust is crispy, the cheese is melty. I still get excited when I hear that sizzle. It sounds like dinner is ready. Which do you like better: thick crust or thin crust? Take a little poll with your family tonight.Ingredients:
| Ingredient | Amount | Notes |
|---|---|---|
| Warm water (about 105°F/40°C) | 1 ½ cups (360 mL) | Ensure temperature is not too hot or it will kill the yeast |
| Instant yeast | 1 package (1 ¼ oz, 2 ¼ tsp, 7 g) | Can substitute active dry yeast if needed |
| Sugar | 1 Tbsp (15 g) | Helps activate the yeast |
| Salt | 1 tsp | Adds flavor |
| Olive oil | 1 Tbsp (15 mL) + extra for greasing | Extra oil for greasing bowl and pan |
| All-purpose flour | 3 ½ cups (450 g) | Can use bread flour for chewier texture |
The Best Pizza Dough for Little Hands (and Big Bellies)
I still remember the first time I made pizza dough with my grandson. Flour was everywhere. Even on the ceiling! That’s a happy memory now. This recipe is foolproof, which means even a twelve-year-old can do it. Doesn’t that smell amazing when it bakes?
You only need a few simple things from your kitchen. Warm water, yeast, sugar, salt, olive oil, and flour. That’s it. No fancy machines required. Just your hands and a big bowl. Let’s get started, friend.
First, we wake up the yeast. Think of it like a tiny bear coming out of a cave. It gets fizzy and happy. Then we add everything together and knead. That’s the fun part where you push and fold the dough.
Step 1: Pour the warm water into a small bowl. Sprinkle the yeast and sugar on top. Stir it gently, then wait five to ten minutes. You’ll see bubbles and foam. That means the yeast is alive. (Hard-learned tip: Never use water that’s too hot or it will kill the yeast. Lukewarm is perfect, like bath water.)
Step 2: Add the salt and olive oil to the frothy yeast mixture. Stir it with a fork. In a large bowl, dump in the flour. Pour the wet stuff into the flour. Mix with a wooden spoon until it gets too stiff. What do you think makes dough puff up like a soft pillow? … Share below!
Step 3: Dump the dough onto a floured counter. Push it away from you with the heel of your hand. Fold it over, then push again. Keep doing this for eight minutes. The dough will go from sticky to silky smooth. My grandma said it should feel like a baby’s cheek.
Step 4: Poke the dough with one finger. If it slowly springs back, you’re done kneading. Grease a clean bowl with olive oil and place the dough inside. Cover it with plastic wrap. Set it in a warm, draft-free spot for one to two hours. It needs to double in size, like a sleepy balloon.
Step 5: Punch the dough down gently. Cut it into two equal balls. Cover them with plastic wrap and let them rest for fifteen minutes. While you wait, preheat your oven to 475°F (250°C). Put your pizza pan inside the oven to get hot. A hot pan means a crispy crust. Trust me on this!
Step 6: Roll each dough ball onto floured parchment paper. Make it twelve inches for a classic pizza. Brush the top with olive oil. Add your favorite sauce, cheese, and toppings. Slide the pizza onto the hot pan. Bake on the lowest rack for ten to twelve minutes. Then move it to the top rack and broil for two minutes. Watch it so it doesn’t burn!
Cook Time: 12–14 minutes
Total Time: 2 hours 15 minutes
Yield: 2 medium pizzas (8 slices each)
Category: Dinner, Pizza
Three Fun Twists on Your Homemade Pizza
Plain cheese is delicious, but sometimes you want a change. I love trying new things with my dough. Here are three of my favorites.
Garden Veggie Surprise: Top your pizza with colorful bell peppers, mushrooms, and black olives. Add a sprinkle of fresh basil after baking. It tastes like summer on a plate!
Spicy Sausage Fiesta: Crumble cooked Italian sausage over the sauce. Add red pepper flakes for a little kick. My nephew calls this the fire-breathing pizza. Which one would you try first? Comment below!
Apple Pie Dessert Pizza: Skip the tomato sauce. Spread softened cream cheese on the dough. Top with thinly sliced apples, cinnamon, and a drizzle of honey. Bake until golden. It’s like a pie you can eat with your hands.
What to Serve with Your Perfect Pizza
A good pizza needs good friends on the plate. I like to serve it with a simple green salad. Toss some lettuce, cherry tomatoes, and a splash of vinaigrette. It’s fresh and crunchy.
Another idea: cucumber sticks with ranch dip. They’re cool and crisp. Perfect for little fingers to grab between slices. You can also add a bowl of marinated olives for a salty bite.
For drinks, try a cold glass of lemonade. It’s bright and tangy. Grown-ups might enjoy a light red wine, like a Pinot Noir. Which would you choose tonight?
Storing Your Pizza Dough Like a Pro
Making pizza dough is fun. But what if you want pizza tonight and don’t have time? You can store the dough for later. That is the magic of planning ahead. Once your dough has risen, you can put it in the fridge. Wrap it tight in plastic wrap. It will stay good for up to three days. The cold slows down the yeast. This actually makes the flavor better. I remember my first time storing dough. I was nervous. But the next day, the pizza tasted even more like a pizzeria.
The freezer is your best friend for batch cooking. You can freeze the dough balls after they rest. Just wrap them in plastic, then put them in a freezer bag. They will keep for three months. When you want pizza, take a ball out. Let it thaw in the fridge overnight. Then let it sit on the counter for 30 minutes. This is why batch cooking matters. You have homemade pizza ready whenever a craving hits. No need to order out. Have you ever tried storing it this way? Share below!
Three Common Pizza Dough Problems and Fixes
Even the best cooks hit a snag. The first problem is dough that is too sticky. Do not panic. Just add flour one tablespoon at a time while you knead. The dough should be soft, not gluey. I once added too much water by accident. A little extra flour saved the day. The second problem is dough that will not rise. This happens when the water is too hot or too cold. The water should feel like a warm bath. If the yeast is old, it will not bubble. Always check the date on your yeast packet.
The third problem is a crust that is too hard. This often means you baked it too long. Remember the hot pan trick. It helps the bottom cook fast. Keep an eye on the oven. Why do these fixes matter? They save you from a sad pizza. They also teach you to trust your hands. You learn what good dough feels like. That confidence will follow you into every recipe. Which of these problems have you run into before?
Your Pizza Dough Questions Answered
Q: Can I use gluten-free flour? A: Yes. Use a gluten-free blend with xanthan gum. The dough will be stickier, so keep your hands wet.
Q: Can I make the dough the night before? A: Yes. Let it rise, then refrigerate it. The flavor gets better overnight.
Q: Can I swap white flour for whole wheat? A: Yes. Use half white and half whole wheat. Whole wheat dough needs a little more water.
Q: How do I scale the recipe for one pizza? A: Cut all ingredients in half. One ball makes one pizza.
Q: Can I add herbs to the dough? A: Yes. Mix in a teaspoon of dried oregano or garlic powder with the flour. *Fun fact: Italians sometimes add a pinch of sugar to help the crust brown.* Which tip will you try first?
A Warm Goodbye from Chloe
I hope you feel ready to make your own pizza dough. It is one of the kindest things you can do for your family. There is nothing like the smell of baking dough in your kitchen. It makes a house feel like a home. I would love to see your pizzas. Snap a picture of your creation. Share it with us. Have you tried this recipe? Tag us on Pinterest! Happy cooking! —Chloe Hartwell.
The Hot Oven Secret
Turn your oven up high, to 475 degrees. That is really hot. Put your empty pizza pan in the oven while it heats up. This is the secret to a crispy crust. A hot pan cooks the bottom fast. Slide your pizza onto that screaming hot pan and bake for ten to twelve minutes. At the very end, move the pizza to the top rack and turn on the broiler. Watch it closely. In two minutes, the cheese gets bubbly and brown. That is the perfect finish. The crust is crispy, the cheese is melty. I still get excited when I hear that sizzle. It sounds like dinner is ready. Which do you like better: thick crust or thin crust? Take a little poll with your family tonight.Ingredients:
| Ingredient | Amount | Notes |
|---|---|---|
| Warm water (about 105°F/40°C) | 1 ½ cups (360 mL) | Ensure temperature is not too hot or it will kill the yeast |
| Instant yeast | 1 package (1 ¼ oz, 2 ¼ tsp, 7 g) | Can substitute active dry yeast if needed |
| Sugar | 1 Tbsp (15 g) | Helps activate the yeast |
| Salt | 1 tsp | Adds flavor |
| Olive oil | 1 Tbsp (15 mL) + extra for greasing | Extra oil for greasing bowl and pan |
| All-purpose flour | 3 ½ cups (450 g) | Can use bread flour for chewier texture |
The Best Pizza Dough for Little Hands (and Big Bellies)
I still remember the first time I made pizza dough with my grandson. Flour was everywhere. Even on the ceiling! That’s a happy memory now. This recipe is foolproof, which means even a twelve-year-old can do it. Doesn’t that smell amazing when it bakes?
You only need a few simple things from your kitchen. Warm water, yeast, sugar, salt, olive oil, and flour. That’s it. No fancy machines required. Just your hands and a big bowl. Let’s get started, friend.
First, we wake up the yeast. Think of it like a tiny bear coming out of a cave. It gets fizzy and happy. Then we add everything together and knead. That’s the fun part where you push and fold the dough.
Step 1: Pour the warm water into a small bowl. Sprinkle the yeast and sugar on top. Stir it gently, then wait five to ten minutes. You’ll see bubbles and foam. That means the yeast is alive. (Hard-learned tip: Never use water that’s too hot or it will kill the yeast. Lukewarm is perfect, like bath water.)
Step 2: Add the salt and olive oil to the frothy yeast mixture. Stir it with a fork. In a large bowl, dump in the flour. Pour the wet stuff into the flour. Mix with a wooden spoon until it gets too stiff. What do you think makes dough puff up like a soft pillow? … Share below!
Step 3: Dump the dough onto a floured counter. Push it away from you with the heel of your hand. Fold it over, then push again. Keep doing this for eight minutes. The dough will go from sticky to silky smooth. My grandma said it should feel like a baby’s cheek.
Step 4: Poke the dough with one finger. If it slowly springs back, you’re done kneading. Grease a clean bowl with olive oil and place the dough inside. Cover it with plastic wrap. Set it in a warm, draft-free spot for one to two hours. It needs to double in size, like a sleepy balloon.
Step 5: Punch the dough down gently. Cut it into two equal balls. Cover them with plastic wrap and let them rest for fifteen minutes. While you wait, preheat your oven to 475°F (250°C). Put your pizza pan inside the oven to get hot. A hot pan means a crispy crust. Trust me on this!
Step 6: Roll each dough ball onto floured parchment paper. Make it twelve inches for a classic pizza. Brush the top with olive oil. Add your favorite sauce, cheese, and toppings. Slide the pizza onto the hot pan. Bake on the lowest rack for ten to twelve minutes. Then move it to the top rack and broil for two minutes. Watch it so it doesn’t burn!
Cook Time: 12–14 minutes
Total Time: 2 hours 15 minutes
Yield: 2 medium pizzas (8 slices each)
Category: Dinner, Pizza
Three Fun Twists on Your Homemade Pizza
Plain cheese is delicious, but sometimes you want a change. I love trying new things with my dough. Here are three of my favorites.
Garden Veggie Surprise: Top your pizza with colorful bell peppers, mushrooms, and black olives. Add a sprinkle of fresh basil after baking. It tastes like summer on a plate!
Spicy Sausage Fiesta: Crumble cooked Italian sausage over the sauce. Add red pepper flakes for a little kick. My nephew calls this the fire-breathing pizza. Which one would you try first? Comment below!
Apple Pie Dessert Pizza: Skip the tomato sauce. Spread softened cream cheese on the dough. Top with thinly sliced apples, cinnamon, and a drizzle of honey. Bake until golden. It’s like a pie you can eat with your hands.
What to Serve with Your Perfect Pizza
A good pizza needs good friends on the plate. I like to serve it with a simple green salad. Toss some lettuce, cherry tomatoes, and a splash of vinaigrette. It’s fresh and crunchy.
Another idea: cucumber sticks with ranch dip. They’re cool and crisp. Perfect for little fingers to grab between slices. You can also add a bowl of marinated olives for a salty bite.
For drinks, try a cold glass of lemonade. It’s bright and tangy. Grown-ups might enjoy a light red wine, like a Pinot Noir. Which would you choose tonight?
Storing Your Pizza Dough Like a Pro
Making pizza dough is fun. But what if you want pizza tonight and don’t have time? You can store the dough for later. That is the magic of planning ahead. Once your dough has risen, you can put it in the fridge. Wrap it tight in plastic wrap. It will stay good for up to three days. The cold slows down the yeast. This actually makes the flavor better. I remember my first time storing dough. I was nervous. But the next day, the pizza tasted even more like a pizzeria.
The freezer is your best friend for batch cooking. You can freeze the dough balls after they rest. Just wrap them in plastic, then put them in a freezer bag. They will keep for three months. When you want pizza, take a ball out. Let it thaw in the fridge overnight. Then let it sit on the counter for 30 minutes. This is why batch cooking matters. You have homemade pizza ready whenever a craving hits. No need to order out. Have you ever tried storing it this way? Share below!
Three Common Pizza Dough Problems and Fixes
Even the best cooks hit a snag. The first problem is dough that is too sticky. Do not panic. Just add flour one tablespoon at a time while you knead. The dough should be soft, not gluey. I once added too much water by accident. A little extra flour saved the day. The second problem is dough that will not rise. This happens when the water is too hot or too cold. The water should feel like a warm bath. If the yeast is old, it will not bubble. Always check the date on your yeast packet.
The third problem is a crust that is too hard. This often means you baked it too long. Remember the hot pan trick. It helps the bottom cook fast. Keep an eye on the oven. Why do these fixes matter? They save you from a sad pizza. They also teach you to trust your hands. You learn what good dough feels like. That confidence will follow you into every recipe. Which of these problems have you run into before?
Your Pizza Dough Questions Answered
Q: Can I use gluten-free flour? A: Yes. Use a gluten-free blend with xanthan gum. The dough will be stickier, so keep your hands wet.
Q: Can I make the dough the night before? A: Yes. Let it rise, then refrigerate it. The flavor gets better overnight.
Q: Can I swap white flour for whole wheat? A: Yes. Use half white and half whole wheat. Whole wheat dough needs a little more water.
Q: How do I scale the recipe for one pizza? A: Cut all ingredients in half. One ball makes one pizza.
Q: Can I add herbs to the dough? A: Yes. Mix in a teaspoon of dried oregano or garlic powder with the flour. *Fun fact: Italians sometimes add a pinch of sugar to help the crust brown.* Which tip will you try first?
A Warm Goodbye from Chloe
I hope you feel ready to make your own pizza dough. It is one of the kindest things you can do for your family. There is nothing like the smell of baking dough in your kitchen. It makes a house feel like a home. I would love to see your pizzas. Snap a picture of your creation. Share it with us. Have you tried this recipe? Tag us on Pinterest! Happy cooking! —Chloe Hartwell.
The Hot Oven Secret
Turn your oven up high, to 475 degrees. That is really hot. Put your empty pizza pan in the oven while it heats up. This is the secret to a crispy crust. A hot pan cooks the bottom fast. Slide your pizza onto that screaming hot pan and bake for ten to twelve minutes. At the very end, move the pizza to the top rack and turn on the broiler. Watch it closely. In two minutes, the cheese gets bubbly and brown. That is the perfect finish. The crust is crispy, the cheese is melty. I still get excited when I hear that sizzle. It sounds like dinner is ready. Which do you like better: thick crust or thin crust? Take a little poll with your family tonight.Ingredients:
| Ingredient | Amount | Notes |
|---|---|---|
| Warm water (about 105°F/40°C) | 1 ½ cups (360 mL) | Ensure temperature is not too hot or it will kill the yeast |
| Instant yeast | 1 package (1 ¼ oz, 2 ¼ tsp, 7 g) | Can substitute active dry yeast if needed |
| Sugar | 1 Tbsp (15 g) | Helps activate the yeast |
| Salt | 1 tsp | Adds flavor |
| Olive oil | 1 Tbsp (15 mL) + extra for greasing | Extra oil for greasing bowl and pan |
| All-purpose flour | 3 ½ cups (450 g) | Can use bread flour for chewier texture |
The Best Pizza Dough for Little Hands (and Big Bellies)
I still remember the first time I made pizza dough with my grandson. Flour was everywhere. Even on the ceiling! That’s a happy memory now. This recipe is foolproof, which means even a twelve-year-old can do it. Doesn’t that smell amazing when it bakes?
You only need a few simple things from your kitchen. Warm water, yeast, sugar, salt, olive oil, and flour. That’s it. No fancy machines required. Just your hands and a big bowl. Let’s get started, friend.
First, we wake up the yeast. Think of it like a tiny bear coming out of a cave. It gets fizzy and happy. Then we add everything together and knead. That’s the fun part where you push and fold the dough.
Step 1: Pour the warm water into a small bowl. Sprinkle the yeast and sugar on top. Stir it gently, then wait five to ten minutes. You’ll see bubbles and foam. That means the yeast is alive. (Hard-learned tip: Never use water that’s too hot or it will kill the yeast. Lukewarm is perfect, like bath water.)
Step 2: Add the salt and olive oil to the frothy yeast mixture. Stir it with a fork. In a large bowl, dump in the flour. Pour the wet stuff into the flour. Mix with a wooden spoon until it gets too stiff. What do you think makes dough puff up like a soft pillow? … Share below!
Step 3: Dump the dough onto a floured counter. Push it away from you with the heel of your hand. Fold it over, then push again. Keep doing this for eight minutes. The dough will go from sticky to silky smooth. My grandma said it should feel like a baby’s cheek.
Step 4: Poke the dough with one finger. If it slowly springs back, you’re done kneading. Grease a clean bowl with olive oil and place the dough inside. Cover it with plastic wrap. Set it in a warm, draft-free spot for one to two hours. It needs to double in size, like a sleepy balloon.
Step 5: Punch the dough down gently. Cut it into two equal balls. Cover them with plastic wrap and let them rest for fifteen minutes. While you wait, preheat your oven to 475°F (250°C). Put your pizza pan inside the oven to get hot. A hot pan means a crispy crust. Trust me on this!
Step 6: Roll each dough ball onto floured parchment paper. Make it twelve inches for a classic pizza. Brush the top with olive oil. Add your favorite sauce, cheese, and toppings. Slide the pizza onto the hot pan. Bake on the lowest rack for ten to twelve minutes. Then move it to the top rack and broil for two minutes. Watch it so it doesn’t burn!
Cook Time: 12–14 minutes
Total Time: 2 hours 15 minutes
Yield: 2 medium pizzas (8 slices each)
Category: Dinner, Pizza
Three Fun Twists on Your Homemade Pizza
Plain cheese is delicious, but sometimes you want a change. I love trying new things with my dough. Here are three of my favorites.
Garden Veggie Surprise: Top your pizza with colorful bell peppers, mushrooms, and black olives. Add a sprinkle of fresh basil after baking. It tastes like summer on a plate!
Spicy Sausage Fiesta: Crumble cooked Italian sausage over the sauce. Add red pepper flakes for a little kick. My nephew calls this the fire-breathing pizza. Which one would you try first? Comment below!
Apple Pie Dessert Pizza: Skip the tomato sauce. Spread softened cream cheese on the dough. Top with thinly sliced apples, cinnamon, and a drizzle of honey. Bake until golden. It’s like a pie you can eat with your hands.
What to Serve with Your Perfect Pizza
A good pizza needs good friends on the plate. I like to serve it with a simple green salad. Toss some lettuce, cherry tomatoes, and a splash of vinaigrette. It’s fresh and crunchy.
Another idea: cucumber sticks with ranch dip. They’re cool and crisp. Perfect for little fingers to grab between slices. You can also add a bowl of marinated olives for a salty bite.
For drinks, try a cold glass of lemonade. It’s bright and tangy. Grown-ups might enjoy a light red wine, like a Pinot Noir. Which would you choose tonight?
Storing Your Pizza Dough Like a Pro
Making pizza dough is fun. But what if you want pizza tonight and don’t have time? You can store the dough for later. That is the magic of planning ahead. Once your dough has risen, you can put it in the fridge. Wrap it tight in plastic wrap. It will stay good for up to three days. The cold slows down the yeast. This actually makes the flavor better. I remember my first time storing dough. I was nervous. But the next day, the pizza tasted even more like a pizzeria.
The freezer is your best friend for batch cooking. You can freeze the dough balls after they rest. Just wrap them in plastic, then put them in a freezer bag. They will keep for three months. When you want pizza, take a ball out. Let it thaw in the fridge overnight. Then let it sit on the counter for 30 minutes. This is why batch cooking matters. You have homemade pizza ready whenever a craving hits. No need to order out. Have you ever tried storing it this way? Share below!
Three Common Pizza Dough Problems and Fixes
Even the best cooks hit a snag. The first problem is dough that is too sticky. Do not panic. Just add flour one tablespoon at a time while you knead. The dough should be soft, not gluey. I once added too much water by accident. A little extra flour saved the day. The second problem is dough that will not rise. This happens when the water is too hot or too cold. The water should feel like a warm bath. If the yeast is old, it will not bubble. Always check the date on your yeast packet.
The third problem is a crust that is too hard. This often means you baked it too long. Remember the hot pan trick. It helps the bottom cook fast. Keep an eye on the oven. Why do these fixes matter? They save you from a sad pizza. They also teach you to trust your hands. You learn what good dough feels like. That confidence will follow you into every recipe. Which of these problems have you run into before?
Your Pizza Dough Questions Answered
Q: Can I use gluten-free flour? A: Yes. Use a gluten-free blend with xanthan gum. The dough will be stickier, so keep your hands wet.
Q: Can I make the dough the night before? A: Yes. Let it rise, then refrigerate it. The flavor gets better overnight.
Q: Can I swap white flour for whole wheat? A: Yes. Use half white and half whole wheat. Whole wheat dough needs a little more water.
Q: How do I scale the recipe for one pizza? A: Cut all ingredients in half. One ball makes one pizza.
Q: Can I add herbs to the dough? A: Yes. Mix in a teaspoon of dried oregano or garlic powder with the flour. *Fun fact: Italians sometimes add a pinch of sugar to help the crust brown.* Which tip will you try first?
A Warm Goodbye from Chloe
I hope you feel ready to make your own pizza dough. It is one of the kindest things you can do for your family. There is nothing like the smell of baking dough in your kitchen. It makes a house feel like a home. I would love to see your pizzas. Snap a picture of your creation. Share it with us. Have you tried this recipe? Tag us on Pinterest! Happy cooking! —Chloe Hartwell.
Shaping Your Pizza
When the dough is big and puffy, punch it down gently. That is the fun part. Cut it into two pieces. You can make one pizza now and freeze the other for later. Let the dough balls rest for fifteen minutes. This makes them easy to stretch. If you try to stretch cold dough, it fights back and shrinks. We learned that the hard way. Roll the dough out on paper dusted with flour or cornmeal. Cornmeal gives the bottom a little crunch, like tiny pebbles on the road. Brush it with olive oil. That stops the sauce from making the dough soggy. Now you can add your sauce, cheese, and toppings. Go wild or keep it simple.The Hot Oven Secret
Turn your oven up high, to 475 degrees. That is really hot. Put your empty pizza pan in the oven while it heats up. This is the secret to a crispy crust. A hot pan cooks the bottom fast. Slide your pizza onto that screaming hot pan and bake for ten to twelve minutes. At the very end, move the pizza to the top rack and turn on the broiler. Watch it closely. In two minutes, the cheese gets bubbly and brown. That is the perfect finish. The crust is crispy, the cheese is melty. I still get excited when I hear that sizzle. It sounds like dinner is ready. Which do you like better: thick crust or thin crust? Take a little poll with your family tonight.Ingredients:
| Ingredient | Amount | Notes |
|---|---|---|
| Warm water (about 105°F/40°C) | 1 ½ cups (360 mL) | Ensure temperature is not too hot or it will kill the yeast |
| Instant yeast | 1 package (1 ¼ oz, 2 ¼ tsp, 7 g) | Can substitute active dry yeast if needed |
| Sugar | 1 Tbsp (15 g) | Helps activate the yeast |
| Salt | 1 tsp | Adds flavor |
| Olive oil | 1 Tbsp (15 mL) + extra for greasing | Extra oil for greasing bowl and pan |
| All-purpose flour | 3 ½ cups (450 g) | Can use bread flour for chewier texture |
The Best Pizza Dough for Little Hands (and Big Bellies)
I still remember the first time I made pizza dough with my grandson. Flour was everywhere. Even on the ceiling! That’s a happy memory now. This recipe is foolproof, which means even a twelve-year-old can do it. Doesn’t that smell amazing when it bakes?
You only need a few simple things from your kitchen. Warm water, yeast, sugar, salt, olive oil, and flour. That’s it. No fancy machines required. Just your hands and a big bowl. Let’s get started, friend.
First, we wake up the yeast. Think of it like a tiny bear coming out of a cave. It gets fizzy and happy. Then we add everything together and knead. That’s the fun part where you push and fold the dough.
Step 1: Pour the warm water into a small bowl. Sprinkle the yeast and sugar on top. Stir it gently, then wait five to ten minutes. You’ll see bubbles and foam. That means the yeast is alive. (Hard-learned tip: Never use water that’s too hot or it will kill the yeast. Lukewarm is perfect, like bath water.)
Step 2: Add the salt and olive oil to the frothy yeast mixture. Stir it with a fork. In a large bowl, dump in the flour. Pour the wet stuff into the flour. Mix with a wooden spoon until it gets too stiff. What do you think makes dough puff up like a soft pillow? … Share below!
Step 3: Dump the dough onto a floured counter. Push it away from you with the heel of your hand. Fold it over, then push again. Keep doing this for eight minutes. The dough will go from sticky to silky smooth. My grandma said it should feel like a baby’s cheek.
Step 4: Poke the dough with one finger. If it slowly springs back, you’re done kneading. Grease a clean bowl with olive oil and place the dough inside. Cover it with plastic wrap. Set it in a warm, draft-free spot for one to two hours. It needs to double in size, like a sleepy balloon.
Step 5: Punch the dough down gently. Cut it into two equal balls. Cover them with plastic wrap and let them rest for fifteen minutes. While you wait, preheat your oven to 475°F (250°C). Put your pizza pan inside the oven to get hot. A hot pan means a crispy crust. Trust me on this!
Step 6: Roll each dough ball onto floured parchment paper. Make it twelve inches for a classic pizza. Brush the top with olive oil. Add your favorite sauce, cheese, and toppings. Slide the pizza onto the hot pan. Bake on the lowest rack for ten to twelve minutes. Then move it to the top rack and broil for two minutes. Watch it so it doesn’t burn!
Cook Time: 12–14 minutes
Total Time: 2 hours 15 minutes
Yield: 2 medium pizzas (8 slices each)
Category: Dinner, Pizza
Three Fun Twists on Your Homemade Pizza
Plain cheese is delicious, but sometimes you want a change. I love trying new things with my dough. Here are three of my favorites.
Garden Veggie Surprise: Top your pizza with colorful bell peppers, mushrooms, and black olives. Add a sprinkle of fresh basil after baking. It tastes like summer on a plate!
Spicy Sausage Fiesta: Crumble cooked Italian sausage over the sauce. Add red pepper flakes for a little kick. My nephew calls this the fire-breathing pizza. Which one would you try first? Comment below!
Apple Pie Dessert Pizza: Skip the tomato sauce. Spread softened cream cheese on the dough. Top with thinly sliced apples, cinnamon, and a drizzle of honey. Bake until golden. It’s like a pie you can eat with your hands.
What to Serve with Your Perfect Pizza
A good pizza needs good friends on the plate. I like to serve it with a simple green salad. Toss some lettuce, cherry tomatoes, and a splash of vinaigrette. It’s fresh and crunchy.
Another idea: cucumber sticks with ranch dip. They’re cool and crisp. Perfect for little fingers to grab between slices. You can also add a bowl of marinated olives for a salty bite.
For drinks, try a cold glass of lemonade. It’s bright and tangy. Grown-ups might enjoy a light red wine, like a Pinot Noir. Which would you choose tonight?
Storing Your Pizza Dough Like a Pro
Making pizza dough is fun. But what if you want pizza tonight and don’t have time? You can store the dough for later. That is the magic of planning ahead. Once your dough has risen, you can put it in the fridge. Wrap it tight in plastic wrap. It will stay good for up to three days. The cold slows down the yeast. This actually makes the flavor better. I remember my first time storing dough. I was nervous. But the next day, the pizza tasted even more like a pizzeria.
The freezer is your best friend for batch cooking. You can freeze the dough balls after they rest. Just wrap them in plastic, then put them in a freezer bag. They will keep for three months. When you want pizza, take a ball out. Let it thaw in the fridge overnight. Then let it sit on the counter for 30 minutes. This is why batch cooking matters. You have homemade pizza ready whenever a craving hits. No need to order out. Have you ever tried storing it this way? Share below!
Three Common Pizza Dough Problems and Fixes
Even the best cooks hit a snag. The first problem is dough that is too sticky. Do not panic. Just add flour one tablespoon at a time while you knead. The dough should be soft, not gluey. I once added too much water by accident. A little extra flour saved the day. The second problem is dough that will not rise. This happens when the water is too hot or too cold. The water should feel like a warm bath. If the yeast is old, it will not bubble. Always check the date on your yeast packet.
The third problem is a crust that is too hard. This often means you baked it too long. Remember the hot pan trick. It helps the bottom cook fast. Keep an eye on the oven. Why do these fixes matter? They save you from a sad pizza. They also teach you to trust your hands. You learn what good dough feels like. That confidence will follow you into every recipe. Which of these problems have you run into before?
Your Pizza Dough Questions Answered
Q: Can I use gluten-free flour? A: Yes. Use a gluten-free blend with xanthan gum. The dough will be stickier, so keep your hands wet.
Q: Can I make the dough the night before? A: Yes. Let it rise, then refrigerate it. The flavor gets better overnight.
Q: Can I swap white flour for whole wheat? A: Yes. Use half white and half whole wheat. Whole wheat dough needs a little more water.
Q: How do I scale the recipe for one pizza? A: Cut all ingredients in half. One ball makes one pizza.
Q: Can I add herbs to the dough? A: Yes. Mix in a teaspoon of dried oregano or garlic powder with the flour. *Fun fact: Italians sometimes add a pinch of sugar to help the crust brown.* Which tip will you try first?
A Warm Goodbye from Chloe
I hope you feel ready to make your own pizza dough. It is one of the kindest things you can do for your family. There is nothing like the smell of baking dough in your kitchen. It makes a house feel like a home. I would love to see your pizzas. Snap a picture of your creation. Share it with us. Have you tried this recipe? Tag us on Pinterest! Happy cooking! —Chloe Hartwell.
Shaping Your Pizza
When the dough is big and puffy, punch it down gently. That is the fun part. Cut it into two pieces. You can make one pizza now and freeze the other for later. Let the dough balls rest for fifteen minutes. This makes them easy to stretch. If you try to stretch cold dough, it fights back and shrinks. We learned that the hard way. Roll the dough out on paper dusted with flour or cornmeal. Cornmeal gives the bottom a little crunch, like tiny pebbles on the road. Brush it with olive oil. That stops the sauce from making the dough soggy. Now you can add your sauce, cheese, and toppings. Go wild or keep it simple.The Hot Oven Secret
Turn your oven up high, to 475 degrees. That is really hot. Put your empty pizza pan in the oven while it heats up. This is the secret to a crispy crust. A hot pan cooks the bottom fast. Slide your pizza onto that screaming hot pan and bake for ten to twelve minutes. At the very end, move the pizza to the top rack and turn on the broiler. Watch it closely. In two minutes, the cheese gets bubbly and brown. That is the perfect finish. The crust is crispy, the cheese is melty. I still get excited when I hear that sizzle. It sounds like dinner is ready. Which do you like better: thick crust or thin crust? Take a little poll with your family tonight.Ingredients:
| Ingredient | Amount | Notes |
|---|---|---|
| Warm water (about 105°F/40°C) | 1 ½ cups (360 mL) | Ensure temperature is not too hot or it will kill the yeast |
| Instant yeast | 1 package (1 ¼ oz, 2 ¼ tsp, 7 g) | Can substitute active dry yeast if needed |
| Sugar | 1 Tbsp (15 g) | Helps activate the yeast |
| Salt | 1 tsp | Adds flavor |
| Olive oil | 1 Tbsp (15 mL) + extra for greasing | Extra oil for greasing bowl and pan |
| All-purpose flour | 3 ½ cups (450 g) | Can use bread flour for chewier texture |
The Best Pizza Dough for Little Hands (and Big Bellies)
I still remember the first time I made pizza dough with my grandson. Flour was everywhere. Even on the ceiling! That’s a happy memory now. This recipe is foolproof, which means even a twelve-year-old can do it. Doesn’t that smell amazing when it bakes?
You only need a few simple things from your kitchen. Warm water, yeast, sugar, salt, olive oil, and flour. That’s it. No fancy machines required. Just your hands and a big bowl. Let’s get started, friend.
First, we wake up the yeast. Think of it like a tiny bear coming out of a cave. It gets fizzy and happy. Then we add everything together and knead. That’s the fun part where you push and fold the dough.
Step 1: Pour the warm water into a small bowl. Sprinkle the yeast and sugar on top. Stir it gently, then wait five to ten minutes. You’ll see bubbles and foam. That means the yeast is alive. (Hard-learned tip: Never use water that’s too hot or it will kill the yeast. Lukewarm is perfect, like bath water.)
Step 2: Add the salt and olive oil to the frothy yeast mixture. Stir it with a fork. In a large bowl, dump in the flour. Pour the wet stuff into the flour. Mix with a wooden spoon until it gets too stiff. What do you think makes dough puff up like a soft pillow? … Share below!
Step 3: Dump the dough onto a floured counter. Push it away from you with the heel of your hand. Fold it over, then push again. Keep doing this for eight minutes. The dough will go from sticky to silky smooth. My grandma said it should feel like a baby’s cheek.
Step 4: Poke the dough with one finger. If it slowly springs back, you’re done kneading. Grease a clean bowl with olive oil and place the dough inside. Cover it with plastic wrap. Set it in a warm, draft-free spot for one to two hours. It needs to double in size, like a sleepy balloon.
Step 5: Punch the dough down gently. Cut it into two equal balls. Cover them with plastic wrap and let them rest for fifteen minutes. While you wait, preheat your oven to 475°F (250°C). Put your pizza pan inside the oven to get hot. A hot pan means a crispy crust. Trust me on this!
Step 6: Roll each dough ball onto floured parchment paper. Make it twelve inches for a classic pizza. Brush the top with olive oil. Add your favorite sauce, cheese, and toppings. Slide the pizza onto the hot pan. Bake on the lowest rack for ten to twelve minutes. Then move it to the top rack and broil for two minutes. Watch it so it doesn’t burn!
Cook Time: 12–14 minutes
Total Time: 2 hours 15 minutes
Yield: 2 medium pizzas (8 slices each)
Category: Dinner, Pizza
Three Fun Twists on Your Homemade Pizza
Plain cheese is delicious, but sometimes you want a change. I love trying new things with my dough. Here are three of my favorites.
Garden Veggie Surprise: Top your pizza with colorful bell peppers, mushrooms, and black olives. Add a sprinkle of fresh basil after baking. It tastes like summer on a plate!
Spicy Sausage Fiesta: Crumble cooked Italian sausage over the sauce. Add red pepper flakes for a little kick. My nephew calls this the fire-breathing pizza. Which one would you try first? Comment below!
Apple Pie Dessert Pizza: Skip the tomato sauce. Spread softened cream cheese on the dough. Top with thinly sliced apples, cinnamon, and a drizzle of honey. Bake until golden. It’s like a pie you can eat with your hands.
What to Serve with Your Perfect Pizza
A good pizza needs good friends on the plate. I like to serve it with a simple green salad. Toss some lettuce, cherry tomatoes, and a splash of vinaigrette. It’s fresh and crunchy.
Another idea: cucumber sticks with ranch dip. They’re cool and crisp. Perfect for little fingers to grab between slices. You can also add a bowl of marinated olives for a salty bite.
For drinks, try a cold glass of lemonade. It’s bright and tangy. Grown-ups might enjoy a light red wine, like a Pinot Noir. Which would you choose tonight?
Storing Your Pizza Dough Like a Pro
Making pizza dough is fun. But what if you want pizza tonight and don’t have time? You can store the dough for later. That is the magic of planning ahead. Once your dough has risen, you can put it in the fridge. Wrap it tight in plastic wrap. It will stay good for up to three days. The cold slows down the yeast. This actually makes the flavor better. I remember my first time storing dough. I was nervous. But the next day, the pizza tasted even more like a pizzeria.
The freezer is your best friend for batch cooking. You can freeze the dough balls after they rest. Just wrap them in plastic, then put them in a freezer bag. They will keep for three months. When you want pizza, take a ball out. Let it thaw in the fridge overnight. Then let it sit on the counter for 30 minutes. This is why batch cooking matters. You have homemade pizza ready whenever a craving hits. No need to order out. Have you ever tried storing it this way? Share below!
Three Common Pizza Dough Problems and Fixes
Even the best cooks hit a snag. The first problem is dough that is too sticky. Do not panic. Just add flour one tablespoon at a time while you knead. The dough should be soft, not gluey. I once added too much water by accident. A little extra flour saved the day. The second problem is dough that will not rise. This happens when the water is too hot or too cold. The water should feel like a warm bath. If the yeast is old, it will not bubble. Always check the date on your yeast packet.
The third problem is a crust that is too hard. This often means you baked it too long. Remember the hot pan trick. It helps the bottom cook fast. Keep an eye on the oven. Why do these fixes matter? They save you from a sad pizza. They also teach you to trust your hands. You learn what good dough feels like. That confidence will follow you into every recipe. Which of these problems have you run into before?
Your Pizza Dough Questions Answered
Q: Can I use gluten-free flour? A: Yes. Use a gluten-free blend with xanthan gum. The dough will be stickier, so keep your hands wet.
Q: Can I make the dough the night before? A: Yes. Let it rise, then refrigerate it. The flavor gets better overnight.
Q: Can I swap white flour for whole wheat? A: Yes. Use half white and half whole wheat. Whole wheat dough needs a little more water.
Q: How do I scale the recipe for one pizza? A: Cut all ingredients in half. One ball makes one pizza.
Q: Can I add herbs to the dough? A: Yes. Mix in a teaspoon of dried oregano or garlic powder with the flour. *Fun fact: Italians sometimes add a pinch of sugar to help the crust brown.* Which tip will you try first?
A Warm Goodbye from Chloe
I hope you feel ready to make your own pizza dough. It is one of the kindest things you can do for your family. There is nothing like the smell of baking dough in your kitchen. It makes a house feel like a home. I would love to see your pizzas. Snap a picture of your creation. Share it with us. Have you tried this recipe? Tag us on Pinterest! Happy cooking! —Chloe Hartwell.
Shaping Your Pizza
When the dough is big and puffy, punch it down gently. That is the fun part. Cut it into two pieces. You can make one pizza now and freeze the other for later. Let the dough balls rest for fifteen minutes. This makes them easy to stretch. If you try to stretch cold dough, it fights back and shrinks. We learned that the hard way. Roll the dough out on paper dusted with flour or cornmeal. Cornmeal gives the bottom a little crunch, like tiny pebbles on the road. Brush it with olive oil. That stops the sauce from making the dough soggy. Now you can add your sauce, cheese, and toppings. Go wild or keep it simple.The Hot Oven Secret
Turn your oven up high, to 475 degrees. That is really hot. Put your empty pizza pan in the oven while it heats up. This is the secret to a crispy crust. A hot pan cooks the bottom fast. Slide your pizza onto that screaming hot pan and bake for ten to twelve minutes. At the very end, move the pizza to the top rack and turn on the broiler. Watch it closely. In two minutes, the cheese gets bubbly and brown. That is the perfect finish. The crust is crispy, the cheese is melty. I still get excited when I hear that sizzle. It sounds like dinner is ready. Which do you like better: thick crust or thin crust? Take a little poll with your family tonight.Ingredients:
| Ingredient | Amount | Notes |
|---|---|---|
| Warm water (about 105°F/40°C) | 1 ½ cups (360 mL) | Ensure temperature is not too hot or it will kill the yeast |
| Instant yeast | 1 package (1 ¼ oz, 2 ¼ tsp, 7 g) | Can substitute active dry yeast if needed |
| Sugar | 1 Tbsp (15 g) | Helps activate the yeast |
| Salt | 1 tsp | Adds flavor |
| Olive oil | 1 Tbsp (15 mL) + extra for greasing | Extra oil for greasing bowl and pan |
| All-purpose flour | 3 ½ cups (450 g) | Can use bread flour for chewier texture |
The Best Pizza Dough for Little Hands (and Big Bellies)
I still remember the first time I made pizza dough with my grandson. Flour was everywhere. Even on the ceiling! That’s a happy memory now. This recipe is foolproof, which means even a twelve-year-old can do it. Doesn’t that smell amazing when it bakes?
You only need a few simple things from your kitchen. Warm water, yeast, sugar, salt, olive oil, and flour. That’s it. No fancy machines required. Just your hands and a big bowl. Let’s get started, friend.
First, we wake up the yeast. Think of it like a tiny bear coming out of a cave. It gets fizzy and happy. Then we add everything together and knead. That’s the fun part where you push and fold the dough.
Step 1: Pour the warm water into a small bowl. Sprinkle the yeast and sugar on top. Stir it gently, then wait five to ten minutes. You’ll see bubbles and foam. That means the yeast is alive. (Hard-learned tip: Never use water that’s too hot or it will kill the yeast. Lukewarm is perfect, like bath water.)
Step 2: Add the salt and olive oil to the frothy yeast mixture. Stir it with a fork. In a large bowl, dump in the flour. Pour the wet stuff into the flour. Mix with a wooden spoon until it gets too stiff. What do you think makes dough puff up like a soft pillow? … Share below!
Step 3: Dump the dough onto a floured counter. Push it away from you with the heel of your hand. Fold it over, then push again. Keep doing this for eight minutes. The dough will go from sticky to silky smooth. My grandma said it should feel like a baby’s cheek.
Step 4: Poke the dough with one finger. If it slowly springs back, you’re done kneading. Grease a clean bowl with olive oil and place the dough inside. Cover it with plastic wrap. Set it in a warm, draft-free spot for one to two hours. It needs to double in size, like a sleepy balloon.
Step 5: Punch the dough down gently. Cut it into two equal balls. Cover them with plastic wrap and let them rest for fifteen minutes. While you wait, preheat your oven to 475°F (250°C). Put your pizza pan inside the oven to get hot. A hot pan means a crispy crust. Trust me on this!
Step 6: Roll each dough ball onto floured parchment paper. Make it twelve inches for a classic pizza. Brush the top with olive oil. Add your favorite sauce, cheese, and toppings. Slide the pizza onto the hot pan. Bake on the lowest rack for ten to twelve minutes. Then move it to the top rack and broil for two minutes. Watch it so it doesn’t burn!
Cook Time: 12–14 minutes
Total Time: 2 hours 15 minutes
Yield: 2 medium pizzas (8 slices each)
Category: Dinner, Pizza
Three Fun Twists on Your Homemade Pizza
Plain cheese is delicious, but sometimes you want a change. I love trying new things with my dough. Here are three of my favorites.
Garden Veggie Surprise: Top your pizza with colorful bell peppers, mushrooms, and black olives. Add a sprinkle of fresh basil after baking. It tastes like summer on a plate!
Spicy Sausage Fiesta: Crumble cooked Italian sausage over the sauce. Add red pepper flakes for a little kick. My nephew calls this the fire-breathing pizza. Which one would you try first? Comment below!
Apple Pie Dessert Pizza: Skip the tomato sauce. Spread softened cream cheese on the dough. Top with thinly sliced apples, cinnamon, and a drizzle of honey. Bake until golden. It’s like a pie you can eat with your hands.
What to Serve with Your Perfect Pizza
A good pizza needs good friends on the plate. I like to serve it with a simple green salad. Toss some lettuce, cherry tomatoes, and a splash of vinaigrette. It’s fresh and crunchy.
Another idea: cucumber sticks with ranch dip. They’re cool and crisp. Perfect for little fingers to grab between slices. You can also add a bowl of marinated olives for a salty bite.
For drinks, try a cold glass of lemonade. It’s bright and tangy. Grown-ups might enjoy a light red wine, like a Pinot Noir. Which would you choose tonight?
Storing Your Pizza Dough Like a Pro
Making pizza dough is fun. But what if you want pizza tonight and don’t have time? You can store the dough for later. That is the magic of planning ahead. Once your dough has risen, you can put it in the fridge. Wrap it tight in plastic wrap. It will stay good for up to three days. The cold slows down the yeast. This actually makes the flavor better. I remember my first time storing dough. I was nervous. But the next day, the pizza tasted even more like a pizzeria.
The freezer is your best friend for batch cooking. You can freeze the dough balls after they rest. Just wrap them in plastic, then put them in a freezer bag. They will keep for three months. When you want pizza, take a ball out. Let it thaw in the fridge overnight. Then let it sit on the counter for 30 minutes. This is why batch cooking matters. You have homemade pizza ready whenever a craving hits. No need to order out. Have you ever tried storing it this way? Share below!
Three Common Pizza Dough Problems and Fixes
Even the best cooks hit a snag. The first problem is dough that is too sticky. Do not panic. Just add flour one tablespoon at a time while you knead. The dough should be soft, not gluey. I once added too much water by accident. A little extra flour saved the day. The second problem is dough that will not rise. This happens when the water is too hot or too cold. The water should feel like a warm bath. If the yeast is old, it will not bubble. Always check the date on your yeast packet.
The third problem is a crust that is too hard. This often means you baked it too long. Remember the hot pan trick. It helps the bottom cook fast. Keep an eye on the oven. Why do these fixes matter? They save you from a sad pizza. They also teach you to trust your hands. You learn what good dough feels like. That confidence will follow you into every recipe. Which of these problems have you run into before?
Your Pizza Dough Questions Answered
Q: Can I use gluten-free flour? A: Yes. Use a gluten-free blend with xanthan gum. The dough will be stickier, so keep your hands wet.
Q: Can I make the dough the night before? A: Yes. Let it rise, then refrigerate it. The flavor gets better overnight.
Q: Can I swap white flour for whole wheat? A: Yes. Use half white and half whole wheat. Whole wheat dough needs a little more water.
Q: How do I scale the recipe for one pizza? A: Cut all ingredients in half. One ball makes one pizza.
Q: Can I add herbs to the dough? A: Yes. Mix in a teaspoon of dried oregano or garlic powder with the flour. *Fun fact: Italians sometimes add a pinch of sugar to help the crust brown.* Which tip will you try first?
A Warm Goodbye from Chloe
I hope you feel ready to make your own pizza dough. It is one of the kindest things you can do for your family. There is nothing like the smell of baking dough in your kitchen. It makes a house feel like a home. I would love to see your pizzas. Snap a picture of your creation. Share it with us. Have you tried this recipe? Tag us on Pinterest! Happy cooking! —Chloe Hartwell.
Shaping Your Pizza
When the dough is big and puffy, punch it down gently. That is the fun part. Cut it into two pieces. You can make one pizza now and freeze the other for later. Let the dough balls rest for fifteen minutes. This makes them easy to stretch. If you try to stretch cold dough, it fights back and shrinks. We learned that the hard way. Roll the dough out on paper dusted with flour or cornmeal. Cornmeal gives the bottom a little crunch, like tiny pebbles on the road. Brush it with olive oil. That stops the sauce from making the dough soggy. Now you can add your sauce, cheese, and toppings. Go wild or keep it simple.The Hot Oven Secret
Turn your oven up high, to 475 degrees. That is really hot. Put your empty pizza pan in the oven while it heats up. This is the secret to a crispy crust. A hot pan cooks the bottom fast. Slide your pizza onto that screaming hot pan and bake for ten to twelve minutes. At the very end, move the pizza to the top rack and turn on the broiler. Watch it closely. In two minutes, the cheese gets bubbly and brown. That is the perfect finish. The crust is crispy, the cheese is melty. I still get excited when I hear that sizzle. It sounds like dinner is ready. Which do you like better: thick crust or thin crust? Take a little poll with your family tonight.Ingredients:
| Ingredient | Amount | Notes |
|---|---|---|
| Warm water (about 105°F/40°C) | 1 ½ cups (360 mL) | Ensure temperature is not too hot or it will kill the yeast |
| Instant yeast | 1 package (1 ¼ oz, 2 ¼ tsp, 7 g) | Can substitute active dry yeast if needed |
| Sugar | 1 Tbsp (15 g) | Helps activate the yeast |
| Salt | 1 tsp | Adds flavor |
| Olive oil | 1 Tbsp (15 mL) + extra for greasing | Extra oil for greasing bowl and pan |
| All-purpose flour | 3 ½ cups (450 g) | Can use bread flour for chewier texture |
The Best Pizza Dough for Little Hands (and Big Bellies)
I still remember the first time I made pizza dough with my grandson. Flour was everywhere. Even on the ceiling! That’s a happy memory now. This recipe is foolproof, which means even a twelve-year-old can do it. Doesn’t that smell amazing when it bakes?
You only need a few simple things from your kitchen. Warm water, yeast, sugar, salt, olive oil, and flour. That’s it. No fancy machines required. Just your hands and a big bowl. Let’s get started, friend.
First, we wake up the yeast. Think of it like a tiny bear coming out of a cave. It gets fizzy and happy. Then we add everything together and knead. That’s the fun part where you push and fold the dough.
Step 1: Pour the warm water into a small bowl. Sprinkle the yeast and sugar on top. Stir it gently, then wait five to ten minutes. You’ll see bubbles and foam. That means the yeast is alive. (Hard-learned tip: Never use water that’s too hot or it will kill the yeast. Lukewarm is perfect, like bath water.)
Step 2: Add the salt and olive oil to the frothy yeast mixture. Stir it with a fork. In a large bowl, dump in the flour. Pour the wet stuff into the flour. Mix with a wooden spoon until it gets too stiff. What do you think makes dough puff up like a soft pillow? … Share below!
Step 3: Dump the dough onto a floured counter. Push it away from you with the heel of your hand. Fold it over, then push again. Keep doing this for eight minutes. The dough will go from sticky to silky smooth. My grandma said it should feel like a baby’s cheek.
Step 4: Poke the dough with one finger. If it slowly springs back, you’re done kneading. Grease a clean bowl with olive oil and place the dough inside. Cover it with plastic wrap. Set it in a warm, draft-free spot for one to two hours. It needs to double in size, like a sleepy balloon.
Step 5: Punch the dough down gently. Cut it into two equal balls. Cover them with plastic wrap and let them rest for fifteen minutes. While you wait, preheat your oven to 475°F (250°C). Put your pizza pan inside the oven to get hot. A hot pan means a crispy crust. Trust me on this!
Step 6: Roll each dough ball onto floured parchment paper. Make it twelve inches for a classic pizza. Brush the top with olive oil. Add your favorite sauce, cheese, and toppings. Slide the pizza onto the hot pan. Bake on the lowest rack for ten to twelve minutes. Then move it to the top rack and broil for two minutes. Watch it so it doesn’t burn!
Cook Time: 12–14 minutes
Total Time: 2 hours 15 minutes
Yield: 2 medium pizzas (8 slices each)
Category: Dinner, Pizza
Three Fun Twists on Your Homemade Pizza
Plain cheese is delicious, but sometimes you want a change. I love trying new things with my dough. Here are three of my favorites.
Garden Veggie Surprise: Top your pizza with colorful bell peppers, mushrooms, and black olives. Add a sprinkle of fresh basil after baking. It tastes like summer on a plate!
Spicy Sausage Fiesta: Crumble cooked Italian sausage over the sauce. Add red pepper flakes for a little kick. My nephew calls this the fire-breathing pizza. Which one would you try first? Comment below!
Apple Pie Dessert Pizza: Skip the tomato sauce. Spread softened cream cheese on the dough. Top with thinly sliced apples, cinnamon, and a drizzle of honey. Bake until golden. It’s like a pie you can eat with your hands.
What to Serve with Your Perfect Pizza
A good pizza needs good friends on the plate. I like to serve it with a simple green salad. Toss some lettuce, cherry tomatoes, and a splash of vinaigrette. It’s fresh and crunchy.
Another idea: cucumber sticks with ranch dip. They’re cool and crisp. Perfect for little fingers to grab between slices. You can also add a bowl of marinated olives for a salty bite.
For drinks, try a cold glass of lemonade. It’s bright and tangy. Grown-ups might enjoy a light red wine, like a Pinot Noir. Which would you choose tonight?
Storing Your Pizza Dough Like a Pro
Making pizza dough is fun. But what if you want pizza tonight and don’t have time? You can store the dough for later. That is the magic of planning ahead. Once your dough has risen, you can put it in the fridge. Wrap it tight in plastic wrap. It will stay good for up to three days. The cold slows down the yeast. This actually makes the flavor better. I remember my first time storing dough. I was nervous. But the next day, the pizza tasted even more like a pizzeria.
The freezer is your best friend for batch cooking. You can freeze the dough balls after they rest. Just wrap them in plastic, then put them in a freezer bag. They will keep for three months. When you want pizza, take a ball out. Let it thaw in the fridge overnight. Then let it sit on the counter for 30 minutes. This is why batch cooking matters. You have homemade pizza ready whenever a craving hits. No need to order out. Have you ever tried storing it this way? Share below!
Three Common Pizza Dough Problems and Fixes
Even the best cooks hit a snag. The first problem is dough that is too sticky. Do not panic. Just add flour one tablespoon at a time while you knead. The dough should be soft, not gluey. I once added too much water by accident. A little extra flour saved the day. The second problem is dough that will not rise. This happens when the water is too hot or too cold. The water should feel like a warm bath. If the yeast is old, it will not bubble. Always check the date on your yeast packet.
The third problem is a crust that is too hard. This often means you baked it too long. Remember the hot pan trick. It helps the bottom cook fast. Keep an eye on the oven. Why do these fixes matter? They save you from a sad pizza. They also teach you to trust your hands. You learn what good dough feels like. That confidence will follow you into every recipe. Which of these problems have you run into before?
Your Pizza Dough Questions Answered
Q: Can I use gluten-free flour? A: Yes. Use a gluten-free blend with xanthan gum. The dough will be stickier, so keep your hands wet.
Q: Can I make the dough the night before? A: Yes. Let it rise, then refrigerate it. The flavor gets better overnight.
Q: Can I swap white flour for whole wheat? A: Yes. Use half white and half whole wheat. Whole wheat dough needs a little more water.
Q: How do I scale the recipe for one pizza? A: Cut all ingredients in half. One ball makes one pizza.
Q: Can I add herbs to the dough? A: Yes. Mix in a teaspoon of dried oregano or garlic powder with the flour. *Fun fact: Italians sometimes add a pinch of sugar to help the crust brown.* Which tip will you try first?
A Warm Goodbye from Chloe
I hope you feel ready to make your own pizza dough. It is one of the kindest things you can do for your family. There is nothing like the smell of baking dough in your kitchen. It makes a house feel like a home. I would love to see your pizzas. Snap a picture of your creation. Share it with us. Have you tried this recipe? Tag us on Pinterest! Happy cooking! —Chloe Hartwell.
Shaping Your Pizza
When the dough is big and puffy, punch it down gently. That is the fun part. Cut it into two pieces. You can make one pizza now and freeze the other for later. Let the dough balls rest for fifteen minutes. This makes them easy to stretch. If you try to stretch cold dough, it fights back and shrinks. We learned that the hard way. Roll the dough out on paper dusted with flour or cornmeal. Cornmeal gives the bottom a little crunch, like tiny pebbles on the road. Brush it with olive oil. That stops the sauce from making the dough soggy. Now you can add your sauce, cheese, and toppings. Go wild or keep it simple.The Hot Oven Secret
Turn your oven up high, to 475 degrees. That is really hot. Put your empty pizza pan in the oven while it heats up. This is the secret to a crispy crust. A hot pan cooks the bottom fast. Slide your pizza onto that screaming hot pan and bake for ten to twelve minutes. At the very end, move the pizza to the top rack and turn on the broiler. Watch it closely. In two minutes, the cheese gets bubbly and brown. That is the perfect finish. The crust is crispy, the cheese is melty. I still get excited when I hear that sizzle. It sounds like dinner is ready. Which do you like better: thick crust or thin crust? Take a little poll with your family tonight.Ingredients:
| Ingredient | Amount | Notes |
|---|---|---|
| Warm water (about 105°F/40°C) | 1 ½ cups (360 mL) | Ensure temperature is not too hot or it will kill the yeast |
| Instant yeast | 1 package (1 ¼ oz, 2 ¼ tsp, 7 g) | Can substitute active dry yeast if needed |
| Sugar | 1 Tbsp (15 g) | Helps activate the yeast |
| Salt | 1 tsp | Adds flavor |
| Olive oil | 1 Tbsp (15 mL) + extra for greasing | Extra oil for greasing bowl and pan |
| All-purpose flour | 3 ½ cups (450 g) | Can use bread flour for chewier texture |
The Best Pizza Dough for Little Hands (and Big Bellies)
I still remember the first time I made pizza dough with my grandson. Flour was everywhere. Even on the ceiling! That’s a happy memory now. This recipe is foolproof, which means even a twelve-year-old can do it. Doesn’t that smell amazing when it bakes?
You only need a few simple things from your kitchen. Warm water, yeast, sugar, salt, olive oil, and flour. That’s it. No fancy machines required. Just your hands and a big bowl. Let’s get started, friend.
First, we wake up the yeast. Think of it like a tiny bear coming out of a cave. It gets fizzy and happy. Then we add everything together and knead. That’s the fun part where you push and fold the dough.
Step 1: Pour the warm water into a small bowl. Sprinkle the yeast and sugar on top. Stir it gently, then wait five to ten minutes. You’ll see bubbles and foam. That means the yeast is alive. (Hard-learned tip: Never use water that’s too hot or it will kill the yeast. Lukewarm is perfect, like bath water.)
Step 2: Add the salt and olive oil to the frothy yeast mixture. Stir it with a fork. In a large bowl, dump in the flour. Pour the wet stuff into the flour. Mix with a wooden spoon until it gets too stiff. What do you think makes dough puff up like a soft pillow? … Share below!
Step 3: Dump the dough onto a floured counter. Push it away from you with the heel of your hand. Fold it over, then push again. Keep doing this for eight minutes. The dough will go from sticky to silky smooth. My grandma said it should feel like a baby’s cheek.
Step 4: Poke the dough with one finger. If it slowly springs back, you’re done kneading. Grease a clean bowl with olive oil and place the dough inside. Cover it with plastic wrap. Set it in a warm, draft-free spot for one to two hours. It needs to double in size, like a sleepy balloon.
Step 5: Punch the dough down gently. Cut it into two equal balls. Cover them with plastic wrap and let them rest for fifteen minutes. While you wait, preheat your oven to 475°F (250°C). Put your pizza pan inside the oven to get hot. A hot pan means a crispy crust. Trust me on this!
Step 6: Roll each dough ball onto floured parchment paper. Make it twelve inches for a classic pizza. Brush the top with olive oil. Add your favorite sauce, cheese, and toppings. Slide the pizza onto the hot pan. Bake on the lowest rack for ten to twelve minutes. Then move it to the top rack and broil for two minutes. Watch it so it doesn’t burn!
Cook Time: 12–14 minutes
Total Time: 2 hours 15 minutes
Yield: 2 medium pizzas (8 slices each)
Category: Dinner, Pizza
Three Fun Twists on Your Homemade Pizza
Plain cheese is delicious, but sometimes you want a change. I love trying new things with my dough. Here are three of my favorites.
Garden Veggie Surprise: Top your pizza with colorful bell peppers, mushrooms, and black olives. Add a sprinkle of fresh basil after baking. It tastes like summer on a plate!
Spicy Sausage Fiesta: Crumble cooked Italian sausage over the sauce. Add red pepper flakes for a little kick. My nephew calls this the fire-breathing pizza. Which one would you try first? Comment below!
Apple Pie Dessert Pizza: Skip the tomato sauce. Spread softened cream cheese on the dough. Top with thinly sliced apples, cinnamon, and a drizzle of honey. Bake until golden. It’s like a pie you can eat with your hands.
What to Serve with Your Perfect Pizza
A good pizza needs good friends on the plate. I like to serve it with a simple green salad. Toss some lettuce, cherry tomatoes, and a splash of vinaigrette. It’s fresh and crunchy.
Another idea: cucumber sticks with ranch dip. They’re cool and crisp. Perfect for little fingers to grab between slices. You can also add a bowl of marinated olives for a salty bite.
For drinks, try a cold glass of lemonade. It’s bright and tangy. Grown-ups might enjoy a light red wine, like a Pinot Noir. Which would you choose tonight?
Storing Your Pizza Dough Like a Pro
Making pizza dough is fun. But what if you want pizza tonight and don’t have time? You can store the dough for later. That is the magic of planning ahead. Once your dough has risen, you can put it in the fridge. Wrap it tight in plastic wrap. It will stay good for up to three days. The cold slows down the yeast. This actually makes the flavor better. I remember my first time storing dough. I was nervous. But the next day, the pizza tasted even more like a pizzeria.
The freezer is your best friend for batch cooking. You can freeze the dough balls after they rest. Just wrap them in plastic, then put them in a freezer bag. They will keep for three months. When you want pizza, take a ball out. Let it thaw in the fridge overnight. Then let it sit on the counter for 30 minutes. This is why batch cooking matters. You have homemade pizza ready whenever a craving hits. No need to order out. Have you ever tried storing it this way? Share below!
Three Common Pizza Dough Problems and Fixes
Even the best cooks hit a snag. The first problem is dough that is too sticky. Do not panic. Just add flour one tablespoon at a time while you knead. The dough should be soft, not gluey. I once added too much water by accident. A little extra flour saved the day. The second problem is dough that will not rise. This happens when the water is too hot or too cold. The water should feel like a warm bath. If the yeast is old, it will not bubble. Always check the date on your yeast packet.
The third problem is a crust that is too hard. This often means you baked it too long. Remember the hot pan trick. It helps the bottom cook fast. Keep an eye on the oven. Why do these fixes matter? They save you from a sad pizza. They also teach you to trust your hands. You learn what good dough feels like. That confidence will follow you into every recipe. Which of these problems have you run into before?
Your Pizza Dough Questions Answered
Q: Can I use gluten-free flour? A: Yes. Use a gluten-free blend with xanthan gum. The dough will be stickier, so keep your hands wet.
Q: Can I make the dough the night before? A: Yes. Let it rise, then refrigerate it. The flavor gets better overnight.
Q: Can I swap white flour for whole wheat? A: Yes. Use half white and half whole wheat. Whole wheat dough needs a little more water.
Q: How do I scale the recipe for one pizza? A: Cut all ingredients in half. One ball makes one pizza.
Q: Can I add herbs to the dough? A: Yes. Mix in a teaspoon of dried oregano or garlic powder with the flour. *Fun fact: Italians sometimes add a pinch of sugar to help the crust brown.* Which tip will you try first?
A Warm Goodbye from Chloe
I hope you feel ready to make your own pizza dough. It is one of the kindest things you can do for your family. There is nothing like the smell of baking dough in your kitchen. It makes a house feel like a home. I would love to see your pizzas. Snap a picture of your creation. Share it with us. Have you tried this recipe? Tag us on Pinterest! Happy cooking! —Chloe Hartwell.
Shaping Your Pizza
When the dough is big and puffy, punch it down gently. That is the fun part. Cut it into two pieces. You can make one pizza now and freeze the other for later. Let the dough balls rest for fifteen minutes. This makes them easy to stretch. If you try to stretch cold dough, it fights back and shrinks. We learned that the hard way. Roll the dough out on paper dusted with flour or cornmeal. Cornmeal gives the bottom a little crunch, like tiny pebbles on the road. Brush it with olive oil. That stops the sauce from making the dough soggy. Now you can add your sauce, cheese, and toppings. Go wild or keep it simple.The Hot Oven Secret
Turn your oven up high, to 475 degrees. That is really hot. Put your empty pizza pan in the oven while it heats up. This is the secret to a crispy crust. A hot pan cooks the bottom fast. Slide your pizza onto that screaming hot pan and bake for ten to twelve minutes. At the very end, move the pizza to the top rack and turn on the broiler. Watch it closely. In two minutes, the cheese gets bubbly and brown. That is the perfect finish. The crust is crispy, the cheese is melty. I still get excited when I hear that sizzle. It sounds like dinner is ready. Which do you like better: thick crust or thin crust? Take a little poll with your family tonight.Ingredients:
| Ingredient | Amount | Notes |
|---|---|---|
| Warm water (about 105°F/40°C) | 1 ½ cups (360 mL) | Ensure temperature is not too hot or it will kill the yeast |
| Instant yeast | 1 package (1 ¼ oz, 2 ¼ tsp, 7 g) | Can substitute active dry yeast if needed |
| Sugar | 1 Tbsp (15 g) | Helps activate the yeast |
| Salt | 1 tsp | Adds flavor |
| Olive oil | 1 Tbsp (15 mL) + extra for greasing | Extra oil for greasing bowl and pan |
| All-purpose flour | 3 ½ cups (450 g) | Can use bread flour for chewier texture |
The Best Pizza Dough for Little Hands (and Big Bellies)
I still remember the first time I made pizza dough with my grandson. Flour was everywhere. Even on the ceiling! That’s a happy memory now. This recipe is foolproof, which means even a twelve-year-old can do it. Doesn’t that smell amazing when it bakes?
You only need a few simple things from your kitchen. Warm water, yeast, sugar, salt, olive oil, and flour. That’s it. No fancy machines required. Just your hands and a big bowl. Let’s get started, friend.
First, we wake up the yeast. Think of it like a tiny bear coming out of a cave. It gets fizzy and happy. Then we add everything together and knead. That’s the fun part where you push and fold the dough.
Step 1: Pour the warm water into a small bowl. Sprinkle the yeast and sugar on top. Stir it gently, then wait five to ten minutes. You’ll see bubbles and foam. That means the yeast is alive. (Hard-learned tip: Never use water that’s too hot or it will kill the yeast. Lukewarm is perfect, like bath water.)
Step 2: Add the salt and olive oil to the frothy yeast mixture. Stir it with a fork. In a large bowl, dump in the flour. Pour the wet stuff into the flour. Mix with a wooden spoon until it gets too stiff. What do you think makes dough puff up like a soft pillow? … Share below!
Step 3: Dump the dough onto a floured counter. Push it away from you with the heel of your hand. Fold it over, then push again. Keep doing this for eight minutes. The dough will go from sticky to silky smooth. My grandma said it should feel like a baby’s cheek.
Step 4: Poke the dough with one finger. If it slowly springs back, you’re done kneading. Grease a clean bowl with olive oil and place the dough inside. Cover it with plastic wrap. Set it in a warm, draft-free spot for one to two hours. It needs to double in size, like a sleepy balloon.
Step 5: Punch the dough down gently. Cut it into two equal balls. Cover them with plastic wrap and let them rest for fifteen minutes. While you wait, preheat your oven to 475°F (250°C). Put your pizza pan inside the oven to get hot. A hot pan means a crispy crust. Trust me on this!
Step 6: Roll each dough ball onto floured parchment paper. Make it twelve inches for a classic pizza. Brush the top with olive oil. Add your favorite sauce, cheese, and toppings. Slide the pizza onto the hot pan. Bake on the lowest rack for ten to twelve minutes. Then move it to the top rack and broil for two minutes. Watch it so it doesn’t burn!
Cook Time: 12–14 minutes
Total Time: 2 hours 15 minutes
Yield: 2 medium pizzas (8 slices each)
Category: Dinner, Pizza
Three Fun Twists on Your Homemade Pizza
Plain cheese is delicious, but sometimes you want a change. I love trying new things with my dough. Here are three of my favorites.
Garden Veggie Surprise: Top your pizza with colorful bell peppers, mushrooms, and black olives. Add a sprinkle of fresh basil after baking. It tastes like summer on a plate!
Spicy Sausage Fiesta: Crumble cooked Italian sausage over the sauce. Add red pepper flakes for a little kick. My nephew calls this the fire-breathing pizza. Which one would you try first? Comment below!
Apple Pie Dessert Pizza: Skip the tomato sauce. Spread softened cream cheese on the dough. Top with thinly sliced apples, cinnamon, and a drizzle of honey. Bake until golden. It’s like a pie you can eat with your hands.
What to Serve with Your Perfect Pizza
A good pizza needs good friends on the plate. I like to serve it with a simple green salad. Toss some lettuce, cherry tomatoes, and a splash of vinaigrette. It’s fresh and crunchy.
Another idea: cucumber sticks with ranch dip. They’re cool and crisp. Perfect for little fingers to grab between slices. You can also add a bowl of marinated olives for a salty bite.
For drinks, try a cold glass of lemonade. It’s bright and tangy. Grown-ups might enjoy a light red wine, like a Pinot Noir. Which would you choose tonight?
Storing Your Pizza Dough Like a Pro
Making pizza dough is fun. But what if you want pizza tonight and don’t have time? You can store the dough for later. That is the magic of planning ahead. Once your dough has risen, you can put it in the fridge. Wrap it tight in plastic wrap. It will stay good for up to three days. The cold slows down the yeast. This actually makes the flavor better. I remember my first time storing dough. I was nervous. But the next day, the pizza tasted even more like a pizzeria.
The freezer is your best friend for batch cooking. You can freeze the dough balls after they rest. Just wrap them in plastic, then put them in a freezer bag. They will keep for three months. When you want pizza, take a ball out. Let it thaw in the fridge overnight. Then let it sit on the counter for 30 minutes. This is why batch cooking matters. You have homemade pizza ready whenever a craving hits. No need to order out. Have you ever tried storing it this way? Share below!
Three Common Pizza Dough Problems and Fixes
Even the best cooks hit a snag. The first problem is dough that is too sticky. Do not panic. Just add flour one tablespoon at a time while you knead. The dough should be soft, not gluey. I once added too much water by accident. A little extra flour saved the day. The second problem is dough that will not rise. This happens when the water is too hot or too cold. The water should feel like a warm bath. If the yeast is old, it will not bubble. Always check the date on your yeast packet.
The third problem is a crust that is too hard. This often means you baked it too long. Remember the hot pan trick. It helps the bottom cook fast. Keep an eye on the oven. Why do these fixes matter? They save you from a sad pizza. They also teach you to trust your hands. You learn what good dough feels like. That confidence will follow you into every recipe. Which of these problems have you run into before?
Your Pizza Dough Questions Answered
Q: Can I use gluten-free flour? A: Yes. Use a gluten-free blend with xanthan gum. The dough will be stickier, so keep your hands wet.
Q: Can I make the dough the night before? A: Yes. Let it rise, then refrigerate it. The flavor gets better overnight.
Q: Can I swap white flour for whole wheat? A: Yes. Use half white and half whole wheat. Whole wheat dough needs a little more water.
Q: How do I scale the recipe for one pizza? A: Cut all ingredients in half. One ball makes one pizza.
Q: Can I add herbs to the dough? A: Yes. Mix in a teaspoon of dried oregano or garlic powder with the flour. *Fun fact: Italians sometimes add a pinch of sugar to help the crust brown.* Which tip will you try first?
A Warm Goodbye from Chloe
I hope you feel ready to make your own pizza dough. It is one of the kindest things you can do for your family. There is nothing like the smell of baking dough in your kitchen. It makes a house feel like a home. I would love to see your pizzas. Snap a picture of your creation. Share it with us. Have you tried this recipe? Tag us on Pinterest! Happy cooking! —Chloe Hartwell.
Waiting Is the Hardest Part
Oil the bowl so the dough doesn’t stick. Put the dough ball inside. Cover it with plastic wrap, like tucking it in for a nap. Leave it in a warm spot for an hour or two. It will double in size. I put my bowl on top of the fridge. That spot is always a little warm. Why does this matter? The waiting time builds flavor. The yeast keeps working slowly, making the dough taste rich and good. Rushing this step means you miss out on that yummy, bready flavor. Have you ever made something that took a long time to rise? It is always worth it.Shaping Your Pizza
When the dough is big and puffy, punch it down gently. That is the fun part. Cut it into two pieces. You can make one pizza now and freeze the other for later. Let the dough balls rest for fifteen minutes. This makes them easy to stretch. If you try to stretch cold dough, it fights back and shrinks. We learned that the hard way. Roll the dough out on paper dusted with flour or cornmeal. Cornmeal gives the bottom a little crunch, like tiny pebbles on the road. Brush it with olive oil. That stops the sauce from making the dough soggy. Now you can add your sauce, cheese, and toppings. Go wild or keep it simple.The Hot Oven Secret
Turn your oven up high, to 475 degrees. That is really hot. Put your empty pizza pan in the oven while it heats up. This is the secret to a crispy crust. A hot pan cooks the bottom fast. Slide your pizza onto that screaming hot pan and bake for ten to twelve minutes. At the very end, move the pizza to the top rack and turn on the broiler. Watch it closely. In two minutes, the cheese gets bubbly and brown. That is the perfect finish. The crust is crispy, the cheese is melty. I still get excited when I hear that sizzle. It sounds like dinner is ready. Which do you like better: thick crust or thin crust? Take a little poll with your family tonight.Ingredients:
| Ingredient | Amount | Notes |
|---|---|---|
| Warm water (about 105°F/40°C) | 1 ½ cups (360 mL) | Ensure temperature is not too hot or it will kill the yeast |
| Instant yeast | 1 package (1 ¼ oz, 2 ¼ tsp, 7 g) | Can substitute active dry yeast if needed |
| Sugar | 1 Tbsp (15 g) | Helps activate the yeast |
| Salt | 1 tsp | Adds flavor |
| Olive oil | 1 Tbsp (15 mL) + extra for greasing | Extra oil for greasing bowl and pan |
| All-purpose flour | 3 ½ cups (450 g) | Can use bread flour for chewier texture |
The Best Pizza Dough for Little Hands (and Big Bellies)
I still remember the first time I made pizza dough with my grandson. Flour was everywhere. Even on the ceiling! That’s a happy memory now. This recipe is foolproof, which means even a twelve-year-old can do it. Doesn’t that smell amazing when it bakes?
You only need a few simple things from your kitchen. Warm water, yeast, sugar, salt, olive oil, and flour. That’s it. No fancy machines required. Just your hands and a big bowl. Let’s get started, friend.
First, we wake up the yeast. Think of it like a tiny bear coming out of a cave. It gets fizzy and happy. Then we add everything together and knead. That’s the fun part where you push and fold the dough.
Step 1: Pour the warm water into a small bowl. Sprinkle the yeast and sugar on top. Stir it gently, then wait five to ten minutes. You’ll see bubbles and foam. That means the yeast is alive. (Hard-learned tip: Never use water that’s too hot or it will kill the yeast. Lukewarm is perfect, like bath water.)
Step 2: Add the salt and olive oil to the frothy yeast mixture. Stir it with a fork. In a large bowl, dump in the flour. Pour the wet stuff into the flour. Mix with a wooden spoon until it gets too stiff. What do you think makes dough puff up like a soft pillow? … Share below!
Step 3: Dump the dough onto a floured counter. Push it away from you with the heel of your hand. Fold it over, then push again. Keep doing this for eight minutes. The dough will go from sticky to silky smooth. My grandma said it should feel like a baby’s cheek.
Step 4: Poke the dough with one finger. If it slowly springs back, you’re done kneading. Grease a clean bowl with olive oil and place the dough inside. Cover it with plastic wrap. Set it in a warm, draft-free spot for one to two hours. It needs to double in size, like a sleepy balloon.
Step 5: Punch the dough down gently. Cut it into two equal balls. Cover them with plastic wrap and let them rest for fifteen minutes. While you wait, preheat your oven to 475°F (250°C). Put your pizza pan inside the oven to get hot. A hot pan means a crispy crust. Trust me on this!
Step 6: Roll each dough ball onto floured parchment paper. Make it twelve inches for a classic pizza. Brush the top with olive oil. Add your favorite sauce, cheese, and toppings. Slide the pizza onto the hot pan. Bake on the lowest rack for ten to twelve minutes. Then move it to the top rack and broil for two minutes. Watch it so it doesn’t burn!
Cook Time: 12–14 minutes
Total Time: 2 hours 15 minutes
Yield: 2 medium pizzas (8 slices each)
Category: Dinner, Pizza
Three Fun Twists on Your Homemade Pizza
Plain cheese is delicious, but sometimes you want a change. I love trying new things with my dough. Here are three of my favorites.
Garden Veggie Surprise: Top your pizza with colorful bell peppers, mushrooms, and black olives. Add a sprinkle of fresh basil after baking. It tastes like summer on a plate!
Spicy Sausage Fiesta: Crumble cooked Italian sausage over the sauce. Add red pepper flakes for a little kick. My nephew calls this the fire-breathing pizza. Which one would you try first? Comment below!
Apple Pie Dessert Pizza: Skip the tomato sauce. Spread softened cream cheese on the dough. Top with thinly sliced apples, cinnamon, and a drizzle of honey. Bake until golden. It’s like a pie you can eat with your hands.
What to Serve with Your Perfect Pizza
A good pizza needs good friends on the plate. I like to serve it with a simple green salad. Toss some lettuce, cherry tomatoes, and a splash of vinaigrette. It’s fresh and crunchy.
Another idea: cucumber sticks with ranch dip. They’re cool and crisp. Perfect for little fingers to grab between slices. You can also add a bowl of marinated olives for a salty bite.
For drinks, try a cold glass of lemonade. It’s bright and tangy. Grown-ups might enjoy a light red wine, like a Pinot Noir. Which would you choose tonight?
Storing Your Pizza Dough Like a Pro
Making pizza dough is fun. But what if you want pizza tonight and don’t have time? You can store the dough for later. That is the magic of planning ahead. Once your dough has risen, you can put it in the fridge. Wrap it tight in plastic wrap. It will stay good for up to three days. The cold slows down the yeast. This actually makes the flavor better. I remember my first time storing dough. I was nervous. But the next day, the pizza tasted even more like a pizzeria.
The freezer is your best friend for batch cooking. You can freeze the dough balls after they rest. Just wrap them in plastic, then put them in a freezer bag. They will keep for three months. When you want pizza, take a ball out. Let it thaw in the fridge overnight. Then let it sit on the counter for 30 minutes. This is why batch cooking matters. You have homemade pizza ready whenever a craving hits. No need to order out. Have you ever tried storing it this way? Share below!
Three Common Pizza Dough Problems and Fixes
Even the best cooks hit a snag. The first problem is dough that is too sticky. Do not panic. Just add flour one tablespoon at a time while you knead. The dough should be soft, not gluey. I once added too much water by accident. A little extra flour saved the day. The second problem is dough that will not rise. This happens when the water is too hot or too cold. The water should feel like a warm bath. If the yeast is old, it will not bubble. Always check the date on your yeast packet.
The third problem is a crust that is too hard. This often means you baked it too long. Remember the hot pan trick. It helps the bottom cook fast. Keep an eye on the oven. Why do these fixes matter? They save you from a sad pizza. They also teach you to trust your hands. You learn what good dough feels like. That confidence will follow you into every recipe. Which of these problems have you run into before?
Your Pizza Dough Questions Answered
Q: Can I use gluten-free flour? A: Yes. Use a gluten-free blend with xanthan gum. The dough will be stickier, so keep your hands wet.
Q: Can I make the dough the night before? A: Yes. Let it rise, then refrigerate it. The flavor gets better overnight.
Q: Can I swap white flour for whole wheat? A: Yes. Use half white and half whole wheat. Whole wheat dough needs a little more water.
Q: How do I scale the recipe for one pizza? A: Cut all ingredients in half. One ball makes one pizza.
Q: Can I add herbs to the dough? A: Yes. Mix in a teaspoon of dried oregano or garlic powder with the flour. *Fun fact: Italians sometimes add a pinch of sugar to help the crust brown.* Which tip will you try first?
A Warm Goodbye from Chloe
I hope you feel ready to make your own pizza dough. It is one of the kindest things you can do for your family. There is nothing like the smell of baking dough in your kitchen. It makes a house feel like a home. I would love to see your pizzas. Snap a picture of your creation. Share it with us. Have you tried this recipe? Tag us on Pinterest! Happy cooking! —Chloe Hartwell.
Waiting Is the Hardest Part
Oil the bowl so the dough doesn’t stick. Put the dough ball inside. Cover it with plastic wrap, like tucking it in for a nap. Leave it in a warm spot for an hour or two. It will double in size. I put my bowl on top of the fridge. That spot is always a little warm. Why does this matter? The waiting time builds flavor. The yeast keeps working slowly, making the dough taste rich and good. Rushing this step means you miss out on that yummy, bready flavor. Have you ever made something that took a long time to rise? It is always worth it.Shaping Your Pizza
When the dough is big and puffy, punch it down gently. That is the fun part. Cut it into two pieces. You can make one pizza now and freeze the other for later. Let the dough balls rest for fifteen minutes. This makes them easy to stretch. If you try to stretch cold dough, it fights back and shrinks. We learned that the hard way. Roll the dough out on paper dusted with flour or cornmeal. Cornmeal gives the bottom a little crunch, like tiny pebbles on the road. Brush it with olive oil. That stops the sauce from making the dough soggy. Now you can add your sauce, cheese, and toppings. Go wild or keep it simple.The Hot Oven Secret
Turn your oven up high, to 475 degrees. That is really hot. Put your empty pizza pan in the oven while it heats up. This is the secret to a crispy crust. A hot pan cooks the bottom fast. Slide your pizza onto that screaming hot pan and bake for ten to twelve minutes. At the very end, move the pizza to the top rack and turn on the broiler. Watch it closely. In two minutes, the cheese gets bubbly and brown. That is the perfect finish. The crust is crispy, the cheese is melty. I still get excited when I hear that sizzle. It sounds like dinner is ready. Which do you like better: thick crust or thin crust? Take a little poll with your family tonight.Ingredients:
| Ingredient | Amount | Notes |
|---|---|---|
| Warm water (about 105°F/40°C) | 1 ½ cups (360 mL) | Ensure temperature is not too hot or it will kill the yeast |
| Instant yeast | 1 package (1 ¼ oz, 2 ¼ tsp, 7 g) | Can substitute active dry yeast if needed |
| Sugar | 1 Tbsp (15 g) | Helps activate the yeast |
| Salt | 1 tsp | Adds flavor |
| Olive oil | 1 Tbsp (15 mL) + extra for greasing | Extra oil for greasing bowl and pan |
| All-purpose flour | 3 ½ cups (450 g) | Can use bread flour for chewier texture |
The Best Pizza Dough for Little Hands (and Big Bellies)
I still remember the first time I made pizza dough with my grandson. Flour was everywhere. Even on the ceiling! That’s a happy memory now. This recipe is foolproof, which means even a twelve-year-old can do it. Doesn’t that smell amazing when it bakes?
You only need a few simple things from your kitchen. Warm water, yeast, sugar, salt, olive oil, and flour. That’s it. No fancy machines required. Just your hands and a big bowl. Let’s get started, friend.
First, we wake up the yeast. Think of it like a tiny bear coming out of a cave. It gets fizzy and happy. Then we add everything together and knead. That’s the fun part where you push and fold the dough.
Step 1: Pour the warm water into a small bowl. Sprinkle the yeast and sugar on top. Stir it gently, then wait five to ten minutes. You’ll see bubbles and foam. That means the yeast is alive. (Hard-learned tip: Never use water that’s too hot or it will kill the yeast. Lukewarm is perfect, like bath water.)
Step 2: Add the salt and olive oil to the frothy yeast mixture. Stir it with a fork. In a large bowl, dump in the flour. Pour the wet stuff into the flour. Mix with a wooden spoon until it gets too stiff. What do you think makes dough puff up like a soft pillow? … Share below!
Step 3: Dump the dough onto a floured counter. Push it away from you with the heel of your hand. Fold it over, then push again. Keep doing this for eight minutes. The dough will go from sticky to silky smooth. My grandma said it should feel like a baby’s cheek.
Step 4: Poke the dough with one finger. If it slowly springs back, you’re done kneading. Grease a clean bowl with olive oil and place the dough inside. Cover it with plastic wrap. Set it in a warm, draft-free spot for one to two hours. It needs to double in size, like a sleepy balloon.
Step 5: Punch the dough down gently. Cut it into two equal balls. Cover them with plastic wrap and let them rest for fifteen minutes. While you wait, preheat your oven to 475°F (250°C). Put your pizza pan inside the oven to get hot. A hot pan means a crispy crust. Trust me on this!
Step 6: Roll each dough ball onto floured parchment paper. Make it twelve inches for a classic pizza. Brush the top with olive oil. Add your favorite sauce, cheese, and toppings. Slide the pizza onto the hot pan. Bake on the lowest rack for ten to twelve minutes. Then move it to the top rack and broil for two minutes. Watch it so it doesn’t burn!
Cook Time: 12–14 minutes
Total Time: 2 hours 15 minutes
Yield: 2 medium pizzas (8 slices each)
Category: Dinner, Pizza
Three Fun Twists on Your Homemade Pizza
Plain cheese is delicious, but sometimes you want a change. I love trying new things with my dough. Here are three of my favorites.
Garden Veggie Surprise: Top your pizza with colorful bell peppers, mushrooms, and black olives. Add a sprinkle of fresh basil after baking. It tastes like summer on a plate!
Spicy Sausage Fiesta: Crumble cooked Italian sausage over the sauce. Add red pepper flakes for a little kick. My nephew calls this the fire-breathing pizza. Which one would you try first? Comment below!
Apple Pie Dessert Pizza: Skip the tomato sauce. Spread softened cream cheese on the dough. Top with thinly sliced apples, cinnamon, and a drizzle of honey. Bake until golden. It’s like a pie you can eat with your hands.
What to Serve with Your Perfect Pizza
A good pizza needs good friends on the plate. I like to serve it with a simple green salad. Toss some lettuce, cherry tomatoes, and a splash of vinaigrette. It’s fresh and crunchy.
Another idea: cucumber sticks with ranch dip. They’re cool and crisp. Perfect for little fingers to grab between slices. You can also add a bowl of marinated olives for a salty bite.
For drinks, try a cold glass of lemonade. It’s bright and tangy. Grown-ups might enjoy a light red wine, like a Pinot Noir. Which would you choose tonight?
Storing Your Pizza Dough Like a Pro
Making pizza dough is fun. But what if you want pizza tonight and don’t have time? You can store the dough for later. That is the magic of planning ahead. Once your dough has risen, you can put it in the fridge. Wrap it tight in plastic wrap. It will stay good for up to three days. The cold slows down the yeast. This actually makes the flavor better. I remember my first time storing dough. I was nervous. But the next day, the pizza tasted even more like a pizzeria.
The freezer is your best friend for batch cooking. You can freeze the dough balls after they rest. Just wrap them in plastic, then put them in a freezer bag. They will keep for three months. When you want pizza, take a ball out. Let it thaw in the fridge overnight. Then let it sit on the counter for 30 minutes. This is why batch cooking matters. You have homemade pizza ready whenever a craving hits. No need to order out. Have you ever tried storing it this way? Share below!
Three Common Pizza Dough Problems and Fixes
Even the best cooks hit a snag. The first problem is dough that is too sticky. Do not panic. Just add flour one tablespoon at a time while you knead. The dough should be soft, not gluey. I once added too much water by accident. A little extra flour saved the day. The second problem is dough that will not rise. This happens when the water is too hot or too cold. The water should feel like a warm bath. If the yeast is old, it will not bubble. Always check the date on your yeast packet.
The third problem is a crust that is too hard. This often means you baked it too long. Remember the hot pan trick. It helps the bottom cook fast. Keep an eye on the oven. Why do these fixes matter? They save you from a sad pizza. They also teach you to trust your hands. You learn what good dough feels like. That confidence will follow you into every recipe. Which of these problems have you run into before?
Your Pizza Dough Questions Answered
Q: Can I use gluten-free flour? A: Yes. Use a gluten-free blend with xanthan gum. The dough will be stickier, so keep your hands wet.
Q: Can I make the dough the night before? A: Yes. Let it rise, then refrigerate it. The flavor gets better overnight.
Q: Can I swap white flour for whole wheat? A: Yes. Use half white and half whole wheat. Whole wheat dough needs a little more water.
Q: How do I scale the recipe for one pizza? A: Cut all ingredients in half. One ball makes one pizza.
Q: Can I add herbs to the dough? A: Yes. Mix in a teaspoon of dried oregano or garlic powder with the flour. *Fun fact: Italians sometimes add a pinch of sugar to help the crust brown.* Which tip will you try first?
A Warm Goodbye from Chloe
I hope you feel ready to make your own pizza dough. It is one of the kindest things you can do for your family. There is nothing like the smell of baking dough in your kitchen. It makes a house feel like a home. I would love to see your pizzas. Snap a picture of your creation. Share it with us. Have you tried this recipe? Tag us on Pinterest! Happy cooking! —Chloe Hartwell.
Waiting Is the Hardest Part
Oil the bowl so the dough doesn’t stick. Put the dough ball inside. Cover it with plastic wrap, like tucking it in for a nap. Leave it in a warm spot for an hour or two. It will double in size. I put my bowl on top of the fridge. That spot is always a little warm. Why does this matter? The waiting time builds flavor. The yeast keeps working slowly, making the dough taste rich and good. Rushing this step means you miss out on that yummy, bready flavor. Have you ever made something that took a long time to rise? It is always worth it.Shaping Your Pizza
When the dough is big and puffy, punch it down gently. That is the fun part. Cut it into two pieces. You can make one pizza now and freeze the other for later. Let the dough balls rest for fifteen minutes. This makes them easy to stretch. If you try to stretch cold dough, it fights back and shrinks. We learned that the hard way. Roll the dough out on paper dusted with flour or cornmeal. Cornmeal gives the bottom a little crunch, like tiny pebbles on the road. Brush it with olive oil. That stops the sauce from making the dough soggy. Now you can add your sauce, cheese, and toppings. Go wild or keep it simple.The Hot Oven Secret
Turn your oven up high, to 475 degrees. That is really hot. Put your empty pizza pan in the oven while it heats up. This is the secret to a crispy crust. A hot pan cooks the bottom fast. Slide your pizza onto that screaming hot pan and bake for ten to twelve minutes. At the very end, move the pizza to the top rack and turn on the broiler. Watch it closely. In two minutes, the cheese gets bubbly and brown. That is the perfect finish. The crust is crispy, the cheese is melty. I still get excited when I hear that sizzle. It sounds like dinner is ready. Which do you like better: thick crust or thin crust? Take a little poll with your family tonight.Ingredients:
| Ingredient | Amount | Notes |
|---|---|---|
| Warm water (about 105°F/40°C) | 1 ½ cups (360 mL) | Ensure temperature is not too hot or it will kill the yeast |
| Instant yeast | 1 package (1 ¼ oz, 2 ¼ tsp, 7 g) | Can substitute active dry yeast if needed |
| Sugar | 1 Tbsp (15 g) | Helps activate the yeast |
| Salt | 1 tsp | Adds flavor |
| Olive oil | 1 Tbsp (15 mL) + extra for greasing | Extra oil for greasing bowl and pan |
| All-purpose flour | 3 ½ cups (450 g) | Can use bread flour for chewier texture |
The Best Pizza Dough for Little Hands (and Big Bellies)
I still remember the first time I made pizza dough with my grandson. Flour was everywhere. Even on the ceiling! That’s a happy memory now. This recipe is foolproof, which means even a twelve-year-old can do it. Doesn’t that smell amazing when it bakes?
You only need a few simple things from your kitchen. Warm water, yeast, sugar, salt, olive oil, and flour. That’s it. No fancy machines required. Just your hands and a big bowl. Let’s get started, friend.
First, we wake up the yeast. Think of it like a tiny bear coming out of a cave. It gets fizzy and happy. Then we add everything together and knead. That’s the fun part where you push and fold the dough.
Step 1: Pour the warm water into a small bowl. Sprinkle the yeast and sugar on top. Stir it gently, then wait five to ten minutes. You’ll see bubbles and foam. That means the yeast is alive. (Hard-learned tip: Never use water that’s too hot or it will kill the yeast. Lukewarm is perfect, like bath water.)
Step 2: Add the salt and olive oil to the frothy yeast mixture. Stir it with a fork. In a large bowl, dump in the flour. Pour the wet stuff into the flour. Mix with a wooden spoon until it gets too stiff. What do you think makes dough puff up like a soft pillow? … Share below!
Step 3: Dump the dough onto a floured counter. Push it away from you with the heel of your hand. Fold it over, then push again. Keep doing this for eight minutes. The dough will go from sticky to silky smooth. My grandma said it should feel like a baby’s cheek.
Step 4: Poke the dough with one finger. If it slowly springs back, you’re done kneading. Grease a clean bowl with olive oil and place the dough inside. Cover it with plastic wrap. Set it in a warm, draft-free spot for one to two hours. It needs to double in size, like a sleepy balloon.
Step 5: Punch the dough down gently. Cut it into two equal balls. Cover them with plastic wrap and let them rest for fifteen minutes. While you wait, preheat your oven to 475°F (250°C). Put your pizza pan inside the oven to get hot. A hot pan means a crispy crust. Trust me on this!
Step 6: Roll each dough ball onto floured parchment paper. Make it twelve inches for a classic pizza. Brush the top with olive oil. Add your favorite sauce, cheese, and toppings. Slide the pizza onto the hot pan. Bake on the lowest rack for ten to twelve minutes. Then move it to the top rack and broil for two minutes. Watch it so it doesn’t burn!
Cook Time: 12–14 minutes
Total Time: 2 hours 15 minutes
Yield: 2 medium pizzas (8 slices each)
Category: Dinner, Pizza
Three Fun Twists on Your Homemade Pizza
Plain cheese is delicious, but sometimes you want a change. I love trying new things with my dough. Here are three of my favorites.
Garden Veggie Surprise: Top your pizza with colorful bell peppers, mushrooms, and black olives. Add a sprinkle of fresh basil after baking. It tastes like summer on a plate!
Spicy Sausage Fiesta: Crumble cooked Italian sausage over the sauce. Add red pepper flakes for a little kick. My nephew calls this the fire-breathing pizza. Which one would you try first? Comment below!
Apple Pie Dessert Pizza: Skip the tomato sauce. Spread softened cream cheese on the dough. Top with thinly sliced apples, cinnamon, and a drizzle of honey. Bake until golden. It’s like a pie you can eat with your hands.
What to Serve with Your Perfect Pizza
A good pizza needs good friends on the plate. I like to serve it with a simple green salad. Toss some lettuce, cherry tomatoes, and a splash of vinaigrette. It’s fresh and crunchy.
Another idea: cucumber sticks with ranch dip. They’re cool and crisp. Perfect for little fingers to grab between slices. You can also add a bowl of marinated olives for a salty bite.
For drinks, try a cold glass of lemonade. It’s bright and tangy. Grown-ups might enjoy a light red wine, like a Pinot Noir. Which would you choose tonight?
Storing Your Pizza Dough Like a Pro
Making pizza dough is fun. But what if you want pizza tonight and don’t have time? You can store the dough for later. That is the magic of planning ahead. Once your dough has risen, you can put it in the fridge. Wrap it tight in plastic wrap. It will stay good for up to three days. The cold slows down the yeast. This actually makes the flavor better. I remember my first time storing dough. I was nervous. But the next day, the pizza tasted even more like a pizzeria.
The freezer is your best friend for batch cooking. You can freeze the dough balls after they rest. Just wrap them in plastic, then put them in a freezer bag. They will keep for three months. When you want pizza, take a ball out. Let it thaw in the fridge overnight. Then let it sit on the counter for 30 minutes. This is why batch cooking matters. You have homemade pizza ready whenever a craving hits. No need to order out. Have you ever tried storing it this way? Share below!
Three Common Pizza Dough Problems and Fixes
Even the best cooks hit a snag. The first problem is dough that is too sticky. Do not panic. Just add flour one tablespoon at a time while you knead. The dough should be soft, not gluey. I once added too much water by accident. A little extra flour saved the day. The second problem is dough that will not rise. This happens when the water is too hot or too cold. The water should feel like a warm bath. If the yeast is old, it will not bubble. Always check the date on your yeast packet.
The third problem is a crust that is too hard. This often means you baked it too long. Remember the hot pan trick. It helps the bottom cook fast. Keep an eye on the oven. Why do these fixes matter? They save you from a sad pizza. They also teach you to trust your hands. You learn what good dough feels like. That confidence will follow you into every recipe. Which of these problems have you run into before?
Your Pizza Dough Questions Answered
Q: Can I use gluten-free flour? A: Yes. Use a gluten-free blend with xanthan gum. The dough will be stickier, so keep your hands wet.
Q: Can I make the dough the night before? A: Yes. Let it rise, then refrigerate it. The flavor gets better overnight.
Q: Can I swap white flour for whole wheat? A: Yes. Use half white and half whole wheat. Whole wheat dough needs a little more water.
Q: How do I scale the recipe for one pizza? A: Cut all ingredients in half. One ball makes one pizza.
Q: Can I add herbs to the dough? A: Yes. Mix in a teaspoon of dried oregano or garlic powder with the flour. *Fun fact: Italians sometimes add a pinch of sugar to help the crust brown.* Which tip will you try first?
A Warm Goodbye from Chloe
I hope you feel ready to make your own pizza dough. It is one of the kindest things you can do for your family. There is nothing like the smell of baking dough in your kitchen. It makes a house feel like a home. I would love to see your pizzas. Snap a picture of your creation. Share it with us. Have you tried this recipe? Tag us on Pinterest! Happy cooking! —Chloe Hartwell.
Waiting Is the Hardest Part
Oil the bowl so the dough doesn’t stick. Put the dough ball inside. Cover it with plastic wrap, like tucking it in for a nap. Leave it in a warm spot for an hour or two. It will double in size. I put my bowl on top of the fridge. That spot is always a little warm. Why does this matter? The waiting time builds flavor. The yeast keeps working slowly, making the dough taste rich and good. Rushing this step means you miss out on that yummy, bready flavor. Have you ever made something that took a long time to rise? It is always worth it.Shaping Your Pizza
When the dough is big and puffy, punch it down gently. That is the fun part. Cut it into two pieces. You can make one pizza now and freeze the other for later. Let the dough balls rest for fifteen minutes. This makes them easy to stretch. If you try to stretch cold dough, it fights back and shrinks. We learned that the hard way. Roll the dough out on paper dusted with flour or cornmeal. Cornmeal gives the bottom a little crunch, like tiny pebbles on the road. Brush it with olive oil. That stops the sauce from making the dough soggy. Now you can add your sauce, cheese, and toppings. Go wild or keep it simple.The Hot Oven Secret
Turn your oven up high, to 475 degrees. That is really hot. Put your empty pizza pan in the oven while it heats up. This is the secret to a crispy crust. A hot pan cooks the bottom fast. Slide your pizza onto that screaming hot pan and bake for ten to twelve minutes. At the very end, move the pizza to the top rack and turn on the broiler. Watch it closely. In two minutes, the cheese gets bubbly and brown. That is the perfect finish. The crust is crispy, the cheese is melty. I still get excited when I hear that sizzle. It sounds like dinner is ready. Which do you like better: thick crust or thin crust? Take a little poll with your family tonight.Ingredients:
| Ingredient | Amount | Notes |
|---|---|---|
| Warm water (about 105°F/40°C) | 1 ½ cups (360 mL) | Ensure temperature is not too hot or it will kill the yeast |
| Instant yeast | 1 package (1 ¼ oz, 2 ¼ tsp, 7 g) | Can substitute active dry yeast if needed |
| Sugar | 1 Tbsp (15 g) | Helps activate the yeast |
| Salt | 1 tsp | Adds flavor |
| Olive oil | 1 Tbsp (15 mL) + extra for greasing | Extra oil for greasing bowl and pan |
| All-purpose flour | 3 ½ cups (450 g) | Can use bread flour for chewier texture |
The Best Pizza Dough for Little Hands (and Big Bellies)
I still remember the first time I made pizza dough with my grandson. Flour was everywhere. Even on the ceiling! That’s a happy memory now. This recipe is foolproof, which means even a twelve-year-old can do it. Doesn’t that smell amazing when it bakes?
You only need a few simple things from your kitchen. Warm water, yeast, sugar, salt, olive oil, and flour. That’s it. No fancy machines required. Just your hands and a big bowl. Let’s get started, friend.
First, we wake up the yeast. Think of it like a tiny bear coming out of a cave. It gets fizzy and happy. Then we add everything together and knead. That’s the fun part where you push and fold the dough.
Step 1: Pour the warm water into a small bowl. Sprinkle the yeast and sugar on top. Stir it gently, then wait five to ten minutes. You’ll see bubbles and foam. That means the yeast is alive. (Hard-learned tip: Never use water that’s too hot or it will kill the yeast. Lukewarm is perfect, like bath water.)
Step 2: Add the salt and olive oil to the frothy yeast mixture. Stir it with a fork. In a large bowl, dump in the flour. Pour the wet stuff into the flour. Mix with a wooden spoon until it gets too stiff. What do you think makes dough puff up like a soft pillow? … Share below!
Step 3: Dump the dough onto a floured counter. Push it away from you with the heel of your hand. Fold it over, then push again. Keep doing this for eight minutes. The dough will go from sticky to silky smooth. My grandma said it should feel like a baby’s cheek.
Step 4: Poke the dough with one finger. If it slowly springs back, you’re done kneading. Grease a clean bowl with olive oil and place the dough inside. Cover it with plastic wrap. Set it in a warm, draft-free spot for one to two hours. It needs to double in size, like a sleepy balloon.
Step 5: Punch the dough down gently. Cut it into two equal balls. Cover them with plastic wrap and let them rest for fifteen minutes. While you wait, preheat your oven to 475°F (250°C). Put your pizza pan inside the oven to get hot. A hot pan means a crispy crust. Trust me on this!
Step 6: Roll each dough ball onto floured parchment paper. Make it twelve inches for a classic pizza. Brush the top with olive oil. Add your favorite sauce, cheese, and toppings. Slide the pizza onto the hot pan. Bake on the lowest rack for ten to twelve minutes. Then move it to the top rack and broil for two minutes. Watch it so it doesn’t burn!
Cook Time: 12–14 minutes
Total Time: 2 hours 15 minutes
Yield: 2 medium pizzas (8 slices each)
Category: Dinner, Pizza
Three Fun Twists on Your Homemade Pizza
Plain cheese is delicious, but sometimes you want a change. I love trying new things with my dough. Here are three of my favorites.
Garden Veggie Surprise: Top your pizza with colorful bell peppers, mushrooms, and black olives. Add a sprinkle of fresh basil after baking. It tastes like summer on a plate!
Spicy Sausage Fiesta: Crumble cooked Italian sausage over the sauce. Add red pepper flakes for a little kick. My nephew calls this the fire-breathing pizza. Which one would you try first? Comment below!
Apple Pie Dessert Pizza: Skip the tomato sauce. Spread softened cream cheese on the dough. Top with thinly sliced apples, cinnamon, and a drizzle of honey. Bake until golden. It’s like a pie you can eat with your hands.
What to Serve with Your Perfect Pizza
A good pizza needs good friends on the plate. I like to serve it with a simple green salad. Toss some lettuce, cherry tomatoes, and a splash of vinaigrette. It’s fresh and crunchy.
Another idea: cucumber sticks with ranch dip. They’re cool and crisp. Perfect for little fingers to grab between slices. You can also add a bowl of marinated olives for a salty bite.
For drinks, try a cold glass of lemonade. It’s bright and tangy. Grown-ups might enjoy a light red wine, like a Pinot Noir. Which would you choose tonight?
Storing Your Pizza Dough Like a Pro
Making pizza dough is fun. But what if you want pizza tonight and don’t have time? You can store the dough for later. That is the magic of planning ahead. Once your dough has risen, you can put it in the fridge. Wrap it tight in plastic wrap. It will stay good for up to three days. The cold slows down the yeast. This actually makes the flavor better. I remember my first time storing dough. I was nervous. But the next day, the pizza tasted even more like a pizzeria.
The freezer is your best friend for batch cooking. You can freeze the dough balls after they rest. Just wrap them in plastic, then put them in a freezer bag. They will keep for three months. When you want pizza, take a ball out. Let it thaw in the fridge overnight. Then let it sit on the counter for 30 minutes. This is why batch cooking matters. You have homemade pizza ready whenever a craving hits. No need to order out. Have you ever tried storing it this way? Share below!
Three Common Pizza Dough Problems and Fixes
Even the best cooks hit a snag. The first problem is dough that is too sticky. Do not panic. Just add flour one tablespoon at a time while you knead. The dough should be soft, not gluey. I once added too much water by accident. A little extra flour saved the day. The second problem is dough that will not rise. This happens when the water is too hot or too cold. The water should feel like a warm bath. If the yeast is old, it will not bubble. Always check the date on your yeast packet.
The third problem is a crust that is too hard. This often means you baked it too long. Remember the hot pan trick. It helps the bottom cook fast. Keep an eye on the oven. Why do these fixes matter? They save you from a sad pizza. They also teach you to trust your hands. You learn what good dough feels like. That confidence will follow you into every recipe. Which of these problems have you run into before?
Your Pizza Dough Questions Answered
Q: Can I use gluten-free flour? A: Yes. Use a gluten-free blend with xanthan gum. The dough will be stickier, so keep your hands wet.
Q: Can I make the dough the night before? A: Yes. Let it rise, then refrigerate it. The flavor gets better overnight.
Q: Can I swap white flour for whole wheat? A: Yes. Use half white and half whole wheat. Whole wheat dough needs a little more water.
Q: How do I scale the recipe for one pizza? A: Cut all ingredients in half. One ball makes one pizza.
Q: Can I add herbs to the dough? A: Yes. Mix in a teaspoon of dried oregano or garlic powder with the flour. *Fun fact: Italians sometimes add a pinch of sugar to help the crust brown.* Which tip will you try first?
A Warm Goodbye from Chloe
I hope you feel ready to make your own pizza dough. It is one of the kindest things you can do for your family. There is nothing like the smell of baking dough in your kitchen. It makes a house feel like a home. I would love to see your pizzas. Snap a picture of your creation. Share it with us. Have you tried this recipe? Tag us on Pinterest! Happy cooking! —Chloe Hartwell.
Waiting Is the Hardest Part
Oil the bowl so the dough doesn’t stick. Put the dough ball inside. Cover it with plastic wrap, like tucking it in for a nap. Leave it in a warm spot for an hour or two. It will double in size. I put my bowl on top of the fridge. That spot is always a little warm. Why does this matter? The waiting time builds flavor. The yeast keeps working slowly, making the dough taste rich and good. Rushing this step means you miss out on that yummy, bready flavor. Have you ever made something that took a long time to rise? It is always worth it.Shaping Your Pizza
When the dough is big and puffy, punch it down gently. That is the fun part. Cut it into two pieces. You can make one pizza now and freeze the other for later. Let the dough balls rest for fifteen minutes. This makes them easy to stretch. If you try to stretch cold dough, it fights back and shrinks. We learned that the hard way. Roll the dough out on paper dusted with flour or cornmeal. Cornmeal gives the bottom a little crunch, like tiny pebbles on the road. Brush it with olive oil. That stops the sauce from making the dough soggy. Now you can add your sauce, cheese, and toppings. Go wild or keep it simple.The Hot Oven Secret
Turn your oven up high, to 475 degrees. That is really hot. Put your empty pizza pan in the oven while it heats up. This is the secret to a crispy crust. A hot pan cooks the bottom fast. Slide your pizza onto that screaming hot pan and bake for ten to twelve minutes. At the very end, move the pizza to the top rack and turn on the broiler. Watch it closely. In two minutes, the cheese gets bubbly and brown. That is the perfect finish. The crust is crispy, the cheese is melty. I still get excited when I hear that sizzle. It sounds like dinner is ready. Which do you like better: thick crust or thin crust? Take a little poll with your family tonight.Ingredients:
| Ingredient | Amount | Notes |
|---|---|---|
| Warm water (about 105°F/40°C) | 1 ½ cups (360 mL) | Ensure temperature is not too hot or it will kill the yeast |
| Instant yeast | 1 package (1 ¼ oz, 2 ¼ tsp, 7 g) | Can substitute active dry yeast if needed |
| Sugar | 1 Tbsp (15 g) | Helps activate the yeast |
| Salt | 1 tsp | Adds flavor |
| Olive oil | 1 Tbsp (15 mL) + extra for greasing | Extra oil for greasing bowl and pan |
| All-purpose flour | 3 ½ cups (450 g) | Can use bread flour for chewier texture |
The Best Pizza Dough for Little Hands (and Big Bellies)
I still remember the first time I made pizza dough with my grandson. Flour was everywhere. Even on the ceiling! That’s a happy memory now. This recipe is foolproof, which means even a twelve-year-old can do it. Doesn’t that smell amazing when it bakes?
You only need a few simple things from your kitchen. Warm water, yeast, sugar, salt, olive oil, and flour. That’s it. No fancy machines required. Just your hands and a big bowl. Let’s get started, friend.
First, we wake up the yeast. Think of it like a tiny bear coming out of a cave. It gets fizzy and happy. Then we add everything together and knead. That’s the fun part where you push and fold the dough.
Step 1: Pour the warm water into a small bowl. Sprinkle the yeast and sugar on top. Stir it gently, then wait five to ten minutes. You’ll see bubbles and foam. That means the yeast is alive. (Hard-learned tip: Never use water that’s too hot or it will kill the yeast. Lukewarm is perfect, like bath water.)
Step 2: Add the salt and olive oil to the frothy yeast mixture. Stir it with a fork. In a large bowl, dump in the flour. Pour the wet stuff into the flour. Mix with a wooden spoon until it gets too stiff. What do you think makes dough puff up like a soft pillow? … Share below!
Step 3: Dump the dough onto a floured counter. Push it away from you with the heel of your hand. Fold it over, then push again. Keep doing this for eight minutes. The dough will go from sticky to silky smooth. My grandma said it should feel like a baby’s cheek.
Step 4: Poke the dough with one finger. If it slowly springs back, you’re done kneading. Grease a clean bowl with olive oil and place the dough inside. Cover it with plastic wrap. Set it in a warm, draft-free spot for one to two hours. It needs to double in size, like a sleepy balloon.
Step 5: Punch the dough down gently. Cut it into two equal balls. Cover them with plastic wrap and let them rest for fifteen minutes. While you wait, preheat your oven to 475°F (250°C). Put your pizza pan inside the oven to get hot. A hot pan means a crispy crust. Trust me on this!
Step 6: Roll each dough ball onto floured parchment paper. Make it twelve inches for a classic pizza. Brush the top with olive oil. Add your favorite sauce, cheese, and toppings. Slide the pizza onto the hot pan. Bake on the lowest rack for ten to twelve minutes. Then move it to the top rack and broil for two minutes. Watch it so it doesn’t burn!
Cook Time: 12–14 minutes
Total Time: 2 hours 15 minutes
Yield: 2 medium pizzas (8 slices each)
Category: Dinner, Pizza
Three Fun Twists on Your Homemade Pizza
Plain cheese is delicious, but sometimes you want a change. I love trying new things with my dough. Here are three of my favorites.
Garden Veggie Surprise: Top your pizza with colorful bell peppers, mushrooms, and black olives. Add a sprinkle of fresh basil after baking. It tastes like summer on a plate!
Spicy Sausage Fiesta: Crumble cooked Italian sausage over the sauce. Add red pepper flakes for a little kick. My nephew calls this the fire-breathing pizza. Which one would you try first? Comment below!
Apple Pie Dessert Pizza: Skip the tomato sauce. Spread softened cream cheese on the dough. Top with thinly sliced apples, cinnamon, and a drizzle of honey. Bake until golden. It’s like a pie you can eat with your hands.
What to Serve with Your Perfect Pizza
A good pizza needs good friends on the plate. I like to serve it with a simple green salad. Toss some lettuce, cherry tomatoes, and a splash of vinaigrette. It’s fresh and crunchy.
Another idea: cucumber sticks with ranch dip. They’re cool and crisp. Perfect for little fingers to grab between slices. You can also add a bowl of marinated olives for a salty bite.
For drinks, try a cold glass of lemonade. It’s bright and tangy. Grown-ups might enjoy a light red wine, like a Pinot Noir. Which would you choose tonight?
Storing Your Pizza Dough Like a Pro
Making pizza dough is fun. But what if you want pizza tonight and don’t have time? You can store the dough for later. That is the magic of planning ahead. Once your dough has risen, you can put it in the fridge. Wrap it tight in plastic wrap. It will stay good for up to three days. The cold slows down the yeast. This actually makes the flavor better. I remember my first time storing dough. I was nervous. But the next day, the pizza tasted even more like a pizzeria.
The freezer is your best friend for batch cooking. You can freeze the dough balls after they rest. Just wrap them in plastic, then put them in a freezer bag. They will keep for three months. When you want pizza, take a ball out. Let it thaw in the fridge overnight. Then let it sit on the counter for 30 minutes. This is why batch cooking matters. You have homemade pizza ready whenever a craving hits. No need to order out. Have you ever tried storing it this way? Share below!
Three Common Pizza Dough Problems and Fixes
Even the best cooks hit a snag. The first problem is dough that is too sticky. Do not panic. Just add flour one tablespoon at a time while you knead. The dough should be soft, not gluey. I once added too much water by accident. A little extra flour saved the day. The second problem is dough that will not rise. This happens when the water is too hot or too cold. The water should feel like a warm bath. If the yeast is old, it will not bubble. Always check the date on your yeast packet.
The third problem is a crust that is too hard. This often means you baked it too long. Remember the hot pan trick. It helps the bottom cook fast. Keep an eye on the oven. Why do these fixes matter? They save you from a sad pizza. They also teach you to trust your hands. You learn what good dough feels like. That confidence will follow you into every recipe. Which of these problems have you run into before?
Your Pizza Dough Questions Answered
Q: Can I use gluten-free flour? A: Yes. Use a gluten-free blend with xanthan gum. The dough will be stickier, so keep your hands wet.
Q: Can I make the dough the night before? A: Yes. Let it rise, then refrigerate it. The flavor gets better overnight.
Q: Can I swap white flour for whole wheat? A: Yes. Use half white and half whole wheat. Whole wheat dough needs a little more water.
Q: How do I scale the recipe for one pizza? A: Cut all ingredients in half. One ball makes one pizza.
Q: Can I add herbs to the dough? A: Yes. Mix in a teaspoon of dried oregano or garlic powder with the flour. *Fun fact: Italians sometimes add a pinch of sugar to help the crust brown.* Which tip will you try first?
A Warm Goodbye from Chloe
I hope you feel ready to make your own pizza dough. It is one of the kindest things you can do for your family. There is nothing like the smell of baking dough in your kitchen. It makes a house feel like a home. I would love to see your pizzas. Snap a picture of your creation. Share it with us. Have you tried this recipe? Tag us on Pinterest! Happy cooking! —Chloe Hartwell.
Waiting Is the Hardest Part
Oil the bowl so the dough doesn’t stick. Put the dough ball inside. Cover it with plastic wrap, like tucking it in for a nap. Leave it in a warm spot for an hour or two. It will double in size. I put my bowl on top of the fridge. That spot is always a little warm. Why does this matter? The waiting time builds flavor. The yeast keeps working slowly, making the dough taste rich and good. Rushing this step means you miss out on that yummy, bready flavor. Have you ever made something that took a long time to rise? It is always worth it.Shaping Your Pizza
When the dough is big and puffy, punch it down gently. That is the fun part. Cut it into two pieces. You can make one pizza now and freeze the other for later. Let the dough balls rest for fifteen minutes. This makes them easy to stretch. If you try to stretch cold dough, it fights back and shrinks. We learned that the hard way. Roll the dough out on paper dusted with flour or cornmeal. Cornmeal gives the bottom a little crunch, like tiny pebbles on the road. Brush it with olive oil. That stops the sauce from making the dough soggy. Now you can add your sauce, cheese, and toppings. Go wild or keep it simple.The Hot Oven Secret
Turn your oven up high, to 475 degrees. That is really hot. Put your empty pizza pan in the oven while it heats up. This is the secret to a crispy crust. A hot pan cooks the bottom fast. Slide your pizza onto that screaming hot pan and bake for ten to twelve minutes. At the very end, move the pizza to the top rack and turn on the broiler. Watch it closely. In two minutes, the cheese gets bubbly and brown. That is the perfect finish. The crust is crispy, the cheese is melty. I still get excited when I hear that sizzle. It sounds like dinner is ready. Which do you like better: thick crust or thin crust? Take a little poll with your family tonight.Ingredients:
| Ingredient | Amount | Notes |
|---|---|---|
| Warm water (about 105°F/40°C) | 1 ½ cups (360 mL) | Ensure temperature is not too hot or it will kill the yeast |
| Instant yeast | 1 package (1 ¼ oz, 2 ¼ tsp, 7 g) | Can substitute active dry yeast if needed |
| Sugar | 1 Tbsp (15 g) | Helps activate the yeast |
| Salt | 1 tsp | Adds flavor |
| Olive oil | 1 Tbsp (15 mL) + extra for greasing | Extra oil for greasing bowl and pan |
| All-purpose flour | 3 ½ cups (450 g) | Can use bread flour for chewier texture |
The Best Pizza Dough for Little Hands (and Big Bellies)
I still remember the first time I made pizza dough with my grandson. Flour was everywhere. Even on the ceiling! That’s a happy memory now. This recipe is foolproof, which means even a twelve-year-old can do it. Doesn’t that smell amazing when it bakes?
You only need a few simple things from your kitchen. Warm water, yeast, sugar, salt, olive oil, and flour. That’s it. No fancy machines required. Just your hands and a big bowl. Let’s get started, friend.
First, we wake up the yeast. Think of it like a tiny bear coming out of a cave. It gets fizzy and happy. Then we add everything together and knead. That’s the fun part where you push and fold the dough.
Step 1: Pour the warm water into a small bowl. Sprinkle the yeast and sugar on top. Stir it gently, then wait five to ten minutes. You’ll see bubbles and foam. That means the yeast is alive. (Hard-learned tip: Never use water that’s too hot or it will kill the yeast. Lukewarm is perfect, like bath water.)
Step 2: Add the salt and olive oil to the frothy yeast mixture. Stir it with a fork. In a large bowl, dump in the flour. Pour the wet stuff into the flour. Mix with a wooden spoon until it gets too stiff. What do you think makes dough puff up like a soft pillow? … Share below!
Step 3: Dump the dough onto a floured counter. Push it away from you with the heel of your hand. Fold it over, then push again. Keep doing this for eight minutes. The dough will go from sticky to silky smooth. My grandma said it should feel like a baby’s cheek.
Step 4: Poke the dough with one finger. If it slowly springs back, you’re done kneading. Grease a clean bowl with olive oil and place the dough inside. Cover it with plastic wrap. Set it in a warm, draft-free spot for one to two hours. It needs to double in size, like a sleepy balloon.
Step 5: Punch the dough down gently. Cut it into two equal balls. Cover them with plastic wrap and let them rest for fifteen minutes. While you wait, preheat your oven to 475°F (250°C). Put your pizza pan inside the oven to get hot. A hot pan means a crispy crust. Trust me on this!
Step 6: Roll each dough ball onto floured parchment paper. Make it twelve inches for a classic pizza. Brush the top with olive oil. Add your favorite sauce, cheese, and toppings. Slide the pizza onto the hot pan. Bake on the lowest rack for ten to twelve minutes. Then move it to the top rack and broil for two minutes. Watch it so it doesn’t burn!
Cook Time: 12–14 minutes
Total Time: 2 hours 15 minutes
Yield: 2 medium pizzas (8 slices each)
Category: Dinner, Pizza
Three Fun Twists on Your Homemade Pizza
Plain cheese is delicious, but sometimes you want a change. I love trying new things with my dough. Here are three of my favorites.
Garden Veggie Surprise: Top your pizza with colorful bell peppers, mushrooms, and black olives. Add a sprinkle of fresh basil after baking. It tastes like summer on a plate!
Spicy Sausage Fiesta: Crumble cooked Italian sausage over the sauce. Add red pepper flakes for a little kick. My nephew calls this the fire-breathing pizza. Which one would you try first? Comment below!
Apple Pie Dessert Pizza: Skip the tomato sauce. Spread softened cream cheese on the dough. Top with thinly sliced apples, cinnamon, and a drizzle of honey. Bake until golden. It’s like a pie you can eat with your hands.
What to Serve with Your Perfect Pizza
A good pizza needs good friends on the plate. I like to serve it with a simple green salad. Toss some lettuce, cherry tomatoes, and a splash of vinaigrette. It’s fresh and crunchy.
Another idea: cucumber sticks with ranch dip. They’re cool and crisp. Perfect for little fingers to grab between slices. You can also add a bowl of marinated olives for a salty bite.
For drinks, try a cold glass of lemonade. It’s bright and tangy. Grown-ups might enjoy a light red wine, like a Pinot Noir. Which would you choose tonight?
Storing Your Pizza Dough Like a Pro
Making pizza dough is fun. But what if you want pizza tonight and don’t have time? You can store the dough for later. That is the magic of planning ahead. Once your dough has risen, you can put it in the fridge. Wrap it tight in plastic wrap. It will stay good for up to three days. The cold slows down the yeast. This actually makes the flavor better. I remember my first time storing dough. I was nervous. But the next day, the pizza tasted even more like a pizzeria.
The freezer is your best friend for batch cooking. You can freeze the dough balls after they rest. Just wrap them in plastic, then put them in a freezer bag. They will keep for three months. When you want pizza, take a ball out. Let it thaw in the fridge overnight. Then let it sit on the counter for 30 minutes. This is why batch cooking matters. You have homemade pizza ready whenever a craving hits. No need to order out. Have you ever tried storing it this way? Share below!
Three Common Pizza Dough Problems and Fixes
Even the best cooks hit a snag. The first problem is dough that is too sticky. Do not panic. Just add flour one tablespoon at a time while you knead. The dough should be soft, not gluey. I once added too much water by accident. A little extra flour saved the day. The second problem is dough that will not rise. This happens when the water is too hot or too cold. The water should feel like a warm bath. If the yeast is old, it will not bubble. Always check the date on your yeast packet.
The third problem is a crust that is too hard. This often means you baked it too long. Remember the hot pan trick. It helps the bottom cook fast. Keep an eye on the oven. Why do these fixes matter? They save you from a sad pizza. They also teach you to trust your hands. You learn what good dough feels like. That confidence will follow you into every recipe. Which of these problems have you run into before?
Your Pizza Dough Questions Answered
Q: Can I use gluten-free flour? A: Yes. Use a gluten-free blend with xanthan gum. The dough will be stickier, so keep your hands wet.
Q: Can I make the dough the night before? A: Yes. Let it rise, then refrigerate it. The flavor gets better overnight.
Q: Can I swap white flour for whole wheat? A: Yes. Use half white and half whole wheat. Whole wheat dough needs a little more water.
Q: How do I scale the recipe for one pizza? A: Cut all ingredients in half. One ball makes one pizza.
Q: Can I add herbs to the dough? A: Yes. Mix in a teaspoon of dried oregano or garlic powder with the flour. *Fun fact: Italians sometimes add a pinch of sugar to help the crust brown.* Which tip will you try first?
A Warm Goodbye from Chloe
I hope you feel ready to make your own pizza dough. It is one of the kindest things you can do for your family. There is nothing like the smell of baking dough in your kitchen. It makes a house feel like a home. I would love to see your pizzas. Snap a picture of your creation. Share it with us. Have you tried this recipe? Tag us on Pinterest! Happy cooking! —Chloe Hartwell.
Getting Your Hands Dirty
Pour the bubbly yeast mix into a big bowl of flour. Add a little salt and oil. Stir it with a big wooden spoon until it gets too thick. Then use your hands. My mom taught me to knead dough like you are pushing a sleepy cat. You push the dough away, fold it over, and push again. It takes about eight minutes. The dough will tell you when it is ready. Poke it with one finger. If the dent slowly springs back, it is done. That is the finger poke test. This trick matters because under-kneaded dough tears easily. Over-kneaded dough gets tough. Your hands know what to do. Just feel the dough and trust them.Waiting Is the Hardest Part
Oil the bowl so the dough doesn’t stick. Put the dough ball inside. Cover it with plastic wrap, like tucking it in for a nap. Leave it in a warm spot for an hour or two. It will double in size. I put my bowl on top of the fridge. That spot is always a little warm. Why does this matter? The waiting time builds flavor. The yeast keeps working slowly, making the dough taste rich and good. Rushing this step means you miss out on that yummy, bready flavor. Have you ever made something that took a long time to rise? It is always worth it.Shaping Your Pizza
When the dough is big and puffy, punch it down gently. That is the fun part. Cut it into two pieces. You can make one pizza now and freeze the other for later. Let the dough balls rest for fifteen minutes. This makes them easy to stretch. If you try to stretch cold dough, it fights back and shrinks. We learned that the hard way. Roll the dough out on paper dusted with flour or cornmeal. Cornmeal gives the bottom a little crunch, like tiny pebbles on the road. Brush it with olive oil. That stops the sauce from making the dough soggy. Now you can add your sauce, cheese, and toppings. Go wild or keep it simple.The Hot Oven Secret
Turn your oven up high, to 475 degrees. That is really hot. Put your empty pizza pan in the oven while it heats up. This is the secret to a crispy crust. A hot pan cooks the bottom fast. Slide your pizza onto that screaming hot pan and bake for ten to twelve minutes. At the very end, move the pizza to the top rack and turn on the broiler. Watch it closely. In two minutes, the cheese gets bubbly and brown. That is the perfect finish. The crust is crispy, the cheese is melty. I still get excited when I hear that sizzle. It sounds like dinner is ready. Which do you like better: thick crust or thin crust? Take a little poll with your family tonight.Ingredients:
| Ingredient | Amount | Notes |
|---|---|---|
| Warm water (about 105°F/40°C) | 1 ½ cups (360 mL) | Ensure temperature is not too hot or it will kill the yeast |
| Instant yeast | 1 package (1 ¼ oz, 2 ¼ tsp, 7 g) | Can substitute active dry yeast if needed |
| Sugar | 1 Tbsp (15 g) | Helps activate the yeast |
| Salt | 1 tsp | Adds flavor |
| Olive oil | 1 Tbsp (15 mL) + extra for greasing | Extra oil for greasing bowl and pan |
| All-purpose flour | 3 ½ cups (450 g) | Can use bread flour for chewier texture |
The Best Pizza Dough for Little Hands (and Big Bellies)
I still remember the first time I made pizza dough with my grandson. Flour was everywhere. Even on the ceiling! That’s a happy memory now. This recipe is foolproof, which means even a twelve-year-old can do it. Doesn’t that smell amazing when it bakes?
You only need a few simple things from your kitchen. Warm water, yeast, sugar, salt, olive oil, and flour. That’s it. No fancy machines required. Just your hands and a big bowl. Let’s get started, friend.
First, we wake up the yeast. Think of it like a tiny bear coming out of a cave. It gets fizzy and happy. Then we add everything together and knead. That’s the fun part where you push and fold the dough.
Step 1: Pour the warm water into a small bowl. Sprinkle the yeast and sugar on top. Stir it gently, then wait five to ten minutes. You’ll see bubbles and foam. That means the yeast is alive. (Hard-learned tip: Never use water that’s too hot or it will kill the yeast. Lukewarm is perfect, like bath water.)
Step 2: Add the salt and olive oil to the frothy yeast mixture. Stir it with a fork. In a large bowl, dump in the flour. Pour the wet stuff into the flour. Mix with a wooden spoon until it gets too stiff. What do you think makes dough puff up like a soft pillow? … Share below!
Step 3: Dump the dough onto a floured counter. Push it away from you with the heel of your hand. Fold it over, then push again. Keep doing this for eight minutes. The dough will go from sticky to silky smooth. My grandma said it should feel like a baby’s cheek.
Step 4: Poke the dough with one finger. If it slowly springs back, you’re done kneading. Grease a clean bowl with olive oil and place the dough inside. Cover it with plastic wrap. Set it in a warm, draft-free spot for one to two hours. It needs to double in size, like a sleepy balloon.
Step 5: Punch the dough down gently. Cut it into two equal balls. Cover them with plastic wrap and let them rest for fifteen minutes. While you wait, preheat your oven to 475°F (250°C). Put your pizza pan inside the oven to get hot. A hot pan means a crispy crust. Trust me on this!
Step 6: Roll each dough ball onto floured parchment paper. Make it twelve inches for a classic pizza. Brush the top with olive oil. Add your favorite sauce, cheese, and toppings. Slide the pizza onto the hot pan. Bake on the lowest rack for ten to twelve minutes. Then move it to the top rack and broil for two minutes. Watch it so it doesn’t burn!
Cook Time: 12–14 minutes
Total Time: 2 hours 15 minutes
Yield: 2 medium pizzas (8 slices each)
Category: Dinner, Pizza
Three Fun Twists on Your Homemade Pizza
Plain cheese is delicious, but sometimes you want a change. I love trying new things with my dough. Here are three of my favorites.
Garden Veggie Surprise: Top your pizza with colorful bell peppers, mushrooms, and black olives. Add a sprinkle of fresh basil after baking. It tastes like summer on a plate!
Spicy Sausage Fiesta: Crumble cooked Italian sausage over the sauce. Add red pepper flakes for a little kick. My nephew calls this the fire-breathing pizza. Which one would you try first? Comment below!
Apple Pie Dessert Pizza: Skip the tomato sauce. Spread softened cream cheese on the dough. Top with thinly sliced apples, cinnamon, and a drizzle of honey. Bake until golden. It’s like a pie you can eat with your hands.
What to Serve with Your Perfect Pizza
A good pizza needs good friends on the plate. I like to serve it with a simple green salad. Toss some lettuce, cherry tomatoes, and a splash of vinaigrette. It’s fresh and crunchy.
Another idea: cucumber sticks with ranch dip. They’re cool and crisp. Perfect for little fingers to grab between slices. You can also add a bowl of marinated olives for a salty bite.
For drinks, try a cold glass of lemonade. It’s bright and tangy. Grown-ups might enjoy a light red wine, like a Pinot Noir. Which would you choose tonight?
Storing Your Pizza Dough Like a Pro
Making pizza dough is fun. But what if you want pizza tonight and don’t have time? You can store the dough for later. That is the magic of planning ahead. Once your dough has risen, you can put it in the fridge. Wrap it tight in plastic wrap. It will stay good for up to three days. The cold slows down the yeast. This actually makes the flavor better. I remember my first time storing dough. I was nervous. But the next day, the pizza tasted even more like a pizzeria.
The freezer is your best friend for batch cooking. You can freeze the dough balls after they rest. Just wrap them in plastic, then put them in a freezer bag. They will keep for three months. When you want pizza, take a ball out. Let it thaw in the fridge overnight. Then let it sit on the counter for 30 minutes. This is why batch cooking matters. You have homemade pizza ready whenever a craving hits. No need to order out. Have you ever tried storing it this way? Share below!
Three Common Pizza Dough Problems and Fixes
Even the best cooks hit a snag. The first problem is dough that is too sticky. Do not panic. Just add flour one tablespoon at a time while you knead. The dough should be soft, not gluey. I once added too much water by accident. A little extra flour saved the day. The second problem is dough that will not rise. This happens when the water is too hot or too cold. The water should feel like a warm bath. If the yeast is old, it will not bubble. Always check the date on your yeast packet.
The third problem is a crust that is too hard. This often means you baked it too long. Remember the hot pan trick. It helps the bottom cook fast. Keep an eye on the oven. Why do these fixes matter? They save you from a sad pizza. They also teach you to trust your hands. You learn what good dough feels like. That confidence will follow you into every recipe. Which of these problems have you run into before?
Your Pizza Dough Questions Answered
Q: Can I use gluten-free flour? A: Yes. Use a gluten-free blend with xanthan gum. The dough will be stickier, so keep your hands wet.
Q: Can I make the dough the night before? A: Yes. Let it rise, then refrigerate it. The flavor gets better overnight.
Q: Can I swap white flour for whole wheat? A: Yes. Use half white and half whole wheat. Whole wheat dough needs a little more water.
Q: How do I scale the recipe for one pizza? A: Cut all ingredients in half. One ball makes one pizza.
Q: Can I add herbs to the dough? A: Yes. Mix in a teaspoon of dried oregano or garlic powder with the flour. *Fun fact: Italians sometimes add a pinch of sugar to help the crust brown.* Which tip will you try first?
A Warm Goodbye from Chloe
I hope you feel ready to make your own pizza dough. It is one of the kindest things you can do for your family. There is nothing like the smell of baking dough in your kitchen. It makes a house feel like a home. I would love to see your pizzas. Snap a picture of your creation. Share it with us. Have you tried this recipe? Tag us on Pinterest! Happy cooking! —Chloe Hartwell.
Getting Your Hands Dirty
Pour the bubbly yeast mix into a big bowl of flour. Add a little salt and oil. Stir it with a big wooden spoon until it gets too thick. Then use your hands. My mom taught me to knead dough like you are pushing a sleepy cat. You push the dough away, fold it over, and push again. It takes about eight minutes. The dough will tell you when it is ready. Poke it with one finger. If the dent slowly springs back, it is done. That is the finger poke test. This trick matters because under-kneaded dough tears easily. Over-kneaded dough gets tough. Your hands know what to do. Just feel the dough and trust them.Waiting Is the Hardest Part
Oil the bowl so the dough doesn’t stick. Put the dough ball inside. Cover it with plastic wrap, like tucking it in for a nap. Leave it in a warm spot for an hour or two. It will double in size. I put my bowl on top of the fridge. That spot is always a little warm. Why does this matter? The waiting time builds flavor. The yeast keeps working slowly, making the dough taste rich and good. Rushing this step means you miss out on that yummy, bready flavor. Have you ever made something that took a long time to rise? It is always worth it.Shaping Your Pizza
When the dough is big and puffy, punch it down gently. That is the fun part. Cut it into two pieces. You can make one pizza now and freeze the other for later. Let the dough balls rest for fifteen minutes. This makes them easy to stretch. If you try to stretch cold dough, it fights back and shrinks. We learned that the hard way. Roll the dough out on paper dusted with flour or cornmeal. Cornmeal gives the bottom a little crunch, like tiny pebbles on the road. Brush it with olive oil. That stops the sauce from making the dough soggy. Now you can add your sauce, cheese, and toppings. Go wild or keep it simple.The Hot Oven Secret
Turn your oven up high, to 475 degrees. That is really hot. Put your empty pizza pan in the oven while it heats up. This is the secret to a crispy crust. A hot pan cooks the bottom fast. Slide your pizza onto that screaming hot pan and bake for ten to twelve minutes. At the very end, move the pizza to the top rack and turn on the broiler. Watch it closely. In two minutes, the cheese gets bubbly and brown. That is the perfect finish. The crust is crispy, the cheese is melty. I still get excited when I hear that sizzle. It sounds like dinner is ready. Which do you like better: thick crust or thin crust? Take a little poll with your family tonight.Ingredients:
| Ingredient | Amount | Notes |
|---|---|---|
| Warm water (about 105°F/40°C) | 1 ½ cups (360 mL) | Ensure temperature is not too hot or it will kill the yeast |
| Instant yeast | 1 package (1 ¼ oz, 2 ¼ tsp, 7 g) | Can substitute active dry yeast if needed |
| Sugar | 1 Tbsp (15 g) | Helps activate the yeast |
| Salt | 1 tsp | Adds flavor |
| Olive oil | 1 Tbsp (15 mL) + extra for greasing | Extra oil for greasing bowl and pan |
| All-purpose flour | 3 ½ cups (450 g) | Can use bread flour for chewier texture |
The Best Pizza Dough for Little Hands (and Big Bellies)
I still remember the first time I made pizza dough with my grandson. Flour was everywhere. Even on the ceiling! That’s a happy memory now. This recipe is foolproof, which means even a twelve-year-old can do it. Doesn’t that smell amazing when it bakes?
You only need a few simple things from your kitchen. Warm water, yeast, sugar, salt, olive oil, and flour. That’s it. No fancy machines required. Just your hands and a big bowl. Let’s get started, friend.
First, we wake up the yeast. Think of it like a tiny bear coming out of a cave. It gets fizzy and happy. Then we add everything together and knead. That’s the fun part where you push and fold the dough.
Step 1: Pour the warm water into a small bowl. Sprinkle the yeast and sugar on top. Stir it gently, then wait five to ten minutes. You’ll see bubbles and foam. That means the yeast is alive. (Hard-learned tip: Never use water that’s too hot or it will kill the yeast. Lukewarm is perfect, like bath water.)
Step 2: Add the salt and olive oil to the frothy yeast mixture. Stir it with a fork. In a large bowl, dump in the flour. Pour the wet stuff into the flour. Mix with a wooden spoon until it gets too stiff. What do you think makes dough puff up like a soft pillow? … Share below!
Step 3: Dump the dough onto a floured counter. Push it away from you with the heel of your hand. Fold it over, then push again. Keep doing this for eight minutes. The dough will go from sticky to silky smooth. My grandma said it should feel like a baby’s cheek.
Step 4: Poke the dough with one finger. If it slowly springs back, you’re done kneading. Grease a clean bowl with olive oil and place the dough inside. Cover it with plastic wrap. Set it in a warm, draft-free spot for one to two hours. It needs to double in size, like a sleepy balloon.
Step 5: Punch the dough down gently. Cut it into two equal balls. Cover them with plastic wrap and let them rest for fifteen minutes. While you wait, preheat your oven to 475°F (250°C). Put your pizza pan inside the oven to get hot. A hot pan means a crispy crust. Trust me on this!
Step 6: Roll each dough ball onto floured parchment paper. Make it twelve inches for a classic pizza. Brush the top with olive oil. Add your favorite sauce, cheese, and toppings. Slide the pizza onto the hot pan. Bake on the lowest rack for ten to twelve minutes. Then move it to the top rack and broil for two minutes. Watch it so it doesn’t burn!
Cook Time: 12–14 minutes
Total Time: 2 hours 15 minutes
Yield: 2 medium pizzas (8 slices each)
Category: Dinner, Pizza
Three Fun Twists on Your Homemade Pizza
Plain cheese is delicious, but sometimes you want a change. I love trying new things with my dough. Here are three of my favorites.
Garden Veggie Surprise: Top your pizza with colorful bell peppers, mushrooms, and black olives. Add a sprinkle of fresh basil after baking. It tastes like summer on a plate!
Spicy Sausage Fiesta: Crumble cooked Italian sausage over the sauce. Add red pepper flakes for a little kick. My nephew calls this the fire-breathing pizza. Which one would you try first? Comment below!
Apple Pie Dessert Pizza: Skip the tomato sauce. Spread softened cream cheese on the dough. Top with thinly sliced apples, cinnamon, and a drizzle of honey. Bake until golden. It’s like a pie you can eat with your hands.
What to Serve with Your Perfect Pizza
A good pizza needs good friends on the plate. I like to serve it with a simple green salad. Toss some lettuce, cherry tomatoes, and a splash of vinaigrette. It’s fresh and crunchy.
Another idea: cucumber sticks with ranch dip. They’re cool and crisp. Perfect for little fingers to grab between slices. You can also add a bowl of marinated olives for a salty bite.
For drinks, try a cold glass of lemonade. It’s bright and tangy. Grown-ups might enjoy a light red wine, like a Pinot Noir. Which would you choose tonight?
Storing Your Pizza Dough Like a Pro
Making pizza dough is fun. But what if you want pizza tonight and don’t have time? You can store the dough for later. That is the magic of planning ahead. Once your dough has risen, you can put it in the fridge. Wrap it tight in plastic wrap. It will stay good for up to three days. The cold slows down the yeast. This actually makes the flavor better. I remember my first time storing dough. I was nervous. But the next day, the pizza tasted even more like a pizzeria.
The freezer is your best friend for batch cooking. You can freeze the dough balls after they rest. Just wrap them in plastic, then put them in a freezer bag. They will keep for three months. When you want pizza, take a ball out. Let it thaw in the fridge overnight. Then let it sit on the counter for 30 minutes. This is why batch cooking matters. You have homemade pizza ready whenever a craving hits. No need to order out. Have you ever tried storing it this way? Share below!
Three Common Pizza Dough Problems and Fixes
Even the best cooks hit a snag. The first problem is dough that is too sticky. Do not panic. Just add flour one tablespoon at a time while you knead. The dough should be soft, not gluey. I once added too much water by accident. A little extra flour saved the day. The second problem is dough that will not rise. This happens when the water is too hot or too cold. The water should feel like a warm bath. If the yeast is old, it will not bubble. Always check the date on your yeast packet.
The third problem is a crust that is too hard. This often means you baked it too long. Remember the hot pan trick. It helps the bottom cook fast. Keep an eye on the oven. Why do these fixes matter? They save you from a sad pizza. They also teach you to trust your hands. You learn what good dough feels like. That confidence will follow you into every recipe. Which of these problems have you run into before?
Your Pizza Dough Questions Answered
Q: Can I use gluten-free flour? A: Yes. Use a gluten-free blend with xanthan gum. The dough will be stickier, so keep your hands wet.
Q: Can I make the dough the night before? A: Yes. Let it rise, then refrigerate it. The flavor gets better overnight.
Q: Can I swap white flour for whole wheat? A: Yes. Use half white and half whole wheat. Whole wheat dough needs a little more water.
Q: How do I scale the recipe for one pizza? A: Cut all ingredients in half. One ball makes one pizza.
Q: Can I add herbs to the dough? A: Yes. Mix in a teaspoon of dried oregano or garlic powder with the flour. *Fun fact: Italians sometimes add a pinch of sugar to help the crust brown.* Which tip will you try first?
A Warm Goodbye from Chloe
I hope you feel ready to make your own pizza dough. It is one of the kindest things you can do for your family. There is nothing like the smell of baking dough in your kitchen. It makes a house feel like a home. I would love to see your pizzas. Snap a picture of your creation. Share it with us. Have you tried this recipe? Tag us on Pinterest! Happy cooking! —Chloe Hartwell.
Getting Your Hands Dirty
Pour the bubbly yeast mix into a big bowl of flour. Add a little salt and oil. Stir it with a big wooden spoon until it gets too thick. Then use your hands. My mom taught me to knead dough like you are pushing a sleepy cat. You push the dough away, fold it over, and push again. It takes about eight minutes. The dough will tell you when it is ready. Poke it with one finger. If the dent slowly springs back, it is done. That is the finger poke test. This trick matters because under-kneaded dough tears easily. Over-kneaded dough gets tough. Your hands know what to do. Just feel the dough and trust them.Waiting Is the Hardest Part
Oil the bowl so the dough doesn’t stick. Put the dough ball inside. Cover it with plastic wrap, like tucking it in for a nap. Leave it in a warm spot for an hour or two. It will double in size. I put my bowl on top of the fridge. That spot is always a little warm. Why does this matter? The waiting time builds flavor. The yeast keeps working slowly, making the dough taste rich and good. Rushing this step means you miss out on that yummy, bready flavor. Have you ever made something that took a long time to rise? It is always worth it.Shaping Your Pizza
When the dough is big and puffy, punch it down gently. That is the fun part. Cut it into two pieces. You can make one pizza now and freeze the other for later. Let the dough balls rest for fifteen minutes. This makes them easy to stretch. If you try to stretch cold dough, it fights back and shrinks. We learned that the hard way. Roll the dough out on paper dusted with flour or cornmeal. Cornmeal gives the bottom a little crunch, like tiny pebbles on the road. Brush it with olive oil. That stops the sauce from making the dough soggy. Now you can add your sauce, cheese, and toppings. Go wild or keep it simple.The Hot Oven Secret
Turn your oven up high, to 475 degrees. That is really hot. Put your empty pizza pan in the oven while it heats up. This is the secret to a crispy crust. A hot pan cooks the bottom fast. Slide your pizza onto that screaming hot pan and bake for ten to twelve minutes. At the very end, move the pizza to the top rack and turn on the broiler. Watch it closely. In two minutes, the cheese gets bubbly and brown. That is the perfect finish. The crust is crispy, the cheese is melty. I still get excited when I hear that sizzle. It sounds like dinner is ready. Which do you like better: thick crust or thin crust? Take a little poll with your family tonight.Ingredients:
| Ingredient | Amount | Notes |
|---|---|---|
| Warm water (about 105°F/40°C) | 1 ½ cups (360 mL) | Ensure temperature is not too hot or it will kill the yeast |
| Instant yeast | 1 package (1 ¼ oz, 2 ¼ tsp, 7 g) | Can substitute active dry yeast if needed |
| Sugar | 1 Tbsp (15 g) | Helps activate the yeast |
| Salt | 1 tsp | Adds flavor |
| Olive oil | 1 Tbsp (15 mL) + extra for greasing | Extra oil for greasing bowl and pan |
| All-purpose flour | 3 ½ cups (450 g) | Can use bread flour for chewier texture |
The Best Pizza Dough for Little Hands (and Big Bellies)
I still remember the first time I made pizza dough with my grandson. Flour was everywhere. Even on the ceiling! That’s a happy memory now. This recipe is foolproof, which means even a twelve-year-old can do it. Doesn’t that smell amazing when it bakes?
You only need a few simple things from your kitchen. Warm water, yeast, sugar, salt, olive oil, and flour. That’s it. No fancy machines required. Just your hands and a big bowl. Let’s get started, friend.
First, we wake up the yeast. Think of it like a tiny bear coming out of a cave. It gets fizzy and happy. Then we add everything together and knead. That’s the fun part where you push and fold the dough.
Step 1: Pour the warm water into a small bowl. Sprinkle the yeast and sugar on top. Stir it gently, then wait five to ten minutes. You’ll see bubbles and foam. That means the yeast is alive. (Hard-learned tip: Never use water that’s too hot or it will kill the yeast. Lukewarm is perfect, like bath water.)
Step 2: Add the salt and olive oil to the frothy yeast mixture. Stir it with a fork. In a large bowl, dump in the flour. Pour the wet stuff into the flour. Mix with a wooden spoon until it gets too stiff. What do you think makes dough puff up like a soft pillow? … Share below!
Step 3: Dump the dough onto a floured counter. Push it away from you with the heel of your hand. Fold it over, then push again. Keep doing this for eight minutes. The dough will go from sticky to silky smooth. My grandma said it should feel like a baby’s cheek.
Step 4: Poke the dough with one finger. If it slowly springs back, you’re done kneading. Grease a clean bowl with olive oil and place the dough inside. Cover it with plastic wrap. Set it in a warm, draft-free spot for one to two hours. It needs to double in size, like a sleepy balloon.
Step 5: Punch the dough down gently. Cut it into two equal balls. Cover them with plastic wrap and let them rest for fifteen minutes. While you wait, preheat your oven to 475°F (250°C). Put your pizza pan inside the oven to get hot. A hot pan means a crispy crust. Trust me on this!
Step 6: Roll each dough ball onto floured parchment paper. Make it twelve inches for a classic pizza. Brush the top with olive oil. Add your favorite sauce, cheese, and toppings. Slide the pizza onto the hot pan. Bake on the lowest rack for ten to twelve minutes. Then move it to the top rack and broil for two minutes. Watch it so it doesn’t burn!
Cook Time: 12–14 minutes
Total Time: 2 hours 15 minutes
Yield: 2 medium pizzas (8 slices each)
Category: Dinner, Pizza
Three Fun Twists on Your Homemade Pizza
Plain cheese is delicious, but sometimes you want a change. I love trying new things with my dough. Here are three of my favorites.
Garden Veggie Surprise: Top your pizza with colorful bell peppers, mushrooms, and black olives. Add a sprinkle of fresh basil after baking. It tastes like summer on a plate!
Spicy Sausage Fiesta: Crumble cooked Italian sausage over the sauce. Add red pepper flakes for a little kick. My nephew calls this the fire-breathing pizza. Which one would you try first? Comment below!
Apple Pie Dessert Pizza: Skip the tomato sauce. Spread softened cream cheese on the dough. Top with thinly sliced apples, cinnamon, and a drizzle of honey. Bake until golden. It’s like a pie you can eat with your hands.
What to Serve with Your Perfect Pizza
A good pizza needs good friends on the plate. I like to serve it with a simple green salad. Toss some lettuce, cherry tomatoes, and a splash of vinaigrette. It’s fresh and crunchy.
Another idea: cucumber sticks with ranch dip. They’re cool and crisp. Perfect for little fingers to grab between slices. You can also add a bowl of marinated olives for a salty bite.
For drinks, try a cold glass of lemonade. It’s bright and tangy. Grown-ups might enjoy a light red wine, like a Pinot Noir. Which would you choose tonight?
Storing Your Pizza Dough Like a Pro
Making pizza dough is fun. But what if you want pizza tonight and don’t have time? You can store the dough for later. That is the magic of planning ahead. Once your dough has risen, you can put it in the fridge. Wrap it tight in plastic wrap. It will stay good for up to three days. The cold slows down the yeast. This actually makes the flavor better. I remember my first time storing dough. I was nervous. But the next day, the pizza tasted even more like a pizzeria.
The freezer is your best friend for batch cooking. You can freeze the dough balls after they rest. Just wrap them in plastic, then put them in a freezer bag. They will keep for three months. When you want pizza, take a ball out. Let it thaw in the fridge overnight. Then let it sit on the counter for 30 minutes. This is why batch cooking matters. You have homemade pizza ready whenever a craving hits. No need to order out. Have you ever tried storing it this way? Share below!
Three Common Pizza Dough Problems and Fixes
Even the best cooks hit a snag. The first problem is dough that is too sticky. Do not panic. Just add flour one tablespoon at a time while you knead. The dough should be soft, not gluey. I once added too much water by accident. A little extra flour saved the day. The second problem is dough that will not rise. This happens when the water is too hot or too cold. The water should feel like a warm bath. If the yeast is old, it will not bubble. Always check the date on your yeast packet.
The third problem is a crust that is too hard. This often means you baked it too long. Remember the hot pan trick. It helps the bottom cook fast. Keep an eye on the oven. Why do these fixes matter? They save you from a sad pizza. They also teach you to trust your hands. You learn what good dough feels like. That confidence will follow you into every recipe. Which of these problems have you run into before?
Your Pizza Dough Questions Answered
Q: Can I use gluten-free flour? A: Yes. Use a gluten-free blend with xanthan gum. The dough will be stickier, so keep your hands wet.
Q: Can I make the dough the night before? A: Yes. Let it rise, then refrigerate it. The flavor gets better overnight.
Q: Can I swap white flour for whole wheat? A: Yes. Use half white and half whole wheat. Whole wheat dough needs a little more water.
Q: How do I scale the recipe for one pizza? A: Cut all ingredients in half. One ball makes one pizza.
Q: Can I add herbs to the dough? A: Yes. Mix in a teaspoon of dried oregano or garlic powder with the flour. *Fun fact: Italians sometimes add a pinch of sugar to help the crust brown.* Which tip will you try first?
A Warm Goodbye from Chloe
I hope you feel ready to make your own pizza dough. It is one of the kindest things you can do for your family. There is nothing like the smell of baking dough in your kitchen. It makes a house feel like a home. I would love to see your pizzas. Snap a picture of your creation. Share it with us. Have you tried this recipe? Tag us on Pinterest! Happy cooking! —Chloe Hartwell.
Getting Your Hands Dirty
Pour the bubbly yeast mix into a big bowl of flour. Add a little salt and oil. Stir it with a big wooden spoon until it gets too thick. Then use your hands. My mom taught me to knead dough like you are pushing a sleepy cat. You push the dough away, fold it over, and push again. It takes about eight minutes. The dough will tell you when it is ready. Poke it with one finger. If the dent slowly springs back, it is done. That is the finger poke test. This trick matters because under-kneaded dough tears easily. Over-kneaded dough gets tough. Your hands know what to do. Just feel the dough and trust them.Waiting Is the Hardest Part
Oil the bowl so the dough doesn’t stick. Put the dough ball inside. Cover it with plastic wrap, like tucking it in for a nap. Leave it in a warm spot for an hour or two. It will double in size. I put my bowl on top of the fridge. That spot is always a little warm. Why does this matter? The waiting time builds flavor. The yeast keeps working slowly, making the dough taste rich and good. Rushing this step means you miss out on that yummy, bready flavor. Have you ever made something that took a long time to rise? It is always worth it.Shaping Your Pizza
When the dough is big and puffy, punch it down gently. That is the fun part. Cut it into two pieces. You can make one pizza now and freeze the other for later. Let the dough balls rest for fifteen minutes. This makes them easy to stretch. If you try to stretch cold dough, it fights back and shrinks. We learned that the hard way. Roll the dough out on paper dusted with flour or cornmeal. Cornmeal gives the bottom a little crunch, like tiny pebbles on the road. Brush it with olive oil. That stops the sauce from making the dough soggy. Now you can add your sauce, cheese, and toppings. Go wild or keep it simple.The Hot Oven Secret
Turn your oven up high, to 475 degrees. That is really hot. Put your empty pizza pan in the oven while it heats up. This is the secret to a crispy crust. A hot pan cooks the bottom fast. Slide your pizza onto that screaming hot pan and bake for ten to twelve minutes. At the very end, move the pizza to the top rack and turn on the broiler. Watch it closely. In two minutes, the cheese gets bubbly and brown. That is the perfect finish. The crust is crispy, the cheese is melty. I still get excited when I hear that sizzle. It sounds like dinner is ready. Which do you like better: thick crust or thin crust? Take a little poll with your family tonight.Ingredients:
| Ingredient | Amount | Notes |
|---|---|---|
| Warm water (about 105°F/40°C) | 1 ½ cups (360 mL) | Ensure temperature is not too hot or it will kill the yeast |
| Instant yeast | 1 package (1 ¼ oz, 2 ¼ tsp, 7 g) | Can substitute active dry yeast if needed |
| Sugar | 1 Tbsp (15 g) | Helps activate the yeast |
| Salt | 1 tsp | Adds flavor |
| Olive oil | 1 Tbsp (15 mL) + extra for greasing | Extra oil for greasing bowl and pan |
| All-purpose flour | 3 ½ cups (450 g) | Can use bread flour for chewier texture |
The Best Pizza Dough for Little Hands (and Big Bellies)
I still remember the first time I made pizza dough with my grandson. Flour was everywhere. Even on the ceiling! That’s a happy memory now. This recipe is foolproof, which means even a twelve-year-old can do it. Doesn’t that smell amazing when it bakes?
You only need a few simple things from your kitchen. Warm water, yeast, sugar, salt, olive oil, and flour. That’s it. No fancy machines required. Just your hands and a big bowl. Let’s get started, friend.
First, we wake up the yeast. Think of it like a tiny bear coming out of a cave. It gets fizzy and happy. Then we add everything together and knead. That’s the fun part where you push and fold the dough.
Step 1: Pour the warm water into a small bowl. Sprinkle the yeast and sugar on top. Stir it gently, then wait five to ten minutes. You’ll see bubbles and foam. That means the yeast is alive. (Hard-learned tip: Never use water that’s too hot or it will kill the yeast. Lukewarm is perfect, like bath water.)
Step 2: Add the salt and olive oil to the frothy yeast mixture. Stir it with a fork. In a large bowl, dump in the flour. Pour the wet stuff into the flour. Mix with a wooden spoon until it gets too stiff. What do you think makes dough puff up like a soft pillow? … Share below!
Step 3: Dump the dough onto a floured counter. Push it away from you with the heel of your hand. Fold it over, then push again. Keep doing this for eight minutes. The dough will go from sticky to silky smooth. My grandma said it should feel like a baby’s cheek.
Step 4: Poke the dough with one finger. If it slowly springs back, you’re done kneading. Grease a clean bowl with olive oil and place the dough inside. Cover it with plastic wrap. Set it in a warm, draft-free spot for one to two hours. It needs to double in size, like a sleepy balloon.
Step 5: Punch the dough down gently. Cut it into two equal balls. Cover them with plastic wrap and let them rest for fifteen minutes. While you wait, preheat your oven to 475°F (250°C). Put your pizza pan inside the oven to get hot. A hot pan means a crispy crust. Trust me on this!
Step 6: Roll each dough ball onto floured parchment paper. Make it twelve inches for a classic pizza. Brush the top with olive oil. Add your favorite sauce, cheese, and toppings. Slide the pizza onto the hot pan. Bake on the lowest rack for ten to twelve minutes. Then move it to the top rack and broil for two minutes. Watch it so it doesn’t burn!
Cook Time: 12–14 minutes
Total Time: 2 hours 15 minutes
Yield: 2 medium pizzas (8 slices each)
Category: Dinner, Pizza
Three Fun Twists on Your Homemade Pizza
Plain cheese is delicious, but sometimes you want a change. I love trying new things with my dough. Here are three of my favorites.
Garden Veggie Surprise: Top your pizza with colorful bell peppers, mushrooms, and black olives. Add a sprinkle of fresh basil after baking. It tastes like summer on a plate!
Spicy Sausage Fiesta: Crumble cooked Italian sausage over the sauce. Add red pepper flakes for a little kick. My nephew calls this the fire-breathing pizza. Which one would you try first? Comment below!
Apple Pie Dessert Pizza: Skip the tomato sauce. Spread softened cream cheese on the dough. Top with thinly sliced apples, cinnamon, and a drizzle of honey. Bake until golden. It’s like a pie you can eat with your hands.
What to Serve with Your Perfect Pizza
A good pizza needs good friends on the plate. I like to serve it with a simple green salad. Toss some lettuce, cherry tomatoes, and a splash of vinaigrette. It’s fresh and crunchy.
Another idea: cucumber sticks with ranch dip. They’re cool and crisp. Perfect for little fingers to grab between slices. You can also add a bowl of marinated olives for a salty bite.
For drinks, try a cold glass of lemonade. It’s bright and tangy. Grown-ups might enjoy a light red wine, like a Pinot Noir. Which would you choose tonight?
Storing Your Pizza Dough Like a Pro
Making pizza dough is fun. But what if you want pizza tonight and don’t have time? You can store the dough for later. That is the magic of planning ahead. Once your dough has risen, you can put it in the fridge. Wrap it tight in plastic wrap. It will stay good for up to three days. The cold slows down the yeast. This actually makes the flavor better. I remember my first time storing dough. I was nervous. But the next day, the pizza tasted even more like a pizzeria.
The freezer is your best friend for batch cooking. You can freeze the dough balls after they rest. Just wrap them in plastic, then put them in a freezer bag. They will keep for three months. When you want pizza, take a ball out. Let it thaw in the fridge overnight. Then let it sit on the counter for 30 minutes. This is why batch cooking matters. You have homemade pizza ready whenever a craving hits. No need to order out. Have you ever tried storing it this way? Share below!
Three Common Pizza Dough Problems and Fixes
Even the best cooks hit a snag. The first problem is dough that is too sticky. Do not panic. Just add flour one tablespoon at a time while you knead. The dough should be soft, not gluey. I once added too much water by accident. A little extra flour saved the day. The second problem is dough that will not rise. This happens when the water is too hot or too cold. The water should feel like a warm bath. If the yeast is old, it will not bubble. Always check the date on your yeast packet.
The third problem is a crust that is too hard. This often means you baked it too long. Remember the hot pan trick. It helps the bottom cook fast. Keep an eye on the oven. Why do these fixes matter? They save you from a sad pizza. They also teach you to trust your hands. You learn what good dough feels like. That confidence will follow you into every recipe. Which of these problems have you run into before?
Your Pizza Dough Questions Answered
Q: Can I use gluten-free flour? A: Yes. Use a gluten-free blend with xanthan gum. The dough will be stickier, so keep your hands wet.
Q: Can I make the dough the night before? A: Yes. Let it rise, then refrigerate it. The flavor gets better overnight.
Q: Can I swap white flour for whole wheat? A: Yes. Use half white and half whole wheat. Whole wheat dough needs a little more water.
Q: How do I scale the recipe for one pizza? A: Cut all ingredients in half. One ball makes one pizza.
Q: Can I add herbs to the dough? A: Yes. Mix in a teaspoon of dried oregano or garlic powder with the flour. *Fun fact: Italians sometimes add a pinch of sugar to help the crust brown.* Which tip will you try first?
A Warm Goodbye from Chloe
I hope you feel ready to make your own pizza dough. It is one of the kindest things you can do for your family. There is nothing like the smell of baking dough in your kitchen. It makes a house feel like a home. I would love to see your pizzas. Snap a picture of your creation. Share it with us. Have you tried this recipe? Tag us on Pinterest! Happy cooking! —Chloe Hartwell.
Getting Your Hands Dirty
Pour the bubbly yeast mix into a big bowl of flour. Add a little salt and oil. Stir it with a big wooden spoon until it gets too thick. Then use your hands. My mom taught me to knead dough like you are pushing a sleepy cat. You push the dough away, fold it over, and push again. It takes about eight minutes. The dough will tell you when it is ready. Poke it with one finger. If the dent slowly springs back, it is done. That is the finger poke test. This trick matters because under-kneaded dough tears easily. Over-kneaded dough gets tough. Your hands know what to do. Just feel the dough and trust them.Waiting Is the Hardest Part
Oil the bowl so the dough doesn’t stick. Put the dough ball inside. Cover it with plastic wrap, like tucking it in for a nap. Leave it in a warm spot for an hour or two. It will double in size. I put my bowl on top of the fridge. That spot is always a little warm. Why does this matter? The waiting time builds flavor. The yeast keeps working slowly, making the dough taste rich and good. Rushing this step means you miss out on that yummy, bready flavor. Have you ever made something that took a long time to rise? It is always worth it.Shaping Your Pizza
When the dough is big and puffy, punch it down gently. That is the fun part. Cut it into two pieces. You can make one pizza now and freeze the other for later. Let the dough balls rest for fifteen minutes. This makes them easy to stretch. If you try to stretch cold dough, it fights back and shrinks. We learned that the hard way. Roll the dough out on paper dusted with flour or cornmeal. Cornmeal gives the bottom a little crunch, like tiny pebbles on the road. Brush it with olive oil. That stops the sauce from making the dough soggy. Now you can add your sauce, cheese, and toppings. Go wild or keep it simple.The Hot Oven Secret
Turn your oven up high, to 475 degrees. That is really hot. Put your empty pizza pan in the oven while it heats up. This is the secret to a crispy crust. A hot pan cooks the bottom fast. Slide your pizza onto that screaming hot pan and bake for ten to twelve minutes. At the very end, move the pizza to the top rack and turn on the broiler. Watch it closely. In two minutes, the cheese gets bubbly and brown. That is the perfect finish. The crust is crispy, the cheese is melty. I still get excited when I hear that sizzle. It sounds like dinner is ready. Which do you like better: thick crust or thin crust? Take a little poll with your family tonight.Ingredients:
| Ingredient | Amount | Notes |
|---|---|---|
| Warm water (about 105°F/40°C) | 1 ½ cups (360 mL) | Ensure temperature is not too hot or it will kill the yeast |
| Instant yeast | 1 package (1 ¼ oz, 2 ¼ tsp, 7 g) | Can substitute active dry yeast if needed |
| Sugar | 1 Tbsp (15 g) | Helps activate the yeast |
| Salt | 1 tsp | Adds flavor |
| Olive oil | 1 Tbsp (15 mL) + extra for greasing | Extra oil for greasing bowl and pan |
| All-purpose flour | 3 ½ cups (450 g) | Can use bread flour for chewier texture |
The Best Pizza Dough for Little Hands (and Big Bellies)
I still remember the first time I made pizza dough with my grandson. Flour was everywhere. Even on the ceiling! That’s a happy memory now. This recipe is foolproof, which means even a twelve-year-old can do it. Doesn’t that smell amazing when it bakes?
You only need a few simple things from your kitchen. Warm water, yeast, sugar, salt, olive oil, and flour. That’s it. No fancy machines required. Just your hands and a big bowl. Let’s get started, friend.
First, we wake up the yeast. Think of it like a tiny bear coming out of a cave. It gets fizzy and happy. Then we add everything together and knead. That’s the fun part where you push and fold the dough.
Step 1: Pour the warm water into a small bowl. Sprinkle the yeast and sugar on top. Stir it gently, then wait five to ten minutes. You’ll see bubbles and foam. That means the yeast is alive. (Hard-learned tip: Never use water that’s too hot or it will kill the yeast. Lukewarm is perfect, like bath water.)
Step 2: Add the salt and olive oil to the frothy yeast mixture. Stir it with a fork. In a large bowl, dump in the flour. Pour the wet stuff into the flour. Mix with a wooden spoon until it gets too stiff. What do you think makes dough puff up like a soft pillow? … Share below!
Step 3: Dump the dough onto a floured counter. Push it away from you with the heel of your hand. Fold it over, then push again. Keep doing this for eight minutes. The dough will go from sticky to silky smooth. My grandma said it should feel like a baby’s cheek.
Step 4: Poke the dough with one finger. If it slowly springs back, you’re done kneading. Grease a clean bowl with olive oil and place the dough inside. Cover it with plastic wrap. Set it in a warm, draft-free spot for one to two hours. It needs to double in size, like a sleepy balloon.
Step 5: Punch the dough down gently. Cut it into two equal balls. Cover them with plastic wrap and let them rest for fifteen minutes. While you wait, preheat your oven to 475°F (250°C). Put your pizza pan inside the oven to get hot. A hot pan means a crispy crust. Trust me on this!
Step 6: Roll each dough ball onto floured parchment paper. Make it twelve inches for a classic pizza. Brush the top with olive oil. Add your favorite sauce, cheese, and toppings. Slide the pizza onto the hot pan. Bake on the lowest rack for ten to twelve minutes. Then move it to the top rack and broil for two minutes. Watch it so it doesn’t burn!
Cook Time: 12–14 minutes
Total Time: 2 hours 15 minutes
Yield: 2 medium pizzas (8 slices each)
Category: Dinner, Pizza
Three Fun Twists on Your Homemade Pizza
Plain cheese is delicious, but sometimes you want a change. I love trying new things with my dough. Here are three of my favorites.
Garden Veggie Surprise: Top your pizza with colorful bell peppers, mushrooms, and black olives. Add a sprinkle of fresh basil after baking. It tastes like summer on a plate!
Spicy Sausage Fiesta: Crumble cooked Italian sausage over the sauce. Add red pepper flakes for a little kick. My nephew calls this the fire-breathing pizza. Which one would you try first? Comment below!
Apple Pie Dessert Pizza: Skip the tomato sauce. Spread softened cream cheese on the dough. Top with thinly sliced apples, cinnamon, and a drizzle of honey. Bake until golden. It’s like a pie you can eat with your hands.
What to Serve with Your Perfect Pizza
A good pizza needs good friends on the plate. I like to serve it with a simple green salad. Toss some lettuce, cherry tomatoes, and a splash of vinaigrette. It’s fresh and crunchy.
Another idea: cucumber sticks with ranch dip. They’re cool and crisp. Perfect for little fingers to grab between slices. You can also add a bowl of marinated olives for a salty bite.
For drinks, try a cold glass of lemonade. It’s bright and tangy. Grown-ups might enjoy a light red wine, like a Pinot Noir. Which would you choose tonight?
Storing Your Pizza Dough Like a Pro
Making pizza dough is fun. But what if you want pizza tonight and don’t have time? You can store the dough for later. That is the magic of planning ahead. Once your dough has risen, you can put it in the fridge. Wrap it tight in plastic wrap. It will stay good for up to three days. The cold slows down the yeast. This actually makes the flavor better. I remember my first time storing dough. I was nervous. But the next day, the pizza tasted even more like a pizzeria.
The freezer is your best friend for batch cooking. You can freeze the dough balls after they rest. Just wrap them in plastic, then put them in a freezer bag. They will keep for three months. When you want pizza, take a ball out. Let it thaw in the fridge overnight. Then let it sit on the counter for 30 minutes. This is why batch cooking matters. You have homemade pizza ready whenever a craving hits. No need to order out. Have you ever tried storing it this way? Share below!
Three Common Pizza Dough Problems and Fixes
Even the best cooks hit a snag. The first problem is dough that is too sticky. Do not panic. Just add flour one tablespoon at a time while you knead. The dough should be soft, not gluey. I once added too much water by accident. A little extra flour saved the day. The second problem is dough that will not rise. This happens when the water is too hot or too cold. The water should feel like a warm bath. If the yeast is old, it will not bubble. Always check the date on your yeast packet.
The third problem is a crust that is too hard. This often means you baked it too long. Remember the hot pan trick. It helps the bottom cook fast. Keep an eye on the oven. Why do these fixes matter? They save you from a sad pizza. They also teach you to trust your hands. You learn what good dough feels like. That confidence will follow you into every recipe. Which of these problems have you run into before?
Your Pizza Dough Questions Answered
Q: Can I use gluten-free flour? A: Yes. Use a gluten-free blend with xanthan gum. The dough will be stickier, so keep your hands wet.
Q: Can I make the dough the night before? A: Yes. Let it rise, then refrigerate it. The flavor gets better overnight.
Q: Can I swap white flour for whole wheat? A: Yes. Use half white and half whole wheat. Whole wheat dough needs a little more water.
Q: How do I scale the recipe for one pizza? A: Cut all ingredients in half. One ball makes one pizza.
Q: Can I add herbs to the dough? A: Yes. Mix in a teaspoon of dried oregano or garlic powder with the flour. *Fun fact: Italians sometimes add a pinch of sugar to help the crust brown.* Which tip will you try first?
A Warm Goodbye from Chloe
I hope you feel ready to make your own pizza dough. It is one of the kindest things you can do for your family. There is nothing like the smell of baking dough in your kitchen. It makes a house feel like a home. I would love to see your pizzas. Snap a picture of your creation. Share it with us. Have you tried this recipe? Tag us on Pinterest! Happy cooking! —Chloe Hartwell.
Getting Your Hands Dirty
Pour the bubbly yeast mix into a big bowl of flour. Add a little salt and oil. Stir it with a big wooden spoon until it gets too thick. Then use your hands. My mom taught me to knead dough like you are pushing a sleepy cat. You push the dough away, fold it over, and push again. It takes about eight minutes. The dough will tell you when it is ready. Poke it with one finger. If the dent slowly springs back, it is done. That is the finger poke test. This trick matters because under-kneaded dough tears easily. Over-kneaded dough gets tough. Your hands know what to do. Just feel the dough and trust them.Waiting Is the Hardest Part
Oil the bowl so the dough doesn’t stick. Put the dough ball inside. Cover it with plastic wrap, like tucking it in for a nap. Leave it in a warm spot for an hour or two. It will double in size. I put my bowl on top of the fridge. That spot is always a little warm. Why does this matter? The waiting time builds flavor. The yeast keeps working slowly, making the dough taste rich and good. Rushing this step means you miss out on that yummy, bready flavor. Have you ever made something that took a long time to rise? It is always worth it.Shaping Your Pizza
When the dough is big and puffy, punch it down gently. That is the fun part. Cut it into two pieces. You can make one pizza now and freeze the other for later. Let the dough balls rest for fifteen minutes. This makes them easy to stretch. If you try to stretch cold dough, it fights back and shrinks. We learned that the hard way. Roll the dough out on paper dusted with flour or cornmeal. Cornmeal gives the bottom a little crunch, like tiny pebbles on the road. Brush it with olive oil. That stops the sauce from making the dough soggy. Now you can add your sauce, cheese, and toppings. Go wild or keep it simple.The Hot Oven Secret
Turn your oven up high, to 475 degrees. That is really hot. Put your empty pizza pan in the oven while it heats up. This is the secret to a crispy crust. A hot pan cooks the bottom fast. Slide your pizza onto that screaming hot pan and bake for ten to twelve minutes. At the very end, move the pizza to the top rack and turn on the broiler. Watch it closely. In two minutes, the cheese gets bubbly and brown. That is the perfect finish. The crust is crispy, the cheese is melty. I still get excited when I hear that sizzle. It sounds like dinner is ready. Which do you like better: thick crust or thin crust? Take a little poll with your family tonight.Ingredients:
| Ingredient | Amount | Notes |
|---|---|---|
| Warm water (about 105°F/40°C) | 1 ½ cups (360 mL) | Ensure temperature is not too hot or it will kill the yeast |
| Instant yeast | 1 package (1 ¼ oz, 2 ¼ tsp, 7 g) | Can substitute active dry yeast if needed |
| Sugar | 1 Tbsp (15 g) | Helps activate the yeast |
| Salt | 1 tsp | Adds flavor |
| Olive oil | 1 Tbsp (15 mL) + extra for greasing | Extra oil for greasing bowl and pan |
| All-purpose flour | 3 ½ cups (450 g) | Can use bread flour for chewier texture |
The Best Pizza Dough for Little Hands (and Big Bellies)
I still remember the first time I made pizza dough with my grandson. Flour was everywhere. Even on the ceiling! That’s a happy memory now. This recipe is foolproof, which means even a twelve-year-old can do it. Doesn’t that smell amazing when it bakes?
You only need a few simple things from your kitchen. Warm water, yeast, sugar, salt, olive oil, and flour. That’s it. No fancy machines required. Just your hands and a big bowl. Let’s get started, friend.
First, we wake up the yeast. Think of it like a tiny bear coming out of a cave. It gets fizzy and happy. Then we add everything together and knead. That’s the fun part where you push and fold the dough.
Step 1: Pour the warm water into a small bowl. Sprinkle the yeast and sugar on top. Stir it gently, then wait five to ten minutes. You’ll see bubbles and foam. That means the yeast is alive. (Hard-learned tip: Never use water that’s too hot or it will kill the yeast. Lukewarm is perfect, like bath water.)
Step 2: Add the salt and olive oil to the frothy yeast mixture. Stir it with a fork. In a large bowl, dump in the flour. Pour the wet stuff into the flour. Mix with a wooden spoon until it gets too stiff. What do you think makes dough puff up like a soft pillow? … Share below!
Step 3: Dump the dough onto a floured counter. Push it away from you with the heel of your hand. Fold it over, then push again. Keep doing this for eight minutes. The dough will go from sticky to silky smooth. My grandma said it should feel like a baby’s cheek.
Step 4: Poke the dough with one finger. If it slowly springs back, you’re done kneading. Grease a clean bowl with olive oil and place the dough inside. Cover it with plastic wrap. Set it in a warm, draft-free spot for one to two hours. It needs to double in size, like a sleepy balloon.
Step 5: Punch the dough down gently. Cut it into two equal balls. Cover them with plastic wrap and let them rest for fifteen minutes. While you wait, preheat your oven to 475°F (250°C). Put your pizza pan inside the oven to get hot. A hot pan means a crispy crust. Trust me on this!
Step 6: Roll each dough ball onto floured parchment paper. Make it twelve inches for a classic pizza. Brush the top with olive oil. Add your favorite sauce, cheese, and toppings. Slide the pizza onto the hot pan. Bake on the lowest rack for ten to twelve minutes. Then move it to the top rack and broil for two minutes. Watch it so it doesn’t burn!
Cook Time: 12–14 minutes
Total Time: 2 hours 15 minutes
Yield: 2 medium pizzas (8 slices each)
Category: Dinner, Pizza
Three Fun Twists on Your Homemade Pizza
Plain cheese is delicious, but sometimes you want a change. I love trying new things with my dough. Here are three of my favorites.
Garden Veggie Surprise: Top your pizza with colorful bell peppers, mushrooms, and black olives. Add a sprinkle of fresh basil after baking. It tastes like summer on a plate!
Spicy Sausage Fiesta: Crumble cooked Italian sausage over the sauce. Add red pepper flakes for a little kick. My nephew calls this the fire-breathing pizza. Which one would you try first? Comment below!
Apple Pie Dessert Pizza: Skip the tomato sauce. Spread softened cream cheese on the dough. Top with thinly sliced apples, cinnamon, and a drizzle of honey. Bake until golden. It’s like a pie you can eat with your hands.
What to Serve with Your Perfect Pizza
A good pizza needs good friends on the plate. I like to serve it with a simple green salad. Toss some lettuce, cherry tomatoes, and a splash of vinaigrette. It’s fresh and crunchy.
Another idea: cucumber sticks with ranch dip. They’re cool and crisp. Perfect for little fingers to grab between slices. You can also add a bowl of marinated olives for a salty bite.
For drinks, try a cold glass of lemonade. It’s bright and tangy. Grown-ups might enjoy a light red wine, like a Pinot Noir. Which would you choose tonight?
Storing Your Pizza Dough Like a Pro
Making pizza dough is fun. But what if you want pizza tonight and don’t have time? You can store the dough for later. That is the magic of planning ahead. Once your dough has risen, you can put it in the fridge. Wrap it tight in plastic wrap. It will stay good for up to three days. The cold slows down the yeast. This actually makes the flavor better. I remember my first time storing dough. I was nervous. But the next day, the pizza tasted even more like a pizzeria.
The freezer is your best friend for batch cooking. You can freeze the dough balls after they rest. Just wrap them in plastic, then put them in a freezer bag. They will keep for three months. When you want pizza, take a ball out. Let it thaw in the fridge overnight. Then let it sit on the counter for 30 minutes. This is why batch cooking matters. You have homemade pizza ready whenever a craving hits. No need to order out. Have you ever tried storing it this way? Share below!
Three Common Pizza Dough Problems and Fixes
Even the best cooks hit a snag. The first problem is dough that is too sticky. Do not panic. Just add flour one tablespoon at a time while you knead. The dough should be soft, not gluey. I once added too much water by accident. A little extra flour saved the day. The second problem is dough that will not rise. This happens when the water is too hot or too cold. The water should feel like a warm bath. If the yeast is old, it will not bubble. Always check the date on your yeast packet.
The third problem is a crust that is too hard. This often means you baked it too long. Remember the hot pan trick. It helps the bottom cook fast. Keep an eye on the oven. Why do these fixes matter? They save you from a sad pizza. They also teach you to trust your hands. You learn what good dough feels like. That confidence will follow you into every recipe. Which of these problems have you run into before?
Your Pizza Dough Questions Answered
Q: Can I use gluten-free flour? A: Yes. Use a gluten-free blend with xanthan gum. The dough will be stickier, so keep your hands wet.
Q: Can I make the dough the night before? A: Yes. Let it rise, then refrigerate it. The flavor gets better overnight.
Q: Can I swap white flour for whole wheat? A: Yes. Use half white and half whole wheat. Whole wheat dough needs a little more water.
Q: How do I scale the recipe for one pizza? A: Cut all ingredients in half. One ball makes one pizza.
Q: Can I add herbs to the dough? A: Yes. Mix in a teaspoon of dried oregano or garlic powder with the flour. *Fun fact: Italians sometimes add a pinch of sugar to help the crust brown.* Which tip will you try first?
A Warm Goodbye from Chloe
I hope you feel ready to make your own pizza dough. It is one of the kindest things you can do for your family. There is nothing like the smell of baking dough in your kitchen. It makes a house feel like a home. I would love to see your pizzas. Snap a picture of your creation. Share it with us. Have you tried this recipe? Tag us on Pinterest! Happy cooking! —Chloe Hartwell.
The Magic of the Yeast
First, you need warm water. Not too hot, just like a warm bath. Mix it with the yeast and a spoonful of sugar. Then you wait. After five or ten minutes, the top gets all bubbly and frothy. *Fun fact: Yeast is a living thing. It eats the sugar and burps out gas. Those little bubbles make the dough puff up and get fluffy.* When you see those bubbles, you know it is working. That step makes me happy every time. This is why the yeast test matters. Dead yeast means flat pizza. Nobody wants a flat, hard crust. We want it soft and chewy. What is your favorite pizza topping? I love simple pepperoni myself. Tell me in your head. Or if you are reading with a friend, say it out loud.Getting Your Hands Dirty
Pour the bubbly yeast mix into a big bowl of flour. Add a little salt and oil. Stir it with a big wooden spoon until it gets too thick. Then use your hands. My mom taught me to knead dough like you are pushing a sleepy cat. You push the dough away, fold it over, and push again. It takes about eight minutes. The dough will tell you when it is ready. Poke it with one finger. If the dent slowly springs back, it is done. That is the finger poke test. This trick matters because under-kneaded dough tears easily. Over-kneaded dough gets tough. Your hands know what to do. Just feel the dough and trust them.Waiting Is the Hardest Part
Oil the bowl so the dough doesn’t stick. Put the dough ball inside. Cover it with plastic wrap, like tucking it in for a nap. Leave it in a warm spot for an hour or two. It will double in size. I put my bowl on top of the fridge. That spot is always a little warm. Why does this matter? The waiting time builds flavor. The yeast keeps working slowly, making the dough taste rich and good. Rushing this step means you miss out on that yummy, bready flavor. Have you ever made something that took a long time to rise? It is always worth it.Shaping Your Pizza
When the dough is big and puffy, punch it down gently. That is the fun part. Cut it into two pieces. You can make one pizza now and freeze the other for later. Let the dough balls rest for fifteen minutes. This makes them easy to stretch. If you try to stretch cold dough, it fights back and shrinks. We learned that the hard way. Roll the dough out on paper dusted with flour or cornmeal. Cornmeal gives the bottom a little crunch, like tiny pebbles on the road. Brush it with olive oil. That stops the sauce from making the dough soggy. Now you can add your sauce, cheese, and toppings. Go wild or keep it simple.The Hot Oven Secret
Turn your oven up high, to 475 degrees. That is really hot. Put your empty pizza pan in the oven while it heats up. This is the secret to a crispy crust. A hot pan cooks the bottom fast. Slide your pizza onto that screaming hot pan and bake for ten to twelve minutes. At the very end, move the pizza to the top rack and turn on the broiler. Watch it closely. In two minutes, the cheese gets bubbly and brown. That is the perfect finish. The crust is crispy, the cheese is melty. I still get excited when I hear that sizzle. It sounds like dinner is ready. Which do you like better: thick crust or thin crust? Take a little poll with your family tonight.Ingredients:
| Ingredient | Amount | Notes |
|---|---|---|
| Warm water (about 105°F/40°C) | 1 ½ cups (360 mL) | Ensure temperature is not too hot or it will kill the yeast |
| Instant yeast | 1 package (1 ¼ oz, 2 ¼ tsp, 7 g) | Can substitute active dry yeast if needed |
| Sugar | 1 Tbsp (15 g) | Helps activate the yeast |
| Salt | 1 tsp | Adds flavor |
| Olive oil | 1 Tbsp (15 mL) + extra for greasing | Extra oil for greasing bowl and pan |
| All-purpose flour | 3 ½ cups (450 g) | Can use bread flour for chewier texture |
The Best Pizza Dough for Little Hands (and Big Bellies)
I still remember the first time I made pizza dough with my grandson. Flour was everywhere. Even on the ceiling! That’s a happy memory now. This recipe is foolproof, which means even a twelve-year-old can do it. Doesn’t that smell amazing when it bakes?
You only need a few simple things from your kitchen. Warm water, yeast, sugar, salt, olive oil, and flour. That’s it. No fancy machines required. Just your hands and a big bowl. Let’s get started, friend.
First, we wake up the yeast. Think of it like a tiny bear coming out of a cave. It gets fizzy and happy. Then we add everything together and knead. That’s the fun part where you push and fold the dough.
Step 1: Pour the warm water into a small bowl. Sprinkle the yeast and sugar on top. Stir it gently, then wait five to ten minutes. You’ll see bubbles and foam. That means the yeast is alive. (Hard-learned tip: Never use water that’s too hot or it will kill the yeast. Lukewarm is perfect, like bath water.)
Step 2: Add the salt and olive oil to the frothy yeast mixture. Stir it with a fork. In a large bowl, dump in the flour. Pour the wet stuff into the flour. Mix with a wooden spoon until it gets too stiff. What do you think makes dough puff up like a soft pillow? … Share below!
Step 3: Dump the dough onto a floured counter. Push it away from you with the heel of your hand. Fold it over, then push again. Keep doing this for eight minutes. The dough will go from sticky to silky smooth. My grandma said it should feel like a baby’s cheek.
Step 4: Poke the dough with one finger. If it slowly springs back, you’re done kneading. Grease a clean bowl with olive oil and place the dough inside. Cover it with plastic wrap. Set it in a warm, draft-free spot for one to two hours. It needs to double in size, like a sleepy balloon.
Step 5: Punch the dough down gently. Cut it into two equal balls. Cover them with plastic wrap and let them rest for fifteen minutes. While you wait, preheat your oven to 475°F (250°C). Put your pizza pan inside the oven to get hot. A hot pan means a crispy crust. Trust me on this!
Step 6: Roll each dough ball onto floured parchment paper. Make it twelve inches for a classic pizza. Brush the top with olive oil. Add your favorite sauce, cheese, and toppings. Slide the pizza onto the hot pan. Bake on the lowest rack for ten to twelve minutes. Then move it to the top rack and broil for two minutes. Watch it so it doesn’t burn!
Cook Time: 12–14 minutes
Total Time: 2 hours 15 minutes
Yield: 2 medium pizzas (8 slices each)
Category: Dinner, Pizza
Three Fun Twists on Your Homemade Pizza
Plain cheese is delicious, but sometimes you want a change. I love trying new things with my dough. Here are three of my favorites.
Garden Veggie Surprise: Top your pizza with colorful bell peppers, mushrooms, and black olives. Add a sprinkle of fresh basil after baking. It tastes like summer on a plate!
Spicy Sausage Fiesta: Crumble cooked Italian sausage over the sauce. Add red pepper flakes for a little kick. My nephew calls this the fire-breathing pizza. Which one would you try first? Comment below!
Apple Pie Dessert Pizza: Skip the tomato sauce. Spread softened cream cheese on the dough. Top with thinly sliced apples, cinnamon, and a drizzle of honey. Bake until golden. It’s like a pie you can eat with your hands.
What to Serve with Your Perfect Pizza
A good pizza needs good friends on the plate. I like to serve it with a simple green salad. Toss some lettuce, cherry tomatoes, and a splash of vinaigrette. It’s fresh and crunchy.
Another idea: cucumber sticks with ranch dip. They’re cool and crisp. Perfect for little fingers to grab between slices. You can also add a bowl of marinated olives for a salty bite.
For drinks, try a cold glass of lemonade. It’s bright and tangy. Grown-ups might enjoy a light red wine, like a Pinot Noir. Which would you choose tonight?
Storing Your Pizza Dough Like a Pro
Making pizza dough is fun. But what if you want pizza tonight and don’t have time? You can store the dough for later. That is the magic of planning ahead. Once your dough has risen, you can put it in the fridge. Wrap it tight in plastic wrap. It will stay good for up to three days. The cold slows down the yeast. This actually makes the flavor better. I remember my first time storing dough. I was nervous. But the next day, the pizza tasted even more like a pizzeria.
The freezer is your best friend for batch cooking. You can freeze the dough balls after they rest. Just wrap them in plastic, then put them in a freezer bag. They will keep for three months. When you want pizza, take a ball out. Let it thaw in the fridge overnight. Then let it sit on the counter for 30 minutes. This is why batch cooking matters. You have homemade pizza ready whenever a craving hits. No need to order out. Have you ever tried storing it this way? Share below!
Three Common Pizza Dough Problems and Fixes
Even the best cooks hit a snag. The first problem is dough that is too sticky. Do not panic. Just add flour one tablespoon at a time while you knead. The dough should be soft, not gluey. I once added too much water by accident. A little extra flour saved the day. The second problem is dough that will not rise. This happens when the water is too hot or too cold. The water should feel like a warm bath. If the yeast is old, it will not bubble. Always check the date on your yeast packet.
The third problem is a crust that is too hard. This often means you baked it too long. Remember the hot pan trick. It helps the bottom cook fast. Keep an eye on the oven. Why do these fixes matter? They save you from a sad pizza. They also teach you to trust your hands. You learn what good dough feels like. That confidence will follow you into every recipe. Which of these problems have you run into before?
Your Pizza Dough Questions Answered
Q: Can I use gluten-free flour? A: Yes. Use a gluten-free blend with xanthan gum. The dough will be stickier, so keep your hands wet.
Q: Can I make the dough the night before? A: Yes. Let it rise, then refrigerate it. The flavor gets better overnight.
Q: Can I swap white flour for whole wheat? A: Yes. Use half white and half whole wheat. Whole wheat dough needs a little more water.
Q: How do I scale the recipe for one pizza? A: Cut all ingredients in half. One ball makes one pizza.
Q: Can I add herbs to the dough? A: Yes. Mix in a teaspoon of dried oregano or garlic powder with the flour. *Fun fact: Italians sometimes add a pinch of sugar to help the crust brown.* Which tip will you try first?
A Warm Goodbye from Chloe
I hope you feel ready to make your own pizza dough. It is one of the kindest things you can do for your family. There is nothing like the smell of baking dough in your kitchen. It makes a house feel like a home. I would love to see your pizzas. Snap a picture of your creation. Share it with us. Have you tried this recipe? Tag us on Pinterest! Happy cooking! —Chloe Hartwell.
The Magic of the Yeast
First, you need warm water. Not too hot, just like a warm bath. Mix it with the yeast and a spoonful of sugar. Then you wait. After five or ten minutes, the top gets all bubbly and frothy. *Fun fact: Yeast is a living thing. It eats the sugar and burps out gas. Those little bubbles make the dough puff up and get fluffy.* When you see those bubbles, you know it is working. That step makes me happy every time. This is why the yeast test matters. Dead yeast means flat pizza. Nobody wants a flat, hard crust. We want it soft and chewy. What is your favorite pizza topping? I love simple pepperoni myself. Tell me in your head. Or if you are reading with a friend, say it out loud.Getting Your Hands Dirty
Pour the bubbly yeast mix into a big bowl of flour. Add a little salt and oil. Stir it with a big wooden spoon until it gets too thick. Then use your hands. My mom taught me to knead dough like you are pushing a sleepy cat. You push the dough away, fold it over, and push again. It takes about eight minutes. The dough will tell you when it is ready. Poke it with one finger. If the dent slowly springs back, it is done. That is the finger poke test. This trick matters because under-kneaded dough tears easily. Over-kneaded dough gets tough. Your hands know what to do. Just feel the dough and trust them.Waiting Is the Hardest Part
Oil the bowl so the dough doesn’t stick. Put the dough ball inside. Cover it with plastic wrap, like tucking it in for a nap. Leave it in a warm spot for an hour or two. It will double in size. I put my bowl on top of the fridge. That spot is always a little warm. Why does this matter? The waiting time builds flavor. The yeast keeps working slowly, making the dough taste rich and good. Rushing this step means you miss out on that yummy, bready flavor. Have you ever made something that took a long time to rise? It is always worth it.Shaping Your Pizza
When the dough is big and puffy, punch it down gently. That is the fun part. Cut it into two pieces. You can make one pizza now and freeze the other for later. Let the dough balls rest for fifteen minutes. This makes them easy to stretch. If you try to stretch cold dough, it fights back and shrinks. We learned that the hard way. Roll the dough out on paper dusted with flour or cornmeal. Cornmeal gives the bottom a little crunch, like tiny pebbles on the road. Brush it with olive oil. That stops the sauce from making the dough soggy. Now you can add your sauce, cheese, and toppings. Go wild or keep it simple.The Hot Oven Secret
Turn your oven up high, to 475 degrees. That is really hot. Put your empty pizza pan in the oven while it heats up. This is the secret to a crispy crust. A hot pan cooks the bottom fast. Slide your pizza onto that screaming hot pan and bake for ten to twelve minutes. At the very end, move the pizza to the top rack and turn on the broiler. Watch it closely. In two minutes, the cheese gets bubbly and brown. That is the perfect finish. The crust is crispy, the cheese is melty. I still get excited when I hear that sizzle. It sounds like dinner is ready. Which do you like better: thick crust or thin crust? Take a little poll with your family tonight.Ingredients:
| Ingredient | Amount | Notes |
|---|---|---|
| Warm water (about 105°F/40°C) | 1 ½ cups (360 mL) | Ensure temperature is not too hot or it will kill the yeast |
| Instant yeast | 1 package (1 ¼ oz, 2 ¼ tsp, 7 g) | Can substitute active dry yeast if needed |
| Sugar | 1 Tbsp (15 g) | Helps activate the yeast |
| Salt | 1 tsp | Adds flavor |
| Olive oil | 1 Tbsp (15 mL) + extra for greasing | Extra oil for greasing bowl and pan |
| All-purpose flour | 3 ½ cups (450 g) | Can use bread flour for chewier texture |
The Best Pizza Dough for Little Hands (and Big Bellies)
I still remember the first time I made pizza dough with my grandson. Flour was everywhere. Even on the ceiling! That’s a happy memory now. This recipe is foolproof, which means even a twelve-year-old can do it. Doesn’t that smell amazing when it bakes?
You only need a few simple things from your kitchen. Warm water, yeast, sugar, salt, olive oil, and flour. That’s it. No fancy machines required. Just your hands and a big bowl. Let’s get started, friend.
First, we wake up the yeast. Think of it like a tiny bear coming out of a cave. It gets fizzy and happy. Then we add everything together and knead. That’s the fun part where you push and fold the dough.
Step 1: Pour the warm water into a small bowl. Sprinkle the yeast and sugar on top. Stir it gently, then wait five to ten minutes. You’ll see bubbles and foam. That means the yeast is alive. (Hard-learned tip: Never use water that’s too hot or it will kill the yeast. Lukewarm is perfect, like bath water.)
Step 2: Add the salt and olive oil to the frothy yeast mixture. Stir it with a fork. In a large bowl, dump in the flour. Pour the wet stuff into the flour. Mix with a wooden spoon until it gets too stiff. What do you think makes dough puff up like a soft pillow? … Share below!
Step 3: Dump the dough onto a floured counter. Push it away from you with the heel of your hand. Fold it over, then push again. Keep doing this for eight minutes. The dough will go from sticky to silky smooth. My grandma said it should feel like a baby’s cheek.
Step 4: Poke the dough with one finger. If it slowly springs back, you’re done kneading. Grease a clean bowl with olive oil and place the dough inside. Cover it with plastic wrap. Set it in a warm, draft-free spot for one to two hours. It needs to double in size, like a sleepy balloon.
Step 5: Punch the dough down gently. Cut it into two equal balls. Cover them with plastic wrap and let them rest for fifteen minutes. While you wait, preheat your oven to 475°F (250°C). Put your pizza pan inside the oven to get hot. A hot pan means a crispy crust. Trust me on this!
Step 6: Roll each dough ball onto floured parchment paper. Make it twelve inches for a classic pizza. Brush the top with olive oil. Add your favorite sauce, cheese, and toppings. Slide the pizza onto the hot pan. Bake on the lowest rack for ten to twelve minutes. Then move it to the top rack and broil for two minutes. Watch it so it doesn’t burn!
Cook Time: 12–14 minutes
Total Time: 2 hours 15 minutes
Yield: 2 medium pizzas (8 slices each)
Category: Dinner, Pizza
Three Fun Twists on Your Homemade Pizza
Plain cheese is delicious, but sometimes you want a change. I love trying new things with my dough. Here are three of my favorites.
Garden Veggie Surprise: Top your pizza with colorful bell peppers, mushrooms, and black olives. Add a sprinkle of fresh basil after baking. It tastes like summer on a plate!
Spicy Sausage Fiesta: Crumble cooked Italian sausage over the sauce. Add red pepper flakes for a little kick. My nephew calls this the fire-breathing pizza. Which one would you try first? Comment below!
Apple Pie Dessert Pizza: Skip the tomato sauce. Spread softened cream cheese on the dough. Top with thinly sliced apples, cinnamon, and a drizzle of honey. Bake until golden. It’s like a pie you can eat with your hands.
What to Serve with Your Perfect Pizza
A good pizza needs good friends on the plate. I like to serve it with a simple green salad. Toss some lettuce, cherry tomatoes, and a splash of vinaigrette. It’s fresh and crunchy.
Another idea: cucumber sticks with ranch dip. They’re cool and crisp. Perfect for little fingers to grab between slices. You can also add a bowl of marinated olives for a salty bite.
For drinks, try a cold glass of lemonade. It’s bright and tangy. Grown-ups might enjoy a light red wine, like a Pinot Noir. Which would you choose tonight?
Storing Your Pizza Dough Like a Pro
Making pizza dough is fun. But what if you want pizza tonight and don’t have time? You can store the dough for later. That is the magic of planning ahead. Once your dough has risen, you can put it in the fridge. Wrap it tight in plastic wrap. It will stay good for up to three days. The cold slows down the yeast. This actually makes the flavor better. I remember my first time storing dough. I was nervous. But the next day, the pizza tasted even more like a pizzeria.
The freezer is your best friend for batch cooking. You can freeze the dough balls after they rest. Just wrap them in plastic, then put them in a freezer bag. They will keep for three months. When you want pizza, take a ball out. Let it thaw in the fridge overnight. Then let it sit on the counter for 30 minutes. This is why batch cooking matters. You have homemade pizza ready whenever a craving hits. No need to order out. Have you ever tried storing it this way? Share below!
Three Common Pizza Dough Problems and Fixes
Even the best cooks hit a snag. The first problem is dough that is too sticky. Do not panic. Just add flour one tablespoon at a time while you knead. The dough should be soft, not gluey. I once added too much water by accident. A little extra flour saved the day. The second problem is dough that will not rise. This happens when the water is too hot or too cold. The water should feel like a warm bath. If the yeast is old, it will not bubble. Always check the date on your yeast packet.
The third problem is a crust that is too hard. This often means you baked it too long. Remember the hot pan trick. It helps the bottom cook fast. Keep an eye on the oven. Why do these fixes matter? They save you from a sad pizza. They also teach you to trust your hands. You learn what good dough feels like. That confidence will follow you into every recipe. Which of these problems have you run into before?
Your Pizza Dough Questions Answered
Q: Can I use gluten-free flour? A: Yes. Use a gluten-free blend with xanthan gum. The dough will be stickier, so keep your hands wet.
Q: Can I make the dough the night before? A: Yes. Let it rise, then refrigerate it. The flavor gets better overnight.
Q: Can I swap white flour for whole wheat? A: Yes. Use half white and half whole wheat. Whole wheat dough needs a little more water.
Q: How do I scale the recipe for one pizza? A: Cut all ingredients in half. One ball makes one pizza.
Q: Can I add herbs to the dough? A: Yes. Mix in a teaspoon of dried oregano or garlic powder with the flour. *Fun fact: Italians sometimes add a pinch of sugar to help the crust brown.* Which tip will you try first?
A Warm Goodbye from Chloe
I hope you feel ready to make your own pizza dough. It is one of the kindest things you can do for your family. There is nothing like the smell of baking dough in your kitchen. It makes a house feel like a home. I would love to see your pizzas. Snap a picture of your creation. Share it with us. Have you tried this recipe? Tag us on Pinterest! Happy cooking! —Chloe Hartwell.
The Magic of the Yeast
First, you need warm water. Not too hot, just like a warm bath. Mix it with the yeast and a spoonful of sugar. Then you wait. After five or ten minutes, the top gets all bubbly and frothy. *Fun fact: Yeast is a living thing. It eats the sugar and burps out gas. Those little bubbles make the dough puff up and get fluffy.* When you see those bubbles, you know it is working. That step makes me happy every time. This is why the yeast test matters. Dead yeast means flat pizza. Nobody wants a flat, hard crust. We want it soft and chewy. What is your favorite pizza topping? I love simple pepperoni myself. Tell me in your head. Or if you are reading with a friend, say it out loud.Getting Your Hands Dirty
Pour the bubbly yeast mix into a big bowl of flour. Add a little salt and oil. Stir it with a big wooden spoon until it gets too thick. Then use your hands. My mom taught me to knead dough like you are pushing a sleepy cat. You push the dough away, fold it over, and push again. It takes about eight minutes. The dough will tell you when it is ready. Poke it with one finger. If the dent slowly springs back, it is done. That is the finger poke test. This trick matters because under-kneaded dough tears easily. Over-kneaded dough gets tough. Your hands know what to do. Just feel the dough and trust them.Waiting Is the Hardest Part
Oil the bowl so the dough doesn’t stick. Put the dough ball inside. Cover it with plastic wrap, like tucking it in for a nap. Leave it in a warm spot for an hour or two. It will double in size. I put my bowl on top of the fridge. That spot is always a little warm. Why does this matter? The waiting time builds flavor. The yeast keeps working slowly, making the dough taste rich and good. Rushing this step means you miss out on that yummy, bready flavor. Have you ever made something that took a long time to rise? It is always worth it.Shaping Your Pizza
When the dough is big and puffy, punch it down gently. That is the fun part. Cut it into two pieces. You can make one pizza now and freeze the other for later. Let the dough balls rest for fifteen minutes. This makes them easy to stretch. If you try to stretch cold dough, it fights back and shrinks. We learned that the hard way. Roll the dough out on paper dusted with flour or cornmeal. Cornmeal gives the bottom a little crunch, like tiny pebbles on the road. Brush it with olive oil. That stops the sauce from making the dough soggy. Now you can add your sauce, cheese, and toppings. Go wild or keep it simple.The Hot Oven Secret
Turn your oven up high, to 475 degrees. That is really hot. Put your empty pizza pan in the oven while it heats up. This is the secret to a crispy crust. A hot pan cooks the bottom fast. Slide your pizza onto that screaming hot pan and bake for ten to twelve minutes. At the very end, move the pizza to the top rack and turn on the broiler. Watch it closely. In two minutes, the cheese gets bubbly and brown. That is the perfect finish. The crust is crispy, the cheese is melty. I still get excited when I hear that sizzle. It sounds like dinner is ready. Which do you like better: thick crust or thin crust? Take a little poll with your family tonight.Ingredients:
| Ingredient | Amount | Notes |
|---|---|---|
| Warm water (about 105°F/40°C) | 1 ½ cups (360 mL) | Ensure temperature is not too hot or it will kill the yeast |
| Instant yeast | 1 package (1 ¼ oz, 2 ¼ tsp, 7 g) | Can substitute active dry yeast if needed |
| Sugar | 1 Tbsp (15 g) | Helps activate the yeast |
| Salt | 1 tsp | Adds flavor |
| Olive oil | 1 Tbsp (15 mL) + extra for greasing | Extra oil for greasing bowl and pan |
| All-purpose flour | 3 ½ cups (450 g) | Can use bread flour for chewier texture |
The Best Pizza Dough for Little Hands (and Big Bellies)
I still remember the first time I made pizza dough with my grandson. Flour was everywhere. Even on the ceiling! That’s a happy memory now. This recipe is foolproof, which means even a twelve-year-old can do it. Doesn’t that smell amazing when it bakes?
You only need a few simple things from your kitchen. Warm water, yeast, sugar, salt, olive oil, and flour. That’s it. No fancy machines required. Just your hands and a big bowl. Let’s get started, friend.
First, we wake up the yeast. Think of it like a tiny bear coming out of a cave. It gets fizzy and happy. Then we add everything together and knead. That’s the fun part where you push and fold the dough.
Step 1: Pour the warm water into a small bowl. Sprinkle the yeast and sugar on top. Stir it gently, then wait five to ten minutes. You’ll see bubbles and foam. That means the yeast is alive. (Hard-learned tip: Never use water that’s too hot or it will kill the yeast. Lukewarm is perfect, like bath water.)
Step 2: Add the salt and olive oil to the frothy yeast mixture. Stir it with a fork. In a large bowl, dump in the flour. Pour the wet stuff into the flour. Mix with a wooden spoon until it gets too stiff. What do you think makes dough puff up like a soft pillow? … Share below!
Step 3: Dump the dough onto a floured counter. Push it away from you with the heel of your hand. Fold it over, then push again. Keep doing this for eight minutes. The dough will go from sticky to silky smooth. My grandma said it should feel like a baby’s cheek.
Step 4: Poke the dough with one finger. If it slowly springs back, you’re done kneading. Grease a clean bowl with olive oil and place the dough inside. Cover it with plastic wrap. Set it in a warm, draft-free spot for one to two hours. It needs to double in size, like a sleepy balloon.
Step 5: Punch the dough down gently. Cut it into two equal balls. Cover them with plastic wrap and let them rest for fifteen minutes. While you wait, preheat your oven to 475°F (250°C). Put your pizza pan inside the oven to get hot. A hot pan means a crispy crust. Trust me on this!
Step 6: Roll each dough ball onto floured parchment paper. Make it twelve inches for a classic pizza. Brush the top with olive oil. Add your favorite sauce, cheese, and toppings. Slide the pizza onto the hot pan. Bake on the lowest rack for ten to twelve minutes. Then move it to the top rack and broil for two minutes. Watch it so it doesn’t burn!
Cook Time: 12–14 minutes
Total Time: 2 hours 15 minutes
Yield: 2 medium pizzas (8 slices each)
Category: Dinner, Pizza
Three Fun Twists on Your Homemade Pizza
Plain cheese is delicious, but sometimes you want a change. I love trying new things with my dough. Here are three of my favorites.
Garden Veggie Surprise: Top your pizza with colorful bell peppers, mushrooms, and black olives. Add a sprinkle of fresh basil after baking. It tastes like summer on a plate!
Spicy Sausage Fiesta: Crumble cooked Italian sausage over the sauce. Add red pepper flakes for a little kick. My nephew calls this the fire-breathing pizza. Which one would you try first? Comment below!
Apple Pie Dessert Pizza: Skip the tomato sauce. Spread softened cream cheese on the dough. Top with thinly sliced apples, cinnamon, and a drizzle of honey. Bake until golden. It’s like a pie you can eat with your hands.
What to Serve with Your Perfect Pizza
A good pizza needs good friends on the plate. I like to serve it with a simple green salad. Toss some lettuce, cherry tomatoes, and a splash of vinaigrette. It’s fresh and crunchy.
Another idea: cucumber sticks with ranch dip. They’re cool and crisp. Perfect for little fingers to grab between slices. You can also add a bowl of marinated olives for a salty bite.
For drinks, try a cold glass of lemonade. It’s bright and tangy. Grown-ups might enjoy a light red wine, like a Pinot Noir. Which would you choose tonight?
Storing Your Pizza Dough Like a Pro
Making pizza dough is fun. But what if you want pizza tonight and don’t have time? You can store the dough for later. That is the magic of planning ahead. Once your dough has risen, you can put it in the fridge. Wrap it tight in plastic wrap. It will stay good for up to three days. The cold slows down the yeast. This actually makes the flavor better. I remember my first time storing dough. I was nervous. But the next day, the pizza tasted even more like a pizzeria.
The freezer is your best friend for batch cooking. You can freeze the dough balls after they rest. Just wrap them in plastic, then put them in a freezer bag. They will keep for three months. When you want pizza, take a ball out. Let it thaw in the fridge overnight. Then let it sit on the counter for 30 minutes. This is why batch cooking matters. You have homemade pizza ready whenever a craving hits. No need to order out. Have you ever tried storing it this way? Share below!
Three Common Pizza Dough Problems and Fixes
Even the best cooks hit a snag. The first problem is dough that is too sticky. Do not panic. Just add flour one tablespoon at a time while you knead. The dough should be soft, not gluey. I once added too much water by accident. A little extra flour saved the day. The second problem is dough that will not rise. This happens when the water is too hot or too cold. The water should feel like a warm bath. If the yeast is old, it will not bubble. Always check the date on your yeast packet.
The third problem is a crust that is too hard. This often means you baked it too long. Remember the hot pan trick. It helps the bottom cook fast. Keep an eye on the oven. Why do these fixes matter? They save you from a sad pizza. They also teach you to trust your hands. You learn what good dough feels like. That confidence will follow you into every recipe. Which of these problems have you run into before?
Your Pizza Dough Questions Answered
Q: Can I use gluten-free flour? A: Yes. Use a gluten-free blend with xanthan gum. The dough will be stickier, so keep your hands wet.
Q: Can I make the dough the night before? A: Yes. Let it rise, then refrigerate it. The flavor gets better overnight.
Q: Can I swap white flour for whole wheat? A: Yes. Use half white and half whole wheat. Whole wheat dough needs a little more water.
Q: How do I scale the recipe for one pizza? A: Cut all ingredients in half. One ball makes one pizza.
Q: Can I add herbs to the dough? A: Yes. Mix in a teaspoon of dried oregano or garlic powder with the flour. *Fun fact: Italians sometimes add a pinch of sugar to help the crust brown.* Which tip will you try first?
A Warm Goodbye from Chloe
I hope you feel ready to make your own pizza dough. It is one of the kindest things you can do for your family. There is nothing like the smell of baking dough in your kitchen. It makes a house feel like a home. I would love to see your pizzas. Snap a picture of your creation. Share it with us. Have you tried this recipe? Tag us on Pinterest! Happy cooking! —Chloe Hartwell.
The Magic of the Yeast
First, you need warm water. Not too hot, just like a warm bath. Mix it with the yeast and a spoonful of sugar. Then you wait. After five or ten minutes, the top gets all bubbly and frothy. *Fun fact: Yeast is a living thing. It eats the sugar and burps out gas. Those little bubbles make the dough puff up and get fluffy.* When you see those bubbles, you know it is working. That step makes me happy every time. This is why the yeast test matters. Dead yeast means flat pizza. Nobody wants a flat, hard crust. We want it soft and chewy. What is your favorite pizza topping? I love simple pepperoni myself. Tell me in your head. Or if you are reading with a friend, say it out loud.Getting Your Hands Dirty
Pour the bubbly yeast mix into a big bowl of flour. Add a little salt and oil. Stir it with a big wooden spoon until it gets too thick. Then use your hands. My mom taught me to knead dough like you are pushing a sleepy cat. You push the dough away, fold it over, and push again. It takes about eight minutes. The dough will tell you when it is ready. Poke it with one finger. If the dent slowly springs back, it is done. That is the finger poke test. This trick matters because under-kneaded dough tears easily. Over-kneaded dough gets tough. Your hands know what to do. Just feel the dough and trust them.Waiting Is the Hardest Part
Oil the bowl so the dough doesn’t stick. Put the dough ball inside. Cover it with plastic wrap, like tucking it in for a nap. Leave it in a warm spot for an hour or two. It will double in size. I put my bowl on top of the fridge. That spot is always a little warm. Why does this matter? The waiting time builds flavor. The yeast keeps working slowly, making the dough taste rich and good. Rushing this step means you miss out on that yummy, bready flavor. Have you ever made something that took a long time to rise? It is always worth it.Shaping Your Pizza
When the dough is big and puffy, punch it down gently. That is the fun part. Cut it into two pieces. You can make one pizza now and freeze the other for later. Let the dough balls rest for fifteen minutes. This makes them easy to stretch. If you try to stretch cold dough, it fights back and shrinks. We learned that the hard way. Roll the dough out on paper dusted with flour or cornmeal. Cornmeal gives the bottom a little crunch, like tiny pebbles on the road. Brush it with olive oil. That stops the sauce from making the dough soggy. Now you can add your sauce, cheese, and toppings. Go wild or keep it simple.The Hot Oven Secret
Turn your oven up high, to 475 degrees. That is really hot. Put your empty pizza pan in the oven while it heats up. This is the secret to a crispy crust. A hot pan cooks the bottom fast. Slide your pizza onto that screaming hot pan and bake for ten to twelve minutes. At the very end, move the pizza to the top rack and turn on the broiler. Watch it closely. In two minutes, the cheese gets bubbly and brown. That is the perfect finish. The crust is crispy, the cheese is melty. I still get excited when I hear that sizzle. It sounds like dinner is ready. Which do you like better: thick crust or thin crust? Take a little poll with your family tonight.Ingredients:
| Ingredient | Amount | Notes |
|---|---|---|
| Warm water (about 105°F/40°C) | 1 ½ cups (360 mL) | Ensure temperature is not too hot or it will kill the yeast |
| Instant yeast | 1 package (1 ¼ oz, 2 ¼ tsp, 7 g) | Can substitute active dry yeast if needed |
| Sugar | 1 Tbsp (15 g) | Helps activate the yeast |
| Salt | 1 tsp | Adds flavor |
| Olive oil | 1 Tbsp (15 mL) + extra for greasing | Extra oil for greasing bowl and pan |
| All-purpose flour | 3 ½ cups (450 g) | Can use bread flour for chewier texture |
The Best Pizza Dough for Little Hands (and Big Bellies)
I still remember the first time I made pizza dough with my grandson. Flour was everywhere. Even on the ceiling! That’s a happy memory now. This recipe is foolproof, which means even a twelve-year-old can do it. Doesn’t that smell amazing when it bakes?
You only need a few simple things from your kitchen. Warm water, yeast, sugar, salt, olive oil, and flour. That’s it. No fancy machines required. Just your hands and a big bowl. Let’s get started, friend.
First, we wake up the yeast. Think of it like a tiny bear coming out of a cave. It gets fizzy and happy. Then we add everything together and knead. That’s the fun part where you push and fold the dough.
Step 1: Pour the warm water into a small bowl. Sprinkle the yeast and sugar on top. Stir it gently, then wait five to ten minutes. You’ll see bubbles and foam. That means the yeast is alive. (Hard-learned tip: Never use water that’s too hot or it will kill the yeast. Lukewarm is perfect, like bath water.)
Step 2: Add the salt and olive oil to the frothy yeast mixture. Stir it with a fork. In a large bowl, dump in the flour. Pour the wet stuff into the flour. Mix with a wooden spoon until it gets too stiff. What do you think makes dough puff up like a soft pillow? … Share below!
Step 3: Dump the dough onto a floured counter. Push it away from you with the heel of your hand. Fold it over, then push again. Keep doing this for eight minutes. The dough will go from sticky to silky smooth. My grandma said it should feel like a baby’s cheek.
Step 4: Poke the dough with one finger. If it slowly springs back, you’re done kneading. Grease a clean bowl with olive oil and place the dough inside. Cover it with plastic wrap. Set it in a warm, draft-free spot for one to two hours. It needs to double in size, like a sleepy balloon.
Step 5: Punch the dough down gently. Cut it into two equal balls. Cover them with plastic wrap and let them rest for fifteen minutes. While you wait, preheat your oven to 475°F (250°C). Put your pizza pan inside the oven to get hot. A hot pan means a crispy crust. Trust me on this!
Step 6: Roll each dough ball onto floured parchment paper. Make it twelve inches for a classic pizza. Brush the top with olive oil. Add your favorite sauce, cheese, and toppings. Slide the pizza onto the hot pan. Bake on the lowest rack for ten to twelve minutes. Then move it to the top rack and broil for two minutes. Watch it so it doesn’t burn!
Cook Time: 12–14 minutes
Total Time: 2 hours 15 minutes
Yield: 2 medium pizzas (8 slices each)
Category: Dinner, Pizza
Three Fun Twists on Your Homemade Pizza
Plain cheese is delicious, but sometimes you want a change. I love trying new things with my dough. Here are three of my favorites.
Garden Veggie Surprise: Top your pizza with colorful bell peppers, mushrooms, and black olives. Add a sprinkle of fresh basil after baking. It tastes like summer on a plate!
Spicy Sausage Fiesta: Crumble cooked Italian sausage over the sauce. Add red pepper flakes for a little kick. My nephew calls this the fire-breathing pizza. Which one would you try first? Comment below!
Apple Pie Dessert Pizza: Skip the tomato sauce. Spread softened cream cheese on the dough. Top with thinly sliced apples, cinnamon, and a drizzle of honey. Bake until golden. It’s like a pie you can eat with your hands.
What to Serve with Your Perfect Pizza
A good pizza needs good friends on the plate. I like to serve it with a simple green salad. Toss some lettuce, cherry tomatoes, and a splash of vinaigrette. It’s fresh and crunchy.
Another idea: cucumber sticks with ranch dip. They’re cool and crisp. Perfect for little fingers to grab between slices. You can also add a bowl of marinated olives for a salty bite.
For drinks, try a cold glass of lemonade. It’s bright and tangy. Grown-ups might enjoy a light red wine, like a Pinot Noir. Which would you choose tonight?
Storing Your Pizza Dough Like a Pro
Making pizza dough is fun. But what if you want pizza tonight and don’t have time? You can store the dough for later. That is the magic of planning ahead. Once your dough has risen, you can put it in the fridge. Wrap it tight in plastic wrap. It will stay good for up to three days. The cold slows down the yeast. This actually makes the flavor better. I remember my first time storing dough. I was nervous. But the next day, the pizza tasted even more like a pizzeria.
The freezer is your best friend for batch cooking. You can freeze the dough balls after they rest. Just wrap them in plastic, then put them in a freezer bag. They will keep for three months. When you want pizza, take a ball out. Let it thaw in the fridge overnight. Then let it sit on the counter for 30 minutes. This is why batch cooking matters. You have homemade pizza ready whenever a craving hits. No need to order out. Have you ever tried storing it this way? Share below!
Three Common Pizza Dough Problems and Fixes
Even the best cooks hit a snag. The first problem is dough that is too sticky. Do not panic. Just add flour one tablespoon at a time while you knead. The dough should be soft, not gluey. I once added too much water by accident. A little extra flour saved the day. The second problem is dough that will not rise. This happens when the water is too hot or too cold. The water should feel like a warm bath. If the yeast is old, it will not bubble. Always check the date on your yeast packet.
The third problem is a crust that is too hard. This often means you baked it too long. Remember the hot pan trick. It helps the bottom cook fast. Keep an eye on the oven. Why do these fixes matter? They save you from a sad pizza. They also teach you to trust your hands. You learn what good dough feels like. That confidence will follow you into every recipe. Which of these problems have you run into before?
Your Pizza Dough Questions Answered
Q: Can I use gluten-free flour? A: Yes. Use a gluten-free blend with xanthan gum. The dough will be stickier, so keep your hands wet.
Q: Can I make the dough the night before? A: Yes. Let it rise, then refrigerate it. The flavor gets better overnight.
Q: Can I swap white flour for whole wheat? A: Yes. Use half white and half whole wheat. Whole wheat dough needs a little more water.
Q: How do I scale the recipe for one pizza? A: Cut all ingredients in half. One ball makes one pizza.
Q: Can I add herbs to the dough? A: Yes. Mix in a teaspoon of dried oregano or garlic powder with the flour. *Fun fact: Italians sometimes add a pinch of sugar to help the crust brown.* Which tip will you try first?
A Warm Goodbye from Chloe
I hope you feel ready to make your own pizza dough. It is one of the kindest things you can do for your family. There is nothing like the smell of baking dough in your kitchen. It makes a house feel like a home. I would love to see your pizzas. Snap a picture of your creation. Share it with us. Have you tried this recipe? Tag us on Pinterest! Happy cooking! —Chloe Hartwell.
Why I Love Making Pizza Dough
Lots of folks buy pizza dough at the store. I used to, too. Then my grandson asked me to teach him how to make it from scratch. I still laugh at that day. He got flour all over his nose. But the pizza we made together? That was the best I ever ate. Making dough at home feels like a secret superpower. You know exactly what goes in it. There is no funny business. Just simple things like flour, water, and yeast. Doesn’t that smell amazing when it bakes? I think it smells like love.The Magic of the Yeast
First, you need warm water. Not too hot, just like a warm bath. Mix it with the yeast and a spoonful of sugar. Then you wait. After five or ten minutes, the top gets all bubbly and frothy. *Fun fact: Yeast is a living thing. It eats the sugar and burps out gas. Those little bubbles make the dough puff up and get fluffy.* When you see those bubbles, you know it is working. That step makes me happy every time. This is why the yeast test matters. Dead yeast means flat pizza. Nobody wants a flat, hard crust. We want it soft and chewy. What is your favorite pizza topping? I love simple pepperoni myself. Tell me in your head. Or if you are reading with a friend, say it out loud.Getting Your Hands Dirty
Pour the bubbly yeast mix into a big bowl of flour. Add a little salt and oil. Stir it with a big wooden spoon until it gets too thick. Then use your hands. My mom taught me to knead dough like you are pushing a sleepy cat. You push the dough away, fold it over, and push again. It takes about eight minutes. The dough will tell you when it is ready. Poke it with one finger. If the dent slowly springs back, it is done. That is the finger poke test. This trick matters because under-kneaded dough tears easily. Over-kneaded dough gets tough. Your hands know what to do. Just feel the dough and trust them.Waiting Is the Hardest Part
Oil the bowl so the dough doesn’t stick. Put the dough ball inside. Cover it with plastic wrap, like tucking it in for a nap. Leave it in a warm spot for an hour or two. It will double in size. I put my bowl on top of the fridge. That spot is always a little warm. Why does this matter? The waiting time builds flavor. The yeast keeps working slowly, making the dough taste rich and good. Rushing this step means you miss out on that yummy, bready flavor. Have you ever made something that took a long time to rise? It is always worth it.Shaping Your Pizza
When the dough is big and puffy, punch it down gently. That is the fun part. Cut it into two pieces. You can make one pizza now and freeze the other for later. Let the dough balls rest for fifteen minutes. This makes them easy to stretch. If you try to stretch cold dough, it fights back and shrinks. We learned that the hard way. Roll the dough out on paper dusted with flour or cornmeal. Cornmeal gives the bottom a little crunch, like tiny pebbles on the road. Brush it with olive oil. That stops the sauce from making the dough soggy. Now you can add your sauce, cheese, and toppings. Go wild or keep it simple.The Hot Oven Secret
Turn your oven up high, to 475 degrees. That is really hot. Put your empty pizza pan in the oven while it heats up. This is the secret to a crispy crust. A hot pan cooks the bottom fast. Slide your pizza onto that screaming hot pan and bake for ten to twelve minutes. At the very end, move the pizza to the top rack and turn on the broiler. Watch it closely. In two minutes, the cheese gets bubbly and brown. That is the perfect finish. The crust is crispy, the cheese is melty. I still get excited when I hear that sizzle. It sounds like dinner is ready. Which do you like better: thick crust or thin crust? Take a little poll with your family tonight.Ingredients:
| Ingredient | Amount | Notes |
|---|---|---|
| Warm water (about 105°F/40°C) | 1 ½ cups (360 mL) | Ensure temperature is not too hot or it will kill the yeast |
| Instant yeast | 1 package (1 ¼ oz, 2 ¼ tsp, 7 g) | Can substitute active dry yeast if needed |
| Sugar | 1 Tbsp (15 g) | Helps activate the yeast |
| Salt | 1 tsp | Adds flavor |
| Olive oil | 1 Tbsp (15 mL) + extra for greasing | Extra oil for greasing bowl and pan |
| All-purpose flour | 3 ½ cups (450 g) | Can use bread flour for chewier texture |
The Best Pizza Dough for Little Hands (and Big Bellies)
I still remember the first time I made pizza dough with my grandson. Flour was everywhere. Even on the ceiling! That’s a happy memory now. This recipe is foolproof, which means even a twelve-year-old can do it. Doesn’t that smell amazing when it bakes?
You only need a few simple things from your kitchen. Warm water, yeast, sugar, salt, olive oil, and flour. That’s it. No fancy machines required. Just your hands and a big bowl. Let’s get started, friend.
First, we wake up the yeast. Think of it like a tiny bear coming out of a cave. It gets fizzy and happy. Then we add everything together and knead. That’s the fun part where you push and fold the dough.
Step 1: Pour the warm water into a small bowl. Sprinkle the yeast and sugar on top. Stir it gently, then wait five to ten minutes. You’ll see bubbles and foam. That means the yeast is alive. (Hard-learned tip: Never use water that’s too hot or it will kill the yeast. Lukewarm is perfect, like bath water.)
Step 2: Add the salt and olive oil to the frothy yeast mixture. Stir it with a fork. In a large bowl, dump in the flour. Pour the wet stuff into the flour. Mix with a wooden spoon until it gets too stiff. What do you think makes dough puff up like a soft pillow? … Share below!
Step 3: Dump the dough onto a floured counter. Push it away from you with the heel of your hand. Fold it over, then push again. Keep doing this for eight minutes. The dough will go from sticky to silky smooth. My grandma said it should feel like a baby’s cheek.
Step 4: Poke the dough with one finger. If it slowly springs back, you’re done kneading. Grease a clean bowl with olive oil and place the dough inside. Cover it with plastic wrap. Set it in a warm, draft-free spot for one to two hours. It needs to double in size, like a sleepy balloon.
Step 5: Punch the dough down gently. Cut it into two equal balls. Cover them with plastic wrap and let them rest for fifteen minutes. While you wait, preheat your oven to 475°F (250°C). Put your pizza pan inside the oven to get hot. A hot pan means a crispy crust. Trust me on this!
Step 6: Roll each dough ball onto floured parchment paper. Make it twelve inches for a classic pizza. Brush the top with olive oil. Add your favorite sauce, cheese, and toppings. Slide the pizza onto the hot pan. Bake on the lowest rack for ten to twelve minutes. Then move it to the top rack and broil for two minutes. Watch it so it doesn’t burn!
Cook Time: 12–14 minutes
Total Time: 2 hours 15 minutes
Yield: 2 medium pizzas (8 slices each)
Category: Dinner, Pizza
Three Fun Twists on Your Homemade Pizza
Plain cheese is delicious, but sometimes you want a change. I love trying new things with my dough. Here are three of my favorites.
Garden Veggie Surprise: Top your pizza with colorful bell peppers, mushrooms, and black olives. Add a sprinkle of fresh basil after baking. It tastes like summer on a plate!
Spicy Sausage Fiesta: Crumble cooked Italian sausage over the sauce. Add red pepper flakes for a little kick. My nephew calls this the fire-breathing pizza. Which one would you try first? Comment below!
Apple Pie Dessert Pizza: Skip the tomato sauce. Spread softened cream cheese on the dough. Top with thinly sliced apples, cinnamon, and a drizzle of honey. Bake until golden. It’s like a pie you can eat with your hands.
What to Serve with Your Perfect Pizza
A good pizza needs good friends on the plate. I like to serve it with a simple green salad. Toss some lettuce, cherry tomatoes, and a splash of vinaigrette. It’s fresh and crunchy.
Another idea: cucumber sticks with ranch dip. They’re cool and crisp. Perfect for little fingers to grab between slices. You can also add a bowl of marinated olives for a salty bite.
For drinks, try a cold glass of lemonade. It’s bright and tangy. Grown-ups might enjoy a light red wine, like a Pinot Noir. Which would you choose tonight?
Storing Your Pizza Dough Like a Pro
Making pizza dough is fun. But what if you want pizza tonight and don’t have time? You can store the dough for later. That is the magic of planning ahead. Once your dough has risen, you can put it in the fridge. Wrap it tight in plastic wrap. It will stay good for up to three days. The cold slows down the yeast. This actually makes the flavor better. I remember my first time storing dough. I was nervous. But the next day, the pizza tasted even more like a pizzeria.
The freezer is your best friend for batch cooking. You can freeze the dough balls after they rest. Just wrap them in plastic, then put them in a freezer bag. They will keep for three months. When you want pizza, take a ball out. Let it thaw in the fridge overnight. Then let it sit on the counter for 30 minutes. This is why batch cooking matters. You have homemade pizza ready whenever a craving hits. No need to order out. Have you ever tried storing it this way? Share below!
Three Common Pizza Dough Problems and Fixes
Even the best cooks hit a snag. The first problem is dough that is too sticky. Do not panic. Just add flour one tablespoon at a time while you knead. The dough should be soft, not gluey. I once added too much water by accident. A little extra flour saved the day. The second problem is dough that will not rise. This happens when the water is too hot or too cold. The water should feel like a warm bath. If the yeast is old, it will not bubble. Always check the date on your yeast packet.
The third problem is a crust that is too hard. This often means you baked it too long. Remember the hot pan trick. It helps the bottom cook fast. Keep an eye on the oven. Why do these fixes matter? They save you from a sad pizza. They also teach you to trust your hands. You learn what good dough feels like. That confidence will follow you into every recipe. Which of these problems have you run into before?
Your Pizza Dough Questions Answered
Q: Can I use gluten-free flour? A: Yes. Use a gluten-free blend with xanthan gum. The dough will be stickier, so keep your hands wet.
Q: Can I make the dough the night before? A: Yes. Let it rise, then refrigerate it. The flavor gets better overnight.
Q: Can I swap white flour for whole wheat? A: Yes. Use half white and half whole wheat. Whole wheat dough needs a little more water.
Q: How do I scale the recipe for one pizza? A: Cut all ingredients in half. One ball makes one pizza.
Q: Can I add herbs to the dough? A: Yes. Mix in a teaspoon of dried oregano or garlic powder with the flour. *Fun fact: Italians sometimes add a pinch of sugar to help the crust brown.* Which tip will you try first?
A Warm Goodbye from Chloe
I hope you feel ready to make your own pizza dough. It is one of the kindest things you can do for your family. There is nothing like the smell of baking dough in your kitchen. It makes a house feel like a home. I would love to see your pizzas. Snap a picture of your creation. Share it with us. Have you tried this recipe? Tag us on Pinterest! Happy cooking! —Chloe Hartwell.




Leave a Reply