
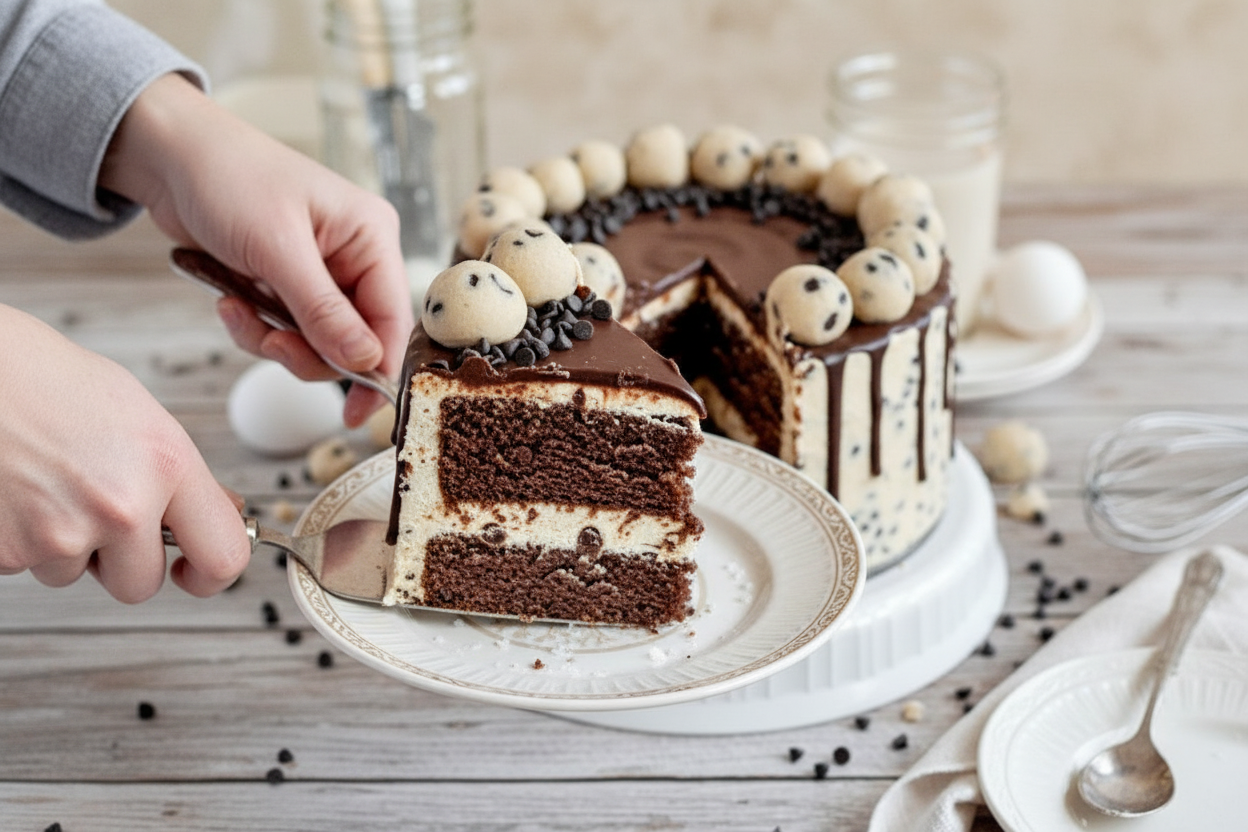
A Cake That Reminds Me of Sunday Mornings
I remember the first time I baked this cake. My kitchen smelled like a warm cookie shop. My grandkids were peeking over the counter. This Cake is called Cookie Dough Cake. It has soft brown sugar layers. It has creamy frosting with little chocolate chips. And yes, there is real cookie dough inside. I still laugh at how my grandson tried to eat the dough before it went in the cake. I had to hide a bowl of it in the fridge. Have you ever had to hide ingredients from your family?Why This Cake Is Special (Even With Allergies)
This recipe works with gluten-free flour and plant-based butter. My friend Sarah has a gluten issue. She cried happy tears when she tried a slice. Why this matters: Everyone should enjoy a birthday cake. No one should feel left out because of food rules. You can swap the buttermilk for almond milk with a splash of vinegar. Why this matters more: When you share food that works for everyone, you share love. That is the whole point of baking. Do you cook for someone with food allergies? Tell me about it. I love hearing how families make it work.The Secret to That Cookie Dough
The cookie dough in this cake is safe to eat raw. The trick is heat-treated flour. You spread flour on a baking sheet and bake it at 350°F for 5 minutes. *Fun fact: Heat-treated flour kills any bad germs. That is how bakeries make cookie dough ice cream safe. The dough tastes just like the one you lick off the spoon. Only now you can eat a whole bowl without worrying. Doesn’t that smell amazing? The brown sugar and vanilla in this dough will fill your whole house.The Frosting That Made Me Change My Mind
I used to think cream cheese frosting was only for carrot cake. Then I tried this one. It has brown sugar and butter mixed in. Beat it for a full 5 to 10 minutes. You want it light and fluffy like a cloud. The mini chocolate chips go in at the very end. I once left the mixer on too long by accident. The frosting got even better. Sometimes happy accidents make the best recipes. What is your favorite kind of frosting? I am always looking for new ideas.Stacking the Cake Like a Pro (Or a Grandma)
First, level the cake layers. A sharp knife works fine. You want flat tops so the cake does not wobble. Spread a thin coat of frosting all over. This is called a crumb coat. It traps the loose crumbs so your final coat looks pretty. Pop the cake in the fridge for 20 minutes. This is the secret to smooth frosting. I learned this after years of messy cakes. Does your cake ever slide around? Put a little frosting on the plate first. That holds it still like glue.The Ganache Drip That Wows Everyone
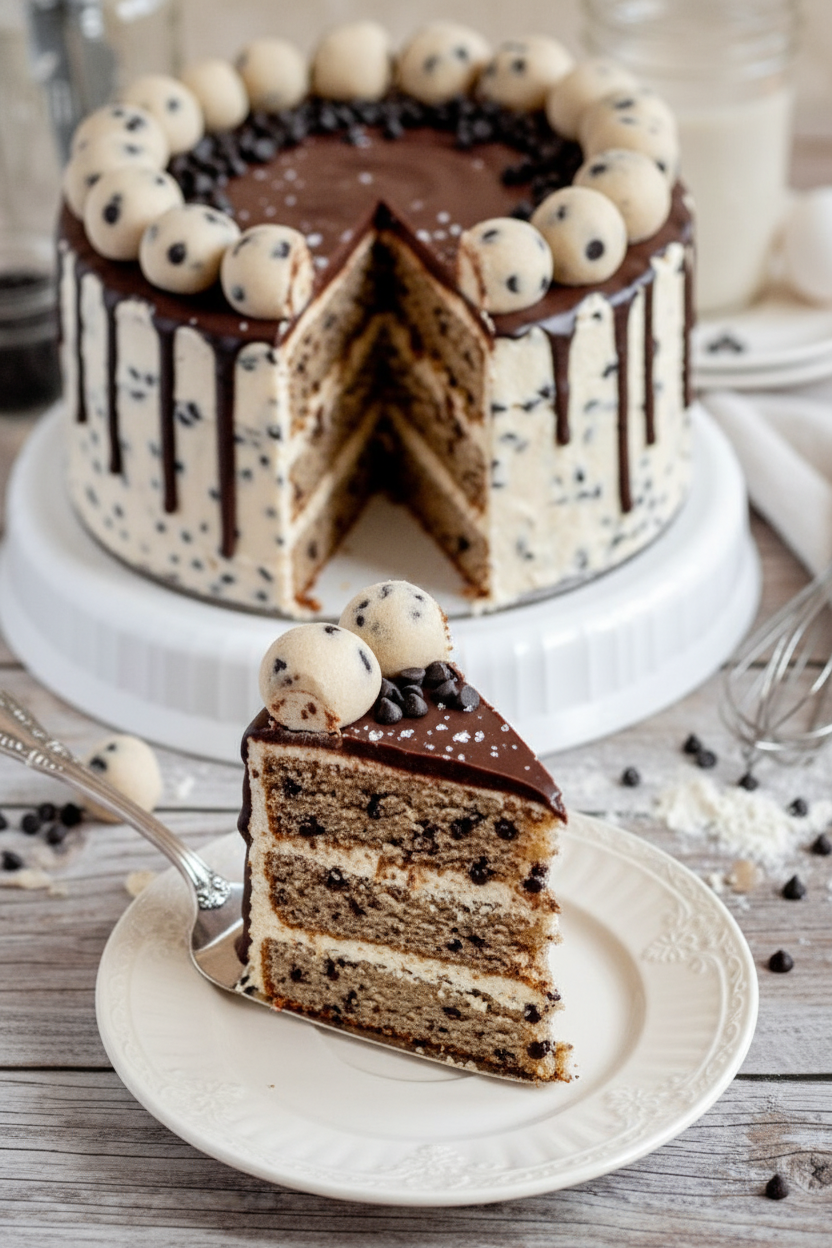
The chocolate ganache is just two ingredients. Chocolate chips and heavy cream. Heat them together in the microwave in 30-second bursts. Let it cool for a few minutes. If it is too hot, it will run right off the cake. If it is too cold, it will not drip at all. I use a spoon to drip it over the edges. My granddaughter calls it the chocolate waterfall. She asks for extra drips every time. Do you like your cake simple or fancy? This one looks fancy but is easy enough for a Tuesday.The Best Part: Rolling Cookie Dough Balls
Save half of your cookie dough for the top. Roll it into little balls. Place them right on the frosting. This cake keeps well. Leave it on the counter for two days. Or put it in the fridge for five days. You can even freeze it for three months. I always make extra cookie dough just for snacking. My husband says I hide it from him. I do not hide it. I just put it in the back of the fridge. Here is a little poll for you: Do you eat cake for breakfast the next day? I vote yes. Cold cake is a gift.Ingredients:
| Ingredient | Amount | Notes |
|---|---|---|
| Flour (cake flour or gluten-free 1:1 baking blend) | 2 1/2 cups (300g) | |
| Baking powder | 2 1/2 teaspoons | |
| Fine sea salt | 1 teaspoon | |
| Butter, room temperature (plant-based or regular) | 3/4 cup (170g) | for brown sugar cake |
| Brown sugar | 1 1/2 cups (300g) | for brown sugar cake |
| Vegetable oil | 3 tablespoons (45ml) | |
| Vanilla extract | 1 tablespoon (15ml) | |
| Large eggs, room temperature | 4 | |
| Buttermilk (plant-based or regular) | 1 1/4 cups (300ml) | |
| Butter, room temperature (plant-based or regular) | 1/2 cup (114g) | for cookie dough cream cheese buttercream |
| Cream cheese, room temperature (plant-based or regular) | 1 block (226g/8oz) | |
| Brown sugar | 2/3 cup (145g) | for buttercream |
| Powdered sugar | 4 cups (480g) | |
| Fine sea salt | 1 teaspoon | for buttercream |
| Mini chocolate chips (plant-based or regular) | 1/2 cup (84g) | for buttercream |
| Butter, room temperature (plant-based or regular) | 1/2 cup (114g) | for cookie dough |
| Brown sugar | 2/3 cup (145g) | for cookie dough |
| Vanilla extract | 1 teaspoon | for cookie dough |
| Heat-treated flour (see note) | 1 cup (120g) | |
| Coarse sea salt | 1 teaspoon | for cookie dough |
| Mini chocolate chips (plant-based or regular) | 1/2 cup (84g) | for cookie dough (double recipe for decor) |
| Chocolate chips (plant-based or regular) | 1/3 cup (55g) | for ganache |
| Heavy cream (plant-based or regular) | 1/3 cup (80ml) | for ganache |
The Cake That Tastes Like a Cookie
I still remember the first time I made this cake. My grandson looked at me like I had pulled a magic trick. He took one bite and said, “Grandma, is this a cookie or a cake?” I just smiled. That is the whole point of this recipe. It combines two of the best desserts in one soft, dreamy bite. You get brown sugar cake layers, creamy cookie dough frosting, and a chocolate drip on top. Doesn’t that sound amazing?
Now, this cake is special because it works for everyone. It is gluten free and dairy free friendly. That means no one has to sit out when dessert time comes. I have made it for birthdays, potlucks, and just because it was Tuesday. Every time, someone asks for the recipe. So pull up a stool and let me walk you through it. You can do this, I promise.
Before we start, let me share a little secret. The key is to have your ingredients at room temperature. Cold butter and cold eggs do not play nice together. They will make your batter lumpy and sad. (Here is a hard-learned tip: set your eggs and butter on the counter an hour before baking. Your mixer will thank you.) Now, let’s get our hands a little floury. Ready?
Let’s Bake the Brown Sugar Cake Layers
Step 1: Preheat your oven to 350 degrees. Grab two 8-inch round cake pans. Spray them with non-stick spray and line the bottoms with parchment paper. I always do this. It saves you from crying when the cake sticks. Trust me on this one.
Step 2: In a small bowl, whisk together the flour, baking powder, and salt. Set it aside for now. In a large bowl, beat the butter, brown sugar, and oil on high speed. Beat until it looks fluffy and light. This takes about 4 or 5 minutes. I like to hum a little song while I do this.
Step 3: Add the eggs and vanilla to the butter mixture. Mix until it is all smooth and combined. Scrape down the sides of the bowl with a rubber spatula. Do not skip this step. You want every bit of that sugary goodness mixed in. My aunt Millie taught me that trick.
Step 4: Add half of the dry flour mixture to the bowl. Mix on low until it is almost combined. Then pour in the milk. The batter might look a little curdled or separated at this point. Do not panic. That is normal. Just keep going and add the rest of the dry ingredients.
Step 5: Mix until just combined. Do not overmix, or the cake will be tough. Divide the batter evenly between the two pans. Bake for 25 to 30 minutes. You will know it is done when the edges pull away from the pan and a toothpick comes out with a few moist crumbs. Let the cakes cool in the pans for 10 minutes, then flip them onto a wire rack to cool completely. (Here is a hard-learned tip: do not frost a warm cake. It will melt into a puddle. Be patient.)
Mini-quiz time! What is the most important thing to remember when mixing wet and dry ingredients together? Is it speed, order, or patience? Share below!
Cook Time: 25-30 minutes
Total Time: 1 hour 15 minutes
Yield: One 2-layer 8-inch cake
Category: Dessert, Cake
Three Fun Twists to Try
Peanut Butter Dream: Swap out the cookie dough filling for a layer of creamy peanut butter. Just mix 1 cup of peanut butter with 1/2 cup of powdered sugar. Spread it between the cake layers. It tastes like a Reese’s cup exploded in cake form.
Mint Chocolate Chip: Add 1 teaspoon of peppermint extract to the buttercream. Use dark chocolate chips instead of mini ones. The cool mint and rich chocolate are a match made in heaven. It feels like eating a thin mint cookie but bigger and softer.
S’mores Surprise: After you frost the cake, press crushed graham crackers onto the sides. Top with toasted mini marshmallows. It tastes just like sitting around a campfire, minus the smoke in your eyes. My neighbor’s kids went wild for this version.
Which one would you try first? Comment below!
How to Serve and Drink with Cake
This cake is rich and sweet, so keep the sides simple. A small scoop of vanilla ice cream or a dollop of whipped cream is perfect. I like to add a few fresh raspberries on the plate. Their tartness cuts through the sweetness. It makes each bite feel new again.
For something cozy, pour yourself a tall glass of cold milk. It is the classic choice for a reason. For the grown-ups, a cup of black coffee pairs wonderfully. The bitterness balances the sugary frosting. My husband always says it is his favorite dessert-and-coffee moment.
Which would you choose tonight? A frosty glass of milk or a warm mug of coffee? I love hearing what you all pick at the dinner table.
Your Cake, All Wrapped Up: Storing and Batch Baking
This cake is a keeper. Store leftovers in an airtight container at room temperature for up to 2 days. For longer, pop it in the fridge for up to 5 days. I once forgot a slice on the counter overnight. It was still good the next morning, but a bit sad. The fridge keeps it fresh and firm.
You can freeze this cake for up to 3 months. Wrap each slice tightly in plastic wrap, then foil. Thaw in the fridge overnight. I remember freezing a whole cake for my daughter’s birthday. It tasted just as good a month later. Batch cooking is a lifesaver for busy weeks. You make one cake, but enjoy it for days.
Have you ever tried storing it this way? Share below! Storing right means less waste. It also means you always have a treat ready. That matters when life gets hectic. Your future self will thank you.
Oopsies! Three Common Troubles and Fixes
First, your cake layers might dome. That is normal. Just level them with a knife before stacking. I once skipped this step and my cake wobbled like a top. A flat top makes a steady stack. Why this matters: a stable cake is easier to frost. You feel proud when it stands tall.
Second, your buttercream might look curdled. This happens when ingredients are cold. Let your butter and cream cheese sit out for an hour first. I remember my first time, I cried over lumpy frosting. Now I always check the temperature. Why this matters: smooth frosting tastes better and spreads like a dream.
Third, your ganache might drip too fast. Let it cool a little before dripping. I once poured hot ganache and it ran off the cake like a river. Wait until it thickens to honey. Which of these problems have you run into before? Fixing them builds your skills. You get better every time.
Your Questions, Answered Quick
Q: Can I make this gluten-free?
A: Yes, use a gluten-free 1:1 baking blend. It works perfectly.
Q: Can I make it ahead?
A: Bake the cakes a day early. Wrap them and frost the next day.
Q: Can I swap ingredients?
A: Use plant-based butter and cream cheese for dairy-free. It tastes just as rich.
Q: How do I scale the recipe?
A: Double it for a bigger cake. Halve it for a smaller one. Just adjust your pan size.
Q: Any tips for the cookie dough?
A: Heat-treat the flour in the oven at 350°F for 5 minutes. This kills germs safely.
Which tip will you try first?
A Warm Goodbye from Chloe
Thank you for baking with me. This cake is made for sharing. It reminds me of cozy Sundays and big smiles. I hope you make it for someone you love. Take a photo and show me your creation. Have you tried this recipe? Tag us on Pinterest!
*Fun fact: This cake uses heat-treated flour so the cookie dough is safe to eat raw.* Happy cooking!
—Chloe Hartwell.
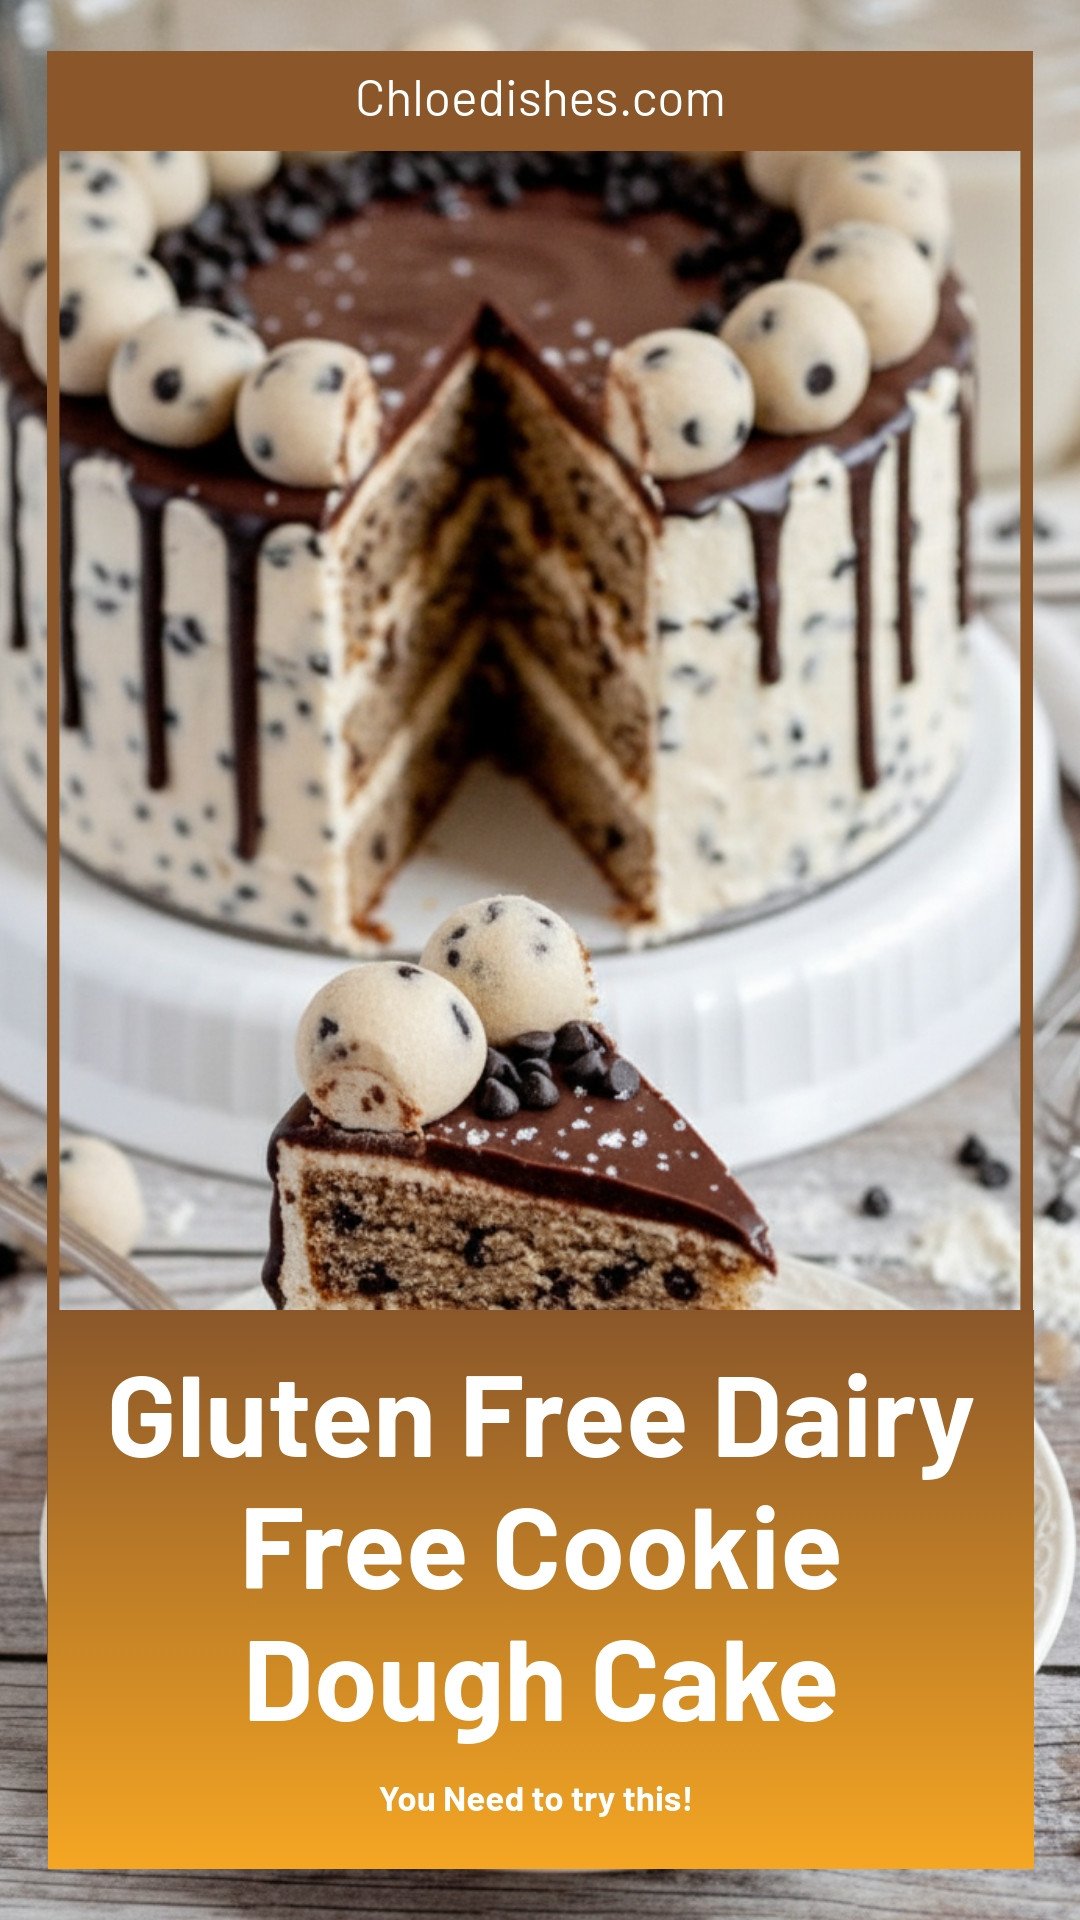

Gluten Free Dairy Free Cookie Dough Cake
Description
Decadent Gluten Free Dairy Free Cookie Dough Cake recipe! An easy, safe dessert for everyone. A rich, edible cookie dough cake you must try.
Ingredients
Brown Sugar Cake2 1/2 cups (300g) flour *cake flour or gluten-free 1:1 baking blend2 1/2 teaspoon baking powder1 teaspoon fine sea salt3/4 cup (170g) butter, room temperature *plant-based or regular1 1/2 cup (300g) brown sugar3 tablespoons (45ml) vegetable oil1 tablespoon (15ml) vanilla extract4 large eggs, room temperature1 1/4 cups (300ml) buttermilk *plant-based or regular
Cookie Dough Cream Cheese Buttercream1/2 cup (114g) butter, room temperature *plant-based or regular1 block (226g/8oz) cream cheese, room temperature *plant-based or regular2/3 cup (145g) brown sugar4 cups (480g) powdered sugar1 teaspoon fine sea salt1/2 cup (84g) mini chocolate chips *plant-based or regular
Cookie Dough1/2 cup (114g) butter, room temperature *plant-based or regular2/3 cup (145g) brown sugar1 teaspoon vanilla extract1 cup (120g) heat-treated flour **see note1 teaspoon coarse sea salt1/2 cup (84g) mini chocolate chips *plant-based or regularIf you want enough cookie dough to use as decor, as in the cake pictured, you will want to double this recipe.
Chocolate Ganache1/3 cup (55g) chocolate chips *plant-based or regular1/3 cup (80ml) heavy cream *plant-based or regular
Instructions
Brown Sugar CakePreheat the oven to 350ºF and prepare two 8-inch round cake pans with non-stick baking spray and parchment paper.Combine the flour, baking powder, and salt in a small mixing bowl and whisk together.With a stand or electric mixer, cream together the butter, brown sugar, and oil on high speed until fluffy. This should take approximately 4-5 minutes.Add in the eggs and vanilla extract and mix until fully combined and smooth. Scrape down the sides of the bowl when needed.Add in half of the dry ingredients and mix on low until almost combined.Pour in the milk and mix until well combined. Note that the batter might look separated or curdled at this point. It’s okay; keep going.Add in the remaining dry ingredients and mix until just combined. Scrape down the sides of the bowl when needed.Divide the batter evenly between the two prepared cake pans and bake for approximately 25-30 minutes or until the edges are pulling away from the pans and a toothpick inserted comes out with a few moist crumbs.Remove from the oven and allow to cool for 10 minutes before removing to a wire rack to cool fully.
Cookie Dough Cream Cheese ButtercreamIn a stand mixer or electric mixer, cream together the butter, cream cheese, and brown sugar on high speed until light and fluffy. This should take approximately 5-10 minutes.Add in the powdered sugar and salt and mix on low until combined.Turn the mixer up to high and allow to beat for 5 minutes.Cover and chill until ready to use.Once the cake has been stacked and crumb-coated, gently fold in the mini chocolate chips into the remaining buttercream. Again, cover and chill until ready to use.
Chocolate Chip Cookie DoughWith a stand or electric mixer, cream together the butter, brown sugar, and vanilla until light and fluffy. This should take approximately 4-5 minutes.Add in the heat-treated flour (see note) and salt and mix on low until a dough forms.Gently fold in the mini chocolate chips.
GanacheCombine the chocolate chips and cream in a microwave-safe bowl and heat in 30-second intervals, stirring after each interval, until fully melted and smooth.
Cake AssemblyLevel each fully cooled cake layer with a cake leveler or knife if needed.Place one leveled layer of cake on a cake board, plate, and/or cake turntable and spread approximately 1 cup of the cookie dough buttercream on top.Pipe a buttercream border around the edge of the cake and fill with the edible cookie dough. If you doubled the recipe to have enough for the cookie dough balls on top to decorate, fill the cake will half of the cookie dough you made.Top with the remaining cake layer and gently apply a thin coat of buttercream. Chill the cake for 20 minutes. *If the cake feels unstable or the buttercream becomes too soft at any point while stacking, stop and chill the cake and frosting for 15 minutes and start again where you left off.Add the mini chocolate chips to the remaining buttercream and spread a final layer of buttercream on the cake and smooth the sides and top with a cake smoother and offset spatula. Chill in the fridge for another 10 minutes. Due to the mini chocolate chips, the frosting will not be very smooth on the cake, and the top edge will not be sharp. Do the best you can. Chill the cake for 10 minutes while you prepare the ganache.With a spoon, squeeze bottle, or piping bag, drip the chocolate ganache over the edges of the cake. Place back in the fridge until the drip sets. See the note for chocolate ganache drip tips.Roll the remaining cookie dough into balls and place on top of the cake. Enjoy!Store leftover cake in an airtight container at room temperature for up to 2 days, in the fridge for up to 5 days, or in the freezer for up to 3 months.
Notes
- If you want enough cookie dough to use as decor, as in the cake pictured, you will want to double the cookie dough recipe. See note for heat-treated flour instructions. For chocolate ganache drip tips: wait until ganache is slightly cooled but still pourable before dripping.


Leave a Reply