

The Day I Learned to Love Pumpkin Cake
The first time I made this pumpkin cake, I was nervous. My granddaughter had just told me she couldn’t eat gluten or dairy anymore. I thought, “How can a cake be good without butter and wheat flour?” I still laugh at that memory. I pulled the cake out of the oven, and it smelled like autumn in a pan. The kitchen was warm and sweet. My granddaughter took one bite and said it was the best cake she ever had. That moment taught me something important. Why this matters: You don’t need fancy ingredients to make someone feel loved. Sometimes the best recipes come from needing to care for others. Have you ever changed a recipe for someone you love?What Makes This Cake So Special
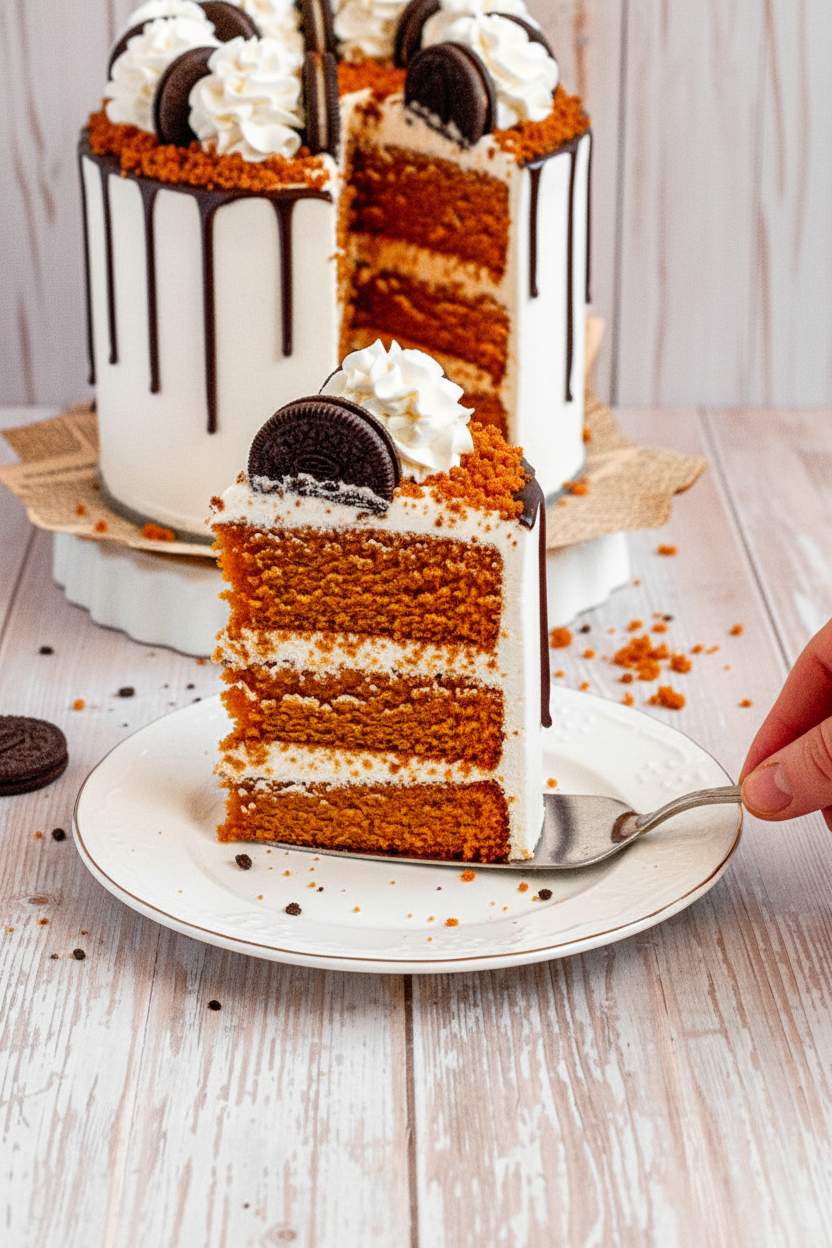
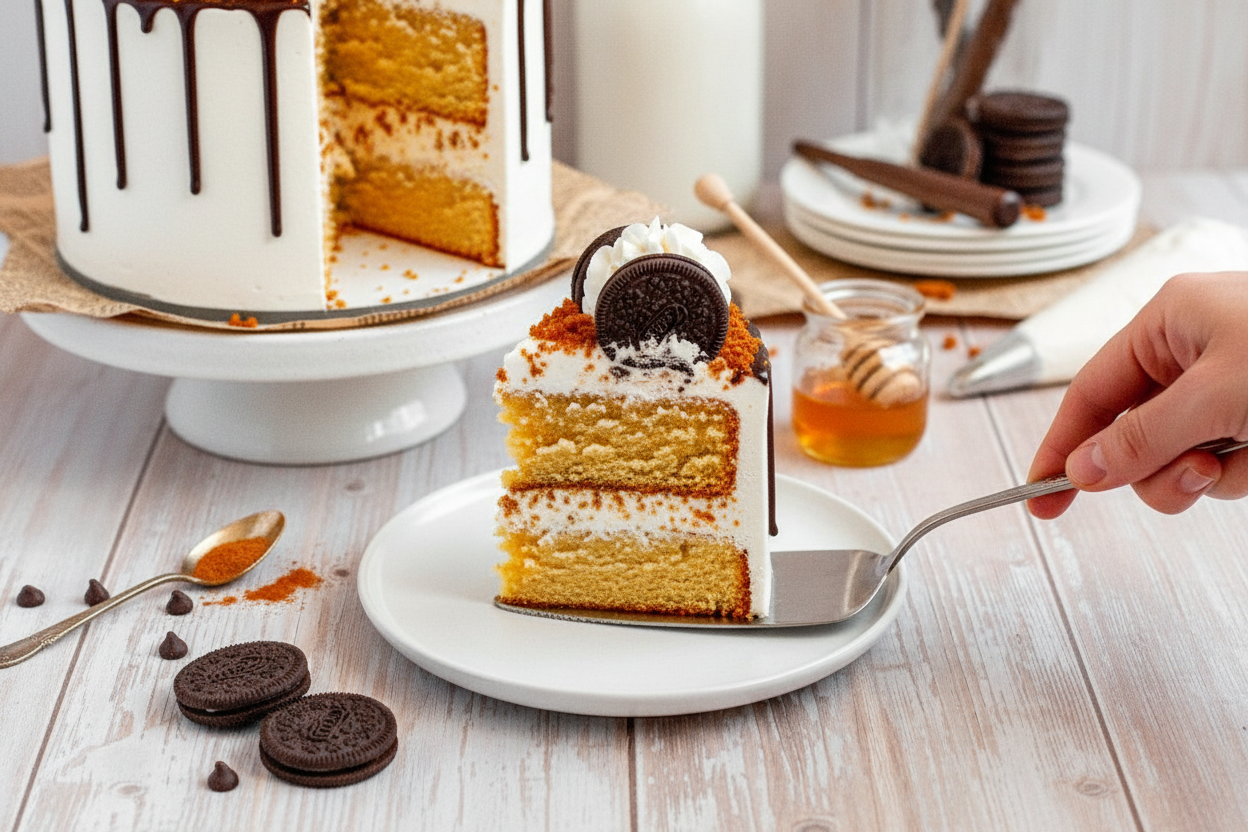
This cake is soft and moist like a hug. The pumpkin gives it a warm, golden color. The honey adds a gentle sweetness that isn’t too heavy. Doesn’t that smell amazing when it bakes? The buttercream is creamy and rich, but it uses dairy-free cream cheese. You would never guess it’s different from regular frosting. The chocolate ganache on top makes it look fancy, but it’s so easy to make. *Fun fact: Pumpkin is actually a fruit, not a vegetable. It belongs to the squash family. So technically, this cake counts as fruit cake. I love how the three layers stack up tall and proud. It looks like a bakery cake, but you made it in your own kitchen. Would you rather have a tall layered cake or a simple sheet cake for a birthday?My Secret for Easy Baking
When I make this cake, I always set out my eggs first. Let them sit on the counter for 20 minutes. Room temperature eggs mix better and make the cake fluffier. It’s a small trick that makes a big difference. I also use a gluten-free 1:1 baking blend. That means you can swap it cup for cup with regular flour. No math or guessing needed. Just measure and pour. Why this matters: Baking doesn’t have to be complicated. Small steps like letting eggs warm up can help anyone succeed. Even if you are twelve years old, you can do this. What is the first thing you ever baked by yourself?The Frosting That Almost Got Away
One time, I was in a hurry and dumped all the powdered sugar in at once. Oh my goodness, a white cloud flew up and covered my whole face. I looked like a snowman in the kitchen. My husband walked in and laughed so hard he cried. Now I always start the mixer on low. I add the sugar a little at a time until it’s safe. Then I turn it up to high and let it beat for five full minutes. That’s how you get light, fluffy buttercream that spreads like a dream. The honey in the frosting gives it a special flavor. It is not too sweet, just right. Have you ever tried honey in frosting before? Would you add anything else to make it your own?Putting It All Together
Assembly is like building a tower of treats. First, you level the cake layers with a knife. Just cut off the little bump on top. Then place one layer on a plate, add frosting, and repeat. The thin layer of frosting on the outside is called a crumb coat. It catches all the little loose crumbs so the final layer looks smooth and clean. Don’t skip this step, even if you are hungry. Your cake will thank you. After the ganache drip and cookie decorations, the cake looks like a masterpiece. But remember, even if it looks messy, it will still taste wonderful. That’s the truth I learned from years of baking.How to Keep Your Cake Happy
This cake stays fresh in the fridge for up to five days. Just keep it in a closed container. If you want to save it longer, you can freeze it for six months. Wrap it well so it doesn’t pick up any funny smells from the freezer. I like to make an extra cake and hide it in the freezer. Then on a rainy day, I pull it out and we have a surprise party. Just me and my family, eating cake in our pajamas. Would you freeze a cake for later or eat it all in one go? I won’t judge either answer. I’ve done both many times.The Best Part of Baking
At the end of the day, this pumpkin cake is about more than ingredients. It is about sharing something good with the people you care about. It is about making a dessert that everyone can enjoy, no matter what their body needs. When you see someone take a bite and smile, that is the real magic. That is why I keep baking, even after all these years. So go ahead, preheat your oven, and make someone’s day a little sweeter. What is the nicest thing someone has ever baked for you? I would love to hear your story.Ingredients:
| Ingredient | Amount | Notes |
|---|---|---|
| Pumpkin puree | 1 can (15oz.) | |
| Honey | 1 1/4 cups (400g) | For cake |
| Canola or vegetable oil | 3/4 cup (177ml) | |
| Applesauce | 1/2 cup (118ml) | |
| Eggs | 3 large | Room temperature |
| Gluten-free 1:1 baking blend | 2 cups (256g) | |
| Baking soda | 2 teaspoons | |
| Pumpkin pie spice | 2 teaspoons | |
| Salt | 1 teaspoon | For cake |
| Dairy-free salted butter | 1 cup (227g) | Room temperature |
| Dairy-free cream cheese, full-fat | 1 package (200g) | |
| Powdered sugar | 6 cups (720g) | |
| Honey | 2 tablespoons | For buttercream |
| Salt | 1 teaspoon | For buttercream |
| Dairy-free chocolate chips | 1/2 cup (120g) | |
| Dairy-free heavy cream | 1/4 cup (59ml) | |
| Chocolate cookies for decor | Optional |
That Time I Baked a Cake for a Rainy Day
I still remember the first pumpkin cake I made for my grandson. It was a chilly, gray afternoon, and the kitchen smelled like a warm hug. He has a lot of food allergies, so I had to get a little creative. Doesn’t that smell amazing? That day, I learned that gluten-free and dairy-free doesn’t mean flavor-free. This cake is proof.
We used honey instead of sugar, and applesauce for extra moisture. I still laugh at how worried I was that it would turn out dry. But the first bite? Pure gold. My grandson asked for seconds before he even finished his first slice.
Before we start, a little secret. Room temperature eggs are your best friend here. They mix more smoothly and help the cake rise just right. Now, let’s get our hands a little messy and bake something wonderful.
Step 1: Preheat your oven to 350°F. Grease three 6-inch round cake pans with non-stick spray and line the bottoms with parchment paper. I once forgot the parchment paper, and the cakes stuck like glue. (Hard-learned tip: don’t skip the parchment paper—it saves your cake and your sanity.)
Step 2: In a large bowl, whisk together one can of pumpkin puree, 1 1/4 cups of honey, 3/4 cup of canola oil, 1/2 cup of applesauce, and three large eggs. Whisk until it looks smooth and golden. My little helper always asks to lick the spoon at this point.
Step 3: Add in 2 cups of gluten-free baking flour, 2 teaspoons of baking soda, 2 teaspoons of pumpkin pie spice, and 1 teaspoon of salt. Stir gently until just combined. Over-mixing makes the cake tough. Think of it like folding laundry—gentle and steady wins.
Step 4: Divide the batter evenly into the three pans. Bake for 30 to 35 minutes. You’ll know they’re done when the edges pull away from the pan and a toothpick comes out with a few moist crumbs. Does your toothpick come out clean? Share below!
Step 5: Let the cakes cool in the pans for 10 minutes. Then flip them onto a wire rack to cool completely. Patience is hard, I know, but a warm cake will melt your frosting into a puddle. I learned that the hard way.
Step 6: For the buttercream, beat 1 cup of dairy-free butter, one package of dairy-free cream cheese, and 2 tablespoons of honey together for 5 to 10 minutes until fluffy. Add 6 cups of powdered sugar and 1 teaspoon of salt. Mix slow, then beat on high for 5 more minutes. Chill it in the fridge until ready.
Step 7: For the ganache drip, combine 1/2 cup of dairy-free chocolate chips with 1/4 cup of dairy-free heavy cream in a microwave-safe bowl. Heat in 30-second bursts, stirring each time, until smooth. Let it cool for a minute before drizzling.
Step 8: Level each cooled cake layer with a knife. Place one layer on a plate, spread about 1 1/2 cups of buttercream on top. Repeat with the other layers. Cover the whole cake with a thin crumb coat, then chill for 10 minutes.
Step 9: Add a second, thicker layer of buttercream and smooth it with a spatula. Chill again for 10 minutes. Drip the chocolate ganache over the top. Add some chocolate cookies around the top and pipe little buttercream swirls between them. Then enjoy every single bite.
Cook Time: 30–35 minutes
Total Time: 1 hour 15 minutes
Yield: 1 three-layer cake (12 servings)
Category: Dessert, Cake
Three Fun Twists to Try
Sometimes I change things up just for fun. My family loves guessing which version I made. Here are three easy twists to make this cake your own.
Maple Pumpkin Spice: Swap the honey for maple syrup. It adds a cozy, woodsy sweetness that tastes like autumn mornings. My grandkids say it’s like eating a pancake in cake form.
Chocolate Pumpkin Combo: Add 1/4 cup of cocoa powder to the dry mix. The chocolate and pumpkin together are a dream team. It’s like a pumpkin patch met a chocolate river.
Nutty Crunch Cake: Fold in 1/2 cup of chopped pecans or walnuts into the batter. Toast them first for extra flavor. The crunch makes every bite a little surprise. Which one would you try first? Comment below!
How to Serve This Sweet Treat
This cake is wonderful on its own, but a little company makes it extra special. I love serving it with a dollop of coconut whipped cream on top. A sprinkle of cinnamon never hurts either.
For a fancy touch, place a few fresh cranberries and rosemary sprigs around the cake stand. It looks like a winter wonderland without any extra work. My neighbors always think I spent hours decorating.
For drinks, a warm cup of chai tea with oat milk is perfect on a cold day. Adults might enjoy a small glass of spiced rum or a pumpkin beer on the side. Which would you choose tonight?
Storing Your Pumpkin Cake
This cake keeps well in the fridge for up to five days. Just put it in an airtight container. You can also freeze it for up to six months. Wrap each slice in plastic wrap, then foil. It stays fresh and tasty. I once froze a whole cake for my son’s birthday. When we thawed it, it tasted just as good as the day I baked it. That was a happy surprise. For reheating, let a slice sit out for 20 minutes. No microwave needed. Batch cooking works great here. Bake two cakes at once. Freeze one for later. That way, you have a treat ready for a busy week. Have you ever tried storing it this way? Share below!
Why does this matter? Storing food well means less waste. You save time and money. It also means you always have a homemade dessert on hand. That is a warm feeling for any kitchen.
Common Problems and Easy Fixes
First, your cake might sink in the middle. This happens if the oven door is opened too soon. Be patient and wait until the last few minutes to check. *Fun fact: Pumpkin is heavy, so it needs a steady heat to rise.*
Second, the buttercream might look curdled. I remember once my cream cheese was too cold. Let it sit on the counter for 30 minutes before mixing. That smooths everything out nicely.
Third, the ganache might be too thick to drip. Just add a little more warm cream, a teaspoon at a time. Stir until it pours like thick syrup. These fixes build your cooking confidence. You will feel brave to try new recipes. Which of these problems have you run into before?
Why does this matter? When you fix small mistakes, your food tastes better. You learn to trust your hands. That makes every meal feel like a win.
Your Questions, Answered
Q: Can I use regular flour instead of gluten-free?
A: Yes, swap the gluten-free blend for the same amount of all-purpose flour. The texture will be softer.
Q: Can I make this ahead of time?
A: Yes, bake the cake layers a day early. Wrap them well and keep them at room temperature.
Q: What can I swap for honey?
A: Use maple syrup or agave nectar. The flavor will change a little, but it will still be sweet.
Q: Can I make a smaller cake?
A: Yes, halve the recipe and bake it in two 6-inch pans. Reduce the baking time by five minutes.
Q: Do I have to use dairy-free cream cheese?
A: No, regular cream cheese works just fine. Use full-fat for the best creamy result. Which tip will you try first?
From My Kitchen to Yours
Thank you for spending time with me today. I hope this pumpkin cake brings joy to your table. It is simple to make and full of cozy fall flavor. Please share a photo of your cake. Tag my blog on Pinterest so I can see your creation. Have you tried this recipe? Tag us on Pinterest! I love hearing from you. Every share and comment makes this kitchen feel full of friends. Happy cooking!
—Chloe Hartwell.
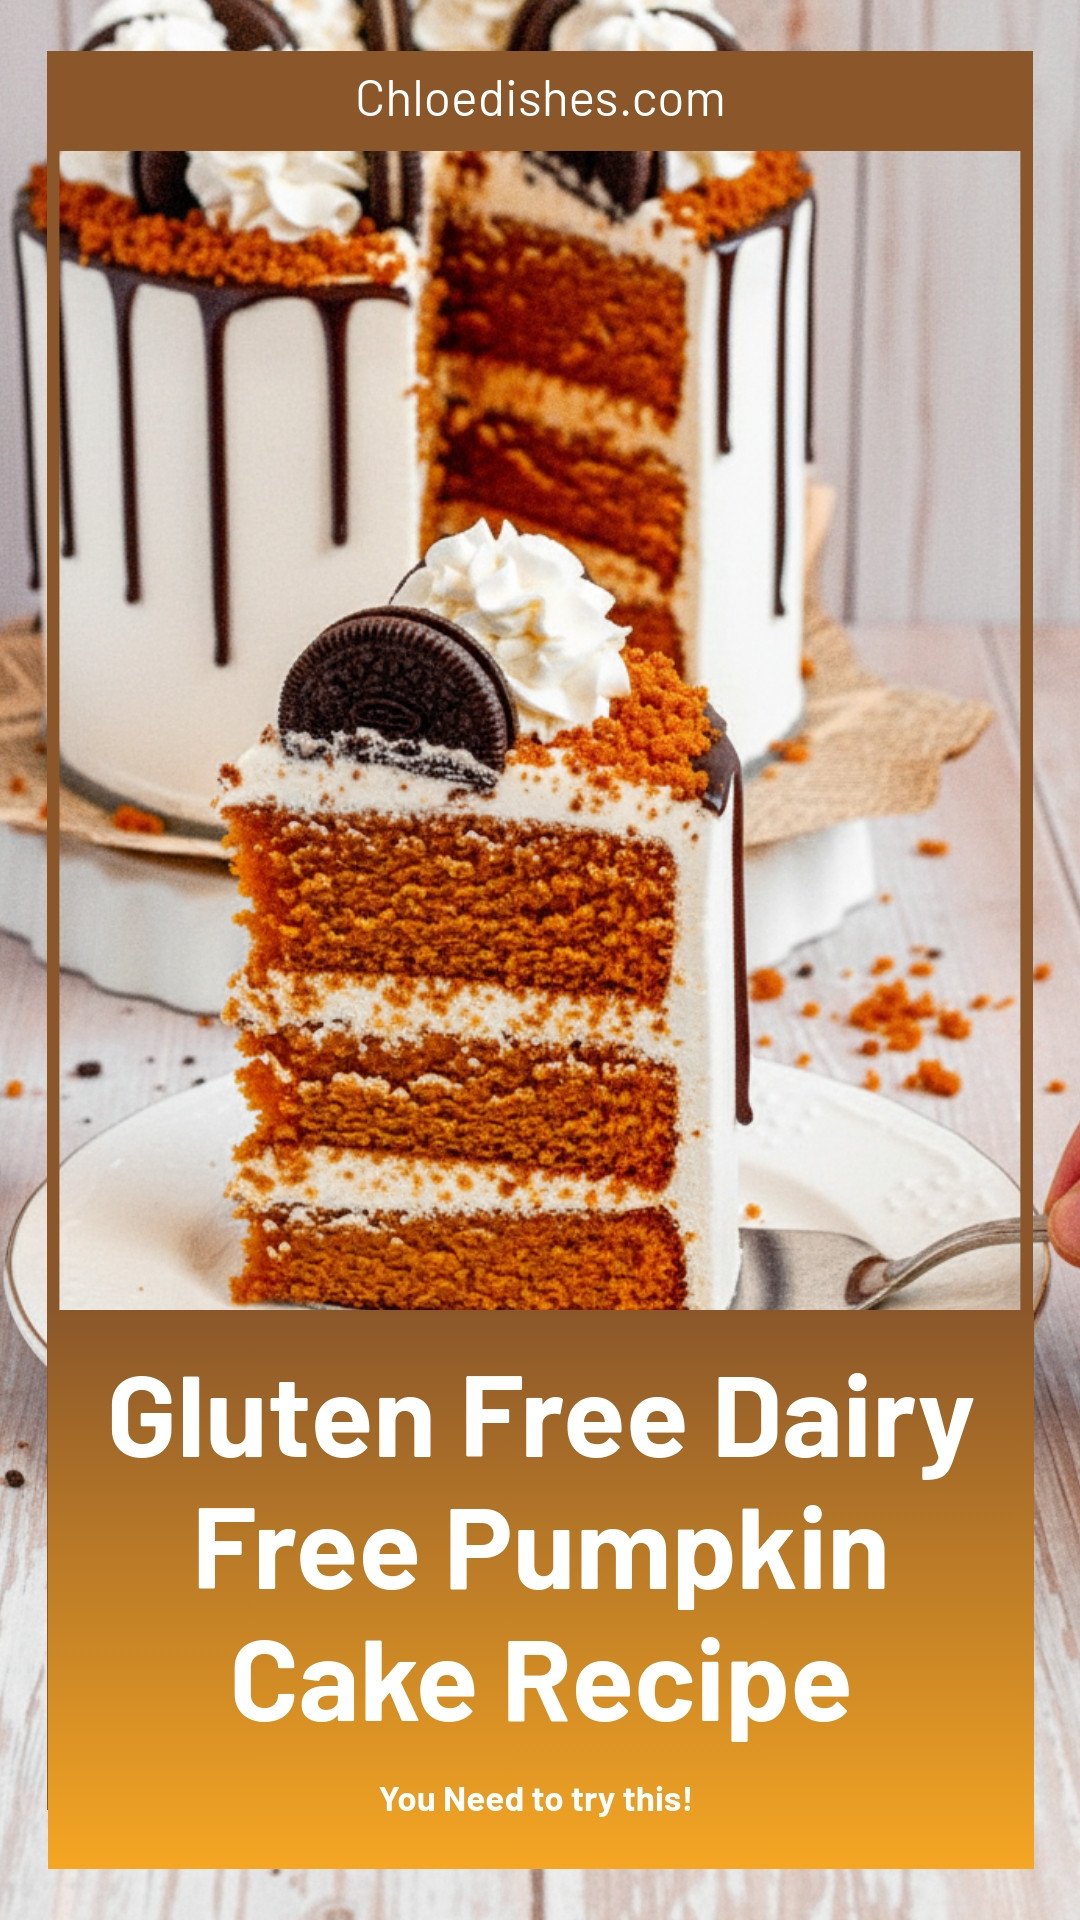
Gluten Free Dairy Free Pumpkin Cake Recipe
Description
Moist & fluffy Gluten Free Dairy Free Pumpkin Cake, topped with creamy maple frosting. The perfect fall dessert for allergies!
Ingredients
Instructions
- Preheat the oven to 350ºF and prepare three 6-inch round cake pans with non-stick baking spray and parchment paper.
- In a large mixing bowl combine the pumpkin, honey, oil, applesauce, and eggs and whisk together until smooth and fully combined.
- Add in the flour, baking soda, pumpkin pie spice, and salt and mix until just combined. Be careful to not over-mix the batter.
- Divide the batter evenly between the prepared cake pans and bake for approximately 30-35 minutes or until the cake edges begin to pull away from the pans, the center springs back to the touch, and a toothpick inserted in the middle comes out with a few moist crumbs.
- Allow to cool in the pans for 10 minutes and then avert on a cooling rack to fully cool.
- In a stand mixer or large mixing bowl with electric beaters, combine the butter, cream cheese, and honey and beat together on high until light and fluffy. This should take approximately 5-10 minutes.
- Add in the powdered sugar and salt and mix on low until combined.
- Turn the mixer up to high and allow it to beat for 5 minutes. Place in the fridge until ready to use.
- Combine the chocolate chips and heavy cream in a microwave-safe bowl and begin to heat in 30-second intervals. Stir after each interval and continue until fully melted and smooth.
- Level each fully cooled cake layer with a knife or cake leveler.
- Place one cake layer on a plate, cake board, or cake turntable. Top with approximately 1½ cups of buttercream. Repeat with the remaining layers.
- Cover the outside of the cake with a thin layer of buttercream and allow to chill in the refrigerator for 10 minutes.
- Cover the cake with a second layer of buttercream and smooth the sides and top with an offset spatula or cake smoother. Place in the fridge to chill for another 10 minutes. Prepare the chocolate ganache if doing so at this time.
- With a piping bag, spoon, or drip bottle, drip the chocolate ganache over the top of the cake. Place back in the fridge to chill for another 10 minutes.
- Place chocolate cookies around the top of the cake and pipe Wilton 1M buttercream swirls in between each cookie. Enjoy! Leftover cake should be stored in an airtight container in the fridge for up to 5 days or frozen for up to 6 months.
Notes
- For best results, use room temperature ingredients. The cake freezes beautifully for up to 6 months.


Leave a Reply