

The Day I Forgot the Vanilla
I once baked these cookies for a holiday party and forgot the vanilla. I realized it after they were in the oven. I still laugh at that. You know what? They still tasted wonderful. Sometimes the best cookies come from our little mistakes. This recipe made me feel brave. It showed me that gluten-free and vegan baking can be just as warm and sweet as the old-fashioned kind. Have you ever baked something and left out an ingredient by accident? What happened?Why This Cookie Matters
These cookies are special because they let everyone join the fun. Your friend who can’t eat gluten can have one. Your cousin who doesn’t eat eggs can have one too. No one feels left out when the cookie plate goes around. That makes my heart feel full. The crushed candy canes remind me of my grandmother’s peppermint sticks. She kept them in a glass jar on her counter. Every time I bite into one of these cookies, I think of her. *Fun fact: Candy canes were first made in the 1600s and were straight, not hooked!* They were just white sugar sticks back then.The Secret to Soft Centers
The yogurt or sour cream is the quiet hero here. It keeps the cookies soft and chewy. If you use plant-based yogurt, it works the exact same way. I like plain soy yogurt best. Doesnt that smell amazing when it mixes with the brown sugar? Dont skip pressing the melted candy bits back into shape. The cookies come out of the oven a little messy. That is okay. You just nudge the red streaks back into place with a butter knife. It takes ten seconds and makes them look like a bakery window.A Lesson in Patience
These cookies need to cool completely on the sheet. I know it is hard to wait. The smell fills your whole kitchen and calls your name. But if you move them too soon, they fall apart. I speak from experience. I had crumb cookies for breakfast once. That waiting time matters. It lets the centers finish baking from the heat of the pan. You get a cookie that is golden on the edges and soft in the middle. Have you ever burned your tongue because you could not wait for a cookie to cool? Me too.Crunch, Sweet, and Mint
The magic is in the mix. You get a crunch from the candy cane pieces. You get a chocolate surprise in every bite. And the mint taste is not too strong. It just whispers “hello” to your tongue. This is why these cookies vanish fast at my house. If you want less sweetness, use dark chocolate chips. If you want more crunch, add an extra tablespoon of crushed candy canes on top before baking. What is your favorite way to eat a cookie? Warm from the oven or cold from the fridge?Making It Your Own
You can swap the all-purpose flour for a 1:1 gluten-free baking blend. I do this all the time for my neighbor Martha. She says these are the best cookies she has had in years. The butter works just fine as regular or plant-based. The choice is yours. Store them in a tin on the counter. They stay soft for almost a week. Or freeze them for six months. I like to hide a few in the freezer for a rainy day. Do you have a secret cookie hiding spot? Share where you keep yours, I promise not to tell.The Last Crumb
I hope you try these cookies with someone you love. Baking together makes the mess worth it. Laugh when the dough sticks to your fingers. Eat one while it is still a little warm. That is the whole point of a cookie. It is not just food. It is a hug you can hold. What is your favorite holiday cookie memory? I would love to hear about it. Maybe you make a special cookie with your mom or your grandpa. Those are the stories that matter most. Thank you for spending this time with me in my imaginary kitchen.Ingredients:
| Ingredient | Amount | Notes |
|---|---|---|
| Salted vegan butter (plant-based or regular) | 1/2 cup (113g) | Room temperature |
| Brown sugar | 3/4 cup (150g) | |
| Granulated sugar | 1/2 cup (100g) | |
| Plain yogurt or sour cream (plant-based or regular) | 1/2 cup (120g) | Room temperature |
| Vanilla extract | 1 teaspoon | |
| All-purpose flour (can sub gluten-free 1:1 baking blend) | 2 1/4 cups (270g) | |
| Baking soda | 1 teaspoon | |
| Coarse sea salt | 1 teaspoon | |
| Crushed candy canes | 1/2 cup (90g) | |
| Chocolate chips (plant-based or regular) | 1/2 cup (120g) |
My Favorite Holiday Cookie Memory
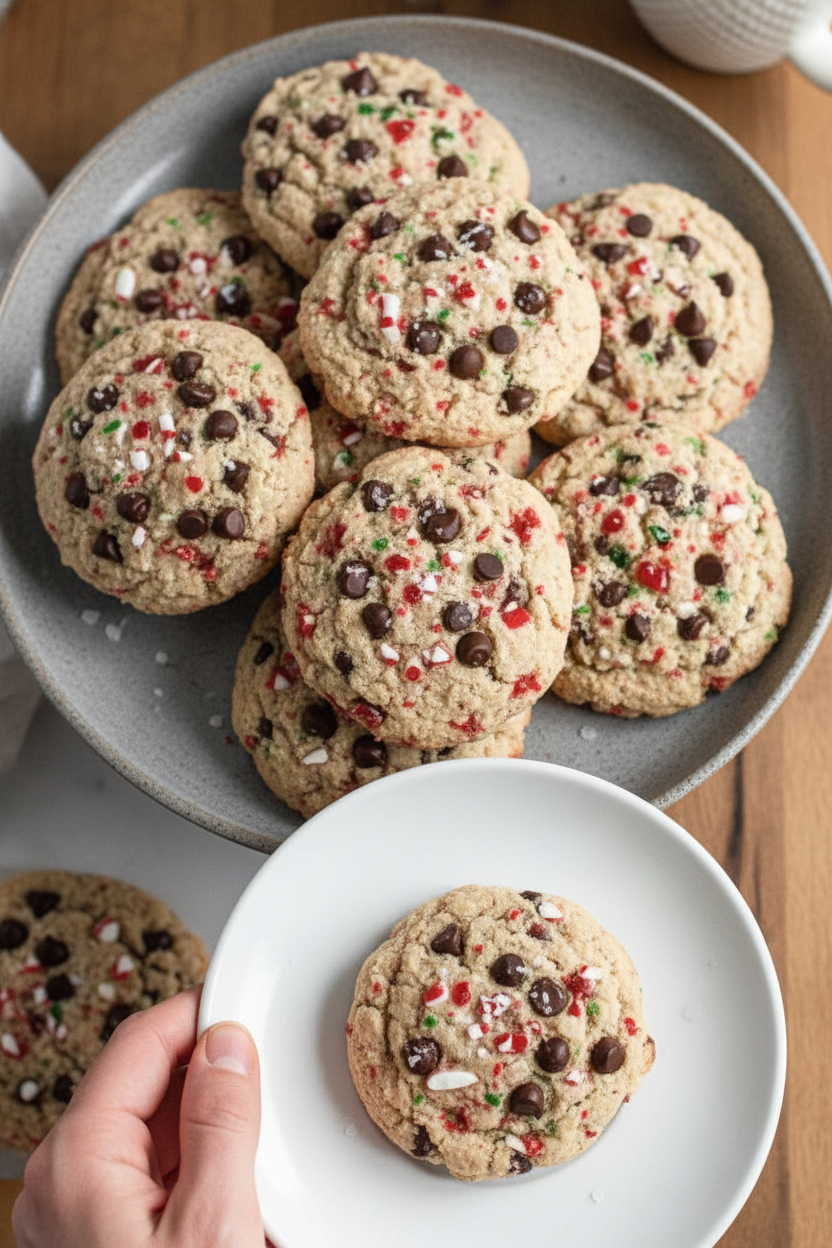
Every Christmas, my grandma would make a big batch of candy cane cookies. The kitchen smelled like peppermint and butter for days. I still laugh at how she would chase us with a wooden spoon if we stole a raw piece of dough. This version is gluten-free and vegan, so everyone at the table can enjoy it. Doesn’t that smell amazing already?
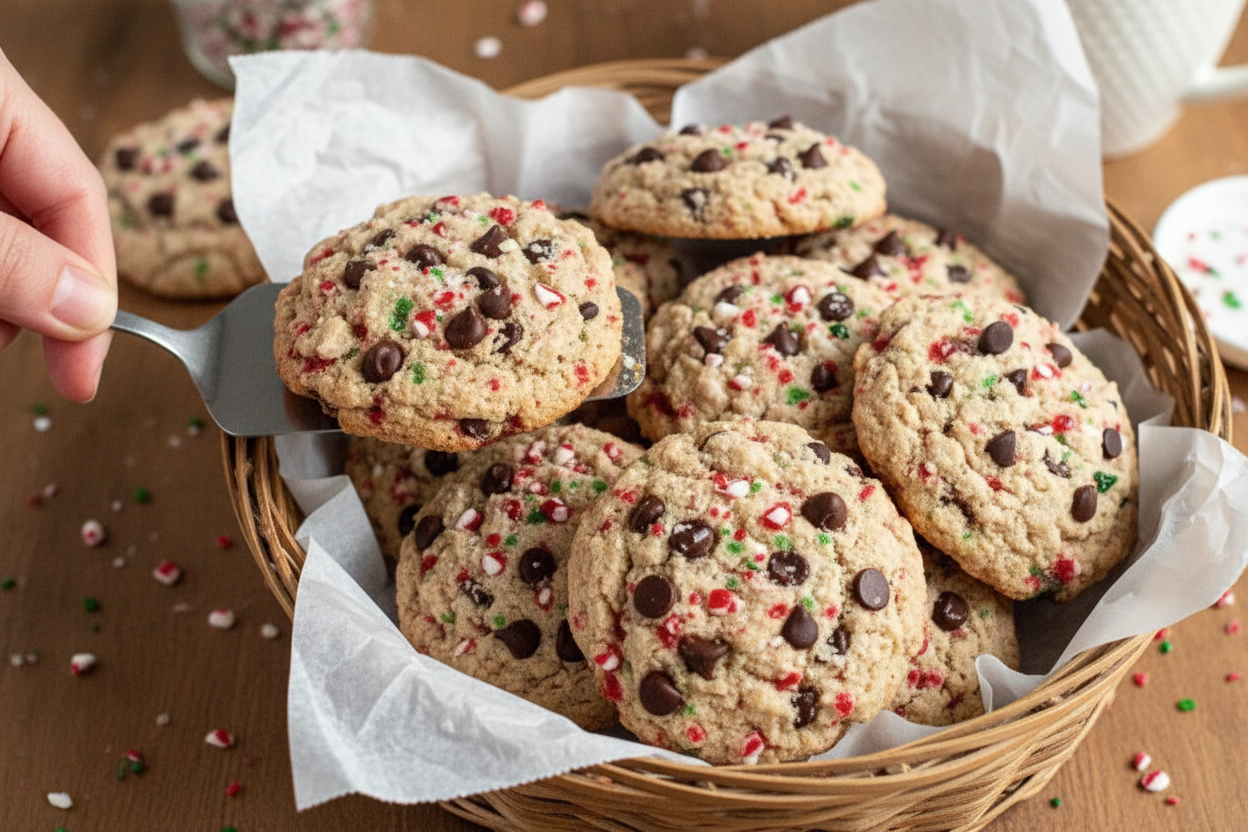
I love how the crushed candy canes melt into little pink puddles on top. It looks like a winter wonderland on a cookie sheet. These cookies are soft, chewy, and full of chocolate chips. You can use regular butter or yogurt if you are not plant-based. The recipe works either way, so do not worry.
Let’s Bake These Together
I have made these cookies a dozen times, and I learn something new each batch. Follow these steps, and you will have perfect cookies every time. Just remember, the dough is forgiving, so have fun with it. What is your favorite holiday cookie to bake? Share below!
Step 1: Preheat your oven to 350 degrees. Line two big cookie sheets with parchment paper. This keeps the cookies from sticking and makes cleanup easy. I once forgot the paper and spent ten minutes scraping. Learn from my mistake.
Step 2: In a large bowl, beat the butter, brown sugar, and white sugar together. Use a mixer on high for two minutes until it looks fluffy and light. This is called “creaming,” and it makes the cookie soft. My cat always tries to lick the beaters.
Step 3: Add the yogurt or sour cream and the vanilla. Mix on high for another two minutes. The dough will look creamy and smell sweet. (Hard-learned tip: Make sure your yogurt is room temperature or the dough will be lumpy.)
Step 4: Add the flour, baking soda, and salt. Mix on low speed until a soft dough forms. Do not overmix, or the cookies will be tough. I usually stop as soon as the flour disappears.
Step 5: Fold in the crushed candy canes and chocolate chips. Stir gently with a spatula until everything is mixed in. The candy canes will break a little more, and that is just fine. Every bit adds flavor.
Step 6: Scoop the dough onto your cookie sheets. Use a big spoon or a 3-tablespoon scoop. Place them two inches apart so they do not touch. Press each ball down slightly if you like flatter cookies. I like them thick, so I skip this.
Step 7: Bake for 8 to 10 minutes. Look for light golden edges and a center that still looks a little soft. Take them out right away. They will keep baking on the hot sheet. Let them cool completely before moving them.
Step 8: While the cookies are still warm, use a butter knife to push any melted candy cane bits back into a round shape. This makes them look pretty. Let the cookies cool fully on the sheet. Store them in a sealed container for up to six days.
Cook Time: 10 minutes
Total Time: 30 minutes
Yield: 18 large cookies
Category: Dessert, Holiday Cookies
Three Fun Twists to Try
Sometimes I change these cookies up depending on what I have in the pantry. Each twist brings something new and yummy. Which one would you try first? Comment below!
Dark Chocolate Mint: Swap the chocolate chips for dark chocolate chunks and add one teaspoon of mint extract. The cool mint pairs perfectly with the sweet candy cane.
White Chocolate Sprinkle: Use white chocolate chips instead of regular ones, and roll the dough balls in rainbow sprinkles before baking. These look like party cookies and taste like a dream.
Spicy Gingerbread: Replace the candy canes with chopped crystallized ginger and add one teaspoon of cinnamon to the flour. The spicy kick warms you right up on a cold winter night.
How to Serve and Sip
These cookies are wonderful all by themselves, but they love company. Serve them with a tall glass of cold oat milk or a mug of hot cocoa with a peppermint stick. For grown-ups, a warm cup of spiced chai or a small glass of dark rum pairs beautifully with the minty chocolate.
I like to put three cookies on a small plate with a handful of fresh raspberries. The tart fruit cuts through the sweetness. Or you can crumble one over a bowl of vanilla ice cream for an easy sundae. Which would you choose tonight?
How to Store These Cookies So They Stay Fresh
These cookies taste best the day you bake them. But life gets busy. You can store them in an airtight container at room temperature for up to six days. If you want them to last longer, pop them in the freezer. They will keep for up to six months.
I remember the first time I made a big batch. I froze half for a holiday party. When I pulled them out, they tasted just as good as fresh. The trick is to let them cool completely before freezing. Place them in a single layer in a freezer bag.
To reheat, warm them in a 300-degree oven for five minutes. This brings back the soft center and crispy edges. Batch cooking saves time and makes you feel ready for anything. Have you ever tried storing cookies this way? Share below!
Storing cookies the right way matters. It stops waste and gives you treats for weeks. You will always have something sweet on hand for guests or a quiet night.
Three Common Cookie Problems and How to Fix Them
Sometimes cookies spread too thin. This happens if the butter is too soft. Next time, chill the dough for 15 minutes before baking. It holds its shape better.
I once forgot to crush the candy canes finely enough. The big pieces burned in the oven. Now I put them in a zip-top bag and smash them with a rolling pin. Small pieces melt evenly.
If your cookies come out dry, you likely overbaked them. Pull them out when the center looks a little underdone. They will keep cooking on the hot sheet. Which of these problems have you run into before?
Fixing these issues builds your cooking confidence. You learn to trust your eyes and hands. The flavor also improves because you nail the texture. A soft, chewy cookie is always a win.
*Fun fact: Crushed candy cane melts into little sugar puddles that turn crunchy when cool. That is why you push them back into a round shape right out of the oven.
Your Quick Questions Answered
Q: Can I use a different gluten-free flour blend? A: Yes, any 1:1 gluten-free baking blend works. Just make sure it has xanthan gum for structure.
Q: Can I make the dough ahead of time? A: Yes. Scoop the dough balls and freeze them on a sheet. Bake straight from frozen, adding two extra minutes.
Q: Can I swap the candy canes for something else? A: Sure. Try crushed peppermint candies or omit for plain chocolate chip cookies.
Q: Can I double the recipe? A: Yes, double everything. Bake in batches so the oven stays at the right temperature.
Q: What if I don’t have vegan butter? A: Regular salted butter works fine. Just keep it at room temperature so it creams well. Which tip will you try first?
A Sweet Goodbye from My Kitchen to Yours
I hope these cookies bring you the same joy they bring my family. Making them is simple. Sharing them is even better. Take a photo of your batch and show us your candy cane swirls.
Your kitchen is a place for little stories and big smiles. Every batch teaches you something new. Keep baking, keep tasting, and keep making memories. Have you tried this recipe? Tag us on Pinterest!
Happy cooking! —Chloe Hartwell.

Gluten-Free Vegan Candy Cane Chocolate Chip Cookies
Description
Indulge in festive Gluten-Free Vegan Candy Cane Chocolate Chip Cookies! Perfectly chewy, dairy-free holiday treats. Easy recipe for guilt-free baking.
Ingredients
Instructions
- Preheat the oven to 350ºF and prepare two large cookie sheets with parchment paper.
- In a stand mixer or in a large mixing bowl with electric beaters, cream the butter, brown sugar, and granulated sugar together on high for 2 minutes or until light and fluffy.
- Add the yogurt (or sour cream) and vanilla and mix on high for another 2 minutes.
- Add the flour, baking soda, and salt and mix on low until a dough forms.
- Add in the crushed candy cane and chocolate chips and mix until just combined.
- With a large 3-tablespoon cookie scoop, scoop the cookie dough and place it on the prepared cookie sheet approximately 2 inches apart. Press down on each cookie dough ball slightly if you desire a flatter cookie.
- Bake for 8-10 minutes or until the edges are a light golden brown and the center of the cookie appears to be slightly underbaked.
- Remove from the oven and, with a butter knife or spoon, gently push any melted candy cane bits back to form a perfectly round cookie. Allow the cookies to cool on the cookie sheets fully. Enjoy!
Notes
- Store the leftover cookies in an airtight container at room temperature for up to 6 days or in the freezer for up to 6 months.


Leave a Reply