

The Day I Learned a New Name for Crunch
My friend Linda brought a tin of this to our book club last spring. She called it “crack” because you cannot stop eating it. I took one bite and laughed out loud. It tasted like the best part of a s’mores campfire, only better. I asked for the recipe right there in her kitchen, while she was still wearing her coat. Doesn’t that smell amazing just thinking about it? The butter and sugar bubbling together on the stove is pure magic. Linda told me her kids beg for this every single weekend.Why This Simple Treat Matters More Than You Think
This recipe taught me something important. You don’t need fancy ingredients to make something unforgettable. Cornflakes are humble. They sit in the back of your pantry, quiet and plain. But when you give them a warm bath of butter and brown sugar, they turn into gold. *Fun fact: Cornflakes were invented in the 1890s by accident. A pot of boiled wheat was left out too long, and instead of throwing it away, someone rolled it into flakes. That mistake changed breakfast forever. This is why I love this recipe. It takes a simple pantry staple and turns it into a party. Anyone can make it. Even a kid who has never baked before can help stir and press the mixture into the pan.How to Make It Without Worry
The most important step is the boiling butter and sugar. You have to stir it for a full three minutes after it starts bubbling. I once got distracted by a phone call and only stirred for two minutes. The cornflakes were still good, but they were not as crunchy. That extra minute makes all the difference. Here is a tip from my own kitchen. Use a big pot. The cornflakes need room to get coated without flying everywhere. I still laugh at that time I used a small saucepan and ended up with cornflakes all over the counter. My dog thought it was great. Have you ever had a baking mess that turned into a happy accident? I would love to hear about it.The Chocolate Choice That Changes Everything
I use half a cup of chocolate chips for a light drizzle. That way you still taste the salty, buttery crunch underneath. But my grandson Jack likes the full cup poured over the whole top. He says it looks like a chocolate river. He is right. If you use plant-based butter and dairy-free chocolate chips, this treat works for everyone. Nobody at the table will know the difference. I served it at a birthday party last month, and three people asked for the recipe before the plate was empty. Do you like a thin drizzle or a thick chocolate blanket? Think about it before you pour.The Little Salt Trick That Wakes Everything Up
Do not skip the sprinkle of coarse sea salt on top. It sounds small, but it makes your tongue wake up and pay attention. The salt plays with the sweet chocolate and brown sugar. It is like a little spark of surprise in every bite. I used table salt once because I ran out of flaky salt. It was fine, but the flaky kind gives you tiny crunchy pops. That texture matters more than you think. This is why we add salt to sweet recipes. It does not make things salty. It makes them taste more like themselves.How to Break It and Share It
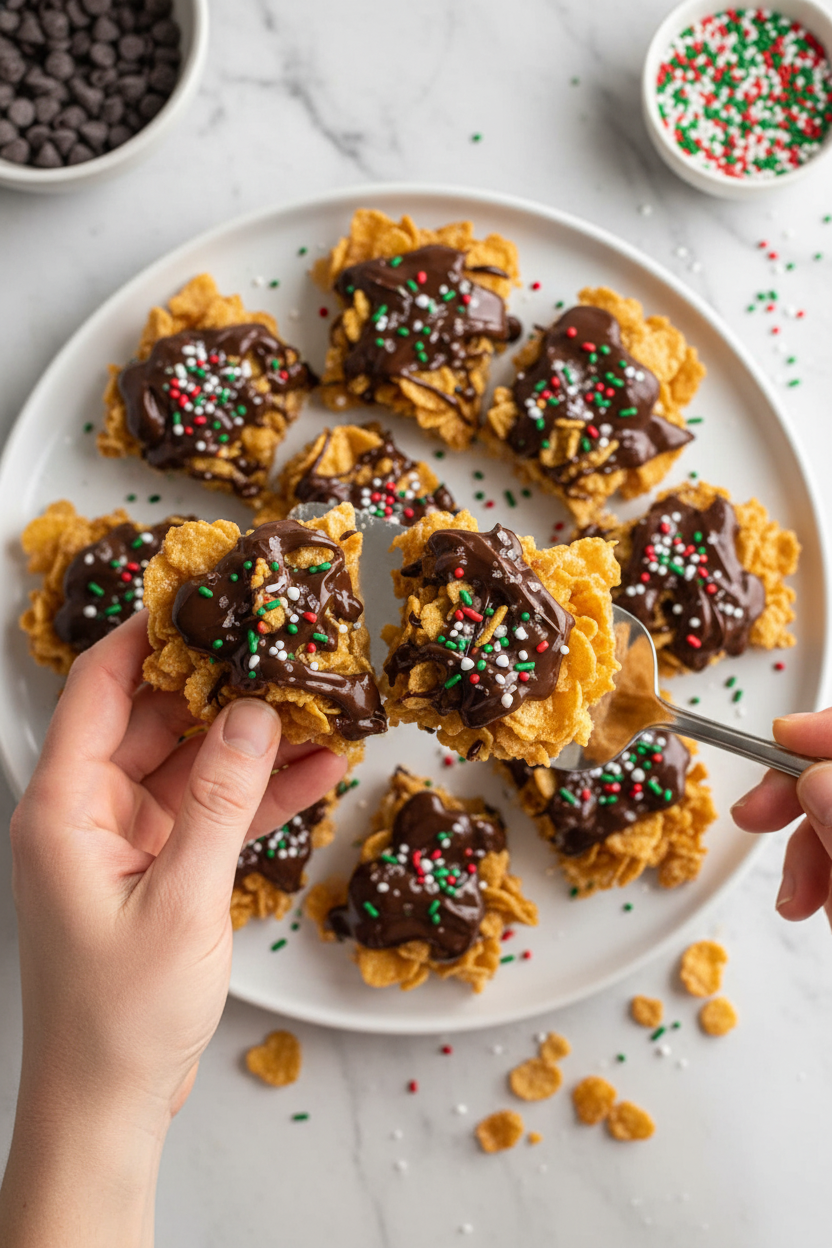
After the chocolate sets, you get to break the big rectangle into pieces. I like to do this by hand. It feels satisfying, like cracking a puzzle into delicious shards. Some pieces come out big and perfect. Others are tiny crumbs that you eat while no one is watching. Store leftovers in an airtight container. If it lasts that long. In my house, it usually disappears within two days. I have learned to hide a small bag in the freezer for myself. That is my little secret. What is the longest you have ever managed to keep a batch of these around? I bet it is not more than a week.A Recipe That Brings People Together
This is more than a snack. It is a reason to gather in the kitchen. You can make it with your little sister, your grandfather, or just by yourself on a rainy afternoon. The smell will bring everyone running anyway. I hope you try this soon. And when you do, I want to know one thing. Did you use sprinkles on top, or did you keep it plain and salty? Send me your answer. I am curious.Ingredients:
| Ingredient | Amount | Notes |
|---|---|---|
| Salted butter (regular or plant-based) | 1/2 cup (113g) | Use unsalted + 1/4 tsp salt if preferred |
| Brown sugar | 1/2 cup (100g) | Light or dark |
| Cornflakes cereal (regular or gluten-free) | 3 cups (125g) | Measure after crushing slightly |
| Fine sea salt | 1/2 teaspoon | Add to butter-sugar mixture |
| Chocolate chips (regular or plant-based) | 1/2–1 cup (84g–168g) | Amount to taste |
| Coarse or flaked sea salt (optional) | To taste | For topping |
| Sprinkles (optional) | To taste | For decor |
The Snack That Disappears Before You Can Blink
I still remember the first time I made this cornflake crack. My neighbor brought some over, and I ate half the pan before dinner. It’s that good. The recipe is simple, and it only uses a few ingredients. Doesn’t that smell amazing when it bakes?
This treat is perfect for a rainy afternoon or a party. The best part? It’s gluten-free and vegan if you use the right butter and chocolate. My grandkids call it “crack” because they can’t stop eating it. I just laugh and hand them another piece.
Let me walk you through it. It’s easy enough for a 12-year-old to help with. Just pay attention to the bubbling butter—that’s where the magic happens. Ready to make some memories?
Let’s Make Cornflake Crack Together
Step 1: Preheat your oven to 350 degrees. Grab a big baking sheet and cover it with parchment paper. This keeps the candy from sticking. (I once forgot the paper, and I was scraping for ten minutes. Learn from my mistake.)
Step 2: Get a heavy-bottomed pot. Add your butter and brown sugar. Turn the heat to medium-high and stir, stir, stir. Once it boils, keep stirring for exactly three more minutes. It will look like golden lava.
Step 3: Take the pot off the heat right away. Dump in your cornflakes and salt. Fold everything together gently so every flake gets coated. My little helper once poured too fast and got cornflakes everywhere. We still laugh about that.
Step 4: Pour the mixture onto your prepared sheet. Press it into a flat rectangle shape. Don’t squish it too hard, or it will be tough. Just pat it down evenly with a spatula.
Step 5: Bake for about ten minutes. You want to see it bubbling. When it comes out, push any stray edges back in with your spatula. (Hard-learned tip: Wear oven mitts. The pan is hot, and your fingers will thank you.)
Step 6: Let it cool on the counter for thirty minutes. Be patient! This is when it gets crunchy. Melt your chocolate chips in a microwave-safe bowl. Do thirty-second bursts and stir each time. Can you guess why we stir? Share below!
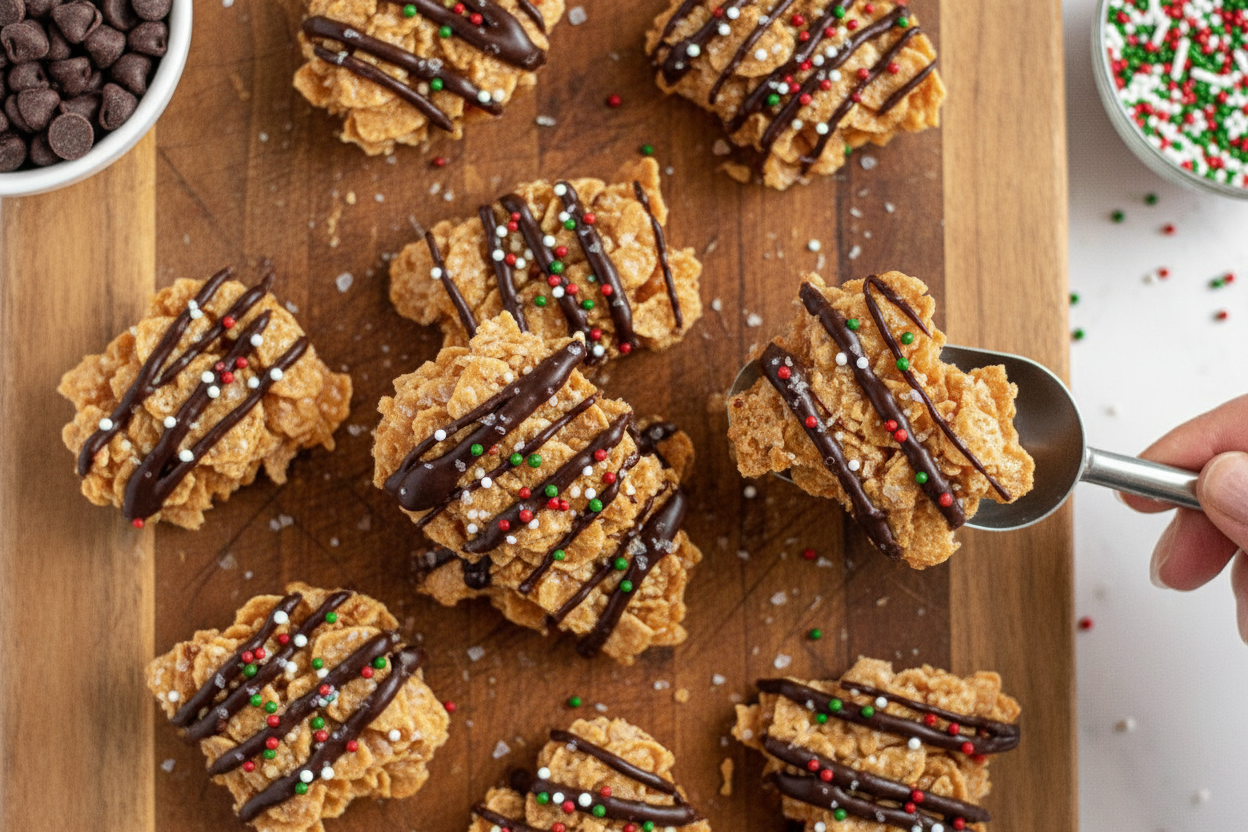
Step 7: Drizzle or spread the melted chocolate over the top. Sprinkle on some sea salt or festive sprinkles if you want. Let it fully set at room temperature. Then break it into messy, delicious pieces. Store leftovers in a jar for up to five days.
Cook Time: 10 minutes
Total Time: 50 minutes
Yield: 12 servings
Category: Dessert, Snack
Three Fun Ways to Change It Up
Peanut Butter Dream: Swap half the butter for creamy peanut butter. Stir it in with the sugar. It makes the crack taste like a candy bar.
Spicy Cinnamon Kick: Add a half teaspoon of cinnamon and a pinch of cayenne pepper to the butter mixture. The heat sneaks up on you, and it’s so cozy in winter.
Citrus Celebration: Stir in one tablespoon of orange zest with the cornflakes. Top it with white chocolate instead of dark. It tastes like sunshine. Which one would you try first? Comment below!
How to Serve Your Crack
Serve these pieces in a big bowl for snacking. They are fantastic crumbled over vanilla ice cream. You can also stack them on a plate next to fresh berries for a pretty look.
For a drink, try cold milk if you are a kid at heart. Grown-ups might love a hot cup of coffee or a dark stout beer. The sweetness pairs perfectly with something bitter. Which would you choose tonight?
Storing Your Cornflake Crack (And Why It Matters)
This cornflake crack keeps well if you store it right. Put leftovers in an airtight container at room temperature for up to 5 days. It stays crispy and sweet, just like fresh from the oven.
You can also store it in the fridge for up to 7 days. The chocolate will firm up a bit, which some folks really love. I once left a batch on the counter overnight and woke up to a happy, crunchy surprise.
For longer storage, freeze it for up to 3 months. Lay pieces flat in a freezer bag with the air squeezed out. This matters because you can make a big batch for holidays or busy weeks. Have you ever tried storing it this way? Share below! Batch cooking saves time and gives you treats ready to grab. It feels like having a secret stash of happiness.
Three Common Problems (And Easy Fixes)
Problem 1: The cornflake crack turns soft. This happens if you don’t let it cool fully. Wait the full 30 minutes at room temperature before adding chocolate. I remember rushing once, and it turned into a sticky mess. Patience is key here.
Problem 2: The chocolate seizes up or gets grainy. Melt it slowly in 30-second intervals, stirring each time. A little water can ruin smooth chocolate. Why this matters: smooth chocolate makes the finished treat look and taste beautiful. It boosts your confidence in the kitchen.
Problem 3: The edges burn while baking. Press the mixture into an even layer and watch the oven. Every oven runs a little different. I once forgot to check, and my edges went dark. Which of these problems have you run into before? Why this matters: fixing them means no waste and a treat you’re proud to share. You learn to trust your senses, not just the timer.
Your Top 5 Questions Answered
Q: Is this recipe gluten-free?
A: Yes, if you use gluten-free cornflakes. Check the box to be sure. Many brands are safe.
Q: Can I make it ahead of time?
A: Absolutely. Make it up to 2 days ahead and store it airtight. It stays lovely and crisp.
Q: What can I swap for butter?
A: Use plant-based butter to keep it vegan. Coconut oil works too, but it changes the flavor slightly.
Q: Can I double the recipe?
A: Yes! Use two baking sheets. Just don’t crowd the pan, or it won’t crisp evenly.
Q: Any fun additions?
A: Try adding dried fruit or nuts before baking. Makes it extra special.
Which tip will you try first?
A Warm Goodbye from Chloe
I hope you make this cornflake crack for someone you love. It’s that kind of recipe. Simple, sweet, and full of crunchy joy. I still remember making it for my grandkids on a rainy Sunday. Their smiles said it all.
*Fun fact: Cornflakes were invented in the 1800s as a healthy breakfast food. Now look at them—they became a candy!
If you make a batch, I would love to see it. Have you tried this recipe? Tag us on Pinterest! Share your photo and let me know how it turned out. Happy cooking!
—Chloe Hartwell.

Cornflake Crack (Gluten-Free & Vegan Option): Gluten-Free Vegan Cornflake Crack Recipe
Description
Crispy, crunchy gluten-free vegan cornflake crack recipe—easy, addictive, and perfect for snacks or dessert. Ready in minutes!
Ingredients
Instructions
- Preheat the oven to 350ºF and prepare a large baking sheet with parchment paper. Set aside.
- In a large heavy-bottomed pot or saucepan, melt the butter and brown sugar over medium-high heat while stirring continuously. Once the butter has fully melted and come to a boil, continue to cook and stir for an additional 3 minutes. Remove from the heat and immediately fold in the cornflakes and salt until fully coated.
- Pour the cornflake mixture onto the prepared baking sheet and press evenly into a single layer rectangle shape.
- Bake for approximately 10 minutes (you want the mixture to be bubbling) and remove from the oven. If needed, gently push any errant edges back in with a spatula or wooden spoon.
- Allow the cornflake crack to cool at room temperature for 30 minutes.
- In a microwave-safe bowl, melt the chocolate in 30-second intervals, stirring after each interval until fully melted and smooth. I used ½ cup of chocolate chips for a drizzle. If you want the whole top to be covered, use 1 cup of chocolate chips.
- Drizzle or pour the melted chocolate over the cornflake crack and spread evenly. Top with a sprinkle of coarse or flaked sea salt and festive sprinkles if desired.
- Allow the cornflake crack to fully cool and set at room temperature before breaking into bite-sized pieces. Enjoy.
- Store leftovers in an airtight container at room temperature for up to 5 days, in the fridge for up to 7 days, or frozen for up to 3 months.
Notes
- For best results, use gluten-free cornflakes if needed and plant-based butter for a fully vegan version.


Leave a Reply