
My First Batch of Lemon Treats
I remember the first time I made these. It was a hot summer afternoon, and my grandkids were bouncing off the walls. I needed something quick and fun. I opened my pantry and saw a box of lemon pudding mix. I thought, why not? I still laugh at how sticky my fingers got. But oh, the smell that filled my kitchen. Doesn’t that smell amazing? Have you ever tried a twist on a classic recipe? Tell me about your biggest kitchen surprise in the comments below.Why These Treats Feel Special
This is not just another rice krispie treat. It is a little bit of sunshine in every bite. The lemon adds a bright, happy flavor that wakes up your taste buds. *Fun fact: Lemon is a natural mood booster. Some studies say just smelling it can make you feel calmer and happier. I love that this recipe uses gluten-free cereal and vegan butter. That means more friends can share a batch. Everyone deserves a sweet treat that makes them smile. That’s why this matters. Baking should be for everyone. Which dessert flavor makes you feel happiest? Is it lemon, chocolate, or something else?The Secret to No-Stick Hands
Here is a little trick my own grandma taught me. When you press the mixture into the pan, wet your hands with a little water. The stickiness just melts away. It works like magic. I still do it every single time. It makes the spreading part so much easier and less messy. Your kids will love helping with this step. Do you have a messy baking trick you swear by? Share it with us! I am always looking for new ideas.The Importance of Patience
I know it is hard to wait. The smell of melted marshmallows and lemon is so good. But letting these treats cool completely is very important. If you cut them too soon, they will fall apart. They will still taste good, but they will be a crumbly mess. That’s why this matters. Patience gives you clean, beautiful squares you can share proudly. What is the hardest part about waiting for food to cool? I always have to hide the pan from my husband.A Story About Sharing
Last spring, I made a double batch for a neighborhood potluck. I put them on a pretty plate with a little lemon zest on top. A little girl named Lily took one bite and her eyes went wide. She said, “Grandma Chloe, this tastes like a lemonade stand!” Everyone around us laughed. That moment made my whole week. Food is not just about eating. It is about making memories with people you love.How to Make Them Your Own
This recipe is like a blank canvas. You can add dried blueberries for extra sweetness. You can swap the white chocolate for dark chocolate chips if you like a little bitterness. I sometimes add a pinch of turmeric for a golden color. It does not change the flavor, but it looks pretty. Cooking is about playing and having fun. Do not be afraid to experiment. If you could add one thing to these treats, what would it be? Sprinkle it on top or mix it in? I would love to hear your ideas.Keeping Them Fresh for Later
These treats store really well. I keep mine in a big jar on the counter for up to a week. They stay soft and chewy the whole time. You can also freeze them for up to six months. Just wrap each square in wax paper and put them in a freezer bag. Then you have a little happiness ready whenever you need it. Do you ever freeze your homemade snacks? What is your favorite thing to pull out for a surprise treat?Ingredients:
| Ingredient | Amount | Notes |
|---|---|---|
| Dairy-free salted butter | 1/2 cup (113g) | |
| Mini marshmallows (divided) | 10 cups (450g) | 8 cups / 2 cups |
| Gluten-free rice cereal | 6 cups (192g) | |
| Instant lemon pudding mix | 1 package (99g) | |
| Vegan white chocolate chips | 1 cup (168g) | |
| Coarse sea salt | 1 teaspoon | |
| Melted white chocolate (optional) | As needed | For topping |
| Lemon zest (optional) | As needed | For topping |
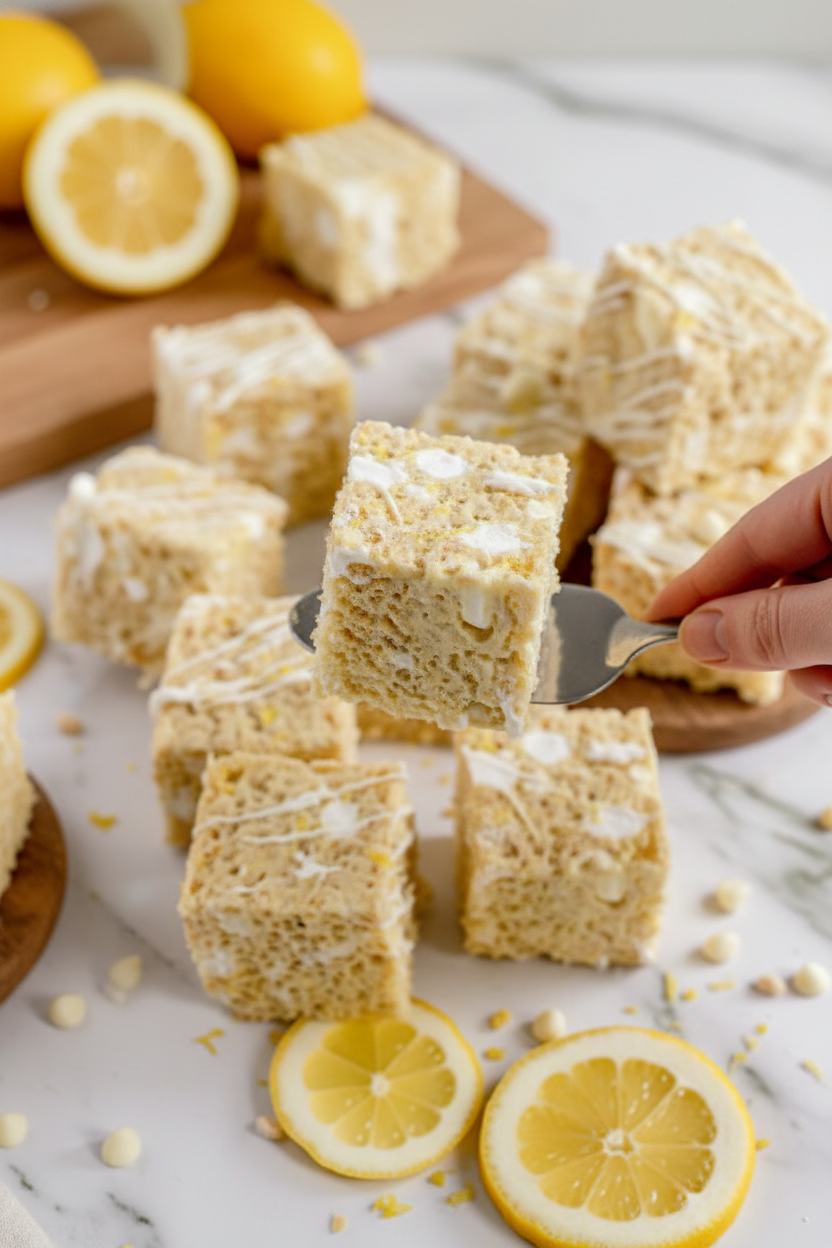
The Lemon Treat That Made My Grandkids Cheer
I still remember the first time I made these. My granddaughter Lily took one bite and said, “Gram, you put sunshine in a pan!” Doesn’t that just make your heart happy? You won’t believe how easy these are. No oven needed, just a microwave and some gentle stirring. Even if you have never cooked anything gluten-free or vegan before, you can do this. I promise.
This recipe came from a rainy afternoon when my daughter brought over her vegan friend. I had no clue what to make. I looked in my pantry and saw rice cereal and a box of lemon pudding. That little “aha” moment changed everything. Now I make these for every birthday party and school bake sale. The secret is the lemon pudding mix. It adds that zing without any fuss.
One thing I love is how this recipe brings people together. My neighbor, who eats gluten-free, never knew she could have Rice Krispie treats again. She cried happy tears. Yes, really. That is the magic of cooking for someone you love. You just need a few simple ingredients and a little bit of patience. Let me show you how.
How to Make These Sunny Treats
Step 1: Get your pan ready. Spray an 8×8-inch baking pan with non-stick spray. Then lay a sheet of parchment paper inside so it hangs over two sides. This makes lifting the treats out so easy. I learned that trick after wrestling with a stuck pan for twenty minutes. (Hard-learned tip: do not skip the parchment paper. Your fingers will thank you later.)
Step 2: Melt the butter and most of the marshmallows. Put 8 cups of mini marshmallows and the dairy-free butter in a large microwave-safe bowl. Heat it on high for one minute. Take it out and stir gently. It will look lumpy. That is fine. Heat it for one more minute, then stir until everything is smooth and shiny. Doesn’t that smell like a carnival?
Step 3: Add the dry ingredients. Pour in the gluten-free rice cereal, the whole package of lemon pudding mix, and the salt. Stir everything together very gently. Do not rush. If you stir too hard, the cereal will crumble into dust. I learned that the hard way when I made a batch that looked like gravel. Let the mixture sit and cool for one minute. (Hard-learned tip: set a timer for that minute. Your sticky fingers will be grateful.)
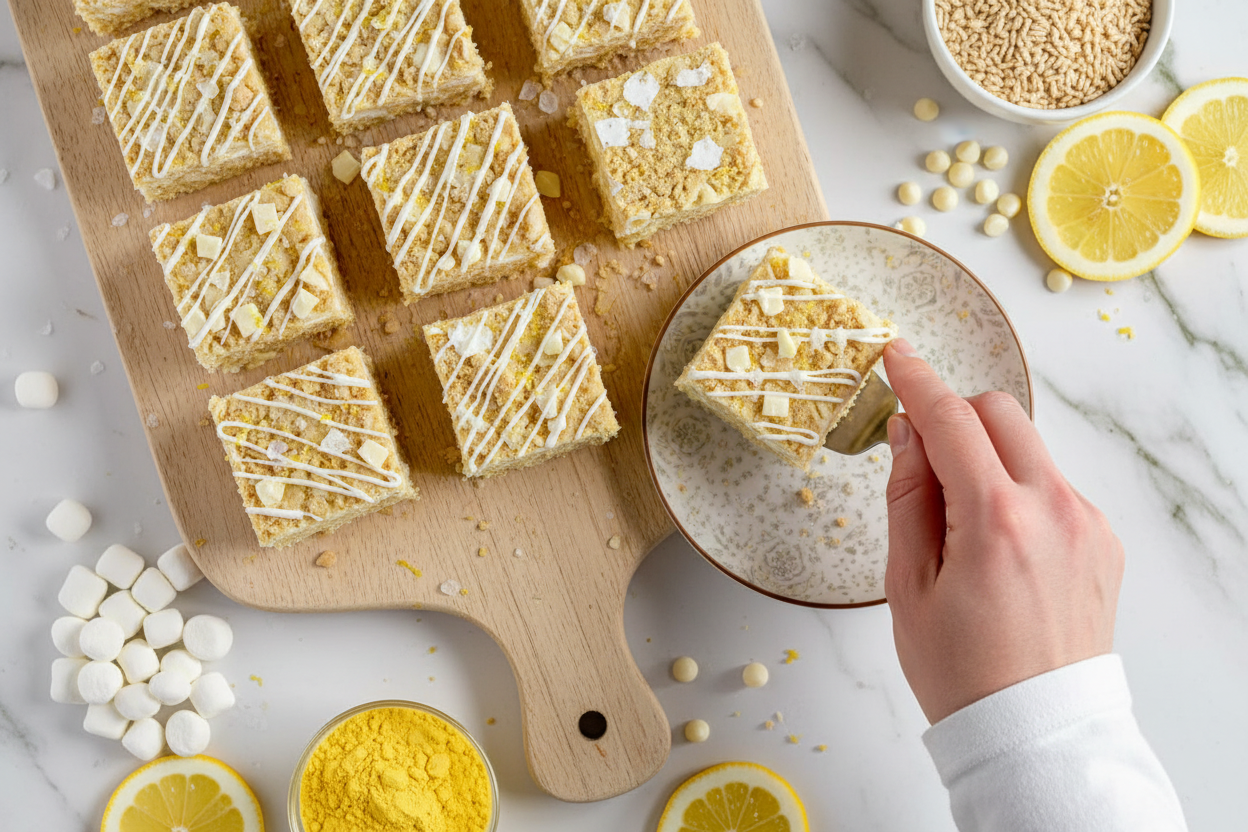
Step 4: Fold in the goodies. Now add the last 2 cups of mini marshmallows and the vegan white chocolate chips. Fold them in very gently, only until you see them scattered through. You want little pockets of unmelted marshmallow and chips. That is what makes each bite a little surprise. My grandkids call them “treasure bites.” What would you name those little pockets? … Share below!
Step 5: Press the mixture into the pan. Scoop the whole thing into your prepared pan. Here is the trick: do not push down hard. If you press too firm, the treats will turn into hard bricks. Use a piece of parchment paper on top and press very, very gently. Spread it out evenly, like you are patting a baby’s back. Let it cool completely on the counter before you even think about cutting.
Step 6: Top and slice. If you want, drizzle some melted white chocolate over the top. Then sprinkle on a little lemon zest for color and extra tang. Let the chocolate set for about 30 minutes. Cut into squares with a sharp knife. Wipe the knife between cuts for clean edges. These are so soft and chewy. You will not believe they are vegan and gluten-free.
Cook Time: 2 minutes
Total Time: 15 minutes plus cooling
Yield: 16 squares
Category: Dessert, Snack
Try a Fun Twist on These
Sometimes I like to change things up. You can too. Berry Lemon Blast: Fold in 1/2 cup of freeze-dried raspberries before pressing into the pan. They add a tart, fruity crunch that kids love. Chocolate Lemon Dream: Swap the white chocolate chips for dark vegan chocolate chips. The dark chocolate makes it taste like a fancy candy bar. Toasty Coconut Crunch: Stir in 1/2 cup of toasted coconut flakes right before the final fold. It adds a chewy, tropical feel. Which one would you try first? Comment below!
Perfect Ways to Serve and Sip
These treats shine all on their own, but I love to dress them up. Serve them on a big white plate with a tiny pile of lemon zest on the side. For a fancy touch, cut them into small triangles instead of squares. They look like little lemon wedges. You can also stack them high on a cake stand for a party. They disappear fast, so hide a few for yourself.
For drinks, I have two favorites. A tall glass of cold oat milk with a squeeze of lemon is perfect. It is like a lemon cookie in a glass. For the grown-ups, try a fizzy lemonade spritzer with a splash of vodka. It is light and not too sweet. Both go so well with the tangy, buttery treats. Which would you choose tonight?
My Best Tips for Storing These Treats
These lemon rice krispie treats stay fresh in an airtight container at room temperature for up to seven days. I learned this the hard way when I left them out uncovered overnight. The next morning they were rock hard and sad. Now I always wrap my pan tightly with plastic wrap too.
You can freeze them for up to six months. Just layer them between sheets of wax paper in a freezer-safe bag. When you want a treat, let it sit on the counter for ten minutes. My granddaughter loves pulling one out for a surprise afternoon snack.
Batch cooking these is wonderful for busy weeks. Make a double batch on Sunday and store half in the freezer. You will always have something homemade and special ready to go. That matters because a little sweet treat can turn a hard day around. Have you ever tried storing it this way? Share below!
Three Common Problems and Easy Fixes
Sometimes the mixture gets too sticky to press into the pan. I remember the first time this happened. I used a spatula and nearly tore the parchment paper. The fix is simple: wet your hands with cold water before pressing. The sticky mixture will not cling to your fingers.
Another issue is the treats turning out too hard. This happens if you overheat the marshmallow mixture. Heat it just until melted, then stop. I once walked away to answer the phone and came back to a brick. Now I always set a timer.
The lemon flavor can be weak if you skip the zest on top. That zest wakes up the whole dessert. Why does this matter? Solving these small problems makes you feel confident in the kitchen. You also get treats that taste exactly how you want. Which of these problems have you run into before?
Your Questions Answered
Q: Are these truly gluten-free?
A: Yes, as long as you use gluten-free rice cereal and certified gluten-free marshmallows. Double-check the labels to be safe.
Q: Can I make them ahead of time?
A: Absolutely. Make them the day before the party. They taste just as fresh the next day.
Q: What can I swap for the lemon pudding mix?
A: Try vanilla pudding with a tablespoon of lemon juice. Or use orange pudding for a fun twist.
Q: Can I double the recipe?
A: Yes. Use a 9×13-inch pan instead of an 8×8. Just give the mixture an extra minute to cool before pressing.
Q: Do I need the white chocolate chips?
A: No, but they add a lovely creamy sweetness. You could leave them out or use dairy-free dark chocolate. Which tip will you try first?
A Sweet Farewell From My Kitchen to Yours
Thank you for spending a little time with me today. I hope these lemon treats bring joy to your table. They remind me of sunny picnics with my family. *Fun fact: lemon was my grandmother’s favorite flavor for spring desserts.*
I would love to see your creations. Snap a photo of your treats and share them. Have you tried this recipe? Tag us on Pinterest! Your pictures make my day. Happy cooking! —Chloe Hartwell.
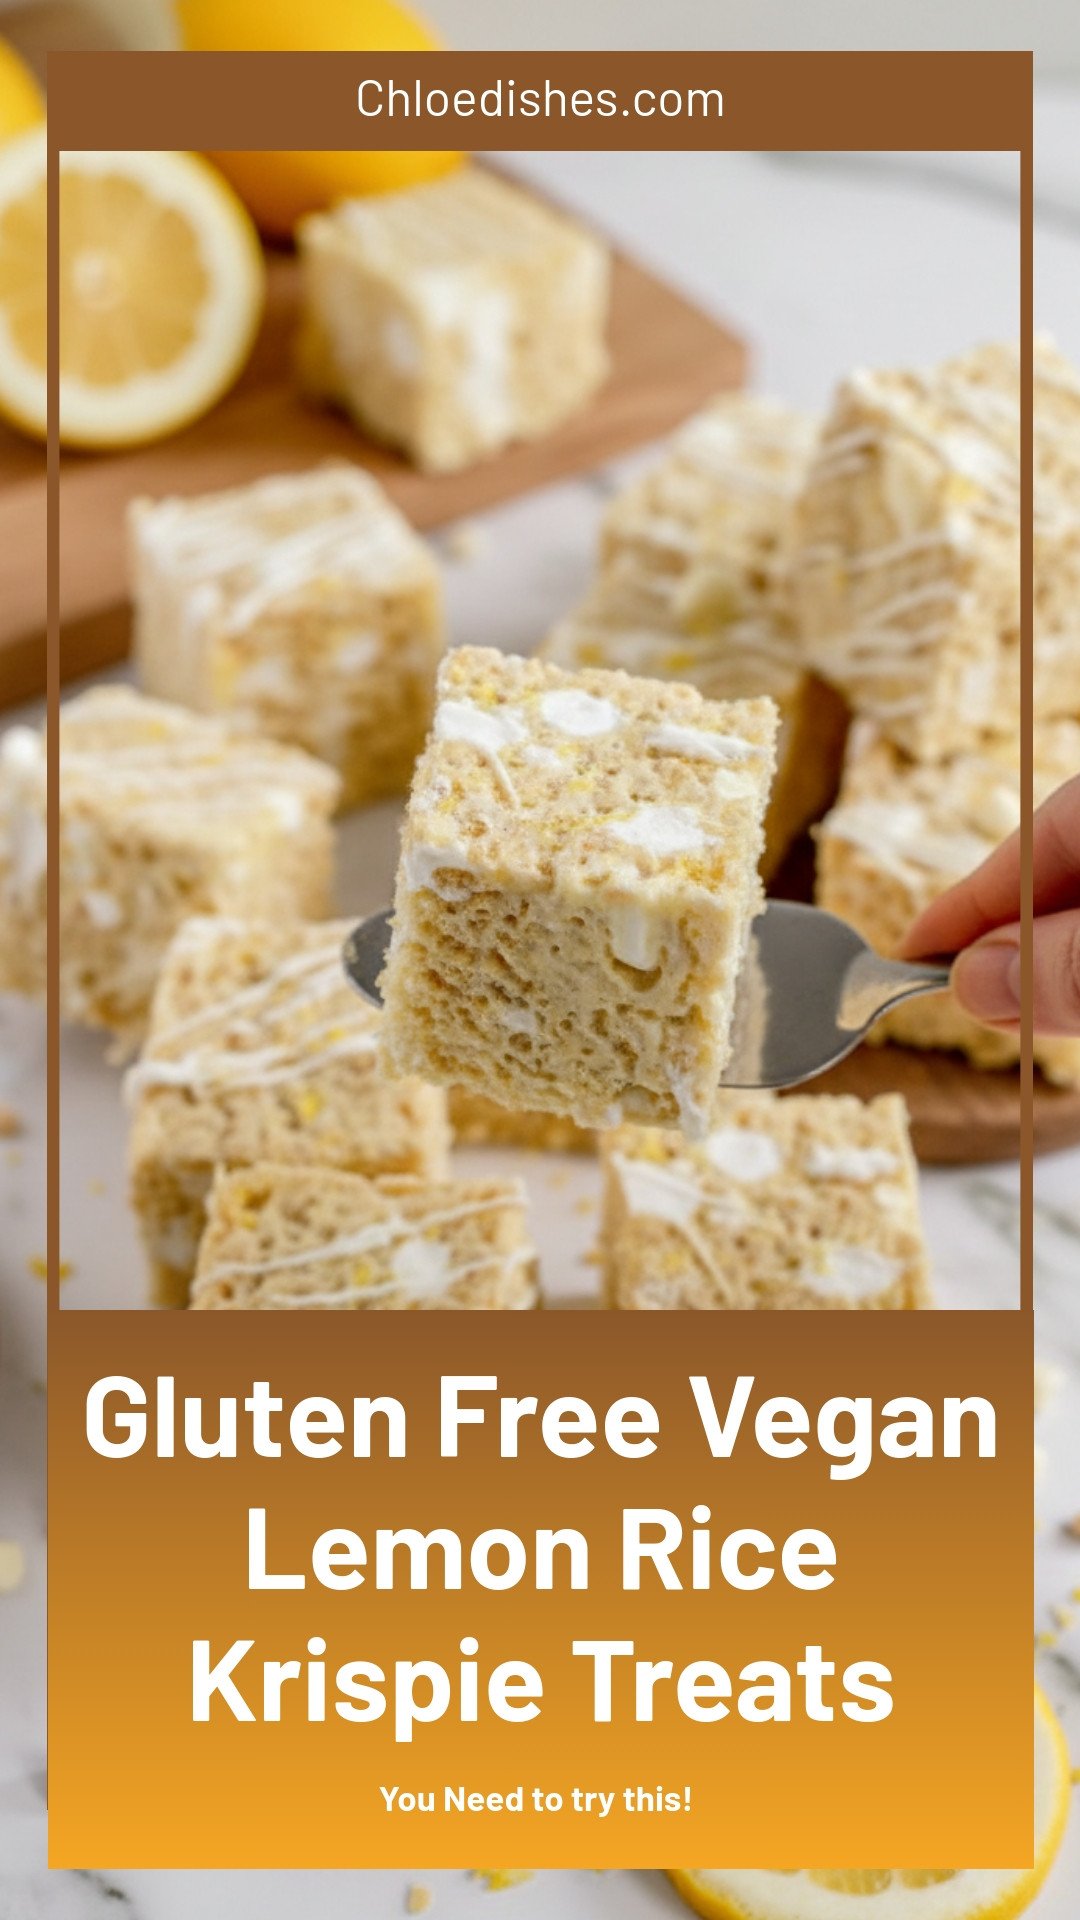

Lemon Rice Krispie Treats (Gluten-Free & Vegan): Gluten Free Vegan Lemon Rice Krispie Treats
Description
Gluten free vegan lemon rice krispie treats, easy 5-ingredient dessert, bright citrus flavor, chewy & sweet. Perfect plant-based snack.
Ingredients
Instructions
- Prepare an 8×8-inch baking pan with non-stick baking spray and parchment paper.
- In a large microwave-safe bowl, combine the butter and 8 cups of mini marshmallows and cook on high heat for 1 minute. Remove from the microwave and gently stir.
- Heat the butter and marshmallow mixture for one more minute in the microwave. Remove from the microwave and gently stir until entirely melted.
- Add in the rice cereal, lemon pudding mix, and salt and gently stir until combined. Allow the mixture to cool for 1 minute.
- Gently fold in the remaining 2 cups of mini marshmallows and chocolate chips and mix until just combined.
- Place the mixture into the prepared pan and very gently spread and press down evenly.
- Top with a drizzle of melted chocolate and lemon zest if desired.
- Allow to fully cool and set before slicing. Enjoy!
Notes
- Store leftover treats in an airtight container at room temperature for up to 7 days or frozen for up to 6 months.


Leave a Reply