
My First Focaccia Fumble
I remember the first time I tried to make fancy bread. I was maybe twelve years old, standing on a little step stool in my grandmother’s kitchen. She handed me a lump of dough that felt like a cold, soft pillow. I thought I was a real pro. Then I tried to make this botanical focaccia, the kind where you press pretty flowers and herbs into the top. My first one looked like a sad pizza that got into a fight. The leaves all slid off. I still laugh at that. Have you ever made a recipe that turned into a total mess?Why We Poke Our Dough
Here is the secret that took me years to learn. You have to “dock” the dough. That just means poking it hard with your fingertips. It makes little dimples all over. Why does this matter? Those dimples catch the olive oil and keep your decorations from sliding off. They also help the bread bake evenly. It is like giving your dough little bowls to hold all the flavor. *Fun fact: Bakers have been poking bread for thousands of years. Ancient Egyptians did it too.*Patience Is a Ingredient
This recipe asks you to wait for three to four hours while the dough rises. That feels like forever when you are hungry. I used to peek under the cloth every ten minutes. But this waiting matters. The yeast wakes up slowly and makes tiny air bubbles. Those bubbles are what give you a soft, chewy inside. Rushing makes a brick. Which do you like better: fluffy bread or crusty bread?Decorating Like a Painter
Now comes the fun part. You get to press herbs, cherry tomatoes, or thin slices of onion into the dough. I once used purple basil and yellow squash flowers from my garden. It looked like a little painting. Press them in gently but firmly. You want them to stick, not fall off in the oven. My neighbor tried using big rose petals once. They turned brown and tasted like old tea. Learn from her mistake. What is the prettiest thing you have ever put on top of bread?The Sizzle and the Smell
When you put the pan in a hot oven, listen for the sizzle. That is the olive oil singing. Then your whole kitchen starts to smell like a bakery and a garden had a baby. Doesn’t that smell amazing? It is the scent of salt, warm flour, and roasting herbs. This is why baking matters. It fills your home with something that no candle can copy. It tells your family that something special is coming.Cool Before You Cut
I know you want to rip into that bread the second it comes out. I do too. But you have to let it sit on a wire rack for a few minutes. That is the hardest part. If you cut it hot, the inside gets gummy and sticky. The steam needs to escape first. Cool bread has a better texture. This is a little lesson in patience for the end. Tell me: Are you a “rip it open hot” person or a “wait for it” person?Sharing the Flower Bread
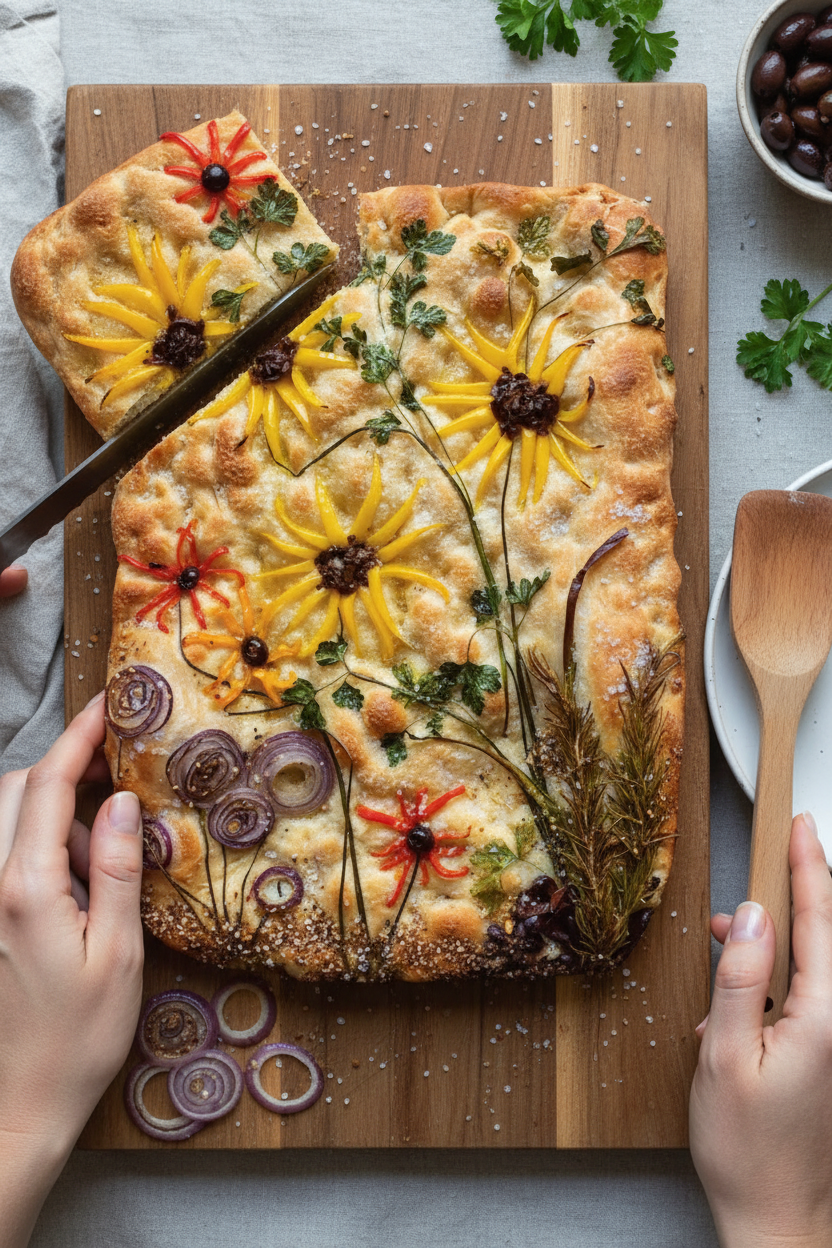
When my botanical focaccia came out golden and covered in green herbs and red tomatoes, I felt like a real artist. I put it on a wooden board and tore off a piece for my husband. He said it tasted like spring. That is why I love this bread. It is not just food. It is something you make with your hands and share with people you love. The little flowers and herbs make ordinary bread feel like a gift. I hope you try it and send me a picture. What would you put on top of your focaccia garden?Ingredients:
| Ingredient | Amount | Notes |
|---|---|---|
| 00 flour | 1 cup plus 1 Tbsp. | |
| All-purpose flour | 1 cup plus 1 Tbsp. and 2 tsp. | |
| Fine sea salt | 1 tsp. | |
| Active dry yeast | 3/4 tsp. | |
| Extra-virgin olive oil | 1 tsp. | |
| Toppings of your choice | As needed | |
| Olive oil | As needed | For coating pan and drizzling |
| Salt and pepper | To taste | For seasoning |
Why I Love This Focaccia
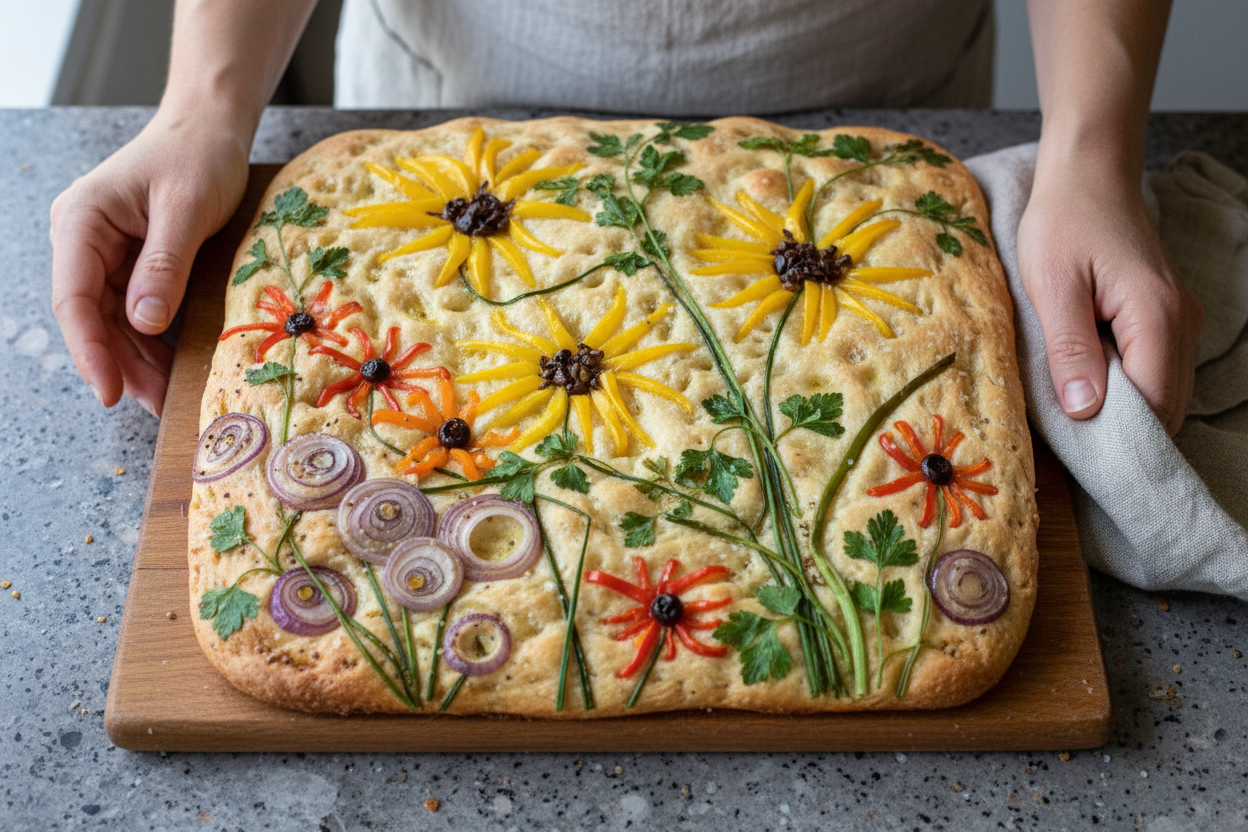
I remember the first time I made focaccia. It was a rainy Sunday, and my kitchen smelled like sunshine. This botanical version is like painting with food. You get to play with herbs, veggies, and flowers. Doesn’t that sound fun?
The dough is soft and forgiving. Even if you are new to baking, you can do this. I still laugh at how proud I felt pulling out my first golden loaf. Trust me, you will feel the same.
This recipe lets you be an artist. Use rosemary sprigs, cherry tomatoes, or edible flowers. The bread becomes a beautiful canvas. (Here is a hard-learned tip: Press toppings gently so they don’t fall off after baking.)
Let’s Bake Together
Step 1: Mix your flours and salt in a big bowl. In a smaller bowl, stir warm water, yeast, and olive oil. Pour the wet into the dry and knead with your hands for about 3 minutes. Let it rest for 15 minutes. Then knead again for 3 minutes. Cut the dough in half, shape into balls, cover with a damp cloth, and let it rise for 3 to 4 hours.
Step 2: Coat your pan with a splash of olive oil. Spread the dough evenly in the pan. Use your fingertips to poke deep dimples all over. Now the fun part—decorate! Press your toppings in gently so they stick. Drizzle more oil and sprinkle salt and pepper. (Don’t skip the dimples; they hold the oil and make the bread soft.)
Step 3: Preheat your oven to 400°F. Bake the focaccia for 30 minutes until it is golden brown. Let it cool on a wire rack. Then slice, share, and watch everyone smile. Have you ever baked bread before? What is your favorite topping? Share below!
Cook Time: 30 minutes
Total Time: 4 hours 15 minutes
Yield: 2 small loaves
Category: Bread, Appetizer
Fun Ways to Change It Up
Veggie Garden Twist: Top with thin slices of zucchini, bell peppers, and cherry tomatoes. It tastes like summer in every bite.
Spicy Herb Kick: Add a pinch of red pepper flakes to your dough. Then top with fresh basil and a drizzle of honey.
Sweet Morning Treat: Skip the salt and pepper. Instead, press in sliced grapes and a sprinkle of cinnamon sugar. Yum!
Which one would you try first? Comment below!
How to Serve and Sip
This focaccia loves company. Serve it warm alongside a big bowl of tomato soup. Or tear it into pieces for a crunchy salad. It also makes a great sandwich bread for fresh mozzarella and basil.
For drinks, try a cold glass of lemonade. The tangy flavor balances the olive oil. Grown-ups might enjoy a crisp white wine like Pinot Grigio.
Which would you choose tonight?
Storing Your Botanical Focaccia
This focaccia tastes best on the day you bake it. But leftovers can be a real treat. Let the bread cool completely before storing it.
Wrap each piece tightly in plastic wrap. Then place it in a zip-top bag. It will stay fresh on the counter for two days.
For longer storage, pop it in the freezer. I once froze half a batch for a busy week. It saved dinner when I had no time to cook.
To reheat, just toast it in a pan with a little olive oil. The crispy crust comes right back. Have you ever tried storing it this way? Share below!
Batch cooking matters because it saves you time later. You can pull out a slice for soup or a snack. It makes your week easier and tastier.
Three Common Focaccia Fixes
First, dough that is too sticky. This happens when you add too much water. The fix is simple: add flour one spoonful at a time while kneading.
I remember my first focaccia. It was a sticky mess. I was so frustrated, but a little extra flour saved it. That bread turned out wonderful.
Second, toppings that fall off. You must press them gently into the dough. This helps them stick during baking. Why this matters: your design stays pretty.
Third, a pale, soft crust. You need a hot oven and enough olive oil. Drizzle generously before baking. Why this matters: a golden crust gives that perfect crunch.
Which of these problems have you run into before? Don’t worry. Every baker has been there. You just learn and try again.
Your Focaccia Questions Answered
Q: Can I use gluten-free flour?
A: Yes, but the texture will be different. Use a gluten-free blend made for bread.
Q: Can I make the dough the night before?
A: Absolutely. Let it rise in the fridge overnight. Bring it to room temp before baking.
Q: What if I don’t have 00 flour?
A: Use all-purpose flour only. It still makes a lovely, chewy focaccia.
Q: Can I double the recipe?
A: Yes. Just use a bigger pan or bake in two batches. The timing stays the same.
Q: What are good topping ideas?
A: Try cherry tomatoes and rosemary. Or sliced olives and thyme. *Fun fact: edible flowers like pansies look beautiful on focaccia.* Which tip will you try first?
A Note from Chloe
Thank you for baking along with me. This focaccia is like art you can eat. I hope your kitchen smells wonderful and your family smiles.
Don’t worry if your design isn’t perfect. The taste is what matters most. Every loaf you bake teaches you something new.
I would love to see your beautiful breads. Have you tried this recipe? Tag us on Pinterest! Take a photo and show off your work. It makes my heart happy.
Keep kneading, keep tasting, and keep sharing. There is always more to learn in the kitchen. Happy cooking! —Chloe Hartwell.

Home Baker Attempts Botanical Focaccia With Results
Description
Stunning botanical focaccia bread recipe from a home baker. Edible flower art on artisan bread. Beautiful, tasty results.
Ingredients
Instructions
- In a mixing bowl, combine flours and salt. In a small mixing bowl, stir together a little less than 1 cup lukewarm tap water, yeast and olive oil; pour it into flour mixture. Knead with your hands until combined, approximately 3 minutes, then let the mixture rest for 15 minutes. Knead rested dough for 3 minutes. Cut into 2 equal pieces and shape each into a ball. Place on floured surface, cover with dampened cloth, and let rest and rise for 3 to 4 hours at room temperature.
- Coat a pan with olive oil and spread dough evenly. Dock (or poke) the dough well with your fingertips. Decorate however you want, making sure that you press the ingredients into the dough to slightly adhere them. Drizzle with olive oil and season with salt and pepper.
- Bake at 400°F for 30 minutes or until golden brown. Let it cool on a wire rack; then ooh, aah and devour.
Notes
- Nutrition information is not provided in the text.


Leave a Reply