

The Day the Snowman Came to My Kitchen
The first time I made these cookies, my granddaughter Lily was six. She kept asking if the snowman would melt in the oven. I told her no, but she watched the whole time like a little guard dog. When we finally put the marshmallow face on, she gasped. She said it looked just like the snowman we built last winter. I still laugh at that memory. Does your family have a silly baking story too? These cookies are not just about eating. They are about playing with your food in the nicest way. That is why I love them. You get to build a tiny snowman you can actually eat. No snow boots needed.Why Gluten Free Does Not Mean Taste Free
I know some folks worry about gluten free cookies being dry. That used to be true, but not anymore. This recipe uses a special mix and one extra trick. You add an extra tablespoon of butter. Just one tablespoon, melted. That little bit keeps the cookie soft and tender. Nobody will guess it is gluten free. Why does this matter? Because everyone deserves a good cookie. Whether you have a gluten problem or not, this cookie should taste wonderful. It is not a “special diet” cookie. It is just a good cookie. *Fun fact: Most sugar cookie mixes were actually invented in the 1950s for busy moms who wanted store-bought taste at home.* Have you ever tried a gluten free cookie that surprised you? I would love to hear about it.Rolling Out the Dough Like a Pro
I remember my own grandma rolling dough on a floured table. She always sang a little song while doing it. For this recipe, you roll it to about the thickness of two nickels stacked up. That is a quarter inch. If you make it thicker, the cookie gets puffy. If thinner, it gets too crunchy. Here is an old trick I learned: chill the dough for ten minutes before cutting shapes. It stops sticking and keeps your snowman shape neat. Also, use a little bit of gluten free flour on your surface. A little goes a long way. Too much flour makes the cookie tough.The Magic of the Marshmallow Face
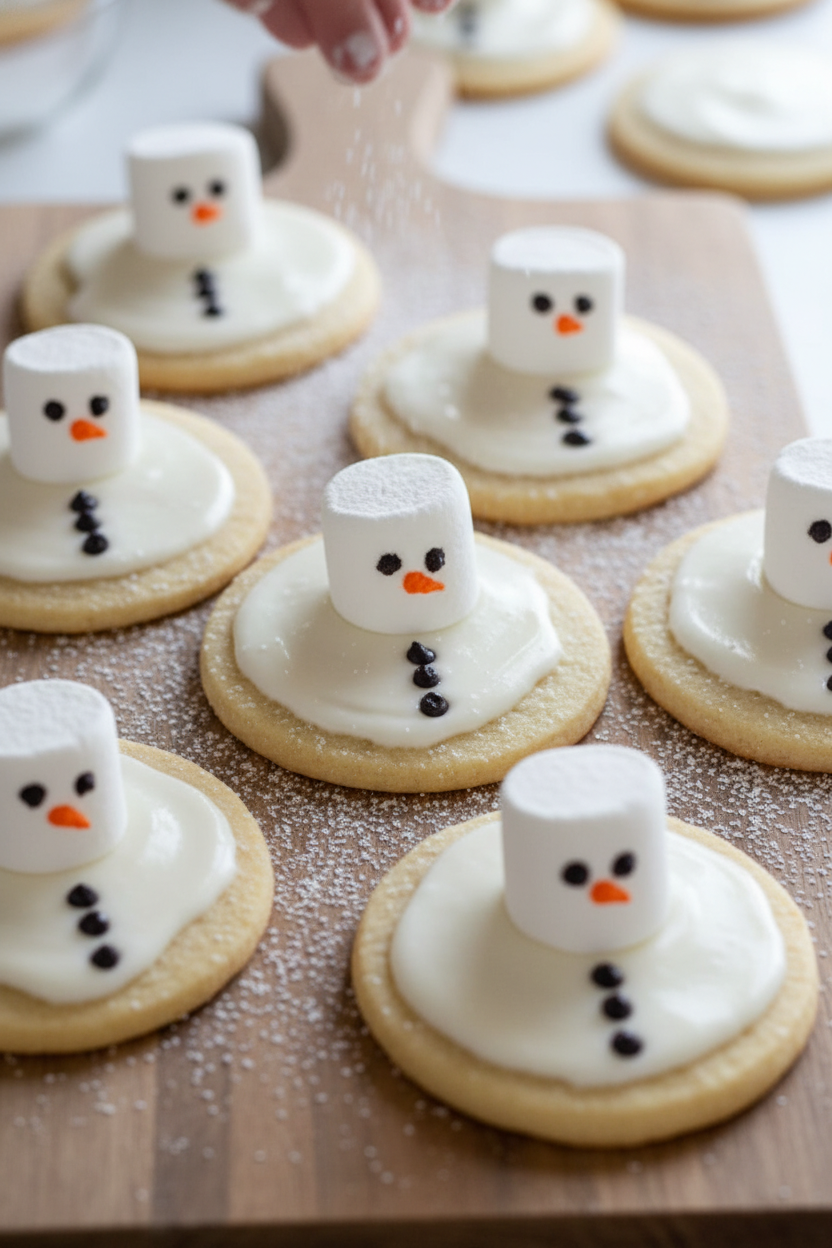
Now for the fun part. While the cookies cool, you become an artist. Take a marshmallow and slice a tiny bit off the bottom. That flat part helps it stay put. Then draw two eyes and an orange carrot nose. You can use store-bought cookie icing or an edible marker. I like using a marker because my hands shake less. Why does this matter? Because this step makes kids feel like real chefs. They learn patience. They learn that a few little lines can become a face. It is simple art. And the best part is, you eat your art after. What kind of face would your snowman make? A happy one? A silly one?Sticking It All Together
You frost the cookie while the frosting is still wet. This is very important. If the frosting gets hard, the marshmallow will slide off. Stick the marshmallow on top. Then push three chocolate chips down the front for buttons. They should look like little coal buttons from a real snowman. I once put the chocolate chips on upside down. My cookies looked like tiny snowmen with sad, droopy buttons. We ate them anyway. Mistakes make the best memories. Have you ever made a baking mistake that turned into a funny story?Cool Your Cookies (And Your Patience)
Let them cool for a full 15 minutes before you touch them. I know it is hard. The kitchen smells so good. But warm frosting is sticky frosting. If you pick one up too soon, the marshmallow will wiggle off. You will end up with a bald snowman. I have been there. It is sad. Once cool, these cookies stay soft for two days in a sealed container. If you stack them, put wax paper between layers. Nobody wants a squished snowman. These make wonderful little gifts for neighbors or teachers.A Little Snowman Poll
Here is my question for you today. Would you rather eat the marshmallow head first or the cookie body first? I am a cookie-first person myself. But my husband always eats the head right off. We argue about this every single time. I hope you try these with someone you love. Maybe a child. Maybe a friend who needs a laugh. Baking is not just about food. It is about making a little moment of joy. And there is nothing better than that.Ingredients:
| Ingredient | Amount | Notes |
|---|---|---|
| Olive Nation Gluten Free Sugar Cookie Mix (or any sugar cookie mix) | 1 package | |
| Butter (melted) | 1 stick + 1 tablespoon | Divided: 1 stick for mix, 1 tablespoon for topping |
| Water | 3 tablespoons | |
| Sugar cookie frosting of your choice | 1 container/tube | |
| Marshmallows | 15 | |
| Gluten Free 1:1 Flour (or traditional flour if no gluten allergy) | ½ cup | For rolling/dusting |
When a Snowman Melts Right Into Your Heart
I still remember the first time my grandson saw a snowman cookie with a marshmallow face. He asked, “Grandma, is he sick?” I laughed so hard I nearly dropped the frosting bag. This recipe is for those little moments. You take a simple sugar cookie and turn it into a puddle of winter fun. Doesn’t that sound cozy?
The best part is you don’t need to be a fancy baker. If you can stir butter and flour, you can make these. I once tried rolling the dough too thin, and the snowmen came out looking like flat pancakes. So learn from me: keep it at a nice quarter-inch thickness. Your cookies will thank you.
Kids love helping with the marshmallow faces. My granddaughter draws the goofiest eyes with edible markers. She always gives the snowman a crooked grin. I think that makes them taste even sweeter. What silly face would you draw on your snowman? Share below!
Now, let’s get our hands a little messy. Here is the step-by-step guide. Follow along, and soon you will have a plate full of melted snowmen grinning up at you. Don’t forget to preheat that oven — I once forgot and spent an hour staring at a cold, sad dough.
How to Build Your Melting Snowman
Step 1: Melt one stick of butter plus one extra tablespoon. Let it cool for a minute, or it will cook the dough too fast. Pour it into a mixing bowl with your sugar cookie mix and three tablespoons of water. Stir until it all comes together into a soft, golden ball. (Hard-learned tip: Don’t overmix, or the cookies get tough. Just mix until it looks like playdough.)
Step 2: Sprinkle some gluten-free flour (or regular flour) onto your countertop. This keeps the dough from sticking like a stubborn friend. Roll the dough out evenly until it is about a quarter-inch thick. I use two wooden sticks on each side to keep it perfect — my grandmother taught me that trick. Cut out simple round or snowman-shaped cookies with your favorite cutter.
Step 3: Place the cut cookies onto a baking sheet lined with parchment paper. Give them a little space — they will puff up like happy cheeks. Bake at 350 degrees for 10 to 13 minutes. You want the edges to turn just a tiny bit brown. When they come out, let them cool on a rack for 15 minutes. No cheating, or the frosting will slide right off.
Step 4: While the cookies cool, make your snowman’s head. Snip a tiny flat piece off the bottom of each marshmallow. This helps it sit upright without wobbling. Use edible markers or a bit of frosting to draw two eyes and a carrot nose. My granddaughter always adds three dots for buttons, too. What silly face would you draw on your snowman? Share below!
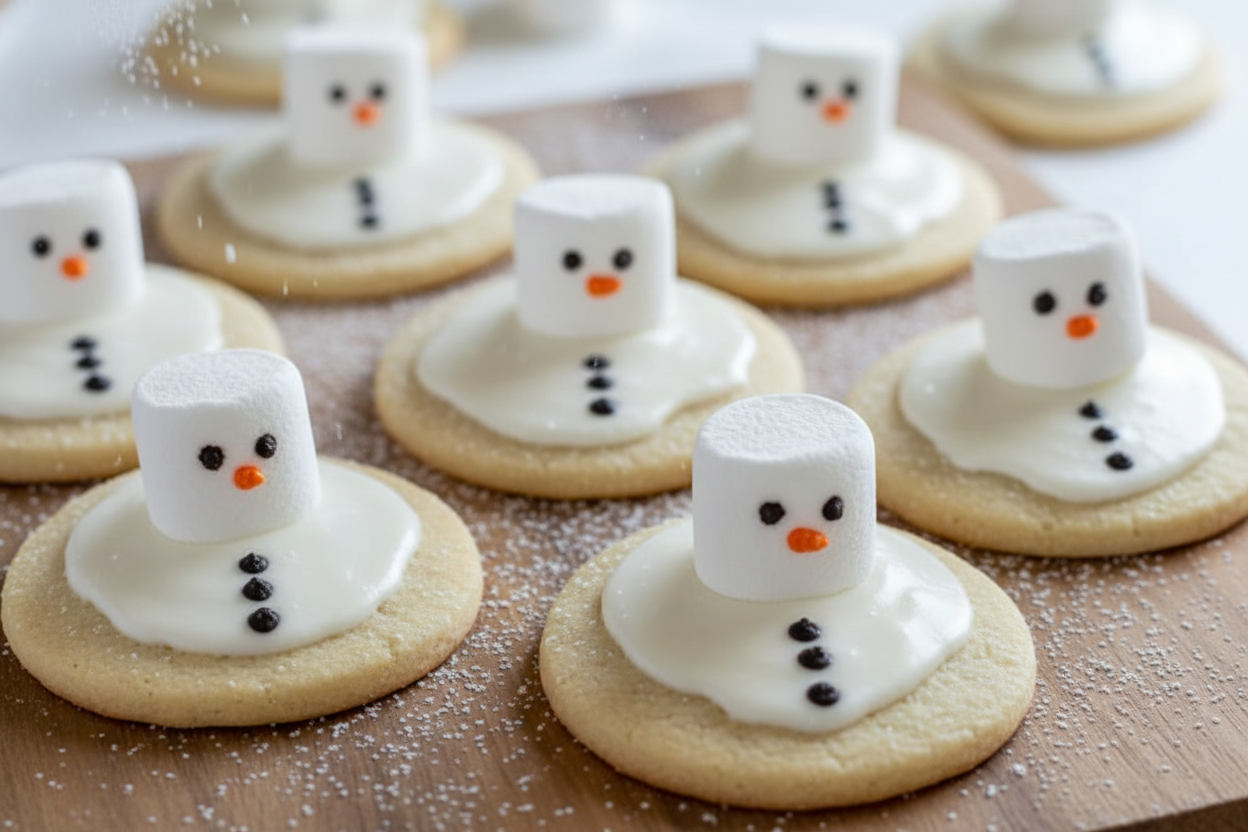
Step 5: Spread a thin layer of sugar cookie frosting onto each cooled cookie. While it is still wet and sticky, press the marshmallow face gently into the center. Then stick three chocolate chips right below it for the coal buttons. Let everything set for a few minutes before serving. They look like little puddles of winter joy.
Cook Time: 13 minutes
Total Time: 45 minutes
Yield: 12 cookies
Category: Dessert, Holiday Treat
Three Fun Ways to Remix This Recipe
Peppermint Snowman: Crush a few candy canes into tiny bits and sprinkle them on top of the frosting before it dries. It adds a crunchy, minty pop that tastes like Christmas morning.
Chocolate Lover’s Melt: Swap the vanilla frosting for chocolate frosting and use white chocolate chips for the buttons. It looks like a snowman who fell into a mud puddle, but tastes amazing.
Berry Blizzard Snowman: Press a small raspberry or a dried cranberry onto the marshmallow for a rosy cheek. It gives a sweet-tart surprise with every bite. Which one would you try first? Comment below!
How to Serve Your Melting Snowmen
Arrange these cookies on a blue plate so they look like they are sitting in a puddle of sky. You can also dust a little powdered sugar around them for a snowy ground effect. My kids love them with a side of warm apple slices in winter.
For a cozy drink, pour yourself a mug of hot chocolate with a tiny splash of peppermint (for grown-ups) or a warm cup of vanilla milk (for everyone else). The sweet cookie and the warm sip are like a hug for your belly. Which would you choose tonight?
How to Store and Reheat Your Melting Snowman Cookies
These cute cookies are best eaten the same day. The marshmallow gets soft if left out too long. I once packed a batch for a school bake sale and forgot them in the car. They looked more like puddles than snowmen by the time I got there.
If you need to store them, keep the cookies and marshmallows separate. Put the baked, unfrosted cookies in an airtight container at room temperature. Store the decorated marshmallow heads in a bowl on the counter, not the fridge. Why this matters: The fridge makes marshmallows hard and chewy. Nobody wants a rock-hard snowman head.
For freezing, place plain cookies in a freezer bag for up to one month. When you are ready, thaw them, then frost and add the marshmallow. This batch-cook trick saves time for holiday parties. Have you ever tried storing it this way? Share below!
Three Common Problems and Easy Fixes
First, the dough can be sticky. Sprinkle a little extra gluten-free flour on your work surface. I remember my first time making these. The dough stuck to everything, even the dog. A light flour dusting fixed it right up.
Second, the marshmallow might slide off the frosting. Press it down gently while the frosting is still wet. Why this matters: A secure snowman head means less mess and more smiles. It also makes the cookie look neat for gift-giving.
Third, cookies can spread too much in the oven. Chill the cut dough on the baking sheet for ten minutes before baking. This keeps the snowman shape round and tidy. Which of these problems have you run into before?
Five Quick Questions About This Recipe
Q: Can I make these cookies gluten-free?
A: Yes, the recipe uses a gluten-free mix and flour. It works perfectly for those with allergies.
Q: Can I prepare the marshmallows ahead of time?
A: Yes, draw the faces on marshmallows a day early. Store them in a sealed bag at room temperature.
Q: What if I do not have a sugar cookie mix?
A: Use your favorite homemade sugar cookie dough instead. Just roll it to 1/4 inch thickness.
Q: How do I scale the recipe for a crowd?
A: Double all ingredients except the water. Start with 3 tablespoons, then add more if the dough feels dry.
Q: Can I use frosting in a tube instead of a can?
A: Yes, tube frosting works great for drawing faces. It gives you more control for small details. Which tip will you try first?
A Sweet Send-Off from My Kitchen to Yours
I hope these snowman cookies bring you as much joy as they brought my grandkids. There is something special about a cookie that makes you giggle. Pull up a chair, bake with someone you love, and don’t worry if the marshmallow falls off.
*Fun fact: Marshmallows were once made from the root of the mallow plant.*
I would love to see your melting snowmen. Have you tried this recipe? Tag us on Pinterest! Share your photos and stories. Every cookie has a happy memory baked inside. Happy cooking! —Chloe Hartwell.
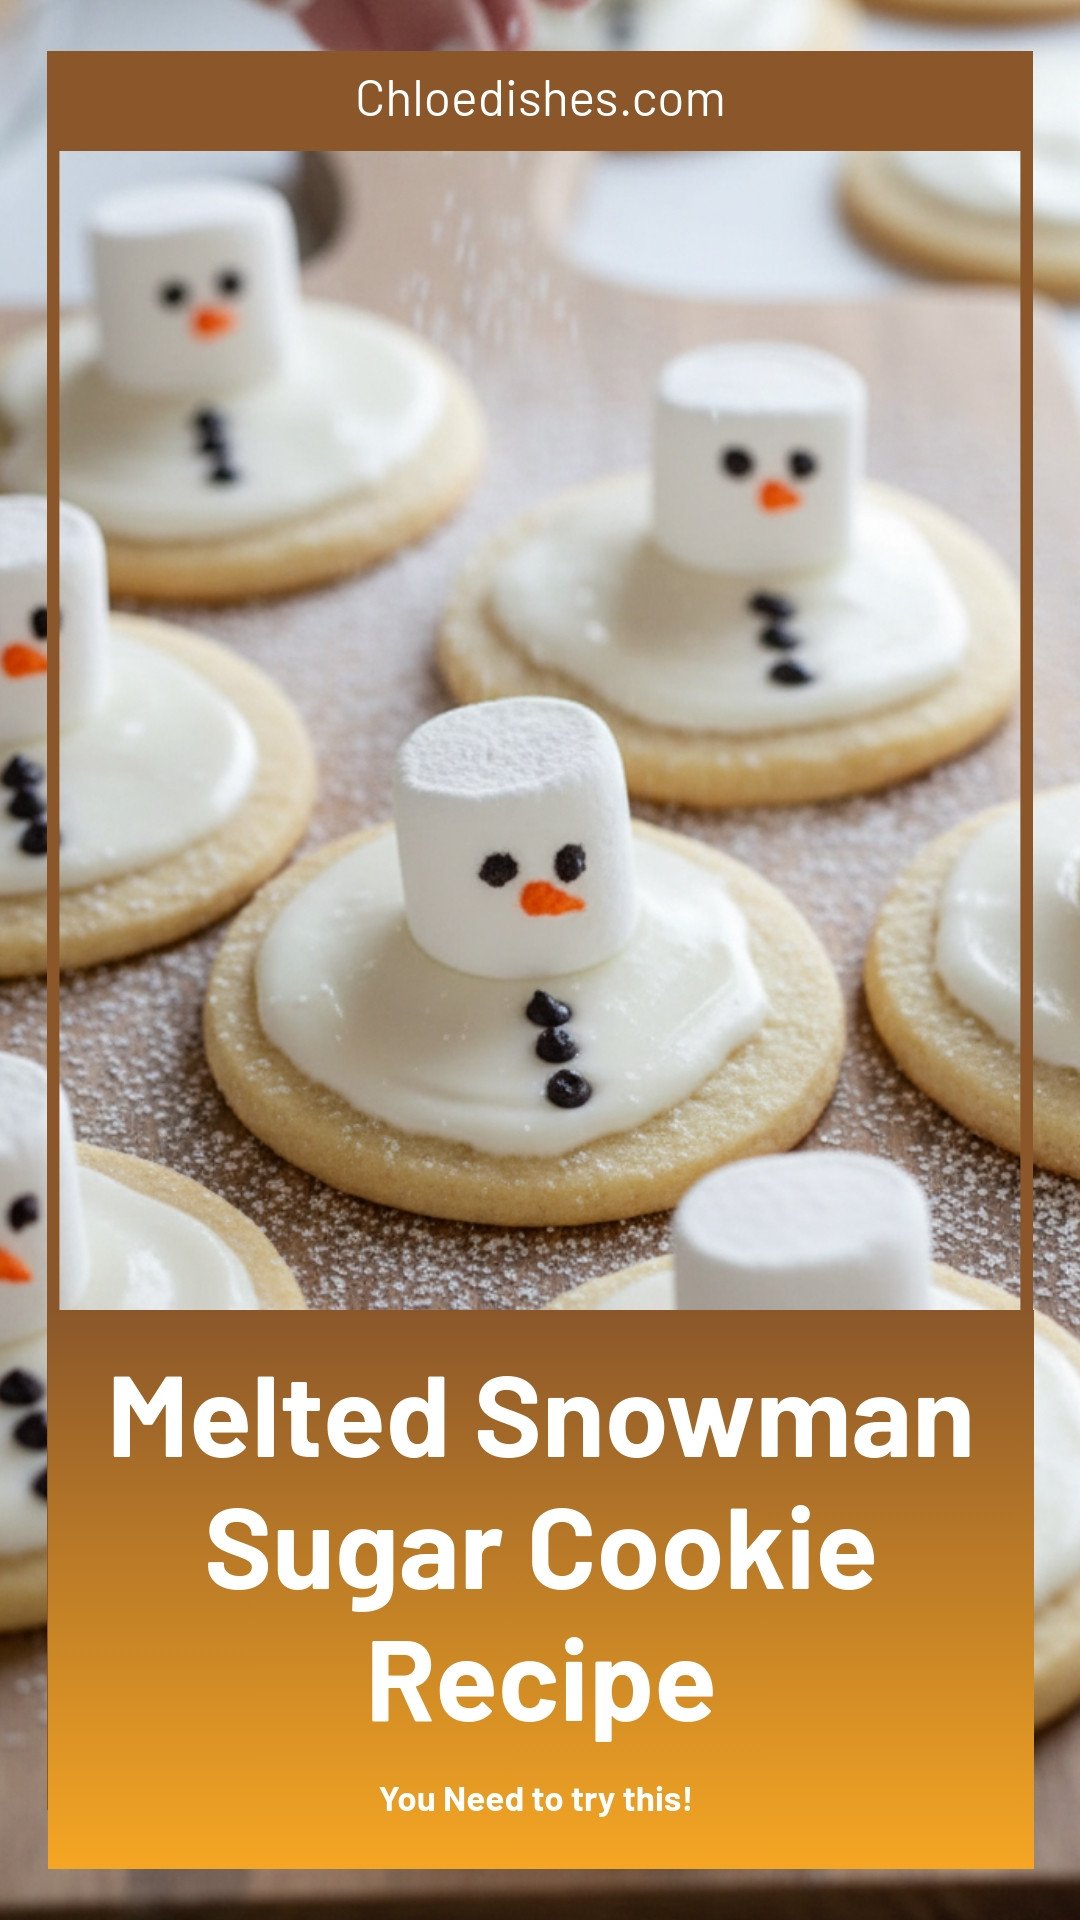
Melted Snowman Sugar Cookie Recipe
Description
Make adorable Melted Snowman Sugar Cookies this winter! A fun, easy treat with royal icing. Perfect holiday baking.
Ingredients
Instructions
- Carefully coat a non stick surface with a bit of gluten free flour. Roll out the dough to ¼ inch thickness. Cut out shapes with cookie cutters and gently transfer to baking sheet lined with parchment paper.
- Bake 10-13 minutes in pre-heated 350°F oven until the edges begin to brown slightly. Place the cookies onto a baking rack and allow them to cool for 15 minutes before frosting. Cool completely before frosting or decorating.
- Frost with your choice of sugar cookie frosting. Place the marshmallow onto the cookie while the frosting is still wet. Then place the three chocolate chips as buttons while it is still wet. Allow them to cool before serving. Enjoy!


Leave a Reply