
My First Caramel Surprise
I remember the first time I made caramel. I was maybe twelve, standing on a little stool in my grandma’s kitchen. The sugar looked like pretty white sand in the pan. Then it started to melt and turn golden. I was so scared I would burn it!
My grandma just laughed and said, “Sugar knows what to do if you give it time.” She was right. Watching it bubble and turn into that deep, dark amber color felt like magic. I still laugh at that memory every time I make a batch today. Doesn’t that smell amazing when it happens for you?
Two Ways to Make Your Caramel
This recipe gives you a choice. You can be a little fancy and make caramel from scratch with sugar and butter. It takes patience, about fifteen minutes of slow, gentle stirring. I like using a light-colored pan so I can see the color change.
Or you can take the easy, fun road like I sometimes do. You just melt twenty Werther’s Original Chewy Caramels with some cream. It is almost like candy magic in a pot. Both ways give you a lovely, salty, buttery sauce. Which one sounds more fun for you today?
The Crunchy Bottom That Matters
The crust is just as important as the creamy top. You take those lovely Biscoff cookies and crush them into fine crumbs with melted butter. They smell like warm cinnamon and comfort. I always sneak a pinch of the dry crumbs before I add the butter.
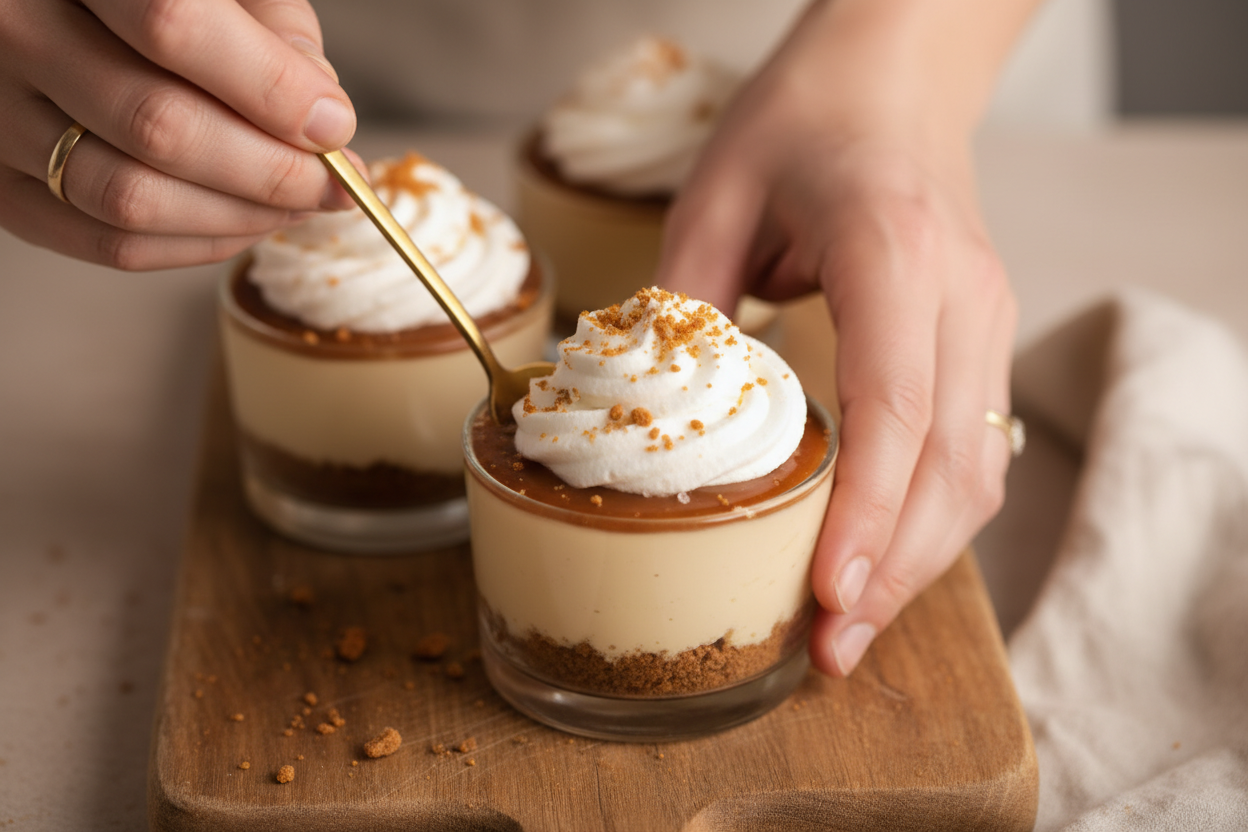
Here is a secret: do not pack the crumbs too tight in your cups. Just press them down gently with the bottom of a glass. A loose crust gives you that nice, crumbly bite against the smooth cheesecake. This is why texture matters so much in a dessert — it keeps every spoonful interesting.
Why Room Temperature Is Your Friend
Let me tell you a little story about a cheesecake that looked like a lumpy moon. I was in a hurry once, and I used cold cream cheese right from the fridge. The filling turned into little white bumps instead of being silky smooth. I learned my lesson that day.
Now I always let my cream cheese sit out for an hour. The same goes for the butter and cream when you make the caramel. Warm ingredients blend together like old friends. This is one of those “why this matters” moments — it is the difference between a lumpy mess and a dreamy, silky bite.
The Folding Trick
When you add the whipped cream to your cheesecake filling, do not just stir like a wild person. You need to fold it gently with a rubber spatula. Imagine you are tucking a soft blanket around a sleeping baby. Slow, gentle sweeps from the bottom up.
That gentle touch makes the filling light and airy, not heavy. You will see it turn into this beautiful, creamy cloud. I always stop and take a deep breath at this step. It reminds me to slow down and enjoy the making, not just the eating. Have you ever noticed how calm it feels to cook this way?
The Waiting Game
Here is the hardest part: you have to wait. These little cheesecake cups need to sit in the fridge for four to six hours. Overnight is even better. I know it feels like forever when you want a treat right now. But the cold helps the flavors hold hands and become best friends.
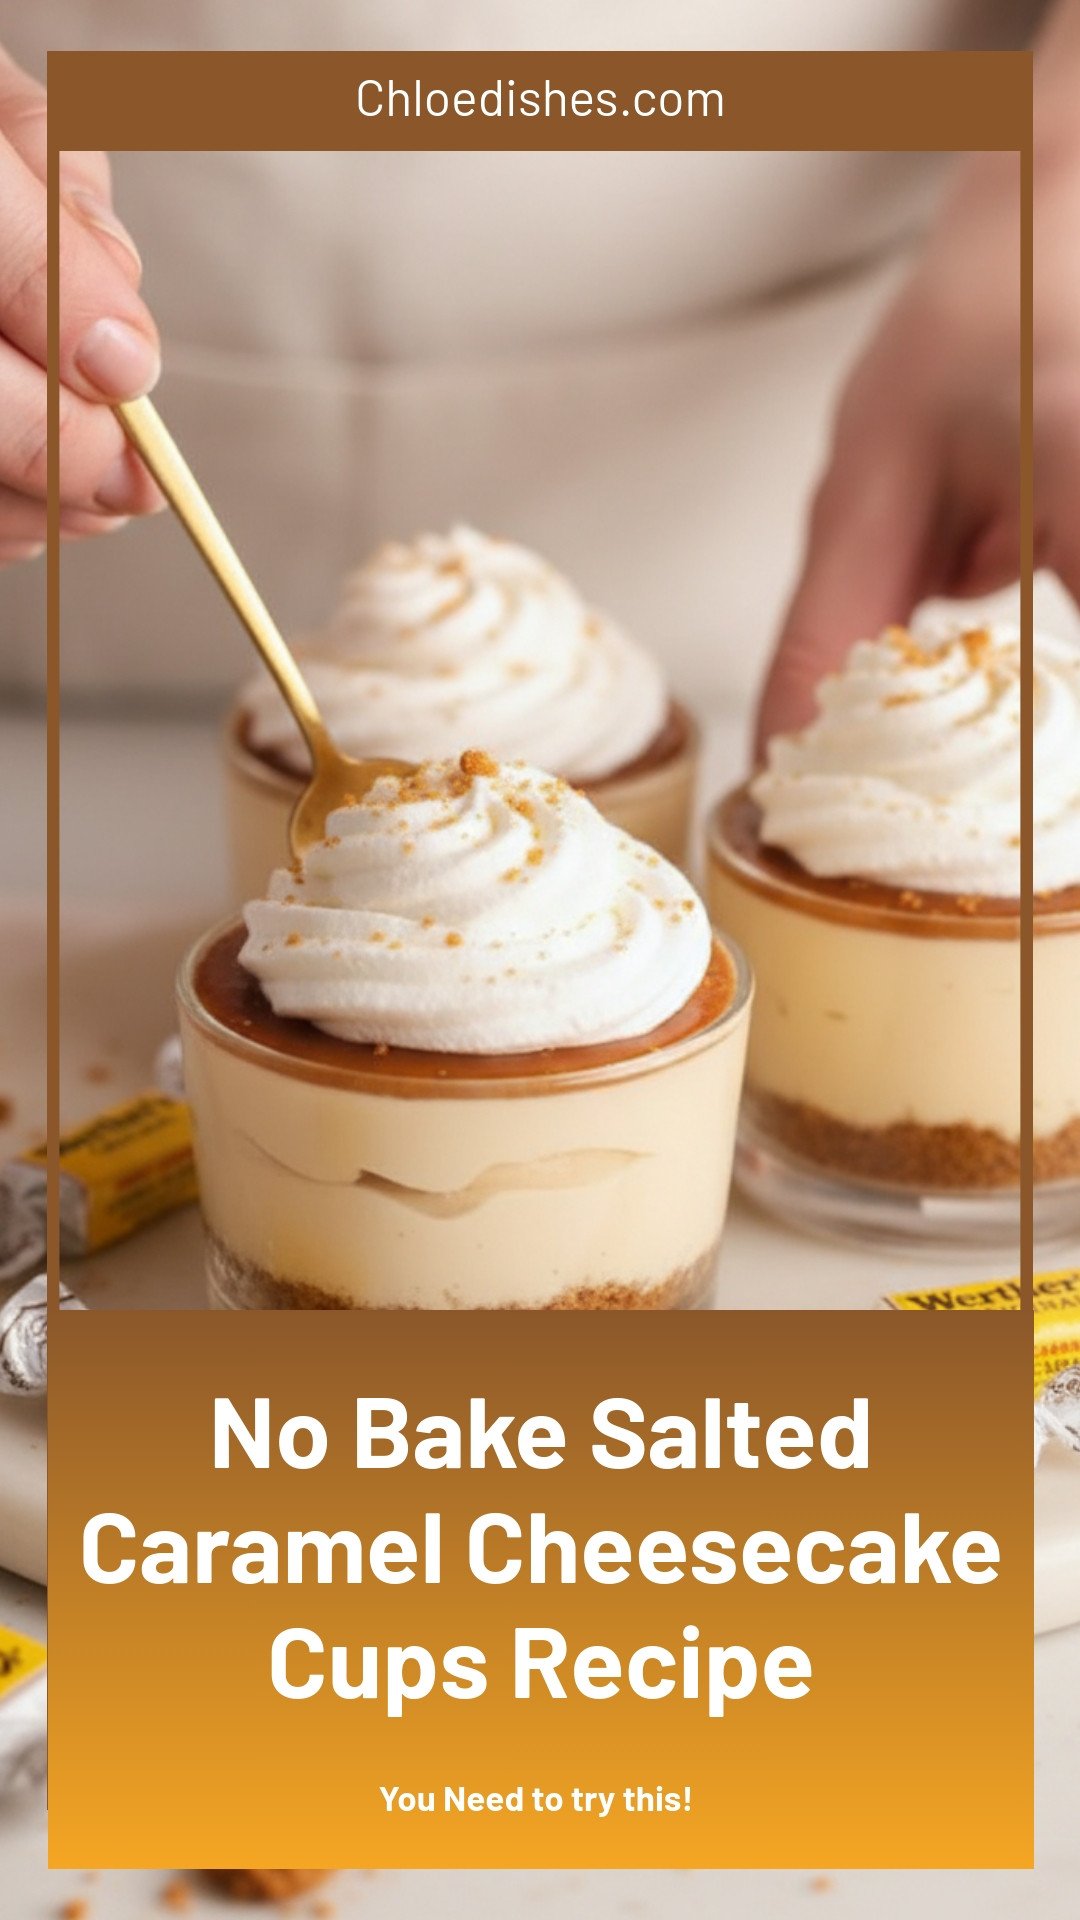
When you finally take them out, the filling will be firm and sliceable with a spoon. Drizzle that extra caramel on top and add a cloud of whipped cream if you like. *Fun fact: Cold temperatures actually make our taste buds more sensitive to sweetness.* That is why chilled desserts taste so wonderfully rich.
Your Turn at the Stove
Now I want to hear from you. What is your favorite part of making a no-bake dessert? Is it the crushing of the cookies or the drizzling of the sauce? Maybe it is licking the spatula clean — no judgment here. I still do that every single time.
If you try this recipe, come back and tell me how it went. Did you use the candy shortcut or try the real cooked caramel? I love hearing about little kitchen victories. And remember, even if your caramel gets a little lumpy, it will still taste wonderful over a scoop of ice cream.
Ingredients:
| Ingredient | Amount | Notes |
|---|---|---|
| Granulated sugar | ¾ cup (150g) | Salted caramel sauce option 1 |
| Unsalted butter | 4 tbsp (56g) | Room temp, sliced; option 1 |
| Heavy cream | ⅓ cup (80g) | Room temp; option 1 |
| Vanilla extract | 1 tsp | Option 1 |
| Salt | ¾ tsp | Option 1 |
| Werther’s Original Chewy Caramels | 20 | Option 2 |
| Heavy cream | 2 tbsp | Option 2 |
| Salt | ½ tsp | Option 2 |
| Biscoff cookies | 200g (about 26 cookies) | Crust |
| Unsalted butter | 6 tbsp (85g) | Melted; crust |
| Cream cheese | 16oz (450g) | Room temp; filling |
| Sugar | ⅓ cup (65g) | Filling |
| Vanilla | 1 tsp | Filling |
| Salted caramel sauce (option 1 or 2) | ⅓ cup | Filling |
| Heavy cream | ⅔ cup (160g) | Chilled; filling |
| Heavy cream | 1 cup (240g) | Chilled; serving (optional) |
Salt and Sugar and a Happy Little Mess
I remember the first time I tried making caramel from scratch. I was maybe your age, standing on a little step stool. The sugar got all lumpy and I thought I ruined it. But my grandma just said, “Give it time, honey.” That patience is everything. Doesn’t that smell amazing when it turns golden?
These no-bake salted caramel cheesecake cups are my little shortcut to fancy. No oven needed, just a fridge and a little love. You can even use the candy method if cooking sugar scares you. I do that when I am feeling lazy, and it works perfectly. I still laugh at how easy this is.
Let us start with the crust. Grab some Biscoff cookies and melt some butter. You can also use graham crackers if that is what you have. My neighbor once used vanilla wafers, and it was just as good. Get the kids to help crush the cookies; it is a great job for little hands.
Let’s Make These Little Cups of Heaven
Step 1: Start your caramel. If using scratch, put sugar in a light-colored pan on the lowest heat. Do not walk away, just stir slowly as it melts. It will look grainy and scary at first, but keep going. (Hard-learned tip: never stir with a wet spoon or the sugar will seize up into a rock.)
Step 2: Once the sugar is a deep golden color, turn off the heat. Toss in your butter and whisk until it melts. It will look separated and weird, but that is fine. Then pour in warm cream slowly while whisking. Watch it bubble up like a happy little volcano.
Step 3: If using the candy shortcut, just put unwrapped Werther’s caramels and cream in a pan. Stir on low heat until they melt into a smooth sauce. Add salt and let it cool. This is my favorite way when I am in a hurry. Which way would you try first? Share below!
Step 4: For the crust, blitz the cookies and melted butter in a food processor. Divide the crumbs into six cups and press them down gently with a glass. Do not pack them too tight, or they become hard as a rock. Pop them in the fridge while you make the filling.
Step 5: Beat the cream cheese, sugar, and vanilla for 2-3 minutes until smooth. Scrape the bowl, then add ⅓ cup of your cooled caramel sauce. Mix just until combined. In another bowl, whip the heavy cream until it forms soft peaks. Fold it all together gently with a spatula.
Step 6: Spoon the silky cheesecake filling over the crusts in your cups. Spread it even and smooth the tops. Refrigerate for at least 4-6 hours, but overnight is best. Patience is hard, I know, but it makes the texture perfect. When ready, drizzle with more warm caramel and maybe some whipped cream.
Cook Time: 4–6 hours
Total Time: 4 hours 15 minutes
Yield: 6 servings
Category: Dessert
Three Fun Twists to Try
Chocolate Lover’s Dream. Mix a spoonful of cocoa powder into your crust crumbs. It adds a deep, cozy chocolate flavor that hugs the caramel.
Berry Swirl Surprise. Warm up some strawberry jam and swirl it on top of the cheesecake before chilling. The tart berries cut through the sweetness like magic.
Salty Peanut Crunch. Sprinkle crushed salted peanuts on top before serving. It adds a little crunch and makes it taste like a candy bar. Which one would you try first? Comment below!
How to Serve and Sip
These cups are perfect just as they are, with a little extra caramel on top. You can also add a dollop of fresh whipped cream and a tiny pinch of sea salt. For a fancy touch, garnish with a caramel candy on the side.
Pair them with a cold glass of milk for the kids, or a warm cup of black coffee for the grown-ups. If you want something cozy, try a mug of spiced apple cider. The sweet and salty flavors love a good companion. Which would you choose tonight?

How to Store Your No Bake Salted Caramel Cheesecake Cups
These little cups love the fridge. Keep them covered with plastic wrap or a lid. They will stay fresh for up to five days. I once left a batch out on the counter by mistake. The next morning, the tops looked sad and runny. Always store them cold. You can also freeze them for up to one month. Just wrap each cup tightly in plastic wrap, then foil. To serve, thaw them overnight in the fridge. This is a great trick for busy weeks. You can make a double batch on Sunday and enjoy treats all week long. Batch cooking saves time and gives you something sweet when you need it. Have you ever tried storing it this way? Share below!
Three Common Problems and Easy Fixes
First, the crust might be too crumbly. This happens if you pack it too tight. Gently press it down with a glass bottom. I remember my first batch fell apart because I pushed too hard. Second, the filling can turn lumpy. This happens when the cream cheese is cold. Always let it sit on the counter for thirty minutes first. Third, the caramel might be too hard. If you used the stovetop method, the sugar may have cooked too long. Next time, watch it like a hawk and take it off the heat right when it turns golden. Fixing these small mistakes makes you a better cook. You learn to trust your eyes and hands. Which of these problems have you run into before?
Why this matters: Getting the crust right means each bite holds together. That makes eating it more fun. And smooth filling tastes richer. You worked hard on this dessert. You deserve it to be perfect.
Your Top Questions Answered
Q: Can I use gluten-free cookies for the crust?
A: Yes! Any crunchy gluten-free cookie works. Just check the package first.
Q: How far ahead can I make these?
A: You can make them up to two days before serving. They taste even better after resting overnight.
Q: Can I swap the heavy cream for milk?
A: No, milk is too thin. The filling needs heavy cream to set properly. Stick with the recipe.
Q: How do I double the recipe?
A: Simply double every ingredient. Use a larger bowl for mixing. You will get twelve cups instead of six.
Q: Should I add the whipped cream on top before serving?
A: I like to add it right before serving. It stays fluffy that way. You can skip it too. The cups are already rich and creamy.
Which tip will you try first?
A Little Sweet Note from My Kitchen to Yours
Thank you for making these little cups with me. I hope they bring a smile to your table. They remind me of summer afternoons and sticky fingers. *Fun fact: These cups were inspired by a roadside bakery I visited in Vermont.* If you take a photo, please tag me on Pinterest. I love seeing your kitchen creations. Have you tried this recipe? Tag us on Pinterest! Until next time, keep stirring with love. Happy cooking! —Chloe Hartwell.

No Bake Salted Caramel Cheesecake Cups: No Bake Salted Caramel Cheesecake Cups Recipe
Description
Salted caramel meets creamy no bake cheesecake in these easy individual cups. The perfect quick dessert!
Ingredients
Salted caramel sauce option 1 (from scratch):¾ cup granulated sugar (150g)4 tbsp unsalted butter, room temp and sliced (56g)⅓ cup heavy cream, room temp (80g)1 tsp vanilla extract¾ tsp salt
Salted caramel sauce option 2 (with candy):20 Werther’s Original Chewy Caramels2 tbsp heavy cream½ tsp salt
Crust:200g Biscoff cookies (about 26 cookies)6 tbsp unsalted butter, melted (85g)
Cheesecake filling:16oz cream cheese, room temp (450g)⅓ cup sugar (65g)1 tsp vanilla⅓ cup salted caramel sauce from option 1 or option 2 above⅔ cup heavy cream, chilled (160g)
Serving:1 cup heavy cream, chilled (240g) – optionalSalted caramel sauce option 1 (from scratch):
Instructions
Salted caramel sauce option 1 (from scratch): Add the sugar to a wide-bottomed, light-colored pan and place on the lowest flame on the stove (do not use high flame as the sugar can easily burn). Let the sugar heat until you see that it has started to melt on the bottom. At this point, use a dry utensil to slowly stir the sugar and encourage it to melt evenly. It will look grainy and lumpy, but keep slowly stirring and allowing the sugar to heat on low flame, and eventually all the lumps and grains will melt. Once the sugar has fully melted, continue to cook until it reaches a deep golden, caramel color. This entire process can take 15+ minutes depending on your pan and stoveTurn off the heat. Add the softened butter, and whisk it in until it has fully melted. The butter will not dissolve in the sugar and will look separated, which is totally okOnce the butter has fully melted, add the warm cream (make sure it is warm to touch; you can heat it in the microwave for 20-30s) and whisk it in. The cream will become very bubbly and frothy at first, but will quickly settle and create a smooth caramel sauce. If you feel that the sauce is becoming too thick or seizing up, turn the heat back on the lowest setting and gently stir until the sauce looks like the right consistency, then turn off the heat againAdd vanilla and salt (start with ½ tsp, taste, and add more as needed) and mix inAt this point, you should have a smooth but runny dark golden caramel sauce. Pour it into a heat-safe glass bowl or jar, and let it cool down fully at room temperature
Salted caramel sauce option 2 (with candy): Add the Werther’s candies (unwrapped) to a nonstick saucepan along with the heavy cream. Cook and stir on the lowest flame until the candy has melted and a smooth sauce has formedTurn off the heat and stir in the saltTransfer to a heat-safe container and let cool completely to room temperature
Crust: Add the cookies and melted butter to a food processor and blitz until a fine crumb formsDivide the crumb evenly between 6 dessert cups (7oz each)Press down gently using the bottom of a narrow glass – don’t pack too tightly! Keep in the fridge while you work on the filling
Cheesecake filling: Add the room temperature cream cheese, sugar and vanilla to the bowl of a stand mixer. Use the paddle attachment to whisk for 2-3 minutes until the sugar dissolves. Scrape the bowl a few times along the wayAdd ⅓ cup of salted caramel sauce (from option 1 or 2; make sure it has cooled to room temperature) and whisk again just until combined. Do not overmixIn a separate bowl, whisk the heavy cream to medium peaks (it should become thick and start to hold shape). Add to the remaining mixture and use a rubber spatula to slowly and gently fold it inYou should have a silky smooth cheesecake mixture now. Divide it evenly between the dessert cups with the crust in them, and spread evenly with a knife or spatulaRefrigerate for 4-6 hours or overnight until thoroughly chilled
Serving: When ready to serve, remove the cheesecake cups from the fridge. Take the remaining salted caramel sauce and microwave for ~10-15 seconds until it becomes runny (but not too hot). Drizzle ~½ tablespoon of the sauce onto each cup and spread it out evenlyOptionally, whip up heavy cream to stiff peaks, and pipe it on top of the cheesecakes to decorateServe cold & enjoy!
Notes
- For best results, ensure all ingredients are at room temperature as specified. Cheesecake cups can be stored in the refrigerator for up to 3 days.


Leave a Reply