
The Pie That Started With a Laugh
I still laugh at the first time I made this pie. It was a hot summer day, and my grandson kept asking for something cold and sweet. I looked in my pantry and found Oreos, peanut butter, and a box of Cool Whip. I thought, why not mix them all together? That mess of a kitchen turned into our favorite dessert. Doesnt that smell amazing when you think about it?
This Oreo Peanut Butter Pie is a no-fuss friend. You dont need a fancy oven or special tools. Just a bowl, a mixer, and a little patience. The best part? You can make it ahead and forget about it until dinnertime. Have you ever made a dessert that saved a busy day?
Why the Crust Matters Most
The crust is like a cozy bed for the filling. You take 24 Oreos and melt 6 tablespoons of dairy-free butter. Then you pulse them in a food processor until they look like dark, crumbly sand. Press that mixture into a pie pan, making sure to push it up the sides. If you skip this step, your crust will fall apart when you cut the pie. I learned that the hard way!
You have two choices here. You can pop the crust in the fridge for 30 minutes for a no-bake pie. Or you can bake it at 350 degrees for 10 to 12 minutes for a crunchier bite. I like the baked version because it smells like a bakery. Let it cool for 30 minutes before adding the filling. This little wait makes the pie hold together better. Why do you think patience always makes food taste better?
The Creamy Heart of the Pie
Now comes the gooey, dreamy part. In a big bowl, mix together 8 ounces of softened cream cheese, 3/4 cup of creamy peanut butter, and 1/4 cup of maple syrup. If you want it a little sweeter, add 2 tablespoons of powdered sugar. Use a hand mixer until its smooth and shiny. This is the moment when your kitchen starts smelling like a peanut butter hug.
Then you fold in the whole container of thawed Cool Whip. Gently mix it until its all one color. Not too fast, or it will get runny. This filling is what makes people close their eyes when they take a bite. I always sneak a little taste from the bowl. Nobody has to know. Do you ever lick the mixing beaters like I do?
The Waiting Game (Worth Every Minute)
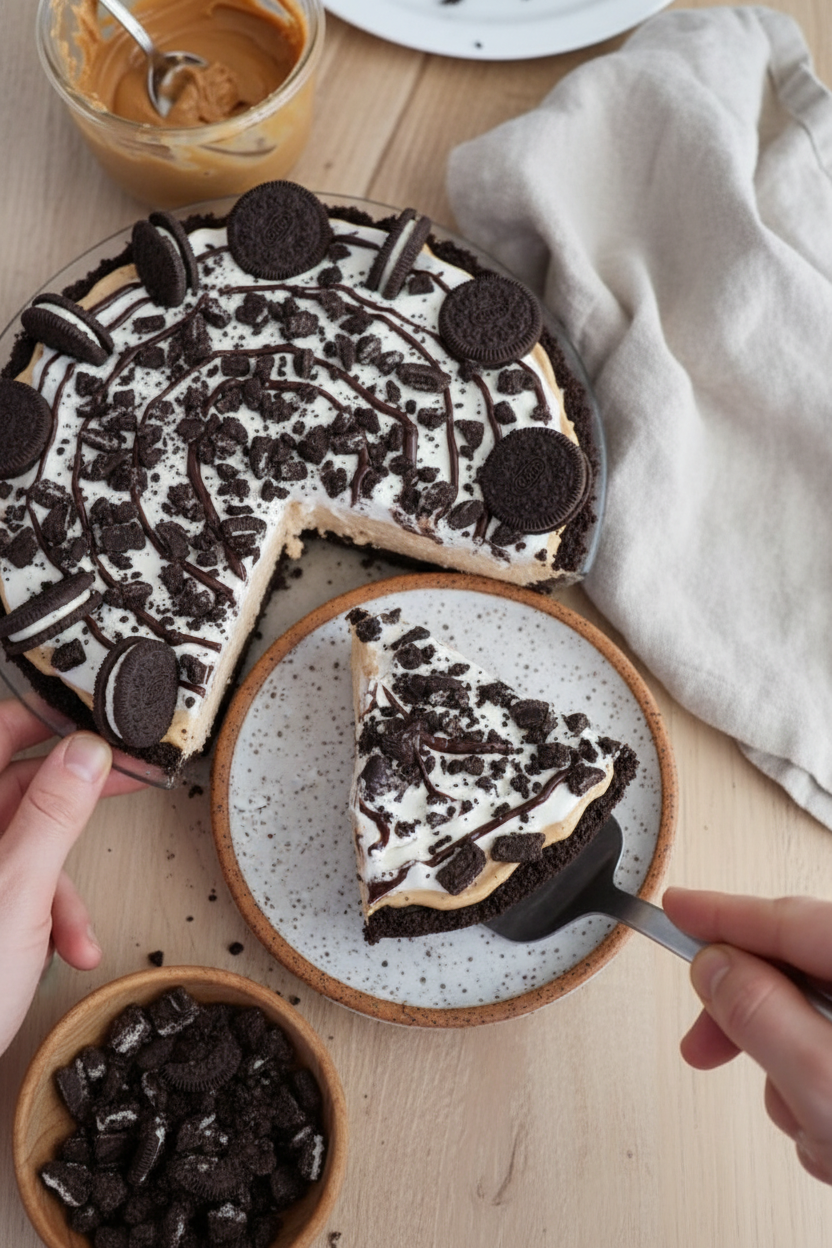
Pour that beautiful peanut butter mixture into your cooled crust. Spread it even with a spatula. You can add extra Cool Whip or crumble a few Oreos on top if you want to be fancy. Then cover the pie with plastic wrap and put it in the fridge for 3 to 4 hours. Overnight is even better. This waiting time lets the flavors get to know each other.
Why does this matter? Because a pie that rests tastes stronger and creamier. The filling sets up just right, so your slices come out clean. I once served this right after making it, and it was a soupy mess. Now I always set a timer and walk away. Have you ever ruined a dessert by being too eager?
A Little History in Every Bite
Did you know that Oreos have been around since 1912? They were first sold in a little grocery store in New York City. And peanut butter has been loved for over a hundred years too. Combining them in a pie is a newer idea, but it feels like they were always meant to be together. This dessert is proof that simple ingredients can make magic.
*Fun fact: The Oreo cookie was named after the gold medal Oreodaphne flower, which smells sweet and grows in the mountains.* I think that flower would be very happy to be turned into a pie. What is your favorite food combination that seems weird but tastes amazing?
Why This Pie is a Kitchen Hero
This recipe uses easy swaps. It uses dairy-free butter and maple syrup, so more people can enjoy it. That means your friend who cant eat dairy can still have a big slice. I love recipes that bring everyone to the table. It does not judge or make anyone feel left out.
Another reason this pie matters: it teaches you to trust your hands. You press the crust, you fold the filling, you wait patiently. There is no wrong way to make it pretty. Each pie looks a little different, and that is the beauty of homemade food. Do you have a special recipe that always makes people smile?
Ingredients:
| Ingredient | Amount | Notes |
|---|---|---|
| Oreos | 24 | |
| Dairy free butter | 6 tablespoons | Melted, not too hot |
| Cream cheese | 8 oz (1 package) | Softened |
| Cool whip | 8 oz (1 package) | Thawed |
| Creamy peanut butter | ¾ cup | |
| Maple syrup | ¼ cup | |
| Powdered sugar | 2 tablespoons | Optional |
My Story Behind This No-Bake Oreo Peanut Butter Pie
I remember the first time I made this pie. My grandson was turning twelve, and he begged for something with Oreos and peanut butter. I said, “Well, let’s see what we can do.”
We pulled out the mixing bowls and got crumbs everywhere. I still laugh at that mess. The kitchen smelled like chocolate and peanuts for hours. Doesn’t that smell amazing?
This pie is no-bake, which means you don’t need to turn on the oven for the filling. That is perfect for hot summer days or when you want a quick treat. You still bake the crust for ten minutes, but it’s very simple.
The secret is letting the pie sit in the fridge long enough. I know it is hard to wait, but trust me. Three hours makes it slice perfectly, like a dream.
Let’s Make It Together: Step by Step
Here is how to build this creamy, crunchy, no-bake masterpiece. Follow along, and do not rush the chilling time. What is your favorite part of making pie: the crust or the filling? Share below!
Step 1: Grab 24 Oreos and 6 tablespoons of melted dairy-free butter. Dump them into a food processor or a blender. Pulse until the cookies look like fine, dark sand. (Hard-learned tip: Do not use hot butter, or the cookies get mushy before you press them into the pan.)
Step 2: Pour that crumb mixture into a pie pan. Use your fingers or the bottom of a glass to press it firmly into the bottom and up the sides. Make sure there are no thin spots where the filling can leak through later.
Step 3: Now you have a choice. For a no-bake crust, pop it in the fridge for 30 minutes. For a baked crust, preheat your oven to 350 degrees and bake it for 10 to 12 minutes. I like baking it—it makes the crust extra crunchy.
Step 4: Let the baked crust cool on a rack for at least 30 minutes. Do not skip this, or your filling will get warm and runny. While it cools, make the filling in a big bowl.
Step 5: In your big bowl, add 8 ounces of softened cream cheese, 3/4 cup of creamy peanut butter, and 1/4 cup of maple syrup. If you like it a little sweeter, add 2 tablespoons of powdered sugar. Use a hand mixer and beat it until it is smooth and shiny.
Step 6: Fold in one 8-ounce container of thawed Cool Whip. Use your mixer again on low speed until everything is light and fluffy. Be gentle so you do not deflate all the air.
Step 7: Scoop the peanut butter filling into your cooled crust. Spread it evenly with a spatula. You can top it with extra Cool Whip or crushed Oreos if you want. Cover the pie and put it in the fridge for 3 to 4 hours, or overnight if you can wait.
Cook Time: 4-6 hours (includes chilling)
Total Time: 4 hours 15 minutes
Yield: 8 servings
Category: Dessert
Three Fun Twists on This Classic Pie
This recipe is a great base, but you can change it up. Here are three ideas to make it your own. Which one would you try first? Comment below!
1. Banana Split Version — Slice a ripe banana over the crust before adding the filling. Then drizzle some chocolate syrup on top before chilling. It tastes like a summer party.
2. Salty Pretzel Crunch — Swap half the Oreos for crushed pretzels in the crust. The salt and sweet together are amazing. It reminds me of county fairs.
3. Minty Chocolate Surprise — Add 1/2 teaspoon of peppermint extract to the filling. Crush some mint Oreos for the crust. It is cool and refreshing for spring.
How to Serve This Pie and What to Drink With It
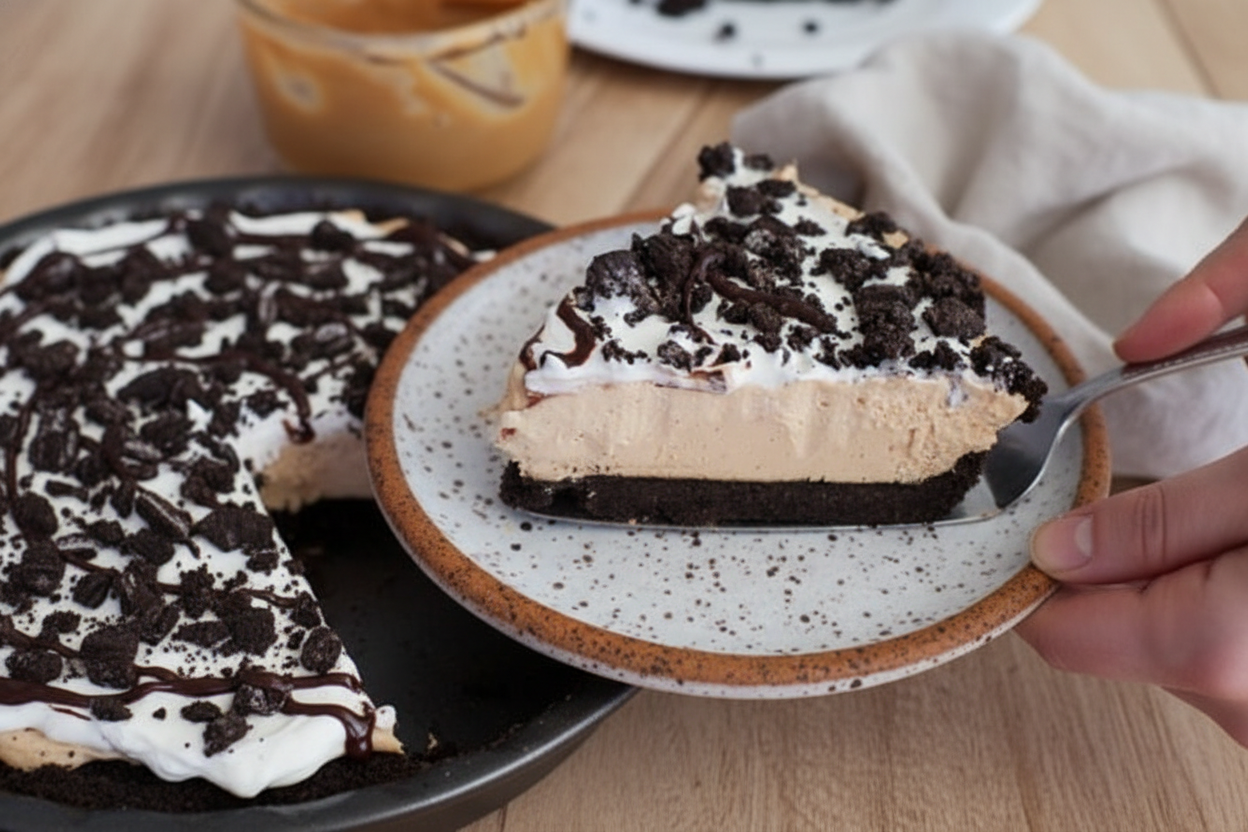
This pie is rich, so small slices work best. Serve it cold, straight from the fridge. A little dollop of whipped cream on top looks pretty and feels fancy.
For a fun crunch, sprinkle crushed peanuts or mini chocolate chips over the top. You can also serve it with fresh strawberries on the side. The tart fruit cuts through the sweetness perfectly.
For drinks, try a cold glass of milk. It is the classic pairing. For grown-ups, a tall glass of iced coffee or a creamy espresso martini works beautifully. Which would you choose tonight?
How to Store and Reheat Your No-Bake Pie
This Oreo Peanut Butter Pie stays best in the fridge. Cover it with plastic wrap or foil. It will keep for up to four days. The filling stays creamy and the crust holds together. I once left a slice on the counter by mistake. It got too soft and mushy. Now I always put it straight in the fridge. You can also freeze this pie. Wrap it tightly in plastic wrap, then foil. Freeze for up to one month. Thaw it in the fridge overnight before serving. Reheating is not needed. This is a no-bake pie, so it is best cold. If you want a warm slice, let it sit out for ten minutes. That softens the peanut butter just a little. Batch cooking is easy here. Make two pies at once. Freeze one for later. That way you have a dessert ready for guests. It saves time and stress. Have you ever tried storing it this way? Share below! Storing food right keeps it safe and tasty. That is why this matters. You waste less and enjoy more.
Common Problems and Easy Fixes
Sometimes the crust crumbles when you cut it. This happens if the Oreo mixture is too dry. Fix it by adding one more tablespoon of melted butter. Press the crust firmly into the pan. I remember my first pie falling apart. My kids called it “crunchy crumbs.” We still laughed and ate it. Another problem is a runny filling. This means the cream cheese was not soft enough. Let your cream cheese sit out for thirty minutes before mixing. Soft cream cheese blends smooth and thick. A third issue is a bland taste. The pie needs a little salt to bring out the peanut butter. Add a pinch of salt to the filling next time. Which of these problems have you run into before? Fixing these small mistakes builds your cooking confidence. That is why this matters. You learn to trust your hands and taste. Every pie gets better. I promise.
Your Questions Answered
Q: Can I make this pie gluten-free? A: Yes. Use gluten-free Oreo-style cookies. They work the same way.
Q: Can I make this pie ahead of time? A: Yes. Make it a day before. It tastes even better after chilling overnight.
Q: Can I swap the peanut butter? A: Yes. Use almond butter or sunflower seed butter. The texture stays creamy.
Q: Can I cut the recipe in half? A: Yes. Use a smaller pie pan or make two mini pies.
Q: Do I have to add powdered sugar? A: No. It is optional. Maple syrup adds enough sweetness. Try it without first. *Fun fact: Maple syrup is a natural sweetener from trees.* Which tip will you try first?
A Warm Goodbye from Chloe
Thank you for spending time in my kitchen today. This pie is made for sharing. I hope you make it for someone you love. Take a picture of your creation. Tag us on Pinterest so I can see. It makes my day to hear from you. Have you tried this recipe? Tag us on Pinterest! Remember, cooking is about joy, not perfection. Every slice tells a story. Happy cooking! —Chloe Hartwell.
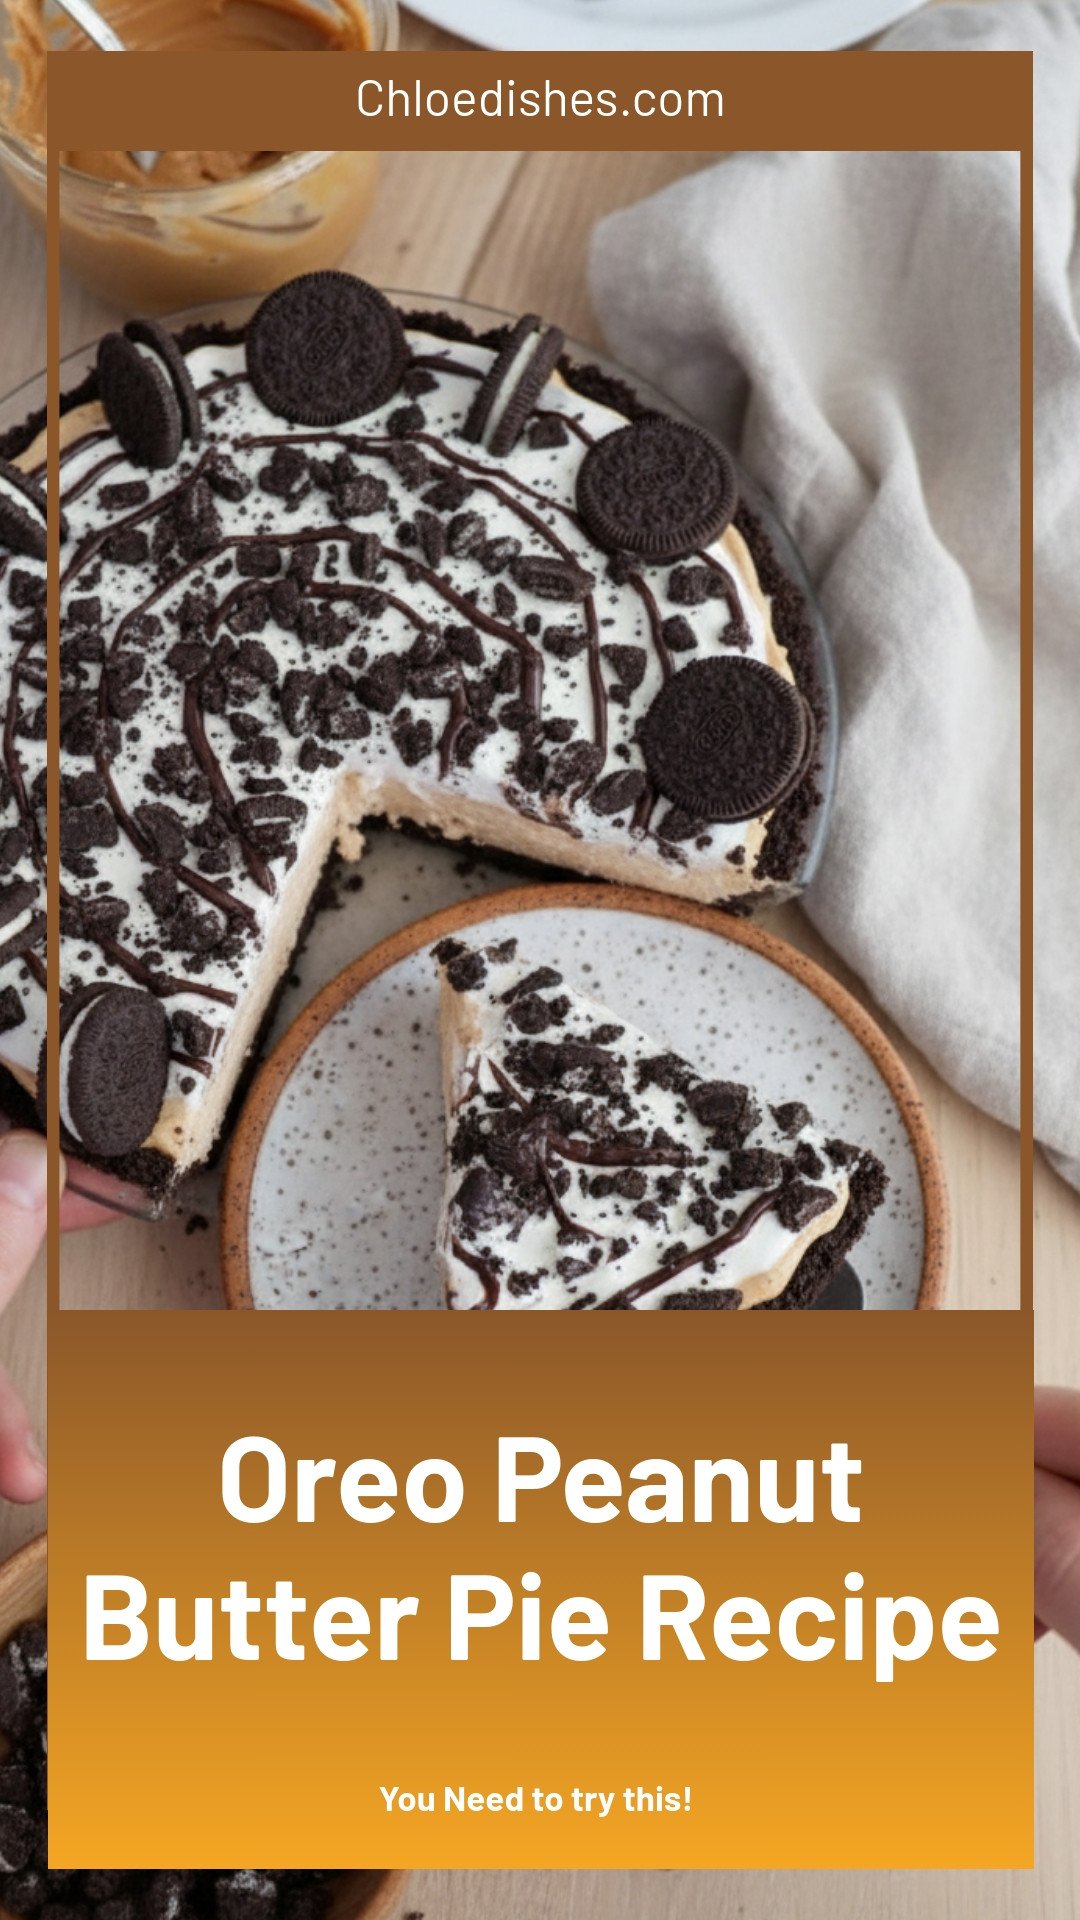
Oreo Peanut Butter Pie Recipe
Description
No-bake Oreo Peanut Butter Pie is a rich, creamy dessert with a crunchy Oreo crust and silky peanut butter filling. Easy and irresistible.
Ingredients
Instructions
- Using a food processor or blender, place your Oreos and melted butter into the bowl. Pulse until completely broken down.Pour the Oreo mixture into the pie pan and press down into the bottom and along the sides.For a no bake pie crust, place this into the refrigerator for 30 minutes. For a baked pie crust, preheat the oven to 350° ℉. Once the oven reaches temperature, place the piecrust into the oven and bake for 10-12 minutes. Remove from the oven and place onto a baking rack. Allow this to cool for at least 30 minutes before adding your peanut butter mixture.
- In a large bowl, combine your cream, cheese, peanut butter, and maple syrup. If you are using powdered sugar, add that at this time as well. Using a hand mixer, mix until creamy.Then, fold in the container of Cool Whip. Using the same hand mixer, mix until creamy.Lastly, add the peanut butter mixture to the pie crust. Spread this evenly over the pie crust. You may top with any additional Cool Whip or Oreos at this time.Cover the pie and place it in the refrigerator for 3 to 4 hours, or overnight.


Leave a Reply