

My First Rump Cap Adventure
I remember the first time I brought home a rump cap roast. My grandma, Nana Rose, called it “the Sunday roast that never fails.” I was a little scared, honestly. It looked like a big, fatty hat for a giant. The butcher told me it was called picanha, which sounds fancy, but Nana just called it “the good piece.” I still laugh at that. She was always right about meat. This cut has a thick, creamy cap of fat on top. That fat is your best friend. It keeps the meat juicy and tastes like butter when it gets crispy. Why does this matter? Because a dry roast makes everyone sad. A moist, tender one makes them ask for seconds. Have you ever cooked a roast that was too dry? Tell me in your heart!The Secret is in the Salt and the Slow Oven
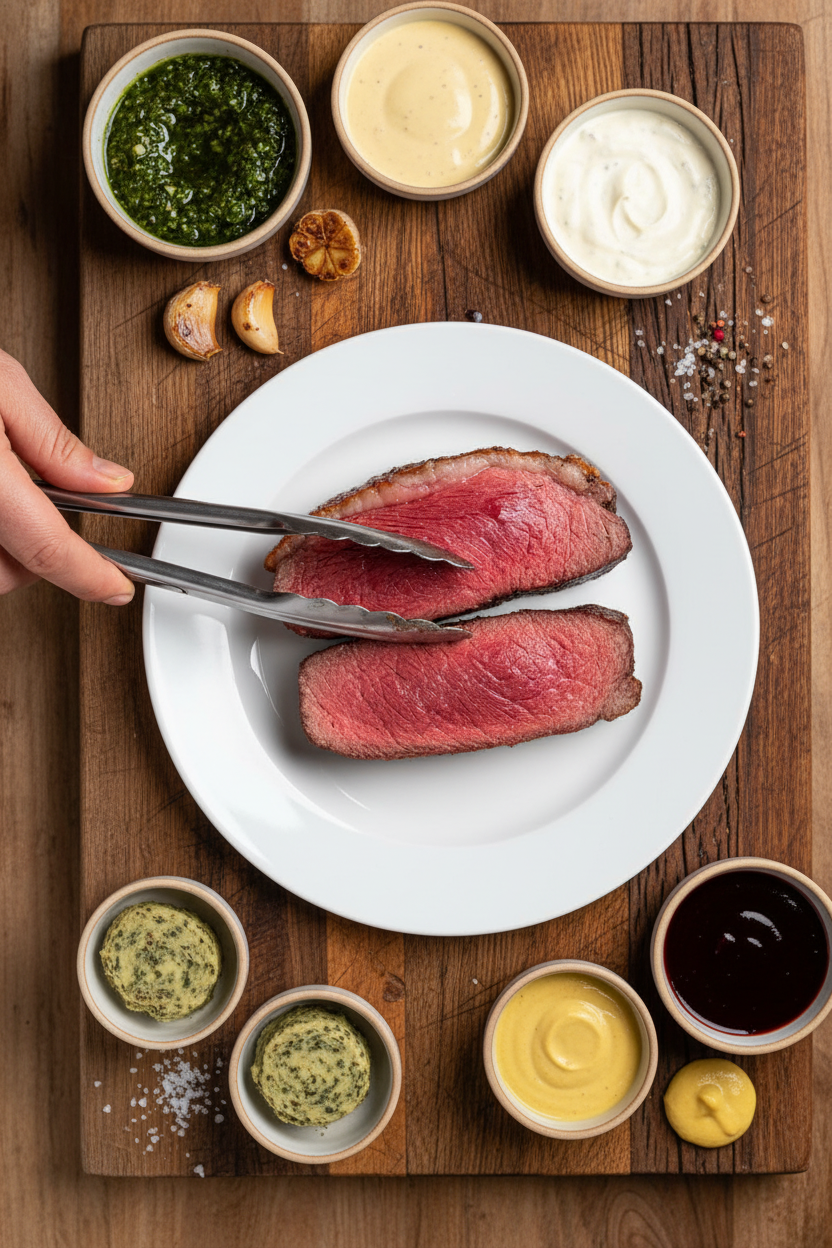
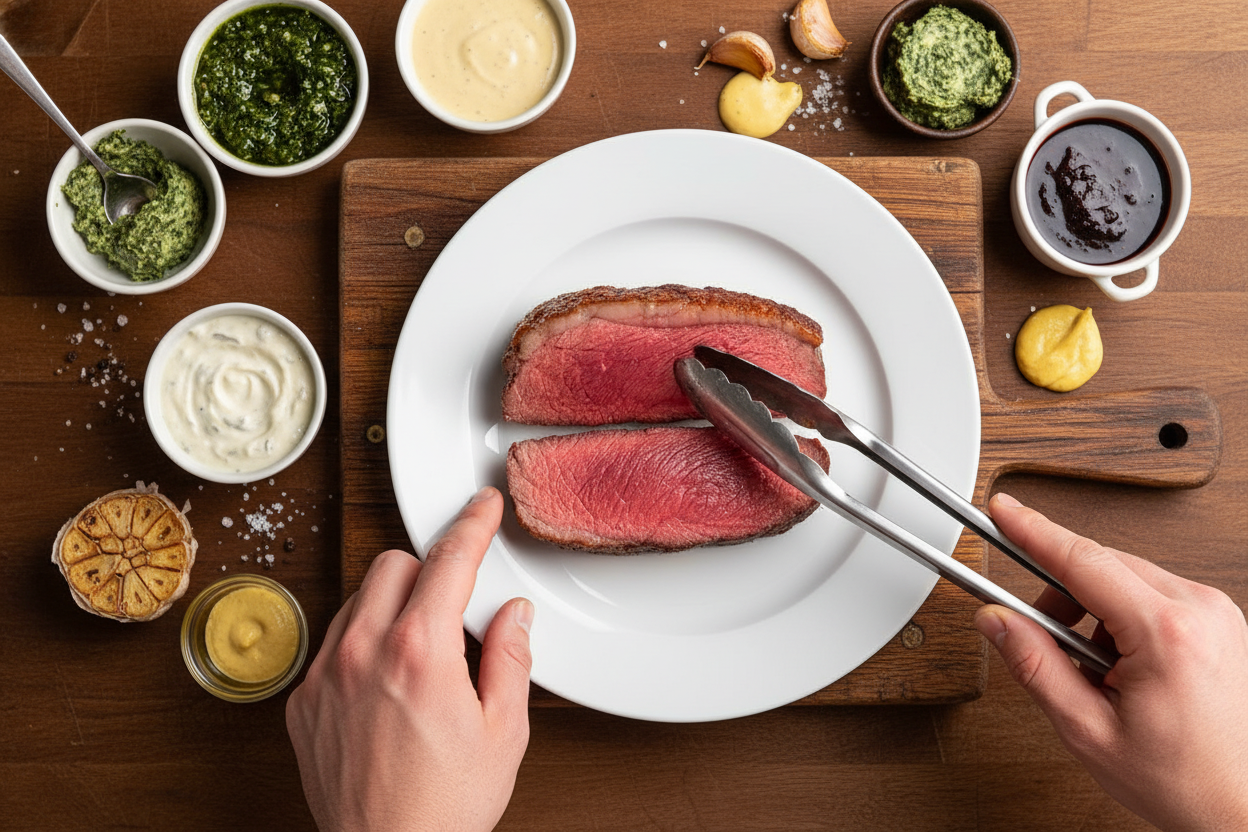
The recipe is simpler than you think. You only need salt and pepper. Really. You rub about two teaspoons of salt on the meat sides. Then you rub three teaspoons on that beautiful fat cap. That extra salt on top helps it get crispy and delicious. Please do not skip the scoring part. You cut little diamond shapes into the fat, deep but not into the meat. Then you put it in a very low oven. 140 degrees Celsius, or about 285 degrees Fahrenheit. You slow-roast it until the inside is just 48 degrees, then you rest it. *Fun fact: resting the meat lets the juices spread out. If you cut too soon, all the flavor runs onto the cutting board and not into your mouth.* Doesn’t that smell amazing? Even just thinking about it.Why Resting is Not Nap Time
Patience is the hardest part. After the slow roast, you take it out and let it sit on the counter for 30 to 40 minutes. Do not cover it. The heat inside keeps cooking it gently. It will climb up to 56 degrees, which is perfect medium rare. This moment matters. It makes the meat tender like a soft pillow. Without this rest, your knife will fight you. I once tried to skip the rest because I was hungry. Bad idea. The meat was tough and the juices were everywhere except in the slices. My husband said, “Chloe, we learned that lesson.” We did. Now I set a timer and walk away. What is the hardest kitchen lesson you ever learned? Spill the beans, friend.The Big Sizzle Under the Grill
While the roast rests, you get your grill or broiler screaming hot. Right before serving, you put the whole roast under the heat for just two to three minutes. Watch it like a hawk. That fat cap will bubble up and turn golden brown. If you leave it even one minute too long, it can burn. Then you get a bitter taste instead of lovely crispness. My grandson once asked, “Grandma, why do we burn the meat on purpose?” I laughed and said, “We are not burning it, honey. We are giving it a golden tan.” He took a bite and his eyes got big. “Okay, I forgive you,” he said. That moment of crunch on top of tender meat is what this is all about. Why does it matter? Texture makes food exciting. Without a good crunch, even the best beef feels a little flat.Slice Thin, Not Thick
Here is a tip I learned the hard way. Do not cut thick slices. I mean it. This cut is not like a thick steak. You want slices about as thick as your pinky finger, maybe a third of an inch. Thin slices let you enjoy the tender meat and the crispy fat in every bite. If you cut it too thick, it can feel chewy and tough. Pay attention to the grain of the meat. That means the lines you see running through the roast. You cut against those lines. It makes the meat fall apart easily when you chew. My friend Judy ignored this once and ended up with pieces like rubber bands. We still tease her. Have you ever cut a roast the wrong way? No judgment here.Pick Your Favorite Sauce, or Three
This roast is a star by itself, but a good sauce makes it a celebration. I love the chimichurri butter shown in the pictures. It is bright and herby and melts all over the pink meat. My current obsession is roasted garlic butter. You mash soft roasted garlic into butter and let it melt on the hot slices. It smells like heaven in your kitchen. You can keep it simple too. A little horseradish cream or good Dijon mustard works wonders. My grandpa always used just salt and the pan juices. He said, “Why hide good beef?” But I say, a little sauce never hurt anyone. Which sauce would you try first? I want to know. Send me a mental message, and I will nod in agreement.This Roast Brings People Together
The best part of this meal is not the meat itself. It is the way everyone gathers around the kitchen. My children love to dip their slices into different sauces. My husband always saves the crispiest fat piece for me. There is something about slow-roasted beef that makes people slow down and talk. No one is in a rush to leave the table. I hope you try this recipe. It feels like a fancy dinner, but it is really just meat, salt, and heat. That is the magic of cooking. Simple things done carefully can make the most beautiful memories. What meal brings your family to the table? I would love to hear about it. Think about it next time you cook.Ingredients:
| Ingredient | Amount | Notes |
|---|---|---|
| Rump cap / picanha (silver skin trimmed) | 2 kg / 4 lb | Also called sirloin cap, coulette |
| Sea salt flakes | 5 tsp | Or 3 ½ tsp cooking salt / kosher salt |
| Black pepper | ½ tsp |
Picanha: The Roast My Grandma Called “Fancy Steak”
My grandma never had a fancy name for this cut. She just called it “the good roast.” I still laugh at that. Picanha is a beef rump cap with a thick, creamy fat layer on top. It comes from the top of the cow’s backside. When you cook it right, the fat turns into pure gold. Does that smell amazing? Yes, it does. It fills your whole kitchen like a hug.
Here is my most important secret. Do not skip the scoring step. Cut little diamonds into the fat cap with a sharp knife. Go right through the fat, but stop before you hit the meat. I once cut too deep, and the roast still turned out fine. But don’t risk it if you can help it. That scoring lets the salt sneak in and makes the fat crispy later.
Salt is your best friend here. Use sea salt flakes if you have them. Rub two teaspoons onto the meat sides and bottom. Then pile the rest onto the fat cap. This is not the time to be shy with salt. My grandma used to say, “Salt it like you mean it.” She was right. That salty crust makes everything better.
Now for the slow roast. Set your oven to 140 degrees Celsius. That is 285 degrees Fahrenheit, if you are like my neighbor who still uses her old thermometer. Put the roast on a rack over a tray. Roast it until the inside hits 48 degrees Celsius. This usually takes about 70 to 90 minutes. Every oven is a little different, so trust your thermometer.
Here is a fun fact you can share at dinner. Did you know that resting meat is not just waiting? It is the most important part of cooking. Take the roast out and leave it on the counter for 30 to 40 minutes. Do not cover it. The internal temperature will climb to 56 degrees Celsius. That is perfect medium rare. I once skipped the rest and ended up with tough meat. Never again.
While the roast rests, turn your oven grill or broiler on high. You want it screaming hot. When the rest is almost done, pop the roast under the grill for 2 to 3 minutes. Watch it like a hawk. (Hard-learned tip: If you walk away for even one minute, the fat can burn and turn bitter. Set a timer!) Pull it out when the fat cap is golden and a little crisp.
Slice it thin, about 8 millimeters thick. Do not go thicker, or the meat will be chewy. Serve it right away with your favorite sauce. What is your go-to sauce for a special roast? Share below!
Cook Time: 70 to 90 minutes
Total Time: 1 hour 45 minutes to 2 hours
Yield: 6 servings
Category: Dinner, Roast Beef
Three Fun Twists on This Roast
You do not have to stop here. Try one of these next time.
Spicy Chimichurri Kick. Add a chopped red chili to your chimichurri butter. It gives the beef a warm, tingly hug. My brother-in-law calls it “fire roast.”
Garlic Herb Crust. Before roasting, mix extra salt with dried rosemary and garlic powder. Rub that all over the fat cap. It smells like a garden in summer.
Sweet and Smoky Glaze. Brush the fat cap with a little honey and smoked paprika during the last 10 minutes of roasting. The sweetness and smoke are perfect together.
Which one would you try first? Comment below!
What to Serve Alongside
This roast loves simple sides. Try crispy roasted potatoes with rosemary. Or a bright salad with lemon and parsley. A bowl of buttery green beans works too.
For drinks, pour a glass of cold red wine like a Malbec. It matches the beefy flavor perfectly. For a non-alcoholic choice, try sparkling water with a slice of lime. It cuts through the richness.
Which would you choose tonight?
Storing Your Picanha Like a Pro
Leftover picanha is a special treat if you store it right. First, let the roast cool completely on the counter. Wrap it tightly in foil or plastic wrap, then pop it in the fridge. It will stay good for up to three days.
I remember the first time I tried to reheat leftover picanha. I tossed it in the microwave and ruined the beautiful medium-rare center. The meat turned tough and gray. Now I know better.
For best results, slice the cold meat thin and warm it gently in a hot skillet. Just 30 seconds per side is enough. This keeps the inside pink and juicy. You can also freeze sliced picanha for up to two months. Just layer it between wax paper in a freezer bag.
Batch cooking this roast? Cook two at once if your oven fits. The second one can rest, then chill, and you have dinner ready for another night. Storing leftovers this way saves you time and work later. That is why this matters: you get two great meals from one cooking effort. *Fun fact: Picanha is actually leaner than many roasts, so storing it correctly keeps it from drying out.*
Have you ever tried storing it this way? Share below!
Three Common Problems and Easy Fixes
Problem one: the fat cap burns under the broiler. I once walked away for just one minute too long. My beautiful fat cap turned black and bitter. The fix is simple. Keep your eyes on the meat the whole time. Pull it out after two minutes if it looks golden. You can always pop it back for one more minute if needed.
Problem two: the meat comes out too well done. This happens when you forget to check the internal temperature. I remember a birthday dinner where my picanha hit 65 degrees by mistake. It was still tasty, but not as juicy. Use a good meat thermometer and pull the roast at 48 degrees. Resting will bring it up to perfect medium-rare. Why this matters: nailing the temperature gives you tender, pink slices every time. That builds your cooking confidence.
Problem three: your picanha is tough and chewy. This usually means you sliced it too thick. Thin slices are the secret to this cut. Cut eight-millimeter pieces against the grain. The grain runs along the length of the roast. Slicing thin makes each bite melt in your mouth. Why this matters: proper slicing transforms a good roast into a great one. It shows you know how to handle the meat.
Which of these problems have you run into before?
Your Top 5 Quick Questions Answered
Q: Is this recipe gluten-free?
A: Yes, all the ingredients listed are naturally gluten-free. Just check your sauce ingredients for any hidden wheat.
Q: Can I make the sauces ahead of time?
A: Absolutely. Chimichurri and garlic butter both keep well in the fridge for up to a week. Make them a day before for easier cooking.
Q: What if I cannot find picanha at the store?
A: Look for sirloin cap or rump cap. Ask your butcher to leave the fat cap on. They usually know the cut by any name.
Q: Can I cook a smaller roast?
A: Yes, just reduce the cooking time. A one-kilo roast might only need 40 minutes. Always use your meat thermometer for safety.
Q: Should I score the fat if I am a beginner?
A: Yes, it helps the fat render and crisp up. Just be careful not to cut into the meat. Use a sharp knife and take your time.
Which tip will you try first?
A Warm Goodbye From My Kitchen
I hope this guide helps you make a perfect picanha roast for your family. There is nothing like the smell of beef roasting in a warm oven. It brings everyone to the table with smiles. I would love to see your results. Take a picture of your golden fat cap and share it with us.
Have you tried this recipe? Tag us on Pinterest!
Remember, every cook makes mistakes. That is how we learn and get better. Keep practicing, and one day this roast will feel easy and natural. You have got this.
Happy cooking!
—Chloe Hartwell.
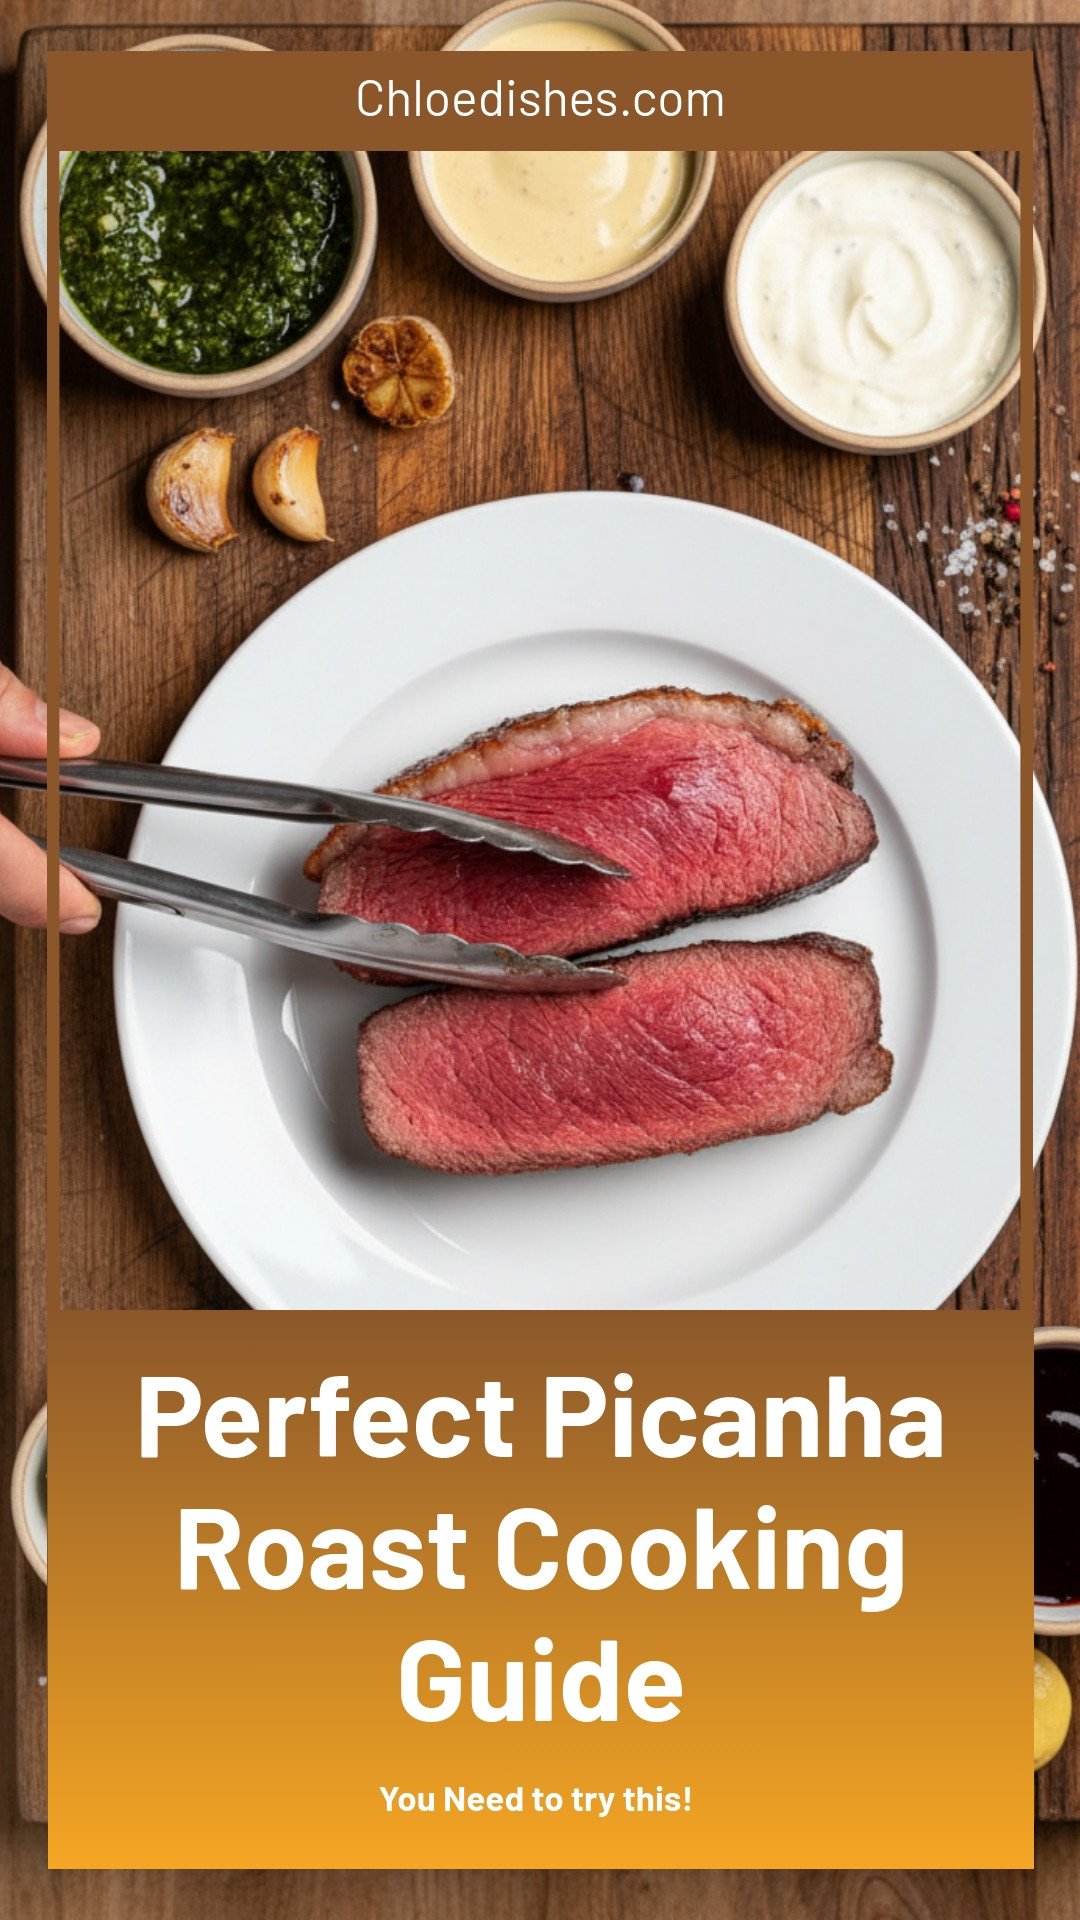
Perfect Picanha Roast Cooking Guide
Description
Learn the secrets to a flawless Perfect Picanha Roast with this easy cooking guide for juicy, tender results every time.
Ingredients
Sauce options:
Instructions
- ABBREVIATED RECIPE: Score fat (cut right in), rub meat with 2 tsp salt, and 3 tsp on fat cap. Roast on rack at 140°C/285°F (120°C fan) until the internal temperature is 48°C / 118°F (~70 minutes – 1 1/2 hrs). Rest 30 minutes, brown fat cap quickly under very hot oven grill/broiler (3 min max). Serve immediately!
- FULL RECIPE: Preheat the oven to 140°C/285°F (120°C fan-forced).
- Dry – Pat excess moisture off the surface of the rump cap with paper towels.
- Score the fat cap with 2.5cm / 1″ diamonds – cut well into the fat but don’t cut into the meat. (But not a disaster if you do, unlike pork crackling!)
- Rub salt – Rub the meat surface with 2 teaspoons of the salt and half the pepper (ie underside and sides). Then rub the remaining 3 teaspoons of salt and pepper into the fat cap.
- Meat thermometer – Place the beef on a rack set on a tray. Insert an oven-safe meat thermometer into the middle of the thickest part of the beef, if using.
- Slow-roast – Roast until the internal temperature is 48°C / 118°F, between 70 to 90 minutes (it varies! Note 3)
- Rest – Remove from the oven and leave on the counter for 30 – 40 minutes to rest (do not cover). The internal temperature will climb to 56°C / 132.8°F which is perfect medium rare. (Note 4 for other doneness)
- Brown fat cap: Preheat – Halfway through the resting time, preheat the oven grill / broiler as high as it will go. Arrange the shelf so the surface of the fat cap will be 12cm / 5″ from the heat element.
- Brown – Grill rump cap for 2 – 3 minutes until the fat cap is golden and a bit crisp. Keep a close eye on it, it can burn quickly, and remove after 3 minutes even if not golden enough else you risk a band of overcooked beef.
- Ready! The beef is ready to serve – there is no need to rest again.
- Slicing to serve: Cut the beef thinly into 8mm / 1/3″ slices and serve with sauce of choice (you can go up to 1.25cm / 1/2″ if you have wagyu). Don’t be tempted to cut thick slices, this beef cut is not suitable for that! (Note 5 about grain direction)
Notes
- Serving suggestion: Pair with chimichurri butter or roasted garlic butter for an extra layer of flavor.


Leave a Reply