
The Day I Learned to Stop Overmixing
I still laugh at the first time I tried making cheesecake brownies. I was so eager to combine everything that I stirred the batter like I was punishing it. The brownies came out tough and flat. My grandma just shook her head and said, “Chloe, baking is like patting a baby’s back. Gentle, gentle, gentle.” That stuck with me. When you see “do not overmix” in a recipe, it’s not a suggestion. It’s a promise that your brownies will stay soft and fudgy. Overmixing wakes up the gluten, which makes things chewy like bread. We want tender, melt-in-your-mouth bites here. Have you ever ruined a batch of brownies by mixing too hard?
That little lesson matters because it changes everything. The red velvet brownie batter in this recipe asks you to fold very gently with a rubber spatula. You want to see the flour disappear, but you stop the second it’s combined. Those last streaks of flour are okay. They will bake out just fine. This is why baking feels like a quiet, patient art. It rewards your soft hands.
A Cheesecake Filling for Every Mood
This recipe gives you two cheesecake fillings. One is plain vanilla, like a cloud of sweet cream. The other is dark chocolate, rich and a little fancy. I like to think of them as two friends who get along perfectly. The vanilla one is easy to make. You just whisk cream cheese, sugar, heavy cream, an egg, and vanilla until smooth. Do not overmix here either. Just get it creamy and stop. The chocolate one starts with a ganache. You melt dark chocolate with heavy cream in the microwave, twenty seconds at a time. Then you fold that ganache into more cream cheese and sugar.
Doesn’t it smell amazing when chocolate and cream come together? That warm, toasty scent fills your whole kitchen. I always pause and take a deep breath. It reminds me of holiday mornings at my grandmother’s house. *Fun fact: adding just two tablespoons of heavy cream to your cheesecake filling makes it extra silky without making it runny. That little bit of fat keeps everything smooth and sliceable.*
Why Red Velvet Is Not Just Chocolate
A lot of folks think red velvet is just chocolate with red dye. That’s not quite true. Red velvet has a tiny bit of vinegar in it. You might think vinegar sounds weird for a dessert, but trust me. It reacts with the cocoa powder to make the cake extra tender. It also helps the red color stay bright. The vinegar does not taste sour. It just makes the brownies soft and balanced. This recipe also uses brown butter. You cook butter in a pan until it turns golden and smells like toasted nuts. Then you stir in dark chocolate right into that warm butter.
That brown butter trick is a secret weapon. It adds a deep, almost caramel flavor that plain butter can’t match. The first time I tried it, I thought I had burned the butter. But no, those little brown specks are pure gold. They make your brownies taste like they came from a fancy bakery. Why does this matter? Because small steps like browning butter or adding vinegar change a simple brownie into something memorable. It does not take extra fancy tools. Just a little patience and curiosity.
The Layering Dance
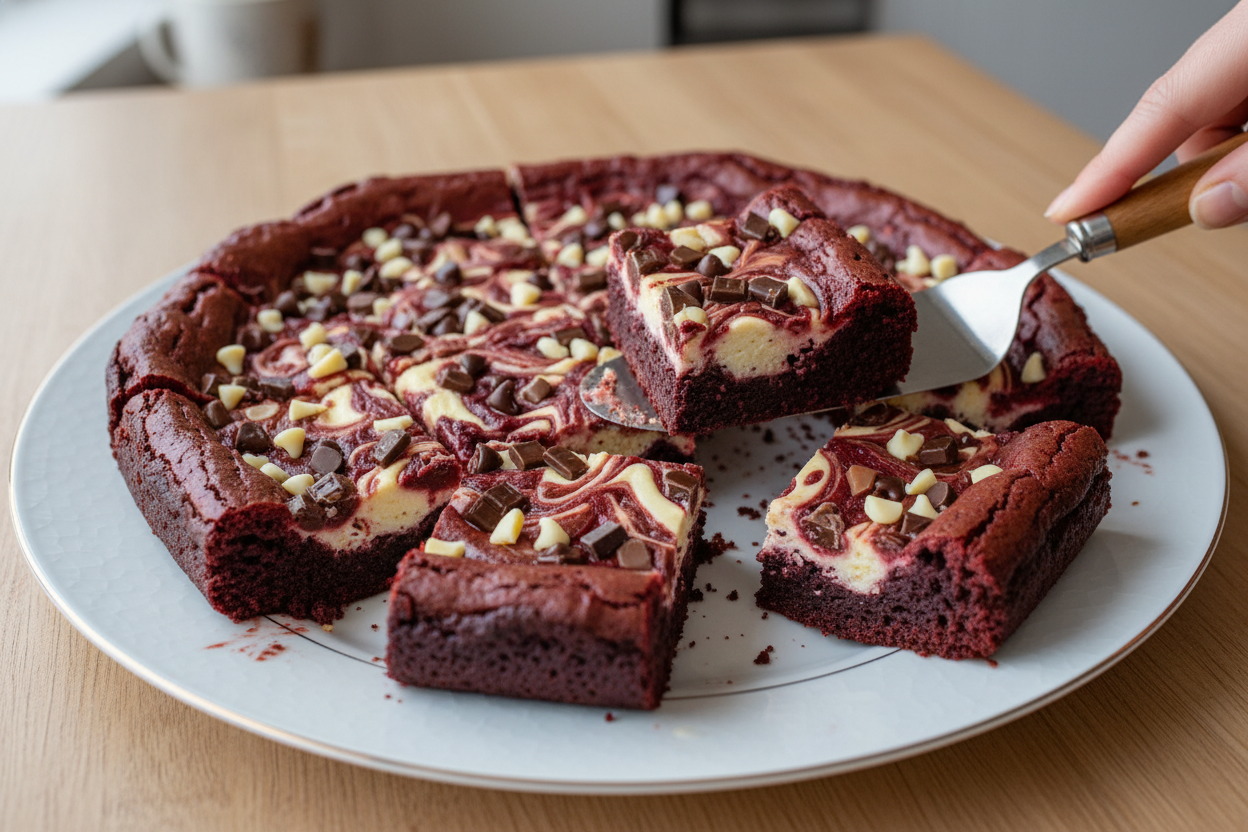
Now comes the fun part. Putting it all together. The recipe says you can layer the batter and fillings however you like. That makes me happy. Baking should have room for your own style. I like to spread half the brownie batter in the pan first. Then I toss on some chopped chocolate pieces. After that, I pipe the vanilla and chocolate cheesecake fillings in thick lines next to each other. It looks like a striped painting. Then I spoon the rest of the brownie batter on top. I add little dollops of leftover cheesecake filling and swirl them with a toothpick.
I always save a few extra chunks of white, dark, and milk chocolate to sprinkle on top before baking. Those little chocolate pieces melt into puddles on the surface. Every bite becomes a surprise. Have you ever made a layered dessert that turned into a beautiful mess? That is exactly what we want here. Swirls and streaks make each slice unique.
I would love to hear your favorite way to layer brownies and cheesecake together. Do you like neat stripes or wild swirls?
The Waiting Game
Baking these brownies takes about thirty to thirty-five minutes. But the real magic happens after you take them out. The recipe says to let them rest at room temperature for twenty minutes. Then you must put them in the fridge for one full hour. I know that is hard. The smell fills your house. Everything looks done and perfect. But warm cheesecake filling is too soft. It will fall apart if you cut into it too soon. That hour in the fridge lets the cream cheese set firm. It makes clean, beautiful slices that hold their shape.
This waiting matters because texture is everything. A brownie that crumbles is sad. A brownie that holds its layers, with a fudgy center and creamy cheesecake stripes, is a triumph. I once cut into a pan too early out of impatience. It looked like a mudslide. I still ate it, and it tasted great. But the next batch, when I waited, looked like a magazine picture. Which one would you rather have? The messy delicious one or the pretty one? I say both are wins, but waiting makes the second one extra special.
Ingredients:
| Ingredient | Amount | Notes |
|---|---|---|
| Cream cheese (vanilla filling) | 8 oz (226g) | Room temperature |
| White sugar (vanilla filling) | ¼ cup (50g) | |
| Heavy cream (vanilla filling) | 2 tbsp | |
| Egg (vanilla filling) | 1 | |
| Vanilla extract (vanilla filling) | 1 tsp | |
| Dark or semi-sweet chocolate (chocolate filling) | 100g | |
| Heavy cream (chocolate filling) | ¼ cup (60g) | |
| Cream cheese (chocolate filling) | 6 oz (170g) | Room temperature |
| White sugar (chocolate filling) | ¼ cup (50g) | |
| Unsalted butter | 12 tbsp (170g) | |
| Dark chocolate (brownie batter) | 50g | |
| White sugar (brownie batter) | ¾ cup (150g) | |
| Brown sugar | ½ cup (100g) | |
| Large eggs | 2 | |
| Vanilla bean paste | 2 tsp | |
| Vinegar | ½ tsp | |
| Red food color | ½ tbsp | |
| All purpose flour | 1 cup (130g) | |
| Dutch processed cocoa powder | 2 tbsp (12g) | |
| Salt | ¾ tsp | |
| Chopped white, dark, milk chocolates or chips | 100g | To your liking |
The Story Behind This Triple-Layer Treat
I remember the first time I made these brownies. My kitchen looked like a red velvet crime scene. Flour was everywhere, and I had cheesecake filling on my nose. But oh, the smell. Doesn’t that smell amazing? That nutty butter and rich chocolate aroma filled my whole house. My neighbor actually knocked on the door to ask what I was baking. I still laugh at that. These brownies became our family’s birthday tradition from that day on. They’re fancy enough for a party but simple enough for a Tuesday night craving.
Now, I need to warn you about something important. This recipe has three parts, but don’t let that scare you. Think of it like building a little castle with three different layers. Each layer does its own job. The vanilla cheesecake is sweet and creamy. The chocolate cheesecake is rich and dreamy. And the red velvet brownie? That’s the cozy, fudgy hug that holds everything together. You can do this. I promise. Take a deep breath and read through the steps once before you start. That little trick always helps me feel ready.
Here is a fun fact for you: The red color in red velvet originally came from a chemical reaction between cocoa and buttermilk. We use food coloring now, but isn’t that fascinating? Did you know that original red velvet didn’t use any dye at all? Share below!
Let’s get our ingredients ready first. Make sure your cream cheese is really soft, like room temperature soft. Cold cream cheese makes lumpy filling, and nobody wants that. Also, line your pan with parchment paper before you do anything else. Trust me, trying to get brownies out of a sticky pan is heartbreaking. I learned that the hard way, and I still have the scar on my finger from scraping.
Step 1: Start with the vanilla cheesecake filling. Put your room temperature cream cheese, white sugar, heavy cream, egg, and vanilla into a bowl. Whisk on medium-low speed until it looks creamy and smooth, but stop as soon as it comes together. (Here is a hard-learned tip: If you whisk too fast or too long, the cheesecake will crack when baked. Be gentle with it, like you are petting a sleepy cat.) Set this bowl aside for now. Step 2: Now make the chocolate cheesecake filling. Put the dark chocolate and heavy cream in a microwave safe bowl. Microwave in 20-second bursts, stirring each time, until it becomes a shiny, smooth ganache. In a separate bowl, whisk the cream cheese and sugar until creamy. Then, fold the ganache into the cream cheese mixture gently. Do not stir hard. Just fold it like you are tucking a blanket around a sleepy child. Step 3: Time for the red velvet brownie batter. Melt your butter in a saucepan over medium heat. Cook it until you see little brown specks appear and it smells nutty and toasty. Be careful here. Burnt butter is sad butter. Remove it from the heat quickly and stir in the dark chocolate until melted. In a large bowl, whisk the white sugar, brown sugar, eggs, and vanilla on high speed for a full 3-4 minutes. You want it super pale, frothy, and light. This step makes your brownies fluffy on the inside. Step 4: Whisk in the vinegar, red food coloring, and your warm butter-chocolate mixture until combined. Sift the flour, cocoa powder, and salt right into the bowl. Use a rubber spatula to fold very gently until just combined. Do not overmix. Overmixing makes tough brownies. (Another hard-learned tip: If you see a few white flour streaks, that is actually okay. Better a streak than a hockey puck.) Set this aside for a minute. Step 5: Preheat your oven to 350F and line a 9×9 inch pan with parchment paper. Now comes the fun part. Spread half of the brownie batter into the pan. Sprinkle some chopped chocolate on top. Use a piping bag or a zip-top bag with a corner snipped off to pipe the vanilla cheesecake and chocolate cheesecake in thick, alternating lines over the batter. Then, dollop the remaining brownie batter on top. Use a toothpick to gently swirl everything together. It should look like a beautiful, messy piece of art. Step 6: Bake for 30-35 minutes. Check it with a toothpick. You want it to come out with moist, sticky crumbs, not wet batter. Let the pan rest on your counter for 20 minutes. Then, transfer it to the fridge for a full hour. I know it is hard to wait, but this step is magic. The cold sets the cheesecake so you get clean, beautiful slices. My kids used to try sneaking bites during this hour. I always caught them. What is the hardest thing you have ever had to wait for? Share below! Cook Time: 30-35 minutesTotal Time: 1 hour 55 minutes (includes cooling and chilling)
Yield: 16 brownies
Category: Dessert, Brownies
Three Fun Twists to Try Next Time
Sometimes I like to mix things up when I have made a recipe a few times. These twists keep it fresh and exciting. Plus, they are great for using up leftovers in your pantry. Give one a try and see what your family thinks.
Peppermint Dream Twist: Add 1/2 teaspoon of peppermint extract to the vanilla cheesecake filling. Crush up some candy canes and sprinkle them on top before baking. This makes a perfect holiday brownie that tastes like Christmas morning. Orange Creamsicle Twist: Stir the zest of one whole orange into the chocolate cheesecake filling. Replace the vinegar in the brownie batter with orange juice. The bright citrus flavor cuts through the rich chocolate beautifully. It tastes like a fancy ice cream bar. Salted Caramel Drizzle Twist: After the brownies are baked and chilled, warm up 1/2 cup of store-bought caramel sauce. Mix in a pinch of flaky sea salt. Drizzle it all over the top of your brownies before slicing. That sweet and salty combo is absolutely irresistible. Which one would you try first? Comment below!How to Serve These Fudgy Beauties
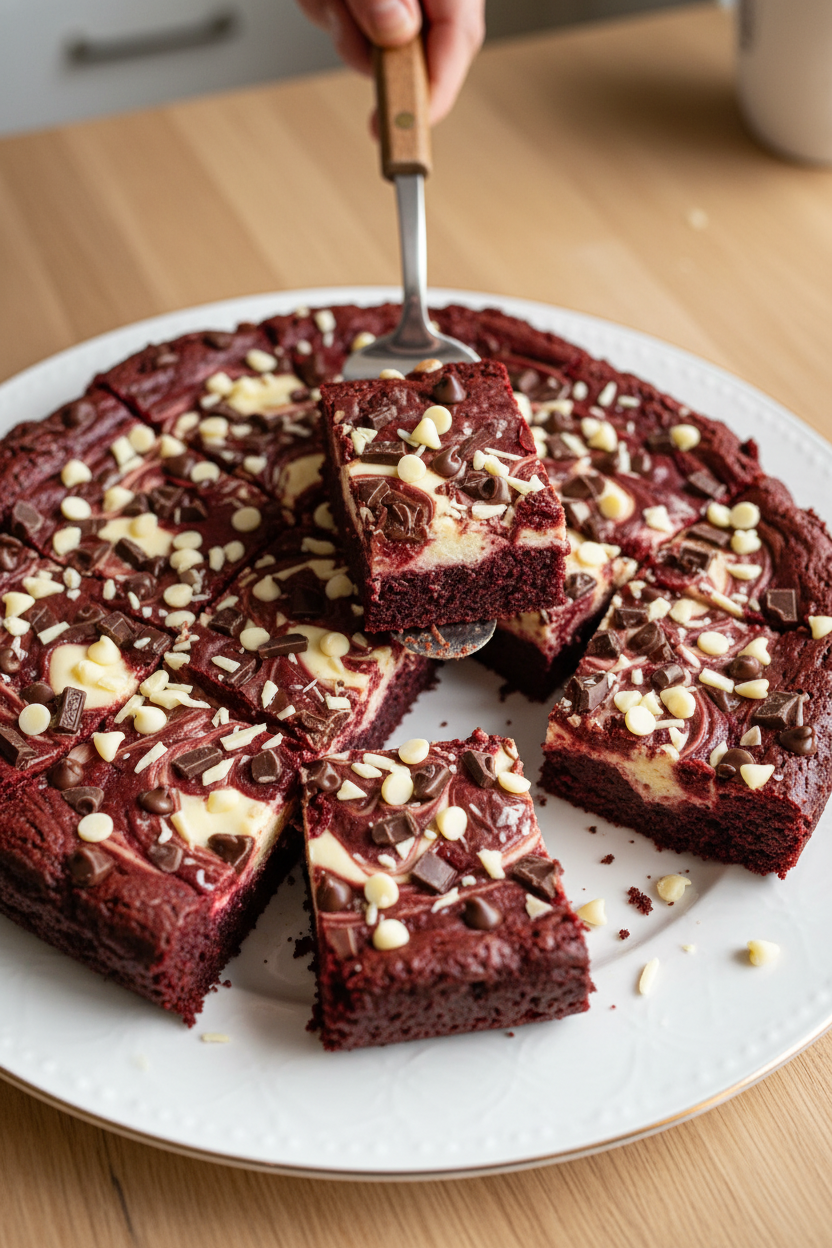
Serving these brownies is half the fun. They are rich and decadent, so a little goes a long way. I like to cut them into small squares, about 2 inches each. That way, everyone can have one without feeling too stuffed. For a pretty plate, dust the top with a little powdered sugar through a small strainer. It makes them look fancy, like from a bakery.
These brownies love company. Serve them warm with a scoop of vanilla ice cream melting on top. Or, pair them with a handful of fresh raspberries. The tart berries balance the sweet chocolate perfectly. Another idea is to serve them with a dollop of lightly sweetened whipped cream and a sprinkle of cocoa powder. Simple but elegant.
For drinks, you have two wonderful choices. For a grown-up treat, pour a small glass of cold milk with a splash of coffee liqueur. It tastes like a creamy dessert in a glass. For the kids, a tall, icy glass of cold milk is the classic choice. Or, try a creamy vanilla milkshake for double the fun. Which would you choose tonight?
How to Store and Reheat These Brownies
First, let them cool completely. Then wrap them tight in plastic wrap. This keeps them soft and fudgy.
You can store them in the fridge for up to five days. I once forgot a batch in the fridge for a week. They were still good, just a little dry.
For the freezer, wrap each brownie in plastic wrap. Then place them in a freezer bag. They will keep for three months. This matters because you can bake once and enjoy for weeks. Batch cooking saves time on busy days.
To reheat, pop a brownie in the microwave for about 15 seconds. It tastes just like fresh from the oven. Have you ever tried storing it this way? Share below!
Three Common Problems and Easy Fixes
Problem one: the brownies sink in the middle. This happens when you open the oven door too early. Just wait until they are fully baked. I remember my first batch sank like a sad little boat. The fix is simple: be patient.
Problem two: the cheesecake filling cracks. This means you overmixed the cream cheese. Mix it just until smooth. Why this matters: overmixing adds air bubbles, which cause cracks. Smooth filling means pretty brownies every time.
Problem three: the brownies stick to the pan. Always use parchment paper with extra hanging over the edges. It makes lifting them out so easy. Which of these problems have you run into before?
*Fun fact: Brownies were invented in America in 1893. Knowing these fixes saves you frustration and helps your baking taste even better. That is why learning small tricks builds your confidence in the kitchen.
Your Top 5 Questions Answered
Q: Can I make this gluten-free?
A: Yes. Swap the all-purpose flour for a 1-to-1 gluten-free flour blend.
Q: Can I make this ahead of time?
A: Yes. Bake the day before and store in the fridge. The flavors get even richer overnight.
Q: Can I swap the cream cheese?
A: You can use mascarpone in the same amount. The texture will be a little softer.
Q: How do I scale the recipe for a bigger pan?
A: Double the ingredients for a 9×13-inch pan. Bake for about 10 minutes longer.
Q: Any tips for clean slicing?
A: Chill the brownies in the fridge for a full hour before cutting. Use a sharp, wet knife. Which tip will you try first?
A Warm Goodbye from Chloe
I hope these brownies bring you as much joy as they bring my family. There is something special about sharing a homemade treat. It feels like giving a warm hug.
I would love to see your baking. Take a photo of your brownies and show me. Have you tried this recipe? Tag us on Pinterest! It makes my heart happy to see your creations.
Happy cooking!
—Chloe Hartwell.




Leave a Reply