
This Cheesecake Came From a Happy Accident
My granddaughter Lily once dropped a whole Oreo into my red velvet cake batter. I still laugh at that. Instead of fishing it out, I baked it in. The chocolate cookie made the cake taste even better right near the crust. That tiny mistake gave me this whole idea. Now we make two layers: soft red velvet cake on the bottom and creamy cheesecake on top. Doesn’t that smell amazing when it bakes? The cocoa and vanilla mix like a warm hug. Have you ever had a kitchen accident that turned into something you love?Why We Use Room-Temperature Ingredients
My mama taught me to let eggs and cream cheese sit out for an hour before baking. Cold ingredients make lumpy batter. Lumpy batter makes sad cheesecake. When everything is room temperature, it blends smooth as butter on warm toast. This matters because creamy cheesecake feels like a little celebration. Nobody wants a bumpy slice on their birthday plate. Also, the sour cream at room temperature helps the top stay crack-free. *Fun fact: professional bakers call this the “tempering rule.”* What is one kitchen rule your family always follows?The Secret Trick With Vinegar and Milk
You stir apple cider vinegar into milk and let it sit for five minutes. It looks a little funny at first, like it’s curdling. But this is exactly what makes red velvet cake so soft and tender. The vinegar reacts with the baking powder to create tiny air bubbles. I remember my grandmother doing this with her finger-stained recipe card. She called it “sour milk magic.” This matters because the bubbles make the cake feel light, even though it’s rich. The vinegar taste disappears completely. You only taste sweet, chocolatey goodness.How to Keep Water Out of Your Cheesecake
We bake this cheesecake sitting in a pan of warm water. That water bath keeps the oven moist so the top doesn’t crack. But you need to wrap the springform pan in three layers of heavy foil first. Water sneaks in through the bottom if you skip this step. One time I forgot the foil and my cheesecake came out soggy. My dog still loved it, but I was sad. This matters because a water bath is like a cozy blanket for your cheesecake. It helps it bake slowly and evenly. Have you ever tried a water bath for baking? What happened?Let It Rest, Let It Chill
After the cheesecake bakes, the hardest part begins. You have to be patient. Turn off the oven and crack the door open. Let the cheesecake sit inside for one whole hour. Then let it cool on the counter for another hour. After that, it goes into the fridge for at least four hours. Overnight is even better. This matters because cheesecake needs time to set. Cutting into warm cheesecake makes a messy puddle. Cold cheesecake slices clean and pretty. I always make this the day before a party. That way I can relax and enjoy the company. What do you like to prepare ahead of time?The Best Part: Frosting and Crushed Oreos
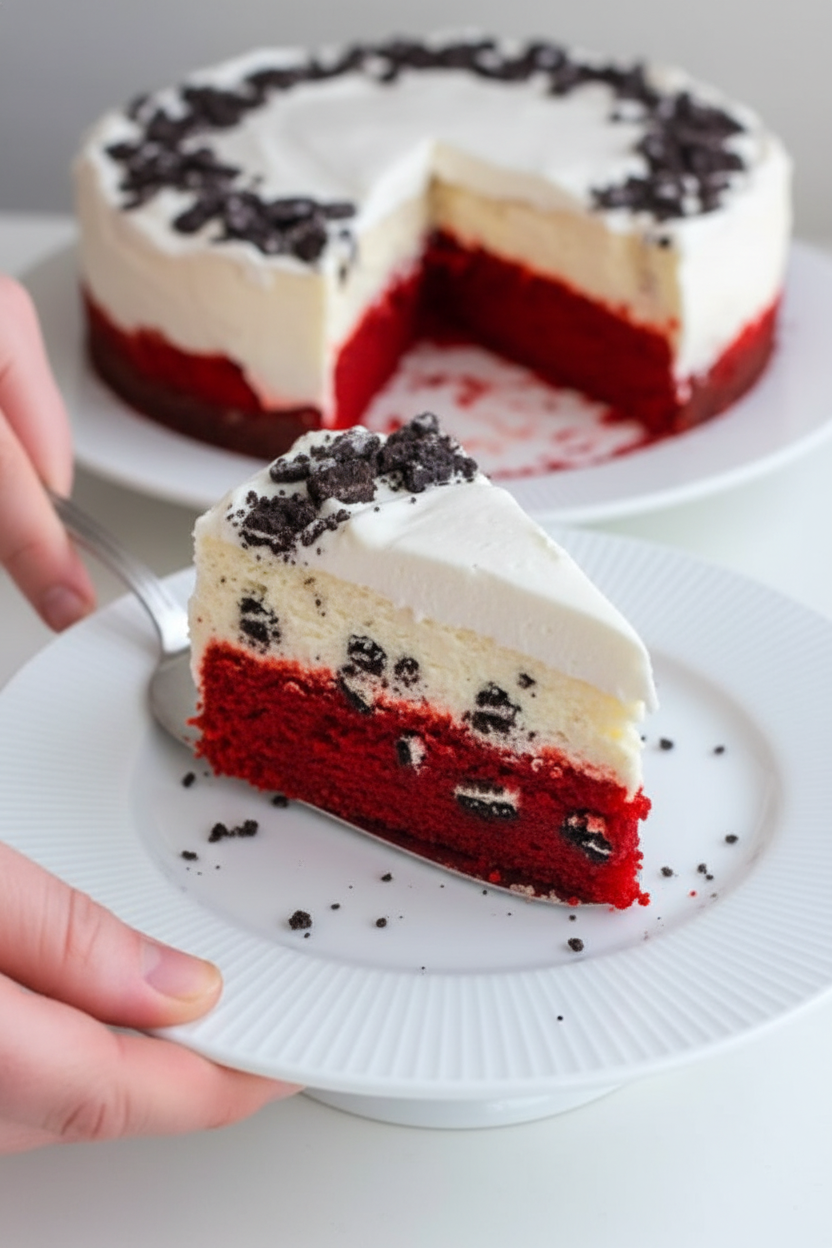
Right before serving, you spread a thick layer of cream cheese frosting on top. Then sprinkle crushed gluten-free Oreos all over. The cookies add a little crunch that feels like a happy surprise. I like to leave some cookie pieces big and some tiny. My neighbor once said this cheesecake looks like a fancy bakery made it. I just smiled and told her about the Lily’s dropped-Oreo story. This matters because food tastes better when it has a memory attached. Every slice tells a little tale.What Makes Red Velvet Red (And Why It Matters)
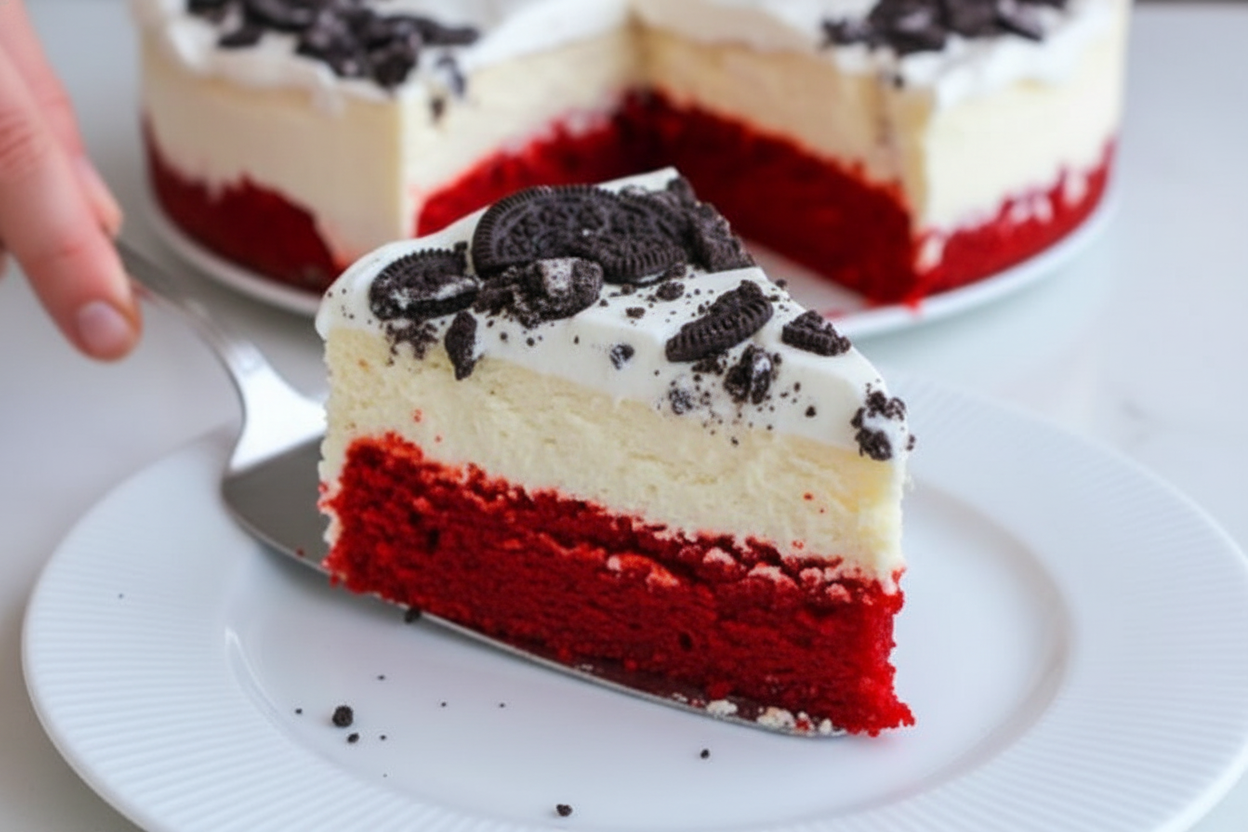
Red velvet cake gets its color from two things: cocoa powder and a little bit of natural red food coloring. The cocoa powder has a chemical that turns red when it touches vinegar. That’s why old-fashioned red velvet cake wasn’t as bright as today’s version. This matters because the color makes people smile. Bright red cake with white cheesecake and dark cookie crumbs looks joyful on a plate. *Fun fact: during World War II, bakers used beet juice to make red velvet because food coloring was hard to find.* Would you ever try using beet juice for natural color? Or do you like the bright red best?Ingredients:
| Ingredient | Amount | Notes |
|---|---|---|
| Eggs | 2 | room temperature, for wet ingredients |
| Milk | ¾ cup | room temperature |
| Apple cider vinegar | ½ tablespoon | |
| Vegetable oil | 2 tablespoon | |
| Sugar | ¾ cup | for wet ingredients |
| Butter | ¼ cup | softened |
| Singing Dog Vanilla | 1 teaspoon | |
| OliveNation red velvet cake emulsion | 2 teaspoon | |
| Red food colouring | to taste | |
| Gluten Free 1:1 Flour | 1 ½ cups | dry ingredients |
| Baking Powder | 1 ½ teaspoon | |
| Cocoa Powder | 1 ¾ tablespoon | |
| Salt | ½ teaspoon | |
| Cream cheese | 24 oz | softened, for cheesecake |
| Sour cream | ½ cup | room temperature |
| Eggs | 2 large | room temperature, for cheesecake |
| Sugar | ⅔ cup | for cheesecake |
| Singing Dog Vanilla extract | 1 ¼ teaspoon | |
| Gluten Free 1:1 Flour | 1 ½ tablespoon | for cheesecake |
| Crushed gluten free oreos | 6-8 | for decorating |
| Cream cheese frosting | 1 cup | for decorating |
My Grandmother Called This a “Company Cake”
I remember the first time my grandmother made a red velvet cake. She sneaked a bit of the deep red batter and let me lick the spoon. I still laugh at that memory. Red velvet has a special way of feeling fancy, like a dress you only wear for birthdays. But I like to dress it up even more. This recipe stacks a creamy cheesecake right on top of that soft red velvet layer. Doesn’t that sound dreamy?
Then I had the silly idea to add Oreos. My kids thought I had lost my mind. But one bite and we were all quiet, just smiling and chewing. The chocolate cookie crunch mixed with the tangy cheesecake is pure magic. You get a rich, red velvet bottom, a silky cheesecake middle, and a crumbly Oreo hat on top. It feels like three desserts in one. Have you ever tried layering two cakes together? Share below!
The secret is taking your time. I learned the hard way that rushing a cheesecake makes it crack. You want to be patient. Let the cream cheese get really soft, almost like butter. And don’t peek in the oven every two minutes. Trust the heat to do its job. The reward is a smooth, gorgeous slice that makes you feel like a pro baker. Doesn’t that smell amazing?
Let’s Bake This Together, Step by Step
Step 1: First, preheat your oven to 350°F. Lightly grease a 9-inch springform pan and set it aside. In a small bowl, stir together ¾ cup of milk and ½ tablespoon of apple cider vinegar. Let it sit for a minute. (Here is a hard-learned tip: do not skip the vinegar. It makes the cake extra tender and reacts with the cocoa for that true red velvet taste.)
Step 2: In a separate bowl, whisk together all the dry ingredients: 1½ cups gluten free flour, 1½ teaspoons baking powder, 1¾ tablespoons cocoa powder, and ½ teaspoon salt. In a larger bowl, beat ¼ cup softened butter, ¾ cup sugar, and 2 tablespoons of vegetable oil on medium-high for a full two minutes. This step helps the cake stay light and fluffy.
Step 3: Add 2 room-temperature eggs to the butter mixture, one at a time. Let each egg fully mix in before adding the next. Then add 1 teaspoon vanilla extract, 2 teaspoons red velvet cake emulsion, and enough red food coloring to make the batter a deep, rich red. I usually add about a tablespoon of liquid coloring here. Mix until it looks like a pretty sunset.
Step 4: Now, add half of the dry ingredients to the butter mixture and stir until just combined. Then pour in the milk-vinegar mixture and the remaining dry ingredients. Mix gently until no streaks of flour remain. Do not overmix, or the cake will be tough. Pour this beautiful red batter into your prepared pan and bake it for 20 minutes.
Step 5: While the cake bakes, make the cheesecake layer. Lower the oven to 325°F when the cake is done. Beat 24 ounces of very soft cream cheese on medium-low until smooth and creamy. This can take about 2 minutes. Scrape the bowl often. Then add ½ cup sour cream, 1½ tablespoons gluten free flour, 2 eggs, ⅔ cup sugar, and 1¼ teaspoons vanilla. Mix for two more minutes.
Step 6: Wrap the outside of your springform pan with three layers of heavy-duty foil. Place it inside a larger roasting pan. Pour the cheesecake mixture gently over the hot red velvet cake. Then pour hot water into the roasting pan until it reaches halfway up the springform pan. Bake the cheesecake at 325°F for 50 minutes. The center will still jiggle a little.
Step 7: Turn off the oven and crack the door open. Let the cheesecake rest inside for one full hour. Then set it on the counter to cool for 30 minutes. Remove the foil and let it cool another 30 minutes. Finally, chill it in the fridge for 4 to 6 hours. I like to make it the night before. Before serving, frost the top with cream cheese frosting and sprinkle crushed gluten free Oreos all over.
Cook Time: 1 hour 10 minutes (plus 1 hour oven resting)
Total Time: 4 hours 15 minutes (active) + 4 to 6 hours chilling
Yield: 12 servings
Category: Dessert, Cheesecake
Three Fun Ways to Change This Recipe
I love a classic, but sometimes I get a wild hair and want to try something new. Here are three twists that surprised me. Spicy Mexican Chocolate: Add ½ teaspoon of cinnamon and a pinch of cayenne pepper to the red velvet batter. It gives a warm kick that pairs perfectly with the sweet cream cheese. Peppermint Holiday: Swap the vanilla in the cheesecake for ½ teaspoon of peppermint extract. Crush up some candy cane pieces and sprinkle them on top instead of Oreos. It feels like Christmas on a plate.
Berry Swirl: Before you pour the cheesecake over the red velvet, drop small spoonfuls of raspberry jam on top. Use a knife to gently swirl it around. The tart berries cut through the richness beautifully. Which one would you try first? Comment below!
How to Serve and What to Sip Alongside
This cheesecake is rich, so serve thin slices on small plates. I like to add a tiny handful of fresh raspberries on the side. The bright tartness wakes up your taste buds between bites. You can also drizzle a little warm chocolate sauce over the top if you are feeling extra fancy. For a fun touch, place a single Oreo cookie on each slice as a garnish.
For drinks, a cold glass of milk is the classic choice. It washes down the sweetness perfectly. For the grown-ups, a cup of strong black coffee or a warm latte is wonderful. The bitterness balances the creamy, sugary cheesecake. Which would you choose tonight?
Storing Your Red Velvet Oreo Cheesecake
This cheesecake stays fresh in the fridge for up to five days. Cover it loosely with plastic wrap or foil. Do not wrap it tight or the top will get sticky. I once left a cheesecake uncovered overnight. The top dried out and cracked. That was a sad morning.
You can also freeze it for up to one month. Slice it first and wrap each slice in plastic wrap. Then put the slices in a freezer bag. To thaw, move a slice to the fridge the night before. Why does this matter? Proper storage keeps the creamy texture just right. Nobody wants a soggy crust. Have you ever tried storing it this way? Share below!
For batch cooking, make two cheesecakes at once. Freeze one for a busy week. It saves time and gives you dessert whenever you want. That is a win in my book.
Common Problems and Easy Fixes
Problem one: cracks on top. This happens when the cheesecake bakes too long or cools too fast. My fix is simple. Bake until the center jiggles slightly. Then let it cool in the oven with the door cracked open. I remember my first cheesecake had a canyon on top. Now I know better.
Problem two: a sunken center. This means the oven was too hot or you overmixed the batter. Mix on low speed and stop as soon as everything is combined. Why does this matter? Overmixing adds air bubbles. Those bubbles pop and cause sinking. A flat top looks so much prettier.
Problem three: a watery cheesecake. This often comes from cream cheese that is too cold. Always let your cream cheese sit out for an hour before mixing. Warm ingredients blend smoothly. Which of these problems have you run into before? Fixing them builds your cooking confidence. You will feel proud each time the cheesecake comes out perfect.
Your Questions Answered
Q: Can I use regular flour instead of gluten free?
A: Yes. Use the same amount of regular all-purpose flour. The texture will be a bit different but still delicious.
Q: Can I make this cheesecake ahead of time?
A: Absolutely. Make it one or two days before. It actually tastes better after resting overnight in the fridge.
Q: What if I don’t have red velvet emulsion?
A: Use 2 teaspoons of vanilla extract instead. Add extra red food coloring to get the color you want.
Q: Can I half the recipe?
A: Yes. Use a 6-inch springform pan. Bake the cake layer for 15 minutes instead of 20.
Q: Do I have to use a water bath?
A: It helps prevent cracks, but you can skip it. Just place a pan of hot water on the rack below the cheesecake. Which tip will you try first?
A Warm Send-Off From Chloe
I hope this recipe brings a little sweetness to your kitchen. Cheesecake is a love language, I think. It takes patience but gives back so much joy. *Fun fact: Oreos were invented in 1912, over a hundred years ago.* They still make everything better.
Take a picture of your cheesecake creation. I would love to see it. Have you tried this recipe? Tag us on Pinterest! Your success makes me smile. Now go on, get baking. Your family will thank you. Happy cooking! —Chloe Hartwell.

Red Velvet Oreo Cheesecake Recipe
Description
Indulge in this rich Red Velvet Oreo Cheesecake—creamy, crunchy, and utterly decadent. Perfect dessert for any occasion.
Ingredients
Instructions
- Preheat the oven to 350 ℉. Lightly grease a 9” springform pan and set aside. Next stir together the milk and apple cider vinegar and set aside. After that add all of the dry ingredients for the red velvet cake to a bowl and mix to combine. Add the butter, sugar, and oil to a bowl and mix on medium high for two minutes. Next add the eggs, allowing each one to mix before adding the next. Then add the vanilla, red velvet cake emulsion, and red coloring. After that add half of the dry ingredients and mix until just combined. Finally add the milk mixture and the remaining dry ingredients and mix to combine. Pour the batter into the prepared springform pan and allow the cake to bake for 20 minutes.
- Once the red velvet cake is done, lower the temperature of the oven to 325 ℉. While the cake portion is baking, prepare your cheesecake batter. Beat the room temperature cream cheese on medium low until smooth, creamy, and free of lumps. Next add the sour cream, flour, eggs, sugar, and vanilla and mix for two more minutes on medium low. Cover the bottom of the springform pan with three layers of foil to prevent water from getting in. Place the springform pan into a larger pan such as a roaster and fill it with enough water to reach halfway up the springform. Pour the cheesecake mixture on top of the red velvet cake. Let it bake for 50 minutes. The center will still be slightly jiggly. Turn off the oven and crack the door open slightly. Leave the cake undisturbed in the oven for an hour. Place the cheesecake on the counter and allow it to cool for 30 minutes. After 30 minutes remove the foil and allow it to cool for another 30 minutes. Place the cooled cheesecake into the refrigerator and let it chill for 4-6 hours. This can be done the night before. Before serving, frost the top of the cheesecake with cream cheese frosting and garnish with the crushed Oreos.




Leave a Reply