
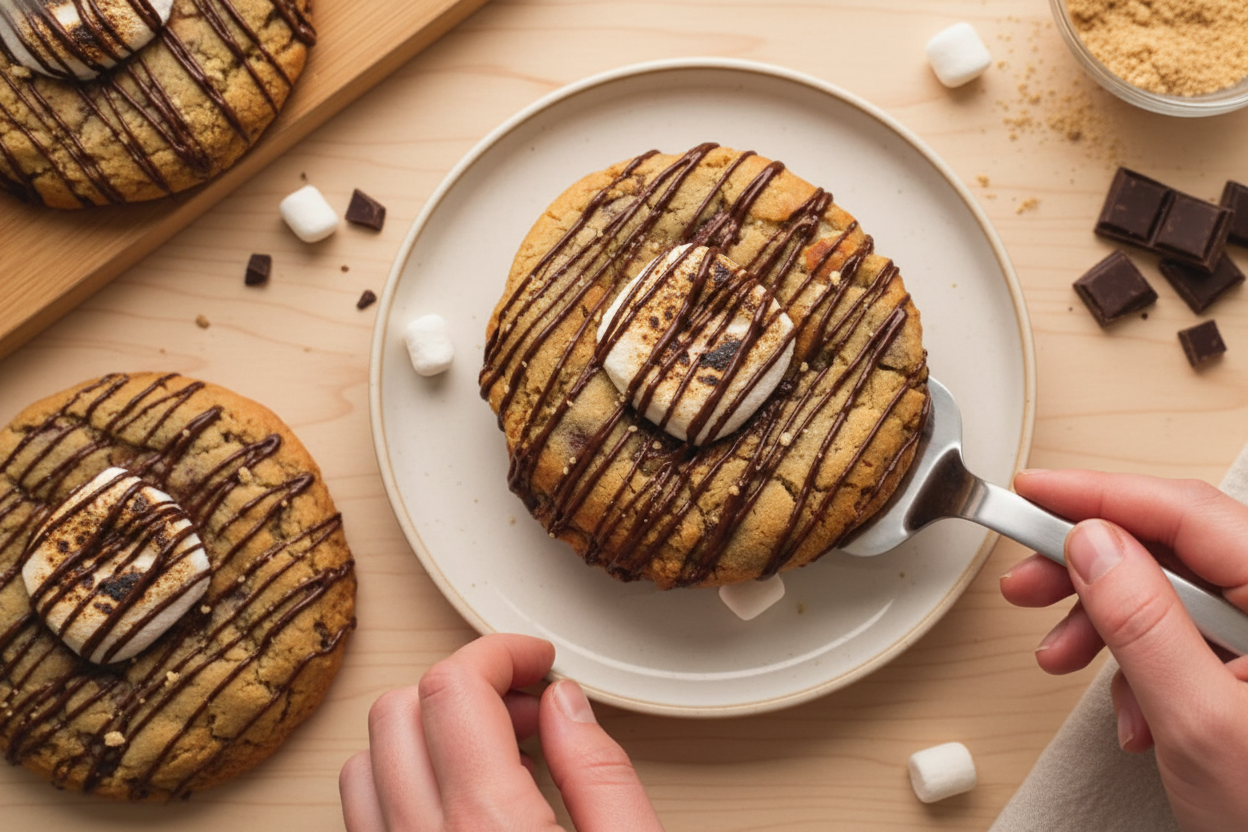
A Sweet S’mores Memory
I still remember the first time I had a s’mores cookie. I was sitting on my back porch, and the sun was going down. My grandson handed me one fresh from the oven. It had a gooey marshmallow on top and a drizzle of dark chocolate. I took one bite and just laughed. It tasted exactly like sitting around a campfire, but without the smoke in your eyes. Doesn’t that smell amazing just thinking about it? This recipe takes that classic campfire treat and turns it into a thick, chewy cookie. It’s the kind of cookie that makes you close your eyes when you eat it.Why This Cookie Works So Well
What makes a s’mores cookie tricky is getting the texture right. You want it soft and chewy, not hard like a rock. This recipe uses two things to help. First, we chill the dough overnight. That lets the flavors mix together and keeps the cookie from spreading too flat. *Fun fact: Chilling cookie dough for at least 6 hours makes the cookies taste richer because the flour soaks up the vanilla and sugar.* Second, we add crushed graham crackers right into the dough. This gives you that classic s’mores taste in every single bite. It matters because a good cookie should remind you of something happy. Have you ever tried making cookies with graham crackers inside? What did you think?Making the Dough is Half the Fun
Start with your butter at room temperature. Soft butter is easier to mix, and it makes everything fluffy. You want to whisk the butter and sugars for about three minutes until it looks light and creamy. Then you add the egg, the extra yolk, and the vanilla. The extra yolk is a secret trick. It makes the cookies extra soft and rich. This is the part where you can let your little helper stir. Next comes the crushed graham crackers. Fold them in gently. Then you sift the flour, baking powder, baking soda, and salt. Add them slowly so you don’t get flour all over the counter. I still laugh at the time I sneezed into the bowl. We ate it anyway. What is your favorite part of baking cookies? Is it mixing the dough or licking the spoon?The Magic of Resting Overnight
After you shape the dough into five big disks, you need to be patient. Pop them in the fridge for at least six hours, but overnight is best. I know it is hard to wait. But this step matters a lot. When the dough is cold, it holds its shape in the oven. You get a thick, puffy cookie instead of a flat one. This is why these cookies look just like the ones from that famous bakery in the mall. While they rest, you can clean up the kitchen or get your toppings ready. Do you usually bake cookies right away, or do you like to chill the dough?Baking and Building the Perfect Top
When you are ready, preheat your oven to 375 degrees. Place the cold dough disks on a baking sheet with space between them. They will grow a little. Bake for eight minutes, then turn the heat down to 350 and bake for seven more. This two-step baking is another trick. It helps the edges get golden while the center stays soft. When they come out, press a giant marshmallow right into the middle of each hot cookie. Then pop them back in the oven for just two to four minutes. The marshmallow will puff up and get a little toasty. This is the part where your kitchen smells like a campfire. It is pure happiness. Do you have a blowtorch at home? If not, you can just let the oven do the toasting. It still tastes wonderful.The Final Touch: Chocolate Drizzle
After the cookies cool for twenty minutes, it is time for the best part. Melt some dark chocolate in the microwave. Stir it every twenty seconds so it doesn’t burn. Pour the melted chocolate into a small baggie or a piping bag. Snip a tiny corner and drizzle it back and forth over the cookies. Do not be shy. The chocolate adds a little crunch when it hardens and a deep, rich flavor. This matters because s’mores need three things: graham, marshmallow, and chocolate. If you have a blowtorch, now is the time to give the marshmallows a quick toast. They will turn golden and warm. Take a bite while the chocolate is still a little soft. I promise you will smile. What is your favorite kind of chocolate for baking? Milk, dark, or white?Ingredients:
| Ingredient | Amount | Notes |
|---|---|---|
| Unsalted butter, room temperature | 12 tbsp (170g) | |
| Granulated sugar | ⅓ cup (67g) | |
| Light brown sugar, packed | ⅔ cup (133g) | |
| Large egg | 1 | |
| Egg yolk | 1 | |
| Vanilla | 1 ½ tsp | |
| Crushed graham crackers | ½ cup (50g) | |
| All purpose flour | 1 ¾ cups (227g) | |
| Baking powder | ¾ tsp | |
| Baking soda | ¼ tsp | |
| Salt | ½ tsp | |
| Dark chocolate chips or chopped chocolate | ½ cup (80g) | |
| Mini marshmallows | ½ cup (40g) | |
| Giant marshmallows | 5 | |
| Dark chocolate (for drizzle on top) | 50g |
The Cookie That Started a Kitchen Memory
I still remember the first time I made these cookies. My granddaughter Lily begged me for “Crumbl-style” treats after trying one at a friend’s house. I laughed and said, “Well, let’s make them even better at home.” Doesn’t that smell amazing when butter and brown sugar get cozy together? This recipe is for thick, chewy s’mores cookies that taste like a campfire hug. The secret is patience—chilling the dough makes all the difference. Trust me, I learned that after one flat, sad batch that still makes me giggle.
Before we start, I want you to know this dough needs a long rest in the fridge. At least 6 hours, but overnight is best. I usually mix it up after dinner, then bake the next morning. The cold dough keeps the cookies thick and soft. (Hard-learned tip: Don’t skip the rest, or your cookies will spread into pancake shapes. I learned that the hard way.) Now, let’s get your hands a little buttery and make some magic.
Cook Time: 20 minutes
Total Time: 6 hours 20 minutes (includes chilling)
Yield: 5 giant cookies
Category: Dessert, Cookies
Let’s Bake Together: Step by Step
Step 1: Cream the Butter and Sugars
Add your room-temperature butter, brown sugar, and white sugar to a big bowl. Whisk on medium-high for 2–3 minutes until it turns fluffy and light-colored. Keep scraping the bowl as you go—nobody wants lumps. I always stop and sniff the bowl here, because it smells like pure happiness.
Step 2: Add the Eggs and Vanilla
Drop in one whole egg, one extra egg yolk, and the vanilla. Whisk for another minute until it’s all creamy and smooth. My neighbor once asked me why I use an extra yolk. I told her, “It makes the cookies extra soft and rich.” She’s used it ever since.
Step 3: Mix in the Graham Crumbs
Pour in the crushed graham crackers and whisk just until combined. Don’t overmix here, or the cookies will get tough. I like to use my hands to crush the grahams in a bag—it’s a fun little way to get kids to help.
Step 4: Sift and Fold the Dry Ingredients
In another bowl, sift together the flour, baking powder, baking soda, and salt. Add this to the dough in two parts, folding gently with a rubber spatula. When the flour is almost mixed in, stop. We want it barely combined for a tender cookie.
Step 5: Add the Chips and Mini Marshmallows
Fold in the dark chocolate chips and mini marshmallows until no flour streaks remain. Be gentle—don’t overmix. My grandson once stirred so hard the marshmallows disappeared. We laughed and called it “marshmallow hide-and-seek.”
Step 6: Shape and Chill the Dough
Divide the dough into 5 equal pieces (about 5.5 ounces each). Shape each into a ball, then flatten into a disc about 3 inches wide. Place them on a tray, cover, and refrigerate for at least 6 hours. Overnight is even better. (Hard-learned tip: If the dough feels sticky, pop it in the fridge for 15 minutes before shaping.)
Step 7: Bake the Cookies
Preheat your oven to 375°F (no fan). Place the chilled dough discs on a parchment-lined baking sheet, leaving 3 inches between each. Bake for 8 minutes at 375°F, then lower the oven to 350°F and bake for another 7 minutes. The edges should look set, but the centers will be soft.
Step 8: Add the Giant Marshmallow
Take the tray out and quickly use the back of a measuring spoon to make a dent in each cookie’s center. Press a giant marshmallow into each dent. Work fast so the cookies stay hot! Pop the tray back in the oven for 2–4 minutes until the marshmallows get lightly golden.
Step 9: Cool, Torch, and Drizzle
Let the cookies rest for 20 minutes. Meanwhile, melt the 50g dark chocolate in the microwave in 20-second bursts, stirring each time. Once cooled, use a kitchen torch to toast the marshmallows until warm. Drizzle the melted chocolate all over. Here’s a fun question: What’s your favorite campfire memory? Share below!
Three Fun Twists on These Cookies
Use white chocolate and butterscotch chips instead of dark chocolate. It makes the cookie taste like a s’more met a caramel candy bar. My friend Marie swears it’s the best version.
Add a pinch of cinnamon to the flour mixture. It gives the cookies a warm, cozy fall feeling. Perfect for a rainy afternoon when you want something extra comforting.
Replace the giant marshmallows with toasted coconut flakes on top. Skip the torch and just sprinkle coconut over the melted chocolate. It’s like a tropical campfire treat. Which one would you try first? Comment below!
How to Serve and Sip These Cookies
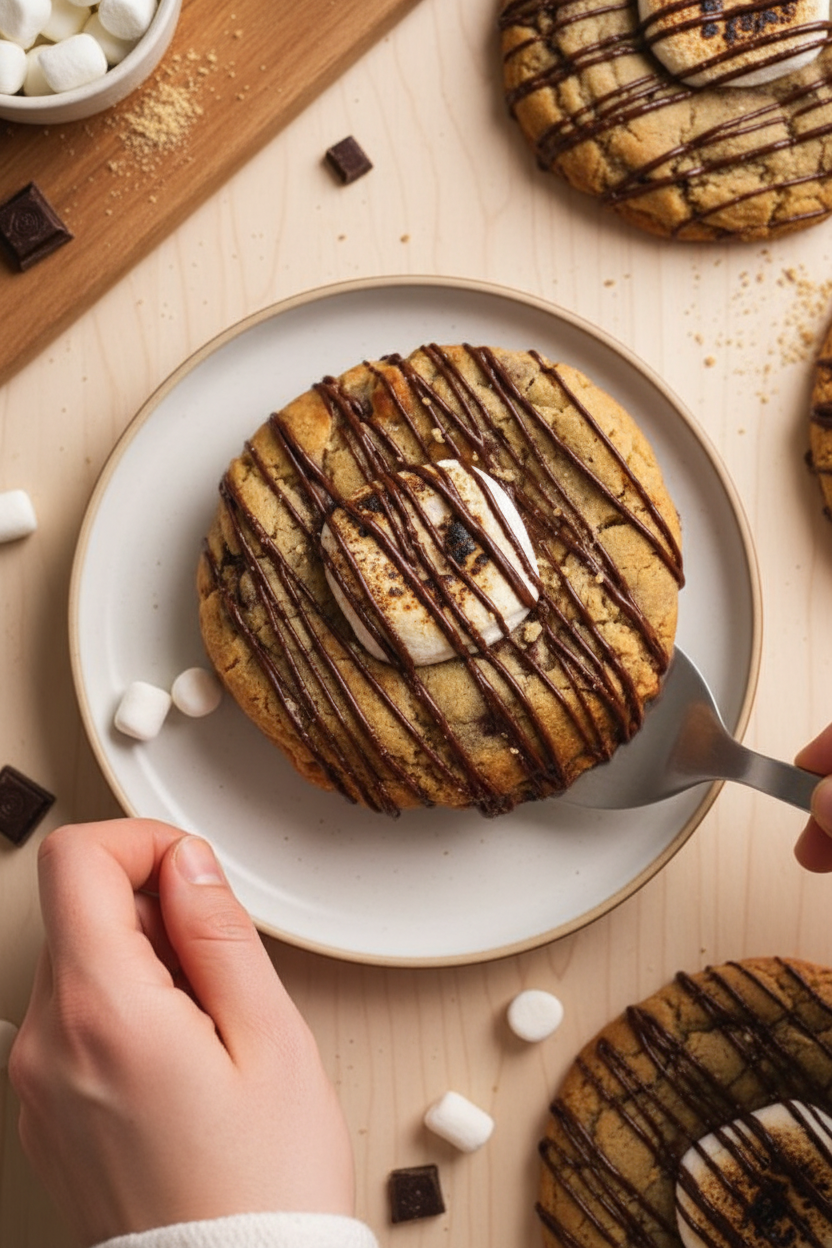
Serve these cookies warm, straight from the baking sheet. Place them on a small plate with a tiny pile of extra graham cracker crumbs on the side. For a pretty look, drizzle a little more chocolate in zigzags right before serving. My neighbor likes to add a sprinkle of sea salt on top—it makes the sweet taste even better.
For drinks, a cold glass of milk is the classic choice. It cools down the warm marshmallow perfectly. For grown-ups, a small glass of bourbon or a dark rum and cola pairs nicely with the toasted chocolate flavor. Which would you choose tonight?
Storing and Reheating Your Cookies
These s’mores cookies are best the day you bake them. But you can store extras in an airtight container for up to three days. I once made a double batch and left them in a tin on the counter. My grandkids finished them before breakfast! For longer storage, freeze the unbaked cookie dough balls. Wrap each one tightly in plastic wrap, then place them in a freezer bag. They will keep for up to three months. When you want fresh cookies, bake them straight from the freezer. Just add two extra minutes to the baking time. Batch cooking matters because it saves you time on busy days. You can enjoy warm cookies whenever the craving hits. Have you ever tried storing it this way? Share below!
Common Problems and Easy Fixes
The first problem is cookies that spread too thin. This happens if your butter is too soft or your dough is warm. Chill the dough overnight as the recipe says. I remember when I skipped that step once. My cookies turned into flat puddles! The second problem is dry cookies. This comes from overmixing the flour. Fold gently until no streaks remain, then stop. The third problem is burnt marshmallows. Keep an eye on the oven during the last few minutes. Every oven runs a little different. Fixing these issues matters because it builds your cooking confidence. You learn to trust your eyes and hands over the timer. Which of these problems have you run into before?
Five Quick Questions About This Recipe
Q: Can I make these gluten-free? A: Yes. Use a 1-to-1 gluten-free flour blend and gluten-free graham crackers.
Q: Can I make the dough ahead of time? A: Yes. Chill the dough for up to 48 hours before baking. The flavor gets better.
Q: Can I swap the dark chocolate? A: Yes. Use milk chocolate or even white chocolate chips instead.
Q: How do I make smaller cookies? A: Divide the dough into eight portions instead of five. Bake for a few minutes less.
Q: Can I skip the blowtorch? A: Yes. Place the cookies under the broiler for 30 seconds. Watch them closely so they don’t burn. Which tip will you try first?
A Warm Send-Off from Chloe
I hope these cookies bring a little campfire joy to your kitchen. Baking is about sharing moments, not just following steps. When you make these, take a photo and share it with me. Have you tried this recipe? Tag us on Pinterest! I love seeing your kitchen adventures. Remember, the best cookies are the ones made with a happy heart. Happy cooking! —Chloe Hartwell.

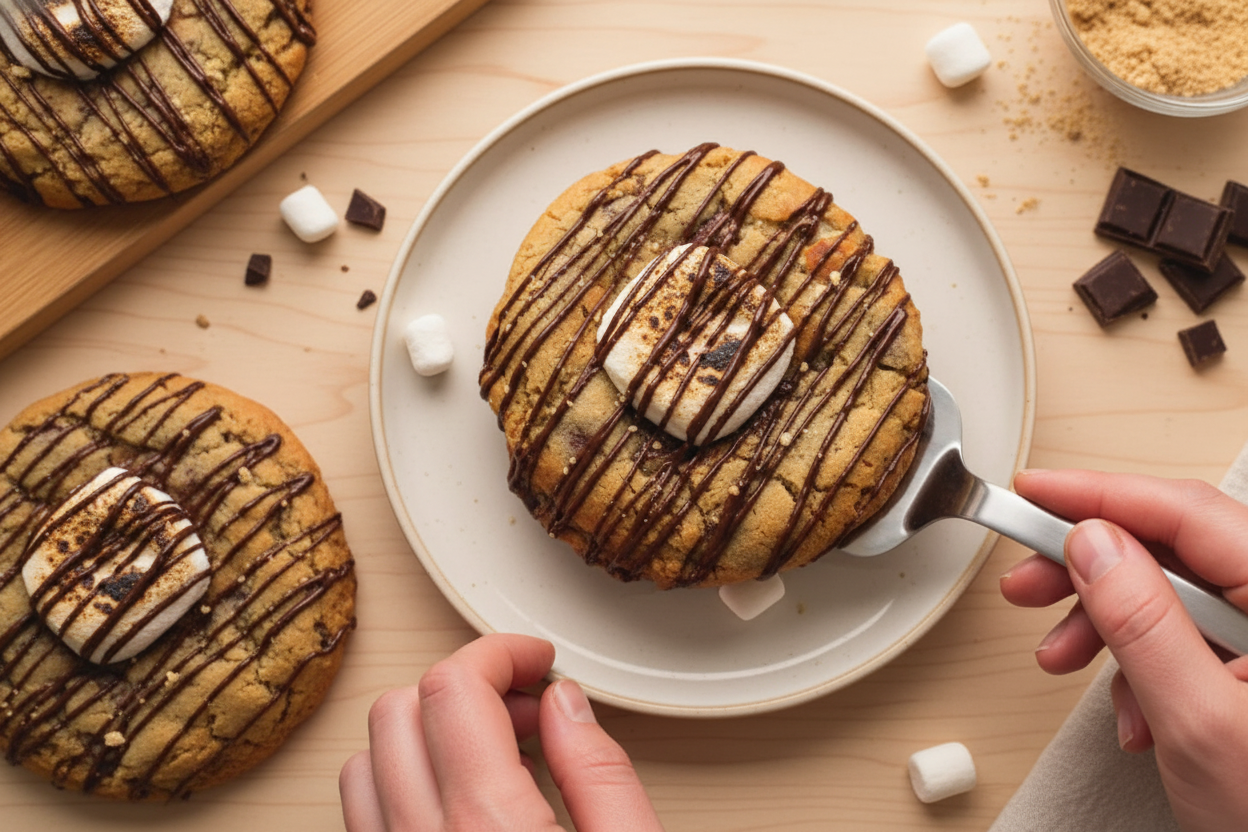
Thick Chewy S Mores Cookies Crumbl Style
Description
Thick, chewy s’mores cookies Crumbl style with gooey marshmallow, rich chocolate, and crunchy graham. Perfect dessert recipe.
Ingredients
Instructions
- Add the butter, brown sugar and granulated sugar to a bowl and whisk on medium high speed for 2-3 minutes until the mixture turns fluffy and light in color. Keep scraping the bowl along the way
- Add the egg, egg yolk and vanilla. Whisk for another minute until a creamy mixture forms
- Add the crushed graham crackers and whisk until just combined
- Now sift the flour, baking powder, baking soda and salt in a separate bowl and mix to combine. Add the dry ingredients to the cookie dough in 2 additions, and use a rubber spatula to gently fold until the flour is almost mixed into the dough
- Add the dark chocolate chips and mini marshmallows, and continue folding until no more streaks of flour remain and the add ins are evenly dispersed. Don’t overmix
- The cookie dough should be soft and easy to work with. If it feels too sticky, refrigerate it for 10-15 minutes until it becomes easier to shape with your hands
- Divide the cookie dough into 5 portions, each should be ~5.5oz in weight. Working one piece at a time, gently shape into a ball, then lightly flatten so they form a 2.5-3″ disc. Repeat with all portions
- Place the cookie dough balls on a plate/tray and refrigerate overnight (minimum 6 hours, overnight recommended)
- When you’re ready to bake after chilling, pre-heat the oven to 375F (conventional / no fan) and line a large light colored baking sheet with parchment paper
- Place the chilled cookie dough balls on the baking sheet, keeping at least 3″ between each
- Transfer to the oven and bake at 375F for 8 minutes, then drop the temperature to 350F and bake for another 7 minutes.
- Remove the tray from the oven, and use the back of a measuring spoon to press down the middles of the cookies and create a pocket / indent. Place one giant marshmallow into the pocket on each cookie, and quickly return the cookie tray to the oven. Try to do this step as quickly as you can so the cookies remain hot
- Bake for another 2-4 minutes until the cookies are golden, look set on the edges but still soft in the middle, and the marshmallows on top have started to get a light golden color on them
- Remove the cookies from the oven, and let them cool at room temperature for 20 minutes
- In the meanwhile, melt the 50g dark chocolate in the microwave in 20 second increments, stirring in between. Transfer it to a piping bag and snip a small hole at the tip
- Once the cookies have rested, take a blowtorch and quickly torch the marshmallows so they become warm and toasted. Then drizzle the chocolate on top of the cookies generously
- Serve warm and enjoy!
Notes
- For best results, chill dough overnight. Torching the marshmallows adds a wonderful toasted flavor.




Leave a Reply