
Why These Cookies Started in My Kitchen
I still remember the first time I burned butter by accident. I was making cookies for my neighbor’s birthday, and I got distracted by a phone call. The butter turned a deep brown, and instead of throwing it away, I sniffed it. It smelled like toasted nuts and caramel. I decided to use it anyway. That happy mistake changed everything. Doesn’t that smell amazing? Brown butter is just regular butter that you cook until the milk solids turn golden. It adds a warm, nutty flavor that makes cookies taste extra special. You don’t need fancy ingredients to make something magical. You just need patience and a little curiosity. **Why this matters:** Brown butter is like a secret shortcut to making simple food taste fancy. It costs nothing extra but gives you huge flavor. *Fun fact:* Brown butter is called “beurre noisette” in French, which means “hazelnut butter.” That’s because it smells just like roasted hazelnuts! What’s a cooking mistake you made that turned out delicious? I’d love to hear your kitchen accidents.The Trick With Sugar and Heat
This recipe has a special step. After you brown the butter, you add both sugars while the pan is still on the lowest heat. You whisk for just a minute or two. You are not trying to melt the sugar into syrup. You are just warming it up so it dissolves better later. I used to skip this step because I was in a hurry. I thought, “It’s just sugar, what’s the difference?” But the cookies came out flat and boring. Now I take my time. The warm butter and sugar create a creamy, caramelly base that makes your cookies chewy and rich. **Why this matters:** Taking two extra minutes here helps the sugar break down. That means your cookies will stay soft in the middle and have a deeper flavor. Small steps make big differences. Tell me: Do you like your cookies soft and chewy, or thin and crispy? I’m team chewy all the way.Why You Need Coffee in Your Cookies
I know what you’re thinking. Coffee in cookies? For kids? Yes, but hear me out. You only use one teaspoon of instant coffee mixed with a tiny bit of hot water. You cannot taste the coffee at all. I promise. What the coffee does is wake up the chocolate flavor. It makes the chocolate taste deeper and richer, like it’s wearing a warm sweater. My grandson hates coffee, but he loves these cookies. He has no idea the coffee is in there. I still laugh at that. **Mini-anecdote:** Once I forgot the coffee, and my daughter asked, “Grandma, did you change the recipe? These taste a little flat.” That’s when I knew the coffee was doing real work. Have you ever tried adding a secret ingredient to a recipe that people couldn’t guess? Drop your secret in the comments.Resting the Dough Is Not Optional
Here is the hardest part of this recipe. You must wait. After you scoop the cookie dough into balls, you put them in the fridge for at least two hours. Overnight is even better. I know you want to eat them right now. I’ve been there. When the dough rests, the flavors get to know each other. The butter soaks into the flour. The sugar relaxes. The chocolate settles in. Cookies baked right away spread too thin and taste plain. Cookies that rest turn out thick, golden, and perfectly gooey. **Why this matters:** Resting the dough is like letting a good soup simmer. Time makes food taste better. You cannot rush deliciousness. Let me ask you something: What is the hardest thing you have ever waited for? For me, it’s always cookie dough in the fridge.The Two-Chocolate Rule
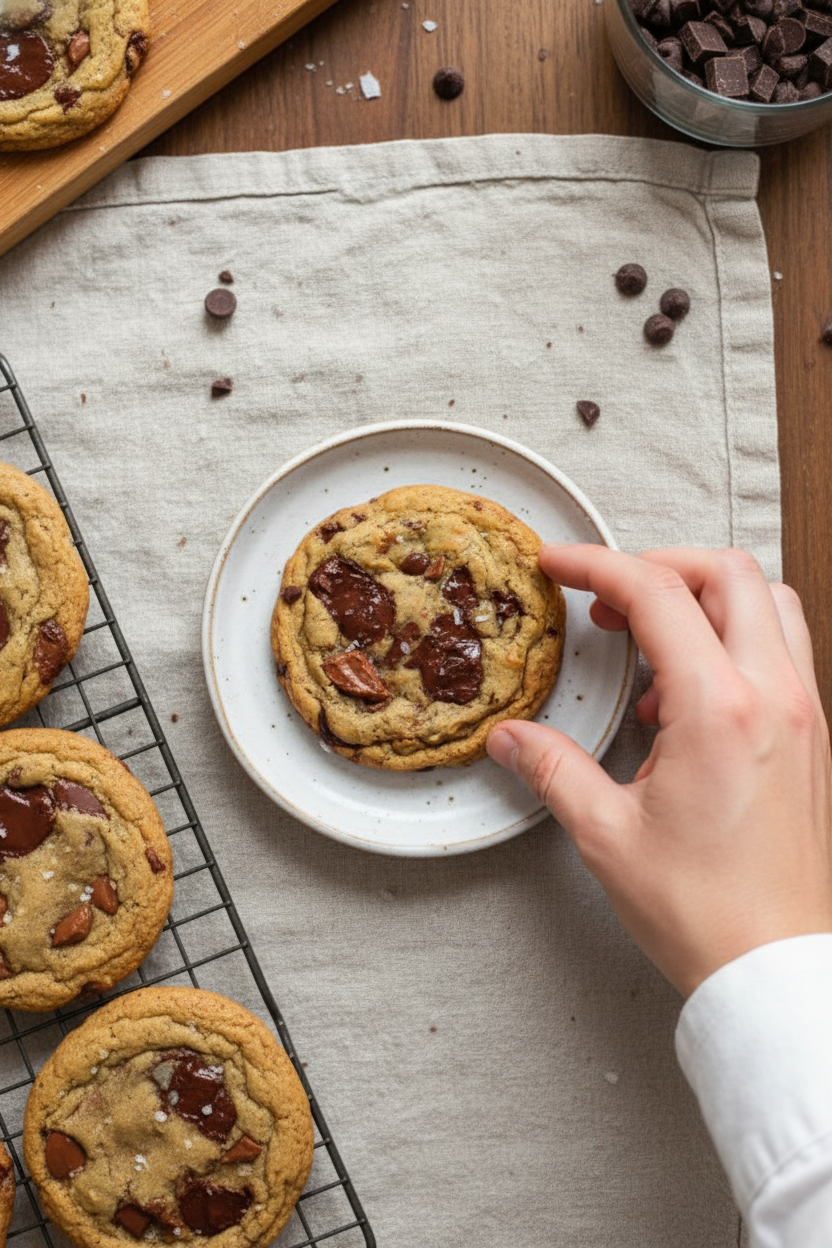
This recipe uses two kinds of chocolate. Dark chocolate and milk chocolate. The dark chocolate gives you deep, almost bitter flavor. The milk chocolate adds creaminess and sweetness. Together, they make each bite interesting. I chop my own chocolate bars instead of using chips. Chips have waxy stuff in them to keep their shape. Chopped chocolate melts into gooey puddles in the cookie. You get little pools of melted chocolate in every bite. It feels like a gift every time. **Mini-anecdote:** One time I only had dark chocolate in the house. I was out of milk chocolate. My husband said the cookies were “too serious.” He said they needed a happy friend. So now I always use both. Cookies need balance. *Fun fact:* Dark chocolate has less sugar than milk chocolate. That’s why using both gives your cookie a sweet-and-slightly-bitter twist that tricks your tongue into wanting more. If you had to pick one chocolate for the rest of your life, would it be dark or milk? Think carefully.Bake One Test Cookie First
This is my favorite tip. Before you bake a whole tray, bake just one cookie. It sounds silly, but it saves you from ruining a whole batch. Every oven is different. Some run hot, some run cool. Bake that test cookie for 11 minutes. See how it looks. If it’s too pale, bake the rest for 12 minutes. If it’s too dark, bake them for 10. That one little cookie tells you everything you need to know. Plus, you get to eat a warm test cookie all by yourself. That’s the real reward. **Mini-anecdote:** My granddaughter once tried to sneak the test cookie before I could inspect it. She got chocolate on her nose. I still laugh when I think about it. Sprinkle a little flakey sea salt on top while they are still warm. The salt makes the sweet taste sweeter. Trust me on this one. What is your favorite way to eat a cookie? Warm from the oven, or cold from the fridge the next day? I want to know.Ingredients:
| Ingredient | Amount | Notes |
|---|---|---|
| Unsalted butter | 10 tbsp (140g) | Brown until fragrant, then cool |
| Light or dark brown sugar | ½ cup to ⅔ cup (100g to 133g) | To taste |
| White sugar | ¼ cup (50g) | |
| Large egg | 1 | |
| Egg yolk | 1 | |
| Vanilla bean paste | 1 tsp | |
| Instant coffee | 1 tsp | Dissolved in 1 tsp hot water |
| All purpose flour | 1⅓ cup (170g) | |
| Salt | ¾ tsp | Reduce to ½ tsp if less saltiness desired |
| Baking powder | ½ tsp | |
| Baking soda | ¼ tsp | |
| Dark chocolate, chopped | 4 oz (113g) | |
| Milk chocolate, chopped | 4 oz (113g) |
The Cookie That Started a Memory
I still remember the first time I browned butter. My kitchen filled with this warm, nutty smell that made me stop and smile. It smelled like caramel and toasted hazelnuts all at once. I knew right then this was going to be something special. Doesn’t that smell amazing? These brown butter chocolate chip cookies have been my secret weapon for years. Every batch disappears faster than I can bake them. Let me show you how to make them too.
First, a little wisdom from my many cookie adventures. The secret is patience. I learned that the hard way when I rushed a batch and ended up with flat, sad discs. Chilling the dough is not optional—it is your best friend. Do you know why most bakery cookies taste so good? They rest the dough overnight. Try to guess the one ingredient that wakes up the chocolate flavor? Share below! Now, let’s get to the fun part.
Step 1: Grab a non-stick pan and add 10 tablespoons of unsalted butter. Melt it on medium-low heat, stirring gently. Keep watching until the butter turns golden brown and smells like toasted nuts. (Here is my hard-learned tip: do not walk away! Burnt butter happens fast and tastes bitter.)
Step 2: Turn the heat to the lowest setting. Add between half and two-thirds cup of brown sugar and a quarter cup of white sugar. Whisk for one to two minutes, just until the sugar starts to dissolve. The mixture might look grainy—that is perfectly fine. Remove from heat and let it cool for five minutes.
Step 3: Crack in one whole egg and one egg yolk. Whisk quickly until smooth and creamy. Add one teaspoon of vanilla bean paste and one teaspoon of instant coffee dissolved in hot water. Whisk for another minute or two until the mixture looks like thick caramel. If you see tiny sugar lumps, press them with your spoon.
Step 4: In a separate bowl, sift together 1 and one-third cups of flour, three-quarter teaspoon of salt, half teaspoon of baking powder, and quarter teaspoon of baking soda. Stir in 4 ounces each of chopped dark and milk chocolate. Make sure your wet mixture is not hot anymore before the next step.
Step 5: Add the dry ingredients to the wet in two batches. Fold gently with a rubber spatula until just combined. Do not overmix, or your cookies will be tough. Use a 2-tablespoon scoop to make 10 dough balls. Gently pull them together without pressing hard. Place them on a plate and add extra chocolate chunks on top.
Step 6: Refrigerate for at least 2 hours. Overnight is even better. When ready to bake, preheat your oven to 375°F with a light-colored baking sheet lined with parchment. Place the balls 3 inches apart. Bake for 11 to 13 minutes. I always bake one test cookie first to check my oven’s mood. Sprinkle with flaky sea salt after baking. Let them cool for 10 to 15 minutes, then enjoy while still warm.
Cook Time: 11–13 minutes
Total Time: 2 hours 30 minutes (with chilling)
Yield: 10 cookies
Category: Dessert
Three Fun Twists to Try
Peanut Butter Swirl: Before chilling, drop spoonfuls of creamy peanut butter on top of each dough ball. Gently swirl with a toothpick for a salty-sweet surprise.
Spiced Chai: Add half a teaspoon of cinnamon, a pinch of cardamom, and a pinch of ginger to the flour. It tastes like a warm hug on a rainy day.
Salted Caramel Center: Press one soft caramel candy into the middle of each dough ball before baking. The caramel gets gooey and stretchy. Which one would you try first? Comment below!
How to Serve and Sip
Serve these cookies warm on a small plate with a tiny bowl of cold vanilla ice cream. The hot-and-cold mix makes everyone smile. Crush a few extra chocolate chunks on top for crunch and pretty looks. Want something grown-up? Pair them with a tall glass of cold milk or a creamy oat milk latte. For adults, a small glass of bourbon or dark rum is lovely with the brown butter notes. Which would you choose tonight?
Storing Your Cookies So They Stay Soft
You can freeze the dough balls before baking. Just scoop them, place them on a tray, and freeze until hard. Then pop them into a freezer bag. They will keep for up to three months. I once forgot a batch in the freezer for two months. They baked up perfectly, and my kids thought I was a magician.
To reheat a baked cookie, pop it in a 300F oven for five minutes. It will taste fresh from the pan. Do not use the microwave unless you want a sad, soggy cookie. Batch cooking is a lifesaver on busy weeks. You can bake just two cookies whenever you want a warm treat. This matters because it saves time and keeps your kitchen smelling amazing.
Store baked cookies in an airtight container with a slice of bread. The bread keeps them soft for days. Have you ever tried storing it this way? Share below!
Three Common Cookie Problems and Easy Fixes
First, cookies that spread too flat. This happens if your butter was too hot when you added the eggs. Next time, let the butter mixture cool for a full ten minutes. I remember once my cookies looked like pancakes. My grandma laughed and said, “They still taste good, honey.” She was right, but fixing it is easy.
Second, cookies that are too hard. You probably baked them a minute too long. Pull them out when the edges are golden but the center still looks soft. They will keep cooking on the hot pan. This matters because a soft cookie is a happy cookie. You worked hard on the dough, so do not ruin it with extra heat.
Third, cookies that taste flat. You forgot the salt or the coffee. That little bit of instant coffee wakes up the chocolate flavor. It does not make them taste like coffee. It just makes the chocolate sing. Which of these problems have you run into before?
Your Cookie Questions Answered
Q: Can I make these gluten-free?
A: Yes. Swap the all-purpose flour for a good gluten-free blend. Add one teaspoon of xanthan gum if your blend does not have it.
Q: Can I make the dough ahead of time?
A: Yes. You can refrigerate the dough for up to three days. The flavor gets better with time.
Q: Can I swap the chocolate?
A: Of course. Use all milk chocolate or all dark chocolate. White chocolate works too, but reduce the sugar a bit.
Q: Can I make a bigger batch?
A: Yes. Just double everything. Use a large bowl and a strong arm.
Q: Do I have to chill the dough?
A: Yes, for at least two hours. Chilling stops the cookies from spreading too much. It also deepens the toffee flavor. Which tip will you try first?
*Fun fact: Chilling the dough for 24 hours makes the cookies taste like they came from a fancy bakery.*
From My Kitchen to Yours
I hope these cookies bring you the same joy they bring my family. There is nothing like a warm cookie and a cold glass of milk. It is a little hug for your soul. I would love to see your batch. Snap a photo and share it with the world. Have you tried this recipe? Tag us on Pinterest!
Keep baking, keep sharing, and remember that a burnt cookie is just a lesson in patience. You are doing great. Happy cooking!
—Chloe Hartwell.

Ultimate Brown Butter Chocolate Chip Cookies Recipe
Description
Ultimate brown butter chocolate chip cookies recipe for soft, chewy perfection. Easy homemade treat with nutty flavor everyone loves.
Ingredients
Instructions
- Place the butter in a non-stick pan and melt it on medium-low heat. Keep stirring for a few minutes until the butter starts to look brown and develops a caramel-y nutty aroma
- Turn the heat all the way to the lowest setting, and add the brown and white sugars. Whisk on the lowest flame for 1-2 minutes, then remove from the heat. The heat facilitates the dissolving of the sugars and starts breaking them down for a deeper flavor. You are not trying to caramelize or melt the sugars. The mixture may look somewhat grainy, don’t worry
- Remove from heat and cool the mixture for 5 minutes. It should be warm, but not hot anymore
- Add the egg and yolk, and quickly whisk to incorporate. Add the vanilla and instant coffee dissolved in hot water, and whisk for 1-2 minutes until the mixture becomes very smooth and creamy like caramel. If you see any clumps of sugar, press them down with the back of a spoon and they should mix in
- Sift all the dry ingredients into a separate bowl. Add the chopped chocolate and mix everything together
- Make sure the wet ingredients aren’t hot (they shouldn’t be). Add the dry ingredients to the wet in 2 batches and fold with a rubber spatula until just combined. Do not overmix!
- Use a 2 tablespoon cookie scoop to divide the dough into 10 balls (if the dough feels a bit too runny to scoop, refrigerate for 10 min first). Don’t apply pressure onto the balls, just gently pull them together
- Place the cookie balls onto a plate or baking sheet, and add a few chocolate chunks on top (you can add more chocolate or reserve some of the chopped chocolate from earlier)
- Refrigerate for at least 2 hours, but ideally overnight for best results
- Pre-heat oven to 375F (conventional / no fan) and prepare a large cookie sheet with parchment paper. It is best to use a lighter colored cookie sheet
- Transfer the balls to the sheet, keeping at least 3″ between them
- Bake for 11-13 minutes depending on how soft and gooey you want the cookies to be. I always recommend baking 1 test cookie first!
- Sprinkle the cookies with some flakey sea salt (optional) and let them cool down at room temperature for 10-15 minutes
- Serve and enjoy while still warm!
Notes
- For extra flavor, top with flakey sea salt before serving.


Leave a Reply