
My First Peanut Butter Pie
I still remember the first time I made a peanut butter pie. It was for a friend who couldn’t eat gluten or dairy. I was nervous because I didn’t want her to feel left out. But then I took a bite of this version. It was creamy, salty, and sweet all at once. I laughed out loud right there in my kitchen. Doesn’t that smell amazing? You can almost taste the peanuts in the air. This pie taught me something important. You don’t need butter or wheat to make something wonderful. What do you think is the best dessert to make for a friend with food allergies?The Crust Is the Secret
Let me tell you about the crust. It starts with gluten-free chocolate cookies. You crush them up with salted peanuts and melted vegan butter. My grandma used to say a good crust holds the whole pie together. When you press it into the pan, take your time. Use a glass or a cup to push it down firm. I like to press it up the sides too. That way, every bite has that crunchy chocolate taste. *Fun fact: The salted peanuts in the crust are not just for crunch. They keep the pie from tasting too sweet. It’s a little trick bakers have used for ages.* Now, here is a question for you: Do you like your pie crust thick or thin? I’m a thick-crust person myself.Why This Filling Works
The filling is where the magic happens. You beat vegan cream cheese with smooth peanut butter until it is fluffy. Then you add icing sugar and a pinch of salt. The real trick is the whipped cream. You beat cold vegan cream until it forms stiff peaks. Then you fold it into the peanut butter mix very gently. Do not stir hard, or you will lose all that airy lightness. Here is a little story. One time I folded too fast, and my pie turned out flat. My kids still joke about my “pancake pie.” I learned to be patient. Patience makes the pie tall and creamy. Have you ever learned a lesson from a kitchen mistake?Waiting Is Worth It
This pie needs to sit in the fridge for at least six hours. I know that sounds like forever. But trust me, it needs that time to set up properly. If you cut it too soon, it will be a soupy mess. That happened to me once when I was in a hurry. I served it in bowls with spoons, and everyone still loved it. But it’s better when you wait. This is why patience matters in cooking. Good things take time, and they taste better when you let them rest. How long do you usually wait before eating a homemade dessert?How to Make It Pretty
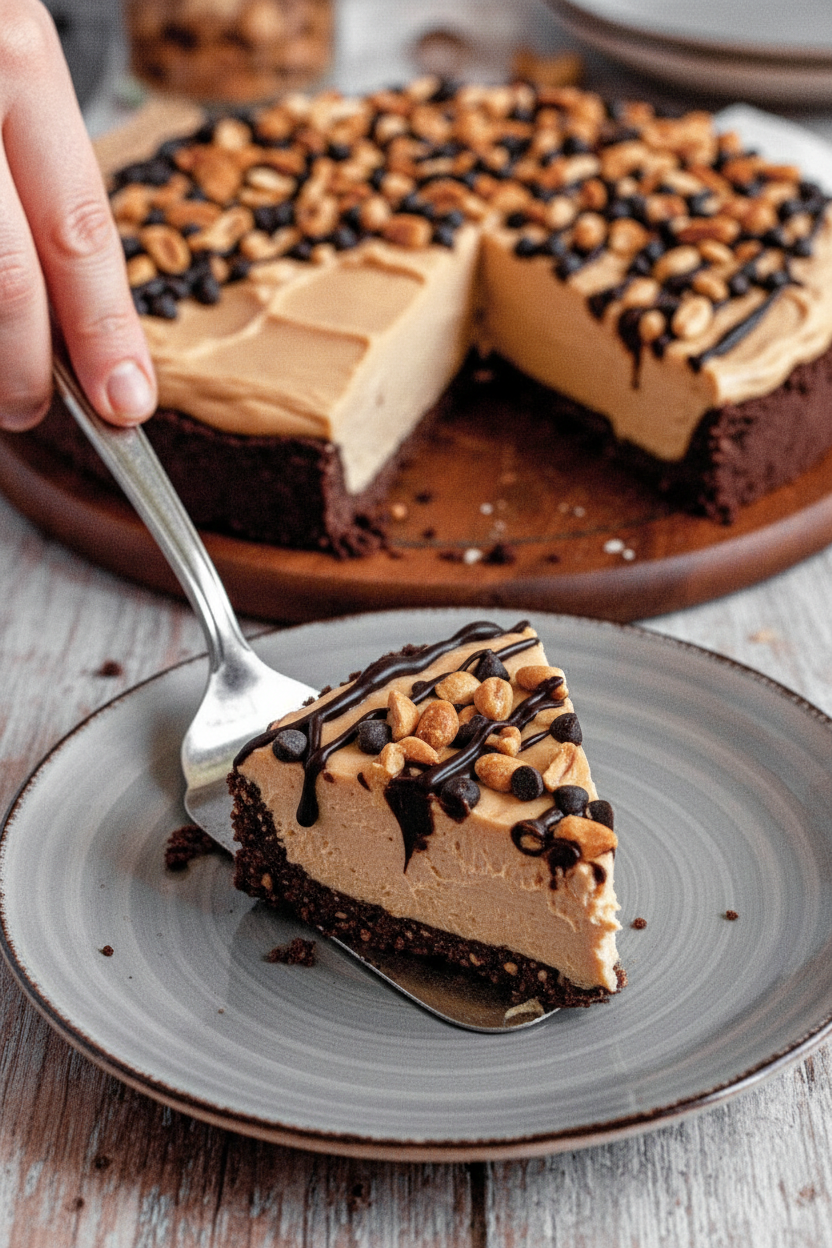
After the filling is in the crust, you can decorate. I like to drizzle melted chocolate on top. Then I sprinkle chocolate chips and a few chopped peanuts. One time, I made a pattern with the chocolate drizzle. It looked like a spider web. My grandson said it was the coolest pie he ever saw. You can be as creative as you want. There are no rules here. Why does this matter? Because making food look nice shows people you care. A pretty pie makes everyone smile before they even take a bite. What is your favorite way to decorate a dessert?Storing Your Leftovers
If you have any pie left, keep it in a sealed container in the fridge. It will stay good for five days. You can also freeze it for up to six months. I once froze a slice and forgot about it for three months. When I thawed it, it tasted just as good as the day I made it. That made me really happy. It is nice to have a treat waiting for you in the freezer. This is why it matters to store food the right way. You waste less, and you always have something delicious ready. Do you ever freeze desserts for a rainy day?Ingredients:
| Ingredient | Amount | Notes |
|---|---|---|
| Vegan salted butter, melted | 1/2 cup (113g) | For the crust |
| Gluten-free vegan chocolate cookie crumbs | 2 cups (240g) | For the crust |
| Salted peanuts, finely chopped | 1 cup (150g) | For the crust |
| Vegan cream cheese, room temperature | 1 cup (250g) | For the filling |
| Smooth peanut butter | 1 cup (210g) | For the filling |
| Icing sugar | 3/4 cup (90g) | For the filling |
| Fine sea salt | Pinch | For the filling |
| Vegan whipping cream, cold | 1 cup (240ml) | For the filling |
| Melted chocolate (optional) | As needed | For decor |
| Chocolate chips (optional) | As needed | For decor |
| Peanuts (optional) | As needed | For decor |
The Pie That Almost Didn’t Happen
I remember the first time I tried making this peanut butter pie. I was in my tiny kitchen, and my grandson kept sneaking spoonfuls of the filling. I laughed so hard I almost forgot to add the sugar. This pie became our favorite project together. Doesn’t that smell amazing already?
The secret is a crunchy cookie crust that holds everything together. It feels like a hug on a plate. And the filling is so creamy and rich, you won’t believe it’s vegan and gluten-free. My daughter still asks for this at every birthday. What memory does peanut butter bring to your mind? Share below!
Let’s Make the Crust First
Step 1: Grab your springform pan or pie plate. Grease it well with non-stick spray and line the bottom with parchment paper. This helps the pie slide out clean later. I once skipped this step and my crust stuck like glue. A hard-learned tip: always use parchment, or you will cry.
Step 2: In a medium bowl, stir together the melted vegan butter, gluten-free chocolate cookie crumbs, and finely chopped salted peanuts. Mix until it looks like wet sand. My grandson calls it “beach dirt,” and honestly, that’s the perfect name.
Step 3: Pour the crust mixture into your pan. Press it firmly on the bottom and up the sides using a flat-bottomed glass or measuring cup. Take your time here. A loose crust will fall apart when you cut the pie. Pop it in the freezer while you make the filling.
Now the Creamy Filling
Step 4: In a large bowl, beat the room-temperature vegan cream cheese and smooth peanut butter together on high speed. Do this for about two to three minutes until it’s silky and light. If the mixture seems lumpy, keep going. My sister once gave up too early and had peanut butter lumps in every bite.
Step 5: Add the icing sugar and a tiny pinch of fine sea salt to the bowl. Mix again until everything is smooth and sweet. Taste a little bit. Just a little. Okay, maybe one more spoonful. Set the bowl aside for a moment.
Step 6: In a separate cold bowl, whip the vegan whipping cream on high until stiff peaks form. This means the cream stands up tall when you lift the beaters. Do not over-whip, or you will get sweet butter. I learned this the hard way during a holiday dinner disaster.
Step 7: Now gently fold the whipped cream into the peanut butter mixture using a spatula. Be very soft and slow. Pretend you are folding a fluffy cloud into a pillow. If you stir too fast, the air escapes and the pie turns flat. Pour the filling into the chilled crust and spread it even.
Step 8: Drizzle melted chocolate on top, and scatter chocolate chips and extra peanuts if you like. Then place the pie in the fridge overnight. That wait is the hardest part. But trust me, it is worth every minute. What is the longest you have ever waited for dessert? Share below!
Cook Time: 20 minutes
Total Time: 6 hours 20 minutes (plus overnight chilling preferred)
Yield: 8 to 10 servings
Category: Dessert
Three Fun Twists to Try
Chocolate Lover’s Dream: Swap the cookie crust for crushed chocolate wafers and add two tablespoons of cocoa powder to the filling. It doubles the chocolate joy. My niece calls it “brownie pie.”
Salty-Sweet Pretzel Crunch: Replace half the peanuts in the crust with crushed gluten-free pretzels. The saltiness fights the sweet filling in the best way. Perfect for people who love that sweet-and-salty dance.
Banana-Berry Summer Pie: Slice fresh bananas and layer them on the crust before adding the filling. Top with a handful of raspberries or strawberries before the chocolate drizzle. It tastes like sunshine and summer picnics. Which one would you try first? Comment below!
How to Serve This Beauty
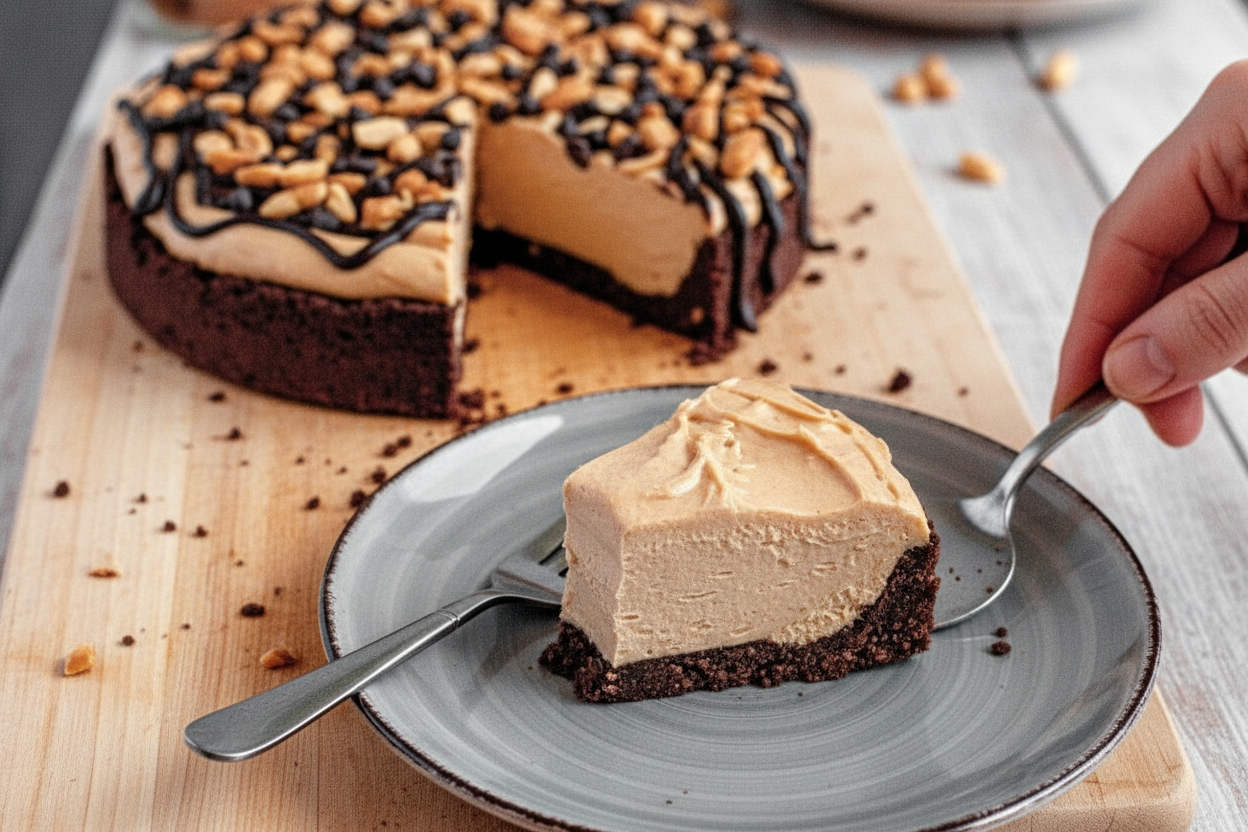
Slice the pie cold from the fridge for the cleanest cuts. Run your knife under hot water and wipe it dry between each slice. This keeps the filling from smearing everywhere. I serve mine with a tiny dollop of coconut whipped cream and a sprinkle of flaky sea salt on top.
For a fun party look, drizzle extra melted chocolate in squiggly lines over the whole pie. It feels fancy with almost no effort. My husband always says it looks like a bakery made it.
Beverage Pairings: A cold glass of oat milk with a dash of cinnamon is lovely and cozy. For grown-ups, a small pour of salted caramel whiskey complements the peanut butter perfectly. Which would you choose tonight?
How to Store Your Peanut Butter Pie So It Stays Perfect
This pie loves the fridge. Let it chill for at least six hours, but overnight is best. The filling sets firm and the crust holds together. I once left it in the fridge for two days by mistake. It tasted even better the next day. The flavors had time to get cozy.
You can also freeze it. Wrap the whole pie in plastic wrap, then foil. It will keep for up to six months. Just thaw it in the fridge overnight before serving. Batch cooking is a lifesaver. Make two pies at once and freeze one for later. That way you are ready for guests or a sudden sweet tooth. Have you ever tried storing it this way? Share below! Storing correctly keeps the texture smooth and the taste fresh. That matters because nobody wants a soggy crust or icy filling.
Reheating is not needed for this pie. Serve it cold straight from the fridge. If you want a warm drizzle, melt a little extra chocolate and pour it on top just before serving. Keep leftovers in an airtight container. They stay good for up to five days.
Three Common Problems and How to Fix Them
Problem one: the crust crumbles when you cut it. This happens if you did not press it firmly enough. Next time, use a flat-bottomed glass and push down hard. Press it up the sides too. A solid crust makes every slice easier to lift.
Problem two: the filling is too runny. That usually means your cream was not cold enough. Chill your mixing bowl and beaters first. Whip the cream until stiff peaks form. Fold it gently into the peanut butter mix. I remember once I rushed this step and ended up with soup. Now I always take my time. Why this matters: getting the filling right builds your cooking confidence. You learn to trust the process.
Problem three: the pie tastes too sweet. A pinch of sea salt fixes that. Salt balances the sugar and brings out the peanut flavor. Try adding an extra pinch next time. Which of these problems have you run into before? Fixing small issues teaches you how ingredients work together. That knowledge makes you a better cook every time.
Five Quick Questions About This Pie
Q: Is this really gluten-free? A: Yes, as long as you use gluten-free chocolate cookies for the crumbs. Check the package label to be sure.
Q: Can I make it ahead of time? A: Absolutely. Make it one or two days before you serve it. The pie tastes better after resting overnight.
Q: What if I don’t have vegan cream cheese? A: You can swap it for thick coconut cream. Blend the solid part of a chilled can of coconut milk until smooth.
Q: Can I make a smaller pie? A: Yes. Halve all the ingredients and use a smaller dish. A 6-inch pie pan works great. Adjust the chilling time to at least 4 hours.
Q: Do I have to decorate it? A: Not at all. The pie is delicious plain. But a drizzle of melted chocolate and a few chopped peanuts look fancy. Which tip will you try first?
*Fun fact: Peanut butter was first made by ancient Aztecs and Incas. They mashed roasted peanuts into a paste long before it became a modern treat.*
A Warm Goodbye from My Kitchen to Yours
Thank you for spending time with me today. I hope this pie brings you joy and full bellies. It is simple enough for a beginner but special enough for a party. I would love to see your creation. Have you tried this recipe? Tag us on Pinterest! Snap a photo and share it with your family and friends. Remember, cooking is about love and little mistakes that turn into memories. Keep your apron on and your heart open. Happy cooking!
—Chloe Hartwell
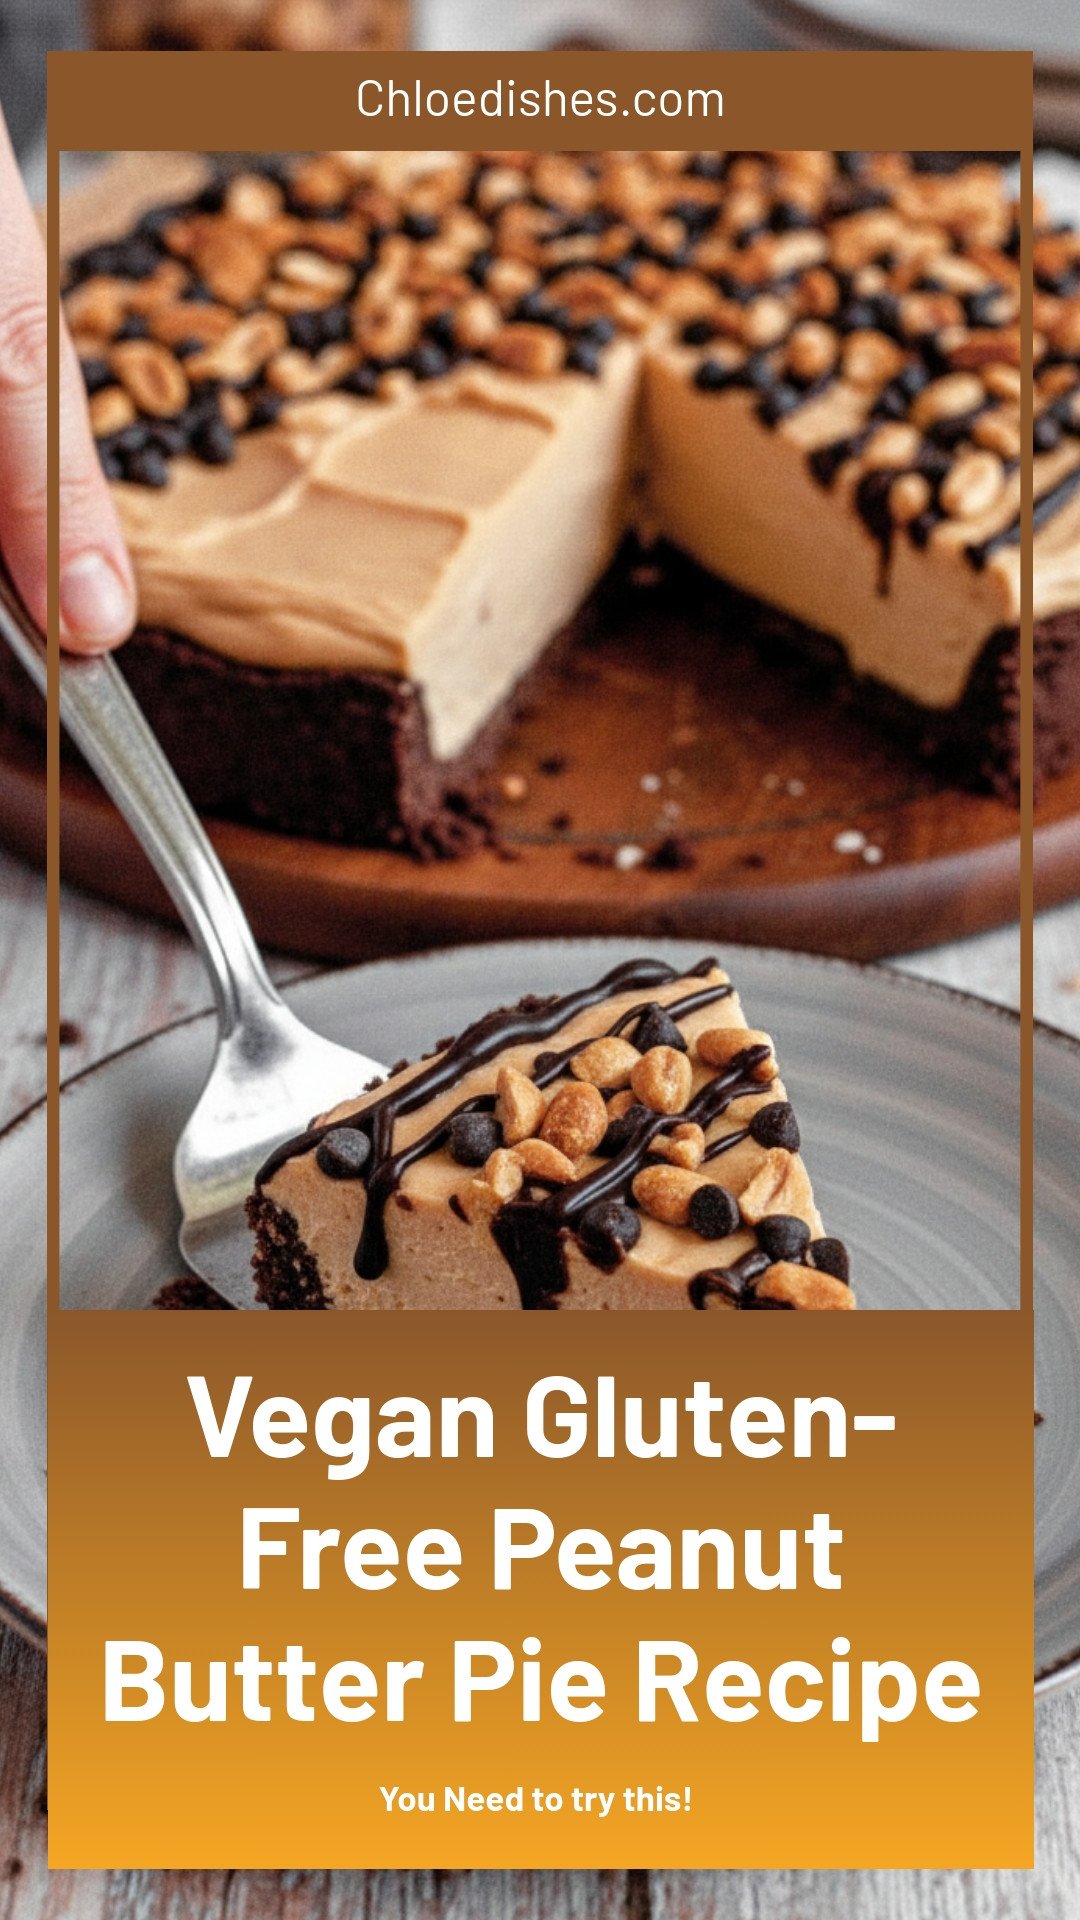
Vegan Gluten-Free Peanut Butter Pie Recipe
Description
Decadent vegan gluten-free peanut butter pie: creamy, rich, and easy to make. The perfect dairy-free dessert for any occasion.
Ingredients
Chocolate Cookie Crumb Crust
Peanut Butter Filling
Instructions
- Prepare a springform pan, pie plate, or cake pan with non-stick baking spray and parchment paper.
- In a medium mixing bowl, combine all of the crust ingredients together and mix until a sand-like texture is achieved.
- Pour into the prepared pan and firmly press the mixture down on the bottom and up against the sides with a heavy-bottomed glass or measuring cup. Place in the freezer to chill while the filling is prepared.
- In a stand mixer or large bowl with electric mixers, beat the cream cheese and peanut butter on high for approximately 2-3 minutes or until smooth.
- Add in the icing sugar and salt and combine until smooth. Set aside.
- In a stand mixer or large bowl with electric mixers, beat the heavy whipping cream on high until stiff peaks form.
- Add the whipped cream to the peanut butter cream cheese mixture and gently fold it together with a spatula. Be very gentle while folding to not beat the air out of the whipped cream.
- Pour the filling into the crust and spread evenly. Top with melted chocolate, chocolate chips, and peanuts if desired. Place in the fridge and allow chilling for a minimum of 6 hours, but preferably overnight. Enjoy!
Notes
- Store leftovers in an airtight container in the fridge for up to 5 days or frozen for up to 6 months.


Leave a Reply