
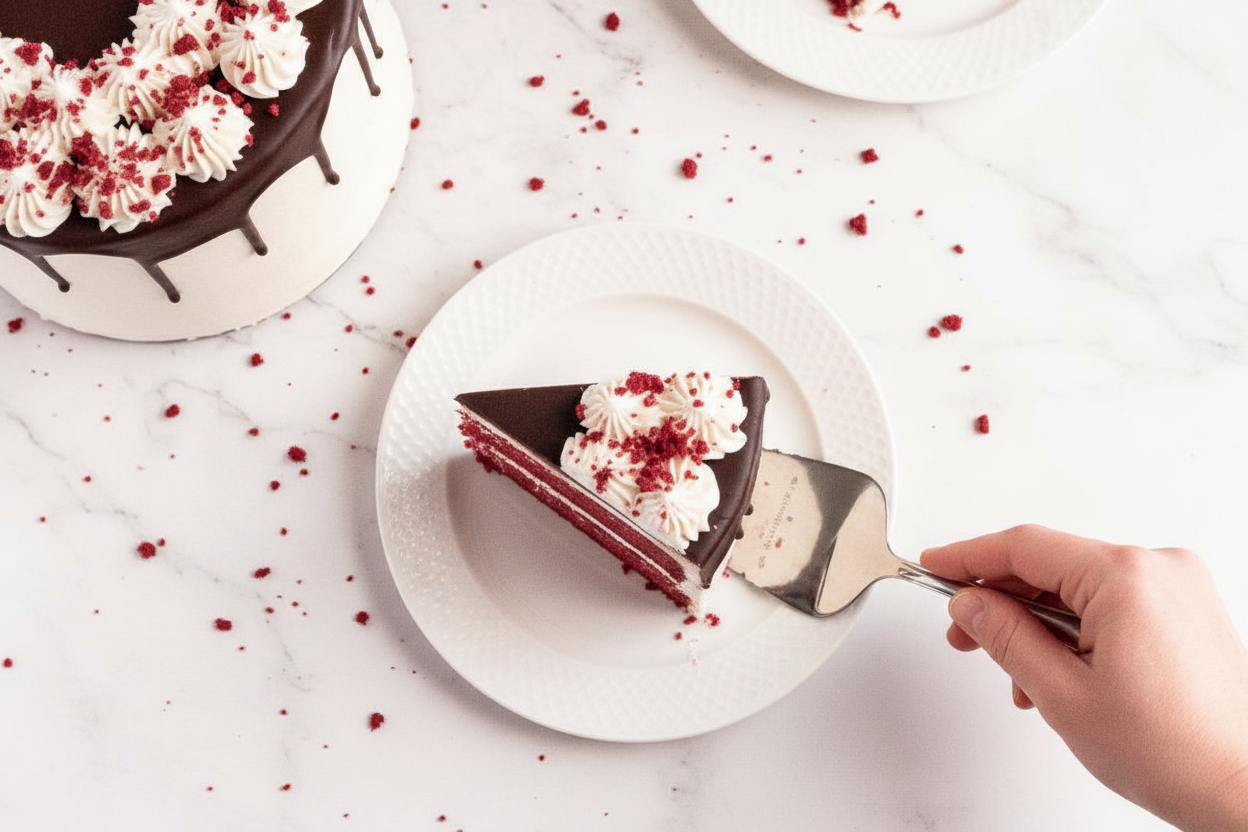
The First Time I Baked This Cake
My granddaughter Lily was turning 12. She wanted a red velvet cake so bad. But she can’t have dairy or gluten. I told her, “Grandma will figure it out.” I spent three days in my kitchen trying different flours. The first cake came out like a brick. We laughed so hard. The second cake was better. The third one? It was perfect. Lily ate three slices and said it was magic. I still laugh at that brick cake story. It taught me to never give up. Have you ever had a baking disaster that turned into a funny memory? Tell me in the comments. I promise I won’t laugh too hard.Why Red Velvet Feels Like a Hug
Red velvet is special because it’s not quite chocolate and not quite vanilla. It sits right in the middle like a good friend. The tiny bit of cocoa powder gives it a warm taste. The red color makes it feel like a party on a plate. Doesn’t that smell amazing when it bakes? Your whole house will smell like love. This is why it matters: when you make a cake for someone with food allergies, you are telling them they matter. You are saying, “I see you, and I want you to have joy too.” That is a powerful thing. It turns a simple cake into a big, warm hug.The Secret to a Fluffy Gluten-Free Cake
Gluten-free baking can be tricky. But here is my trick: apple cider vinegar and dairy-free milk. You mix them together and let them sit for five minutes. It makes a “buttermilk” that helps the cake rise high and soft. Also, use a 1:1 gluten-free flour blend. Do not swap in coconut flour or almond flour alone. It will not work the same. Here is a *fun fact*: red velvet cake was not always red. Long ago, bakers used natural cocoa powder. When it mixed with vinegar and milk, it turned a rusty reddish-brown. People loved the color so much that they started adding food coloring. Now we make it bright red on purpose.How to Make the Buttercream Dreamy
The frosting is the star of this cake. You must beat the butter and dairy-free cream cheese for a full five to ten minutes. Do not rush this step. You want it light and fluffy like clouds. Then add the powdered sugar slowly. If you dump it all at once, you will wear a sugar cloud. I have done that. It is funny but messy. This is why it matters: good frosting can make a simple cake taste fancy. It holds everything together. When you take the time to whip it right, people will ask for seconds. And that is the best compliment a grandma can get.Putting It All Together Like a Puzzle
Assembling the cake is like building a tower of joy. First, level the cake tops so they are flat. Save those crumbs for the top decoration. Then stack the layers with frosting in between. Put a thin “crumb coat” all over the outside. Pop it in the fridge for ten minutes. This keeps the crumbs from showing in your final coat. The chocolate ganache on top is easy. Just melt dairy-free chocolate with a little milk in the microwave. Stir every thirty seconds. Pour it over the chilled cake and push it gently over the edges. Does your mouth water just thinking about it? Mine does. Which part of baking a cake do you enjoy the most? Is it the mixing, the frosting, or the eating? I love the eating part best.Making It Your Own
You can change this cake to fit what you have at home. Use beet juice instead of red food coloring for a natural red. It works but makes the cake a tiny bit earthy. You can also swap the sour cream for plain dairy-free yogurt. The texture will be a little different but still good. I once made this cake for a friend who can’t have nuts. I checked every ingredient label twice. She cried when she saw the cake. She said no one had ever made her a birthday cake before. That moment reminded me why I love cooking for others. What is one food you wish you could make for someone special? Share your story below. I would love to hear it.Ingredients:
| Ingredient | Amount | Notes |
|---|---|---|
| Dairy-free milk | 2 cups (500ml) | Room temperature |
| Apple cider vinegar | 1 1/2 tablespoons | |
| Granulated sugar | 1 1/2 cups (300g) | |
| Dairy-free sour cream | 1 1/2 cups (360g) | Room temperature |
| Canola or vegetable oil | 2/3 cup (157ml) | |
| Vanilla extract | 1 tablespoon | |
| Red food color | 2–3 teaspoons | See note |
| Gluten-free flour 1:1 baking blend | 3 cups (360g) | |
| Cornstarch | 2 tablespoons (16g) | |
| Cocoa powder | 2 tablespoons (16g) | |
| Baking powder | 3 teaspoons | |
| Baking soda | 2 teaspoons | |
| Fine sea salt | 1 teaspoon | |
| Dairy-free salted butter | 1 cup (227g) | Room temperature (for buttercream) |
| Dairy-free cream cheese | 1 1/3 cups (200g) | Room temperature (for buttercream) |
| Powdered sugar | 6 cups (720g) | For buttercream |
| Fine sea salt | 1 teaspoon | For buttercream |
| Dairy-free chocolate | 1/2 cup | For ganache |
| Dairy-free milk | 2 1/2 tablespoons | For ganache |
The Day I Fell in Love with Red Velvet
I still remember the first time I made a red velvet cake. I was twelve, same as you maybe, and I used too much food coloring. My hands looked like I’d fought a strawberry and lost. I still laugh at that. This vegan gluten-free version is my gift to you. It’s soft, rich, and just as special as the one from my childhood. Doesn’t that smell amazing just thinking about it?
Let’s start with the cake itself. You’ll need two bowls and a little patience. First, we make a “buttermilk” by mixing dairy-free milk with apple cider vinegar. Set it aside for five minutes. It will look a little weird and curdled. That’s good. That’s the magic.
In another bowl, beat the sugar, sour cream, oil, vanilla, and red food color until it’s smooth and pretty. Then add your dry ingredients: flour, cornstarch, cocoa, baking powder, baking soda, and salt. While the mixer runs, slowly pour in that curdled milk mixture. (Here is a hard-learned tip: Do not dump it all in at once or you will wear it.) Mix until smooth, then divide into three prepared pans.
Bake at 350°F for about 40 minutes. Check with a toothpick. If it comes out clean or with a few crumbs, you win. Let it cool in the pan for ten minutes, then flip it onto a rack. My grandma always said not to rush the cooling. She was right. A warm cake crumbles into a mess.
Now the buttercream. Beat your dairy-free butter and cream cheese together until light and fluffy. This takes a full five to ten minutes. Do not skip this. Then add powdered sugar and salt. Beat again on high for five more minutes. It should be smooth and cloud-like. Pop it in the fridge if you’re not frosting right away.
For the ganache, just melt dairy-free chocolate with milk in the microwave. Do thirty-second bursts and stir each time. It’s so simple. But here is a fun fact call-out: If you overheat the chocolate, it seizes into a gritty lump. So be gentle. Stir with love.
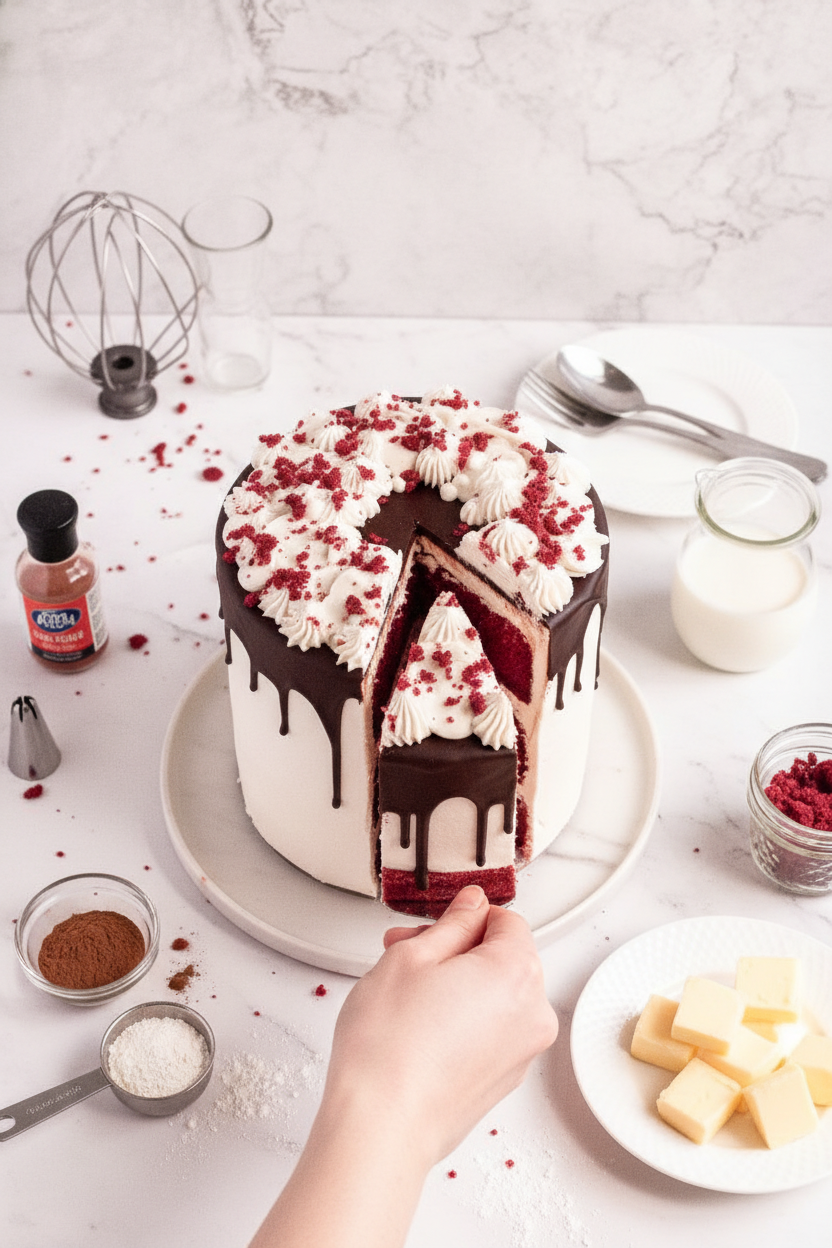
To assemble, level your cake layers with a knife. Save the scraps for topping. Put one layer on a plate, then one and a half cups of buttercream. Repeat. Cover the whole cake with a thin layer of frosting and chill for ten minutes. Then add a thicker layer and smooth it out. Pour the ganache on top and push it over the edges. Chill again. Then pipe rosettes and stars and little dots. Sprinkle crumbs on top. What is the very first step you do before mixing the milk and vinegar? Share below!
Three Fun Twists to Try
Berry Red Velvet Cake: Fold one cup of chopped fresh strawberries into the batter before baking. It adds little bursts of sweet-tart flavor. So good for spring.
Mocha Red Velvet Cake: Add one tablespoon of instant coffee or espresso powder to the dry ingredients. It deepens the chocolate taste without making it taste like coffee. My husband loves this one.
Spiced Red Velvet Cake: Mix in half a teaspoon of cinnamon and a pinch of nutmeg with the flour. It gives the cake a cozy, holiday feel. Perfect for a cold afternoon. Which one would you try first? Comment below!
How to Serve & Sip
This cake is rich, so serve it with something light. A handful of fresh raspberries on the side cuts the sweetness perfectly. A dusting of powdered sugar on the plate looks fancy, too. You could also add a dollop of coconut whipped cream for extra creaminess.
For drinks, I love a tall glass of cold oat milk or a simple chamomile tea. It helps balance the dessert. If you are serving adults, a small cup of strong black coffee is wonderful. The bitterness is a perfect match. Which would you choose tonight?
Cook Time: 40-45 minutes
Total Time: 2 hours (including cooling and frosting)
Yield: 12-14 servings (one 3-layer 6-inch cake)
Category: Dessert, Cake
Storing Your Red Velvet Cake
This cake stays fresh in the fridge for up to five days. Just keep it in an airtight container. I once forgot a slice on the counter overnight. It was dry the next morning, and I felt so silly. Now I always pop it in the fridge right away. You can also freeze the cake for up to six months. Wrap each layer tightly in plastic wrap, then foil. When you want to eat it, thaw it in the fridge overnight. This is great for baking ahead of a big party. Have you ever tried storing it this way? Share below! Knowing how to store cake well means you can enjoy it longer. That matters because it saves you time and reduces waste. A little planning makes every slice taste just as good as the first.
Common Baking Problems and Fixes
Sometimes the cake sinks in the middle. This usually means the oven was too cool or you opened the door too early. Next time, wait until the cake is almost done before checking. I remember when my first red velvet cake fell flat. It still tasted good, but it was a pancake. Another problem is dry cake. This can happen if you bake it too long. Start checking a few minutes early with a toothpick. A third issue is the frosting being too runny. That means your butter or cream cheese was too warm. Pop it in the fridge for ten minutes and try again. Which of these problems have you run into before? Fixing these little things gives you confidence in the kitchen. That matters because you learn to trust your own hands and eyes. Good flavor comes from patience, not panic.
Quick Questions and Answers
Q: Can I use regular flour instead of gluten-free?
A: Yes, just swap the gluten-free blend for the same amount of all-purpose flour.
Q: How do I make this cake ahead of time?
A: Bake the layers and freeze them. Make the frosting and ganache the day you serve.
Q: Can I swap the oil for something else?
A: Yes, melted coconut oil works great. Just make sure it is room temperature.
Q: How do I cut the recipe in half?
A: Use two eggs’ worth of a flax egg and a smaller pan. Check for doneness sooner.
Q: Do I have to use red food coloring?
A: Nope. The cake will be a dark chocolate color instead. It still tastes wonderful.
Which tip will you try first?
A Warm Farewell from the Kitchen
Thank you for baking along with me today. This cake is special because it brings people together. I hope your kitchen smells as sweet as mine did. Take a picture of your creation and share it with us. *Fun fact: Red velvet cake was once made with beets for color.* Have you tried this recipe? Tag us on Pinterest! Your photos make my heart so full. Keep cooking with love and a little patience. Happy cooking!
—Chloe Hartwell
Vegan Gluten Free Red Velvet Cake Recipe
Description
Indulge in a rich, moist Vegan Gluten Free Red Velvet Cake that’s dairy-free and utterly delicious. Perfect for any celebration!




Leave a Reply