
My First Shortbread Memory
I still remember the first time I tasted a shortbread cookie. I was maybe eight years old, sitting on my grandma’s porch. She handed me a little round cookie that melted on my tongue. I thought she was a kitchen magician. Doesn’t that smell amazing? That buttery, sweet scent is pure comfort.
This version is for everyone. My niece can’t eat gluten or dairy, and she deserves that same magic. I still laugh at how nervous I was the first time I tried making them without butter. But these cookies? They turned out perfect, light as air.
Why This Recipe Works So Well
The secret is in the whipping. You beat the dairy-free butter and powdered sugar for a full five minutes. That might feel like forever, but it creates tiny air bubbles. Those air bubbles make the cookie light and fluffy, not heavy or dense.
Cornstarch is another hero here. It gives the cookies that special sandy texture that shortbread is famous for. *Fun fact: Cornstarch is also what makes some old-fashioned puddings so silky smooth.* Why this matters: You don’t need fancy ingredients to get that classic shortbread feel. Just a little patience and a mixer.
The Little Tricks I Learned
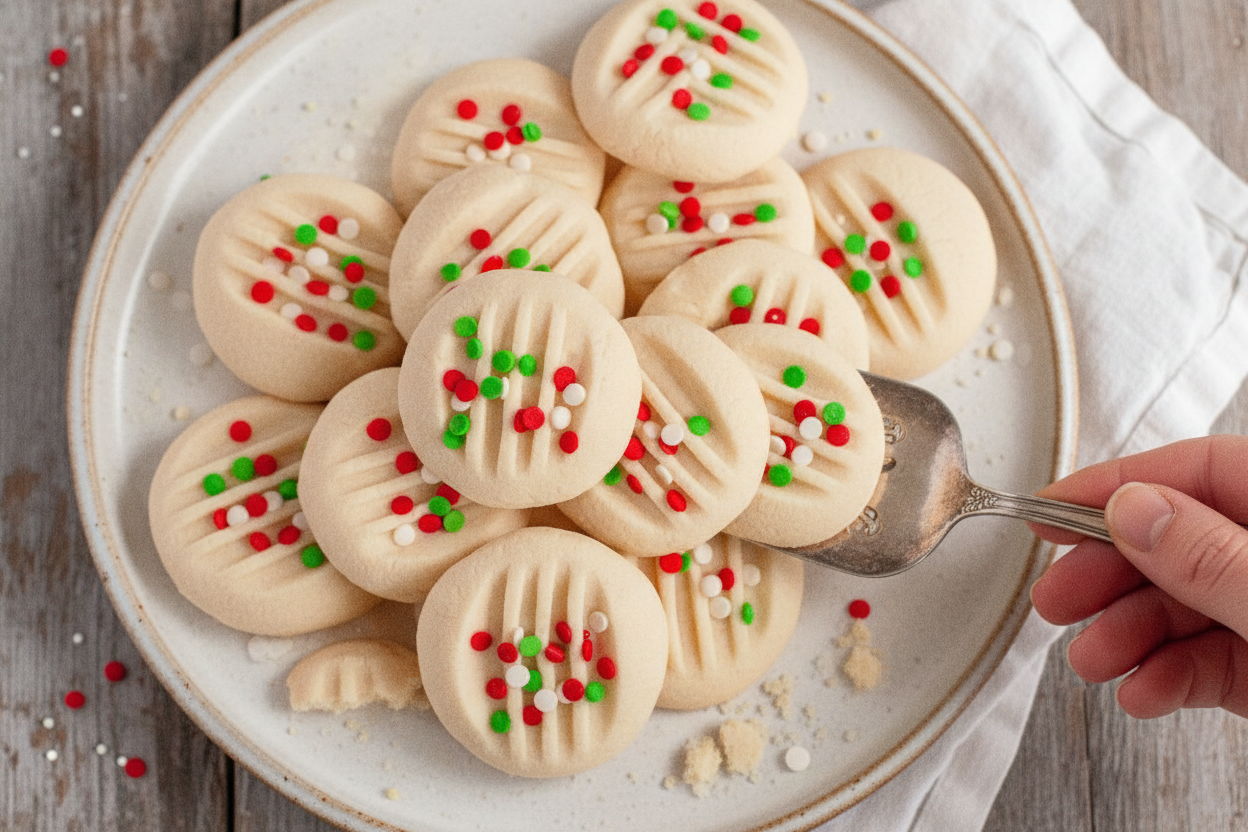
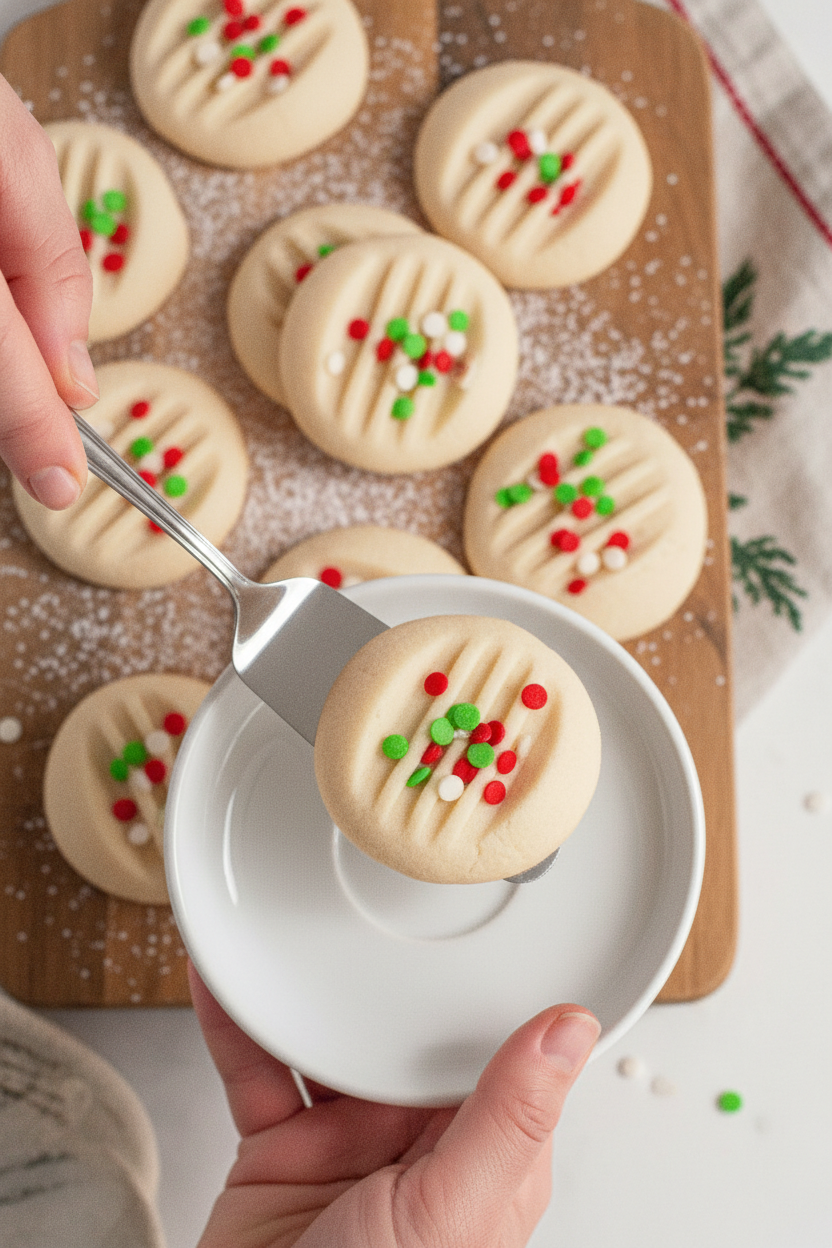
Here is a tip I wish someone had told me sooner. Dust your hands with powdered sugar before rolling the dough into balls. The dough is a bit sticky, and the sugar keeps it from clinging to your fingers. It also adds a tiny sweet sparkle to the outside.
Same goes for the fork you use to press the cookies down. Lightly dust the fork with powdered sugar. Otherwise, it might pull the dough up. Have you ever had a cookie press stick to your fingers? I have, and it is no fun. This trick saves the day every single time.
A Little Bit of Kitchen History
Shortbread comes from Scotland, where bakers made it with butter, sugar, and flour. It was a special treat, not an everyday cookie. Back then, it was often served at weddings and holidays. I like to think those Scottish grandmas would be proud of this version.
Why this matters: Food changes over time, but the love behind it stays the same. We adapt recipes so more people can share in the joy. That is what makes cooking so beautiful. I always feel connected to the past when I bake these.
Make Them Your Own
These cookies love a little dress-up. Sprinkles are the easiest way to add color and fun. You could also add a tiny pinch of cinnamon or a drop of almond extract instead of vanilla. I have even pressed a raspberry into the center of each cookie before baking. The tartness is wonderful.
What is your favorite cookie add-in? I would love to hear your ideas. Maybe you like chocolate chips or a bit of lemon zest. Do you prefer cookies plain or with toppings? Tell me in the comments below.
The Best Part Is Sharing
These cookies keep well for up to five days in a tin. They also freeze beautifully for up to six months. That means you can make a big batch and pull them out when friends come over. I always keep a stash in my freezer for surprise visitors.
I want to know: who will you share these cookies with? Maybe your best friend, your teacher, or your neighbor. Food tastes better when it is shared. Have you ever baked something for someone just to see them smile? That is the real magic here.
Ingredients:
| Ingredient | Amount | Notes |
|---|---|---|
| Dairy-free butter, room temperature | 3/4 cup (170g) | Use a good quality stick-style butter |
| Powdered sugar | 1/2 cup (60g) | Ensure it is gluten-free |
| Vanilla extract | 1 teaspoon | Pure vanilla recommended |
| Gluten-free flour 1:1 baking blend | 1 1/2 cups (180g) | Use a blend with xanthan gum |
| Cornstarch | 1/4 cup (32g) | Helps create the whipped texture |
| Fine sea salt | 1/2 teaspoon | — |
| Sprinkles | optional | Add before baking if desired |
My Grandma Called These “Cloud Cookies”
The first time I made whipped shortbread, I was ten years old. My grandma handed me a wooden spoon and said, “Beat it until your arm hurts, honey.” I didn’t know back then that butter and sugar could get so fluffy. It really does look like a cloud in a bowl. That memory makes me smile every time I bake these cookies.
This version is vegan and gluten-free, but you won’t miss a thing. My friend Sarah tried them and said, “These taste just like my nana’s!” The secret is beating the butter for a full five minutes. You have to let the mixer do the hard work. Doesn’t that smell amazing as the vanilla goes in?
Now let me walk you through it, step by step. I promise it’s easier than tying your shoes. And if you mess up? We’ll laugh about it later. I still laugh at the time I forgot the cornstarch and got flat little pancakes instead of puffy clouds.
Step 1: Preheat your oven to 300 degrees. Line two cookie sheets with parchment paper. This keeps the bottoms from burning. My oven runs hot, so I always peek at the 10-minute mark. (Hard-learned tip: If your butter is too cold, the dough won’t whip properly. Let it sit out for 30 minutes first.)
Step 2: In a stand mixer or a big bowl with electric beaters, beat the butter and powdered sugar on high for a full 5 minutes. Scrape down the sides halfway through. This is where the magic happens. The mixture should turn pale and fluffy, like whipped cream.
Step 3: Add the vanilla extract and beat on high for another 2 minutes. I always use real vanilla, not the fake stuff. My neighbor once used mint extract by accident. We still tease her about those “toothpaste cookies.”
Step 4: Measure in the flour, cornstarch, and salt. Mix on low until just combined. Don’t overmix here, or the cookies get tough. The dough will look a little crumbly at first. That’s okay.
Step 5: Turn the mixer up to high and beat for 2 more minutes. The dough will come together and get lighter. It should feel smooth and a bit sticky. What’s your favorite cookie to bake on a rainy day? Share below!
Step 6: Use a 1.5-tablespoon scoop to portion the dough. Dust your hands with powdered sugar, then roll each piece into a ball. Place them on the cookie sheets. Gently press each ball with a fork that’s also dusted with powdered sugar. Add sprinkles if you want.
Step 7: Bake for 10 to 15 minutes, until the edges are just set. The tops will still be pale, not brown. Let the cookies cool fully on the baking sheets. Then store them in an airtight container for up to 5 days. They freeze beautifully for 6 months too.
Cook Time: 10–15 minutes
Total Time: 30 minutes
Yield: 18–20 cookies
Category: Dessert, Cookies
Three Fun Ways to Change Up the Flavor
Plain shortbread is lovely, but sometimes I like to play around. Here are three twists I’ve tried in my own kitchen. They’re all super easy, I promise.
Lemon Poppy Seed: Add the zest of one lemon and one tablespoon of poppy seeds with the dry ingredients. It tastes like sunshine in cookie form.
Chocolate Dip: After baking and cooling, dip half of each cookie in melted dark chocolate. Let them set on wax paper. My kids fight over these.
Spiced Chai: Add one teaspoon of cinnamon, half a teaspoon of ginger, and a pinch of cardamom to the flour. It makes your whole kitchen smell like a cozy tea shop. Which one would you try first? Comment below!
How to Serve and Sip These Cookies
These cookies are light, so they’re perfect with a hot drink. I like to set them out on a pretty plate, just slightly overlapping. A little dusting of powdered sugar on top makes them look fancy.
For a fun dessert, sandwich two cookies with a dollop of dairy-free whipped cream and fresh berries. It’s like a tiny shortcake. You can also crumble them over vanilla ice cream for a quick crunch.
For drinks, I love a warm mug of spiced apple cider (non-alcoholic). It’s sweet and cozy. If you want something grown-up, a glass of cold oat milk with a splash of vanilla liqueur is divine. Which would you choose tonight?
Storing Your Shortbread Cookies
These cookies stay fresh in an airtight container on the counter for up to five days. I remember the first time I made them, I left the lid loose by accident. The cookies got a little soft, but they still tasted lovely. For longer storage, pop them in the freezer for up to six months. Just layer them between wax paper in a freezer-safe bag. When you want a treat, let them thaw on the counter for ten minutes. Batch cooking is a lifesaver for busy weeks. You can double the dough and freeze half before baking. Have you ever tried storing it this way? Share below! This matters because having ready-to-bake cookies means you can share warm treats anytime. It makes holidays and last-minute guests so much easier.
Three Common Cookie Problems and Fixes
Sometimes the dough feels too sticky. I once panicked because my hands were covered in dough. The fix is simple: dust your hands with powdered sugar before rolling. Another problem is cookies spreading too flat. This happens if the butter is too warm. Just chill the dough balls for fifteen minutes before baking. The third issue is cookies that are too dry. That means you measured the flour too tightly. Spoon the flour into your cup, then level it off. Which of these problems have you run into before? Fixing these small things matters because it builds your confidence in the kitchen. You learn to trust your hands and eyes. Getting the texture right also makes the cookie taste buttery and light, just like it should.
Five Quick Q&A for Your Baking
Q: Can I use regular flour instead of gluten-free?
A: Yes, just swap in the same amount of all-purpose flour. The texture will be slightly different but still delicious.
Q: Can I make these cookies ahead of time?
A: Absolutely. Scoop and freeze the dough balls on a tray, then store them in a bag. Bake straight from frozen, adding two extra minutes.
Q: Can I swap the dairy-free butter for real butter?
A: Yes, use the same amount of room-temperature salted butter. The flavor will be richer.
Q: How do I scale the recipe for more cookies?
A: Simply double or triple all ingredients. The baking time stays the same. Just use two baking sheets at a time.
Q: Any tips for adding flavor?
A: You can add a teaspoon of lemon zest or a pinch of cinnamon to the dough. Which tip will you try first?
A Warm Send-Off from My Kitchen
I hope these cookies bring you as much joy as they bring my family. The smell of them baking makes the whole house feel cozy. I love hearing how recipes turn out for others. Have you tried this recipe? Tag us on Pinterest! It makes my day to see your photos on the board. Keep baking, keep sharing, and don’t be afraid to make a little mess. Happy cooking! —Chloe Hartwell.
*Fun fact: Whipped shortbread cookies were invented in Scotland over 200 years ago. They were a special treat for winter holidays.*


Vegan Gluten Free Whipped Shortbread Cookies
Description
Melt-in-your-mouth vegan gluten free whipped shortbread cookies, perfectly light and festive. Easy dairy-free holiday treat!
Ingredients
Instructions
- Preheat the oven to 300ºF and prepare two cookie sheets with parchment paper.
- In a stand mixer or large mixing bowl with electric beaters, beat the butter and powdered sugar on high for 5 minutes. Scrape down the sides of the bowl when necessary.
- Add in the vanilla extract and mix on high for another 2 minutes.
- Measure in the flour, cornstarch, and salt and mix on low until combined.
- Turn the mixer up to high and allow it to beat for 2 minutes.
- Portion the dough with a 1.5 tablespoon scoop and, with hands lightly dusted with powdered sugar, roll into balls and place on the prepared cookie sheets. Gently press each cookie ball with a fork lightly dusted with powdered sugar and top with sprinkles if desired.
- Bake for 10-15 minutes, or until the edges are just set. Allow the cookies to cool fully on the sheets. Enjoy!
Notes
- Store at room temperature in an airtight container for up to 5 days or frozen for up to 6 months.


Leave a Reply