
Why I Love These No-Dairy Treats
Some friends thought I was crazy when I tried to make Nanaimo bars without butter or milk. “It won’t taste the same,” they said. But I had a secret. My grandson, Leo, just found out he can’t eat dairy. I wanted him to enjoy the same sweet squares I made for his mom when she was small. So I rolled up my sleeves and got to work in the kitchen. Doesn’t that smell amazing when the chocolate melts? You know what? These bars are just as rich and creamy. Leo ate three before I could hide the pan. I still laugh at that. Here is a little trick: press the bottom layer down really, really hard. That makes the bars hold together. Have you ever tried a no-bake dessert with your family?A Little Bit of History
Nanaimo bars come from a city called Nanaimo, up in Canada. A lady named Mabel won a baking contest with this recipe way back in the 1950s. Her original recipe used lots of butter and eggs. Over time, bakers started playing with it. Now we have so many fun versions. I love that a simple recipe can bring people together across the years. We are still making Mabel’s creation, just with a new twist. *Fun fact: The lady who won that contest used to mail her Nanaimo bars to soldiers during the war.* The recipe really spread from there. Do you have a family recipe that has been passed down?Why This Matters at Home
When you learn to swap out ingredients like butter for dairy-free butter, you open a door for more people. Your friend who cannot eat milk, or your aunt who feels sick after cream, can now sit at your table and enjoy dessert with everyone else. That feels good. I remember when Leo first tasted these. His face lit up like a Christmas tree. He said, “Grandma, these are better than the real ones.” That is why this matters. You do not have to miss out on joy just because your body works a little differently. Everyone deserves a sweet treat. What would you make different for someone you love?The Flavors You Will Taste
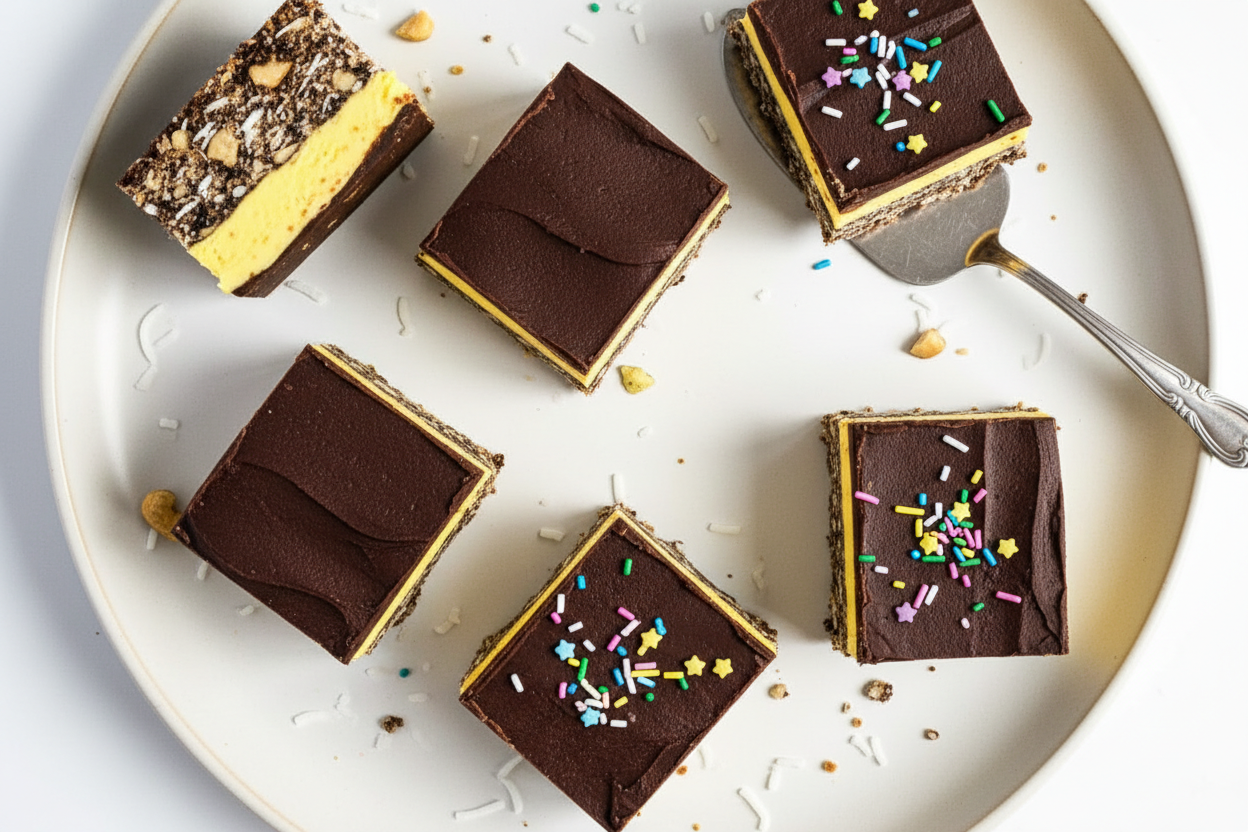
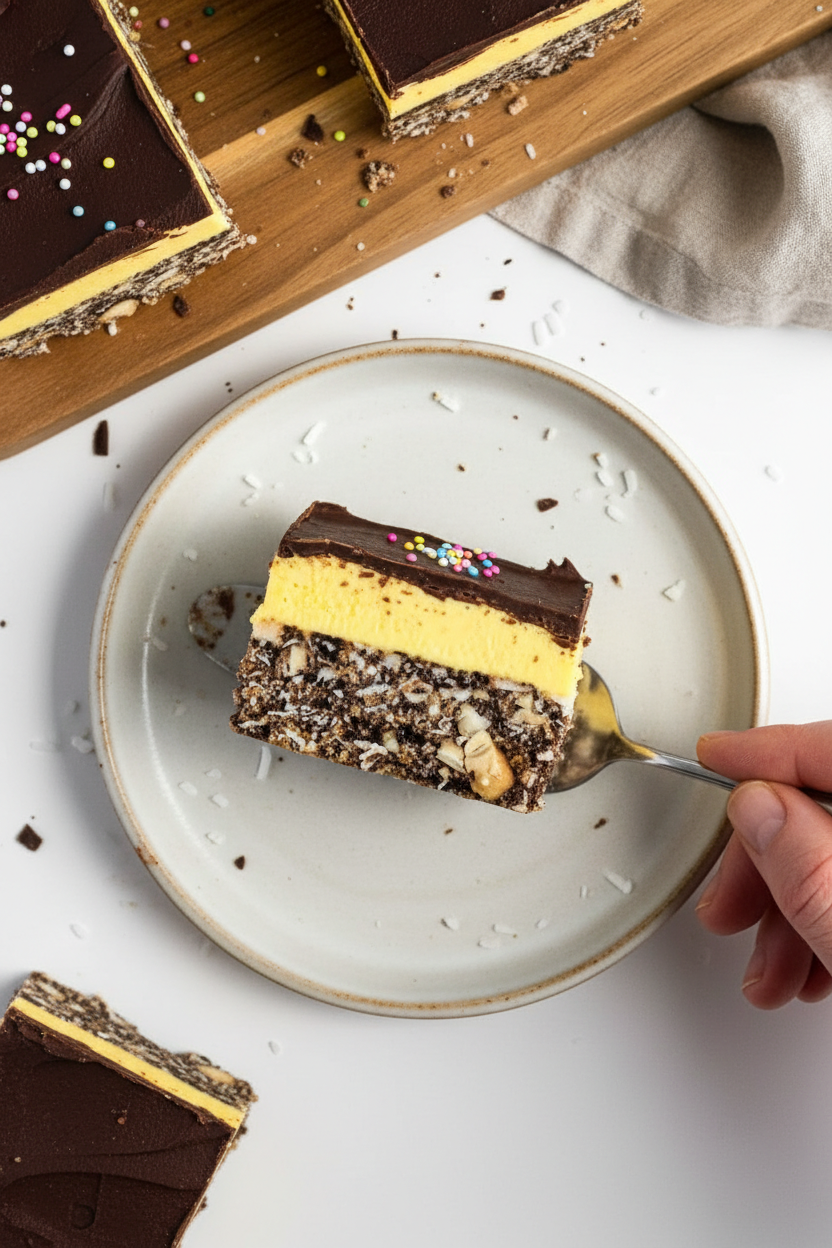
This bar has three layers, and each one tells a story. The bottom is crunchy from graham crackers, coconut, and cashews. It tastes like a chocolate cookie you pressed into the pan with your hands. The middle layer is smooth, creamy, and a tiny bit sweet. It is like the filling of a fancy cake. The top layer is pure chocolate magic. You pour it on shiny and let it harden in the fridge. When you bite down, you get crunch, then cream, then smooth chocolate. It is like a little party in your mouth. I always sneak a square before dinner is ready.What I Learned in My Kitchen
The first time I made these, I forgot to press the base down hard enough. The whole thing fell apart when I tried to cut it. My kitchen looked like a disaster zone. But I learned a big lesson: patience and a firm hand make all the difference. Another thing I learned is to let the bars chill for at least an hour. Longer is better. If you cut too soon, the middle layer squishes out like a gooey mess. But when you wait, the pieces hold their shape perfectly and taste much better. Have you ever ruined a dessert by rushing it? I sure have.Simple Tips for Big Success
Use a stand mixer if you have one. The middle layer needs to be whipped for a full five minutes to get fluffy. Your arm will get tired if you use a hand mixer, trust me. Also, line your pan with parchment paper. That way you can lift the whole block of bars out cleanly. If you want to add sprinkles, do it right after you pour the chocolate top. The chocolate sets fast, and sprinkles need something sticky to hold onto. I like using rainbow sprinkles because they make the bars look cheerful. What color sprinkles would you choose?How to Keep Them Fresh
Store these bars in an airtight container in the fridge. They will stay good for about a week. That is, if you do not eat them all in two days like my family does. You can also freeze them for up to a month. Just wrap each square in wax paper first. When you want a treat, pull one out and let it sit for two minutes. The middle layer softens just a bit. That is the perfect moment to take a bite. I keep a stash hidden in the back of my freezer for late-night snacking. Do you have a secret hiding spot for treats in your house?Ingredients:
| Ingredient | Amount | Notes |
|---|---|---|
| Dairy-free salted butter | 1/2 cup | Base layer |
| Sugar | 1/4 cup | Base layer |
| Cocoa powder | 5 tbsp. | Base layer |
| Egg, beaten | 1 | Base layer |
| Graham cracker crumbs | 1 3/4 cups | Can sub gluten-free crumbs |
| Sweetened shredded coconut | 1 cup | Base layer |
| Chopped cashews | 1/2 cup | Base layer |
| Dairy-free salted butter | 1/2 cup | Middle layer, room temperature |
| Dairy-free milk | 3 tbsp. | Middle layer |
| Powdered sugar | 2 cups | Middle layer |
| Custard powder | 2 tbsp. | Middle layer |
| Yellow food colouring | optional | Middle layer |
| Dairy-free semisweet chocolate | 4 oz. | Top layer |
| Dairy-free salted butter | 2 tsp. | Top layer |
| Sprinkles | 1/2 cup | Top layer, optional |
My First Nanaimo Bar (And Why I Messed It Up)
I still laugh when I think about my first try making these bars. I was visiting a friend in Canada, and she handed me a slice that looked like a little striped brick. One bite and I was hooked—chocolate, creamy middle, and a crunchy bottom. I begged for the recipe and promised to make it for my family back home.
The problem? I forgot to press the base layer down firmly enough. When I cut the bars, the bottom crumbled into a million pieces. My kids called it “Nanaimo Sand.” Now I always tell people: press that layer like you’re packing a suitcase for a bumpy flight!
This vegan version came later, when my niece went dairy-free. I was nervous to try it, but honestly? It tastes just like the real thing. Doesn’t that smell amazing when the chocolate melts? Let’s get started.
Here is the step-by-step for making these no-bake beauties. Remember to give yourself time to chill them—the hardest part is waiting!
Step 1: Grab your 8×8 pan. Spray it with non-stick spray, then line it with parchment paper. Let the paper hang over the edges a little—that’s your handle later. (Hard-learned tip: If you skip the parchment, you’ll be chiseling bars out like a miner!) Step 2: In a medium pot, melt the dairy-free butter, sugar, and cocoa powder over medium-low heat. Stir it gently until it’s all smooth and dark. Take it off the heat and let it cool for one minute. Step 3: Beat one egg in a small bowl. Pour it into the pot and stir fast. The mixture will thicken up like a pudding. Remove from heat immediately—you don’t want scrambled eggs in your dessert! Step 4: Stir in the graham cracker crumbs, shredded coconut, and chopped cashews. Mix until everything is coated in that chocolate-y goodness. Now dump it all into your pan. Step 5: Press the base layer down very, very firmly. Use your hands or the bottom of a glass. Make it flat and tight. Set the pan aside while you make the middle layer. Step 6: In a stand mixer, beat the room-temperature dairy-free butter on high until it’s light and fluffy. This takes about two minutes. Scrape the sides once or twice. Step 7: Add the powdered sugar, custard powder, dairy-free milk, and a drop of yellow food coloring if you want that classic look. Mix on low until the sugar stops flying everywhere, then crank it to high for five minutes. Spread this creamy layer over your base. Pop it in the fridge. Step 8: Melt the chocolate and butter together in the microwave. Do 30-second bursts, stirring between each. When it’s smooth and shiny, pour it over the cold middle layer. Tilt the pan to spread it evenly. Add sprinkles if you’re feeling fancy. Step 9: Let the bars chill in the fridge for at least one hour. I know it’s hard to wait, but trust me. What’s the messiest dessert you’ve ever made? Share below! When they’re firm, lift the parchment, cut into 16 squares, and store in an airtight container in the fridge. Cook Time: 20 minutesTotal Time: 1 hour 20 minutes
Yield: 16 bars
Category: Dessert
Three Fun Twists to Try
Sometimes I get bored making the same thing twice. That’s when I start playing with my food. Here are three ways to shake up these Nanaimo bars. Each one is simple and tasty.
Peppermint Dream: Add 1/2 teaspoon of peppermint extract to the middle layer. Top with crushed candy canes instead of sprinkles. Perfect for winter holidays. Salty Sweet Swirl: Sprinkle a pinch of flaky sea salt over the top layer right after you pour the chocolate. The salt makes the sweet pop like fireworks in your mouth. Berry Bright: Swap the custard powder for freeze-dried strawberry powder. The middle layer turns pink and tastes like summer. Kids go nuts for this one. Which one would you try first? Comment below!How I Like to Serve These Bars
These bars are rich, so a little slice goes a long way. I like to cut them into tiny squares and serve them on a pretty plate. A dusting of cocoa powder on top makes them look fancy for company.
They pair beautifully with a cold glass of oat milk or a hot cup of peppermint tea. For grown-ups, a small glass of dark rum or coffee liqueur is a lovely match. The bitterness balances the sweet.
Sometimes I serve them alongside a bowl of fresh raspberries. The tart fruit cuts through the creamy sweetness. Which would you choose tonight?
Storing Your Vegan Nanaimo Bars
These bars keep very well in the fridge. Place them in an airtight container with wax paper between layers. They will stay fresh for up to one week. I once forgot a batch in the back of my fridge for ten days. They were still delicious, just a bit softer. For longer storage, wrap each bar in plastic wrap and freeze for up to three months. To thaw, simply move them to the fridge overnight. Do not microwave them. The chocolate layer will melt and get messy. Batch cooking is a lifesaver for busy weeks. You can make a double batch and freeze half for later. That way you always have a treat ready for visitors. Have you ever tried storing it this way? Share below!
Common Problems and Easy Fixes
The first problem is a crumbly base layer. This happens when you do not press the crumbs down firmly enough. Use the bottom of a glass to really pack it in. I remember my first batch fell apart like sand. It still tasted good but looked messy. The second problem is a runny middle layer. This means your butter was too soft or you skipped the five minutes of mixing. Cream the butter until it is fluffy and light. This helps it hold its shape. The third problem is chocolate that cracks when you cut it. Let the bars sit at room temperature for five minutes before slicing. Use a sharp knife and wipe it clean between cuts. Why does this matter? Fixing these small mistakes makes you feel proud and confident in the kitchen. It also makes the flavors blend perfectly. Every layer should be firm and easy to bite. Which of these problems have you run into before?
Your Top Questions Answered
Q: Can I make these gluten-free?
A: Yes. Use gluten-free graham cracker crumbs. The texture stays very similar.
Q: Can I make them ahead of time?
A: Absolutely. Make them one or two days before serving. They taste even better after resting.
Q: Can I swap the cashews for something else?
A: Yes. Try walnuts, almonds, or skip them entirely for a nut-free version.
Q: Can I double the recipe?
A: Yes. Use a 9×13 inch pan and double all ingredients. Increase chilling time by 30 minutes.
Q: Do I need the food coloring?
A: No. It is only for looks. The custard powder already gives a nice yellow color. Which tip will you try first?
A Warm Send-Off from Chloe
I hope you love making these bars as much as I do. They remind me of Sunday potlucks with friends on the porch. Each layer has its own job to do. The base is crunchy, the middle is creamy, and the top is smooth. It is a little kitchen miracle. *Fun fact: Nanaimo bars are named after a city in Canada.* If you make them, take a photo. I would love to see your creation. Have you tried this recipe? Tag us on Pinterest! Happy cooking!
—Chloe Hartwell.

Vegan Nanaimo Bars A Dairy-Free Dessert
Description
Indulge in rich Vegan Nanaimo Bars, a dairy-free dessert that’s creamy, chocolatey, and no-bake. Perfect plant-based treat.
Ingredients
Instructions
- Prepare an 8×8 inch baking pan with non-stick baking spray and parchment paper.
- In a medium pot, melt the butter, sugar, and cocoa powder over medium-low heat.
- Add in the beaten egg and mix until it thickens. Remove from heat.
- Mix in the graham crackers crumbs, cashews, and coconut until combined.
- Place into the prepared baking tray and very firmly and evenly press the base layer down. Set aside.
- Cream the butter in the bowl of a stand mixer on high until light and fluffy.
- Add in the powdered sugar, custard powder, milk, and food coloring (if using) and mix on low until combined then high for 5 minutes. Spread evenly on the base layer and refrigerate.
- Heat chocolate and butter in the microwave in 30-second intervals until fully melted and smooth.
- Spread evenly on the cooled base and buttercream layer and add sprinkles if desired.
- Allow to fully cool and set in the refrigerator for at least 1 hour.
- Cut into 16 squares and store in an airtight container in the fridge. Enjoy!
Notes
- Equipment needed: Stand Mixer, Medium Pot, 8 x 8 Pan, Parchment Paper, Spatula


Leave a Reply