
The Cake That Started with a Mint Patch
My grandma had a wild mint patch behind her woodshed. It took over everything. She’d pull handfuls and chop it up for tea or lemonade. One summer, she tried folding it into a chocolate cake batter. I still laugh at that. The leaves turned brown and bitter. We ate it anyway, with big smiles. That’s when I learned mint and chocolate belong together, but you have to be gentle with them. This Mint Chocolate Chip Cake is my love letter to that messy kitchen experiment. It uses mint extract instead of leaves, so no bitterness. And it’s got a soft crumb that feels like a hug. Have you ever planted mint? It grows like a happy weed, doesn’t it?Why Gluten-Free Doesn’t Mean Taste-Free
I know some folks worry gluten-free cakes will be dry or crumbly. This one isn’t. The secret is cornstarch. It adds a silky softness that regular flour sometimes lacks. Plus, using room temperature eggs and buttermilk helps everything blend smoothly. *Fun fact: Buttermilk is actually a natural tenderizer. It makes cakes more moist by breaking down gluten strands.* Why this matters: When you bake for someone with food allergies, you’re telling them they matter. That’s a big deal. This cake can be made with plant-based butter and milk, so almost anyone can have a slice. Do you have a friend who needs special treats? This recipe is perfect for sharing.The Buttercream That Tastes Like Summer
Mint buttercream smells like cool breezes on a hot day. When I whip it up, the whole kitchen gets this fresh, bright scent. Doesn’t that smell amazing? The trick is creaming the butter for a full five minutes. It becomes fluffy and cloud-like. Then you add just a teaspoon of mint extract. Too much makes it taste like toothpaste. Trust me on this one. I once made a double batch and my neighbor knocked on the door, asking if I was baking candy canes. We laughed about it over coffee. A good buttercream brings people together. Why this matters: Small, simple joys—like a perfect frosting bite—remind us to slow down. What’s your favorite flavor to add to buttercream?Why You Should Tap Your Cake Pans
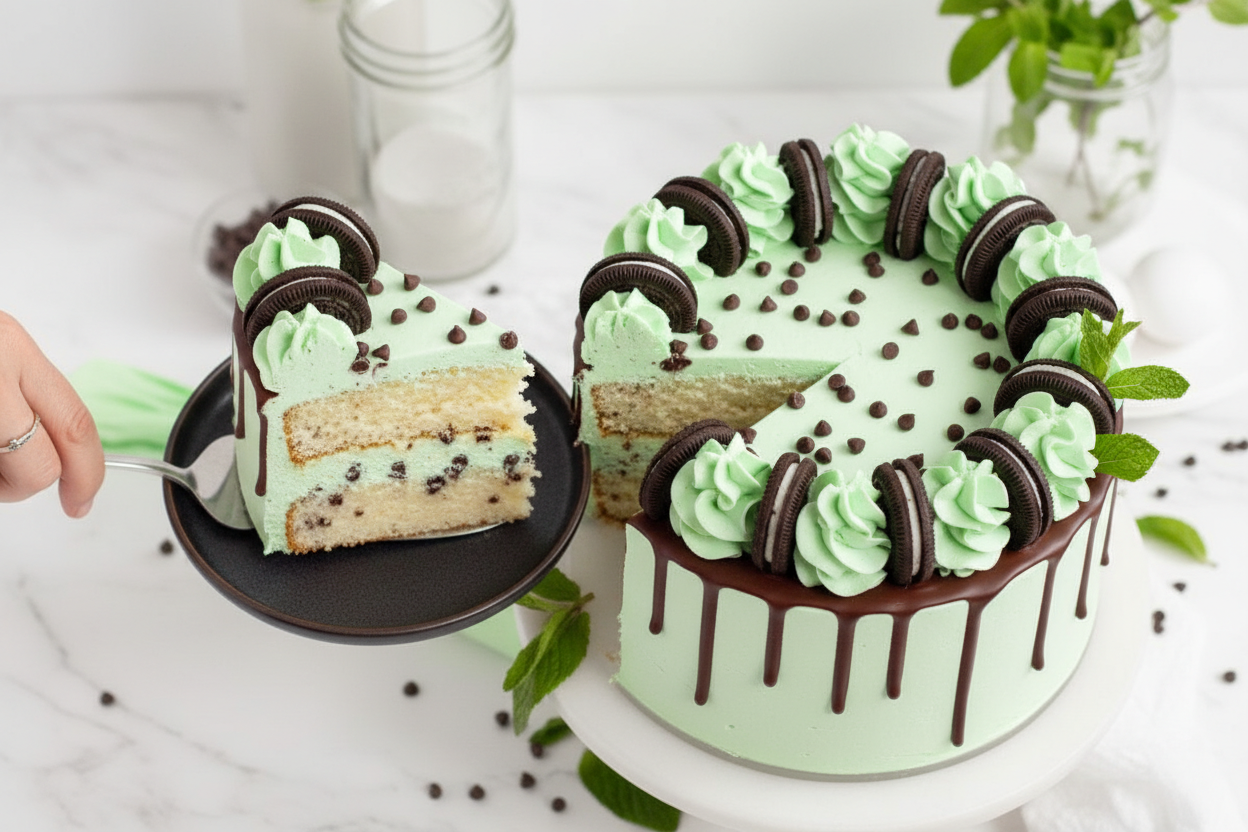
Before the cake goes in the oven, give each pan a few gentle taps on the counter. This releases air bubbles that make holes in your cake. My grandma used to say, “You’re settling the batter in, like tucking a baby in bed.” It sounds silly, but it works. Those little bubbles would ruin your smooth top layer. Another thing: mini chocolate chips are better than regular ones for this cake. They don’t sink to the bottom as much. And tossing them in a bit of flour before folding helps them stay put. Have you ever had a cake where all the chips ended up at the bottom? Frustrating, right?The Ganache Drip That Steals the Show
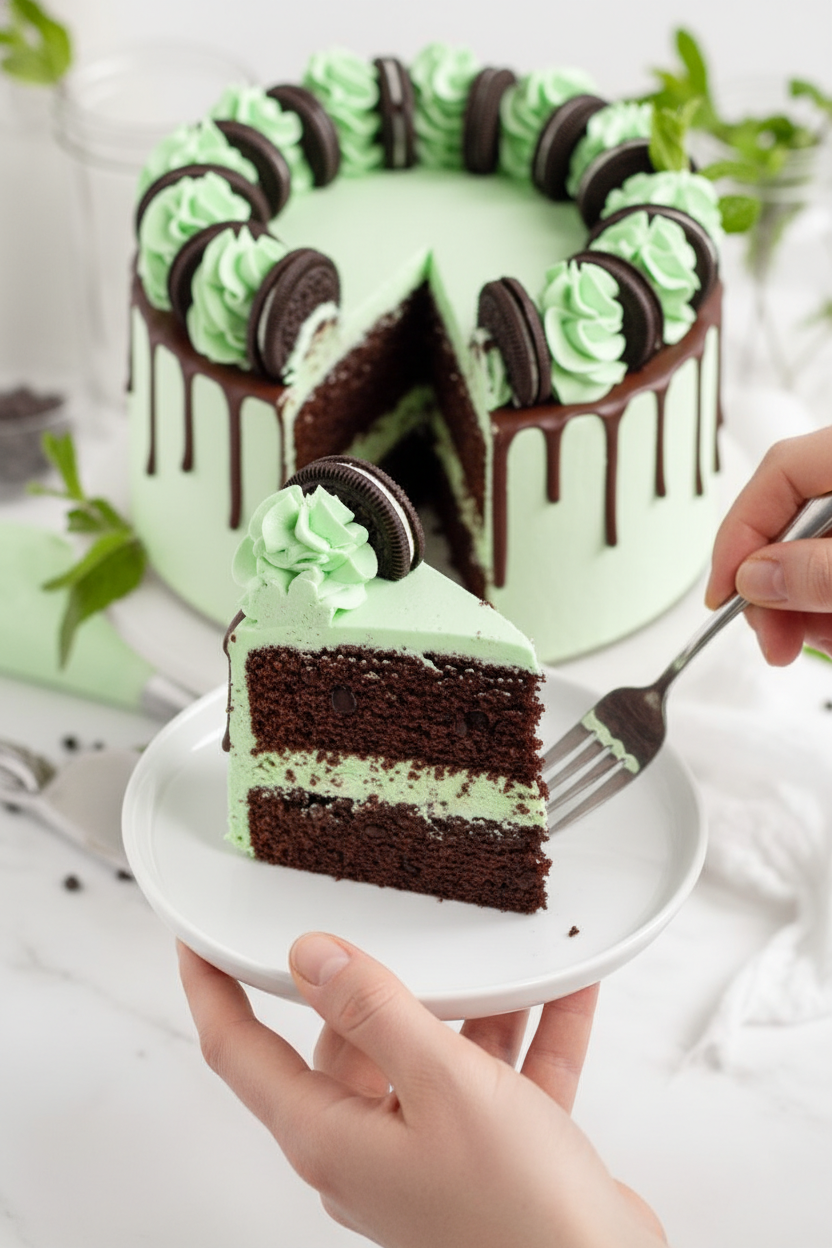
This part feels like magic. You warm the leftover ganache and let it drip down the sides of the chilled cake. It creates beautiful little rivers of chocolate. I always pause and watch it for a minute. It’s like painting with chocolate. The cake needs to be cold so the drips set fast. Warm cake makes a mess. Why this matters: Taking time to make food beautiful shows you care. Even if it’s just for yourself. That moment of finishing a cake, stepping back, and smiling—that’s real joy. Would you rather have neat, perfect drips or messy, artistic ones?Storing Secrets for Busy Bakers
This cake keeps well. You can store it in an airtight container on the counter for two days. Or in the fridge for five. The flavor actually gets better after a day. The mint and chocolate meld together like old friends. I once froze a slice and ate it three months later. Still tasted like summer. If you make this ahead, don’t add the ganache drip until the day you serve it. Otherwise, it gets sticky and loses its shine. Fresh is always best for that glossy look. Do you have a favorite cake that tastes better the next day? I’d love to hear about it.Your Turn to Bake a Memory
This cake isn’t just about ingredients. It’s about the feeling you get when you pull two perfect layers from the oven. The way your kitchen smells like chocolate and mint. The way someone’s face lights up when you hand them a slice. That’s what baking is really for. So grab your mixing bowl and give it a try. Don’t worry if your drip is a little crooked or your swirl isn’t perfect. It will taste amazing. I promise. And if you have questions, just think of me, Chloe, standing in my grandma’s old kitchen, cheering you on. What’s the first thing you’ll do differently next time you bake?Ingredients:
| Ingredient | Amount | Notes |
|---|---|---|
| Gluten-free flour 1:1 baking blend | 2 cups (240g) | For cake |
| Cornstarch | 1/3 cup (44g) | For cake |
| Baking powder | 2 teaspoons (9g) | For cake |
| Fine sea salt | 1 teaspoon (6g) | For cake |
| Baking soda | 1/2 teaspoon | For cake |
| Egg whites, room temperature | 4 large | For cake |
| Egg, room temperature | 1 large | For cake |
| Buttermilk, room temperature *plant-based or regular | 1 1/3 cups (320ml) | For cake |
| Vanilla extract | 1 tablespoon (15ml) | For cake |
| Butter, room temperature *plant-based or regular | 2/3 cup (150g) | For cake |
| Granulated sugar | 1 1/2 cups (300g) | For cake |
| Mini chocolate chips *plant-based or regular | 1 1/2 cups (252g) | For cake |
| Gluten-free flour 1:1 baking blend | 1 tablespoon | For coating chips |
| Butter, room temperature *plant-based or regular | 2 cups (454g) | For mint buttercream |
| Powdered sugar | 4 cups (480g) | For mint buttercream |
| Mint extract | 1 teaspoon | For mint buttercream |
| Fine sea salt | 1 teaspoon | For mint buttercream |
| Green gel color (optional) | 2-3 drops | For mint buttercream |
| Chocolate chips *plant-based or regular | 1 cup (168g) | For chocolate ganache |
| Heavy cream, room temperature *plant-based or regular | 1 cup (240ml) | For chocolate ganache |
This Cake Tastes Like a Memory
I still remember the first time I made this cake. It was for my granddaughter’s birthday party, and she had just found out she couldn’t eat gluten or dairy. Her little face lit up when I set this minty, chocolatey dream on the table. Doesn’t that smell amazing? That blend of cool mint and rich chocolate is pure magic. This cake is for everyone who wants a slice of joy without the tummy ache.
Let’s start with the most important part: getting the cake layers just right. We mix our dry ingredients first. Flour, cornstarch, baking powder, salt, and baking soda all get a good whisk. Fun fact: Cornstarch is our secret weapon! It makes the gluten-free flour feel soft and tender, just like a regular cake. Set that bowl aside and get your wet ingredients ready.
Now, we cream the butter and sugar together until it’s light and fluffy. This takes a good 3-5 minutes. I always sing a little song while I wait. Then we add the dry and wet ingredients in small batches, starting and ending with the dry. Toss those mini chocolate chips with a little extra flour so they don’t sink to the bottom. Gently fold them in. Pour into your pans and tap them on the counter. That gets rid of hidden air bubbles. Bake for 25-30 minutes until the top springs back when you pat it. (Hard-learned tip: Don’t open the oven door for the first 20 minutes, or the cake might fall flat.) Let them cool for 15 minutes in the pan, then move them to a rack. Do you like your mint frosting super green, or just a little hint of color? Share below!
Putting It All Together
While the cakes cool, we make the mint buttercream. Beat the butter on high for a long time, like 5-10 minutes, until it’s pale and fluffy. Add the powdered sugar and salt on low so you don’t get a sugar cloud in your kitchen. Then add the mint extract and a drop or two of green food color if you want. Beat it on high for another 5 minutes. The ganache is even easier: just melt chocolate chips and cream in the microwave in 30-second bursts, stirring each time. Let it cool a little.
Now for the fun part. Level the cakes if they have a dome on top. Place one layer on your plate. Slather on about 2 cups of that mint buttercream. Pipe a little border around the edge, then fill the middle with ganache. Place the second cake on top. Give the whole thing a thin “crumb coat” of buttercream. Pop it in the fridge for 20 minutes. I always use this time to lick the mixing bowl. After it’s chilled, spread on the final smooth layer of buttercream. Warm up the leftover ganache and drip it over the edges of the cake. Let it set in the fridge. Finally, pipe some pretty swirls on top. Place an Oreo between each swirl if you like.
Store leftover cake in an airtight container. It stays fresh on the counter for 2 days, in the fridge for 5 days, or in the freezer for 3 months. This cake is a hug in dessert form.
Cook Time: 25-30 minutes
Total Time: 1 hour 30 minutes
Yield: 8-10 servings
Category: Dessert, Cake
Three Fun Twists to Try
Feeling adventurous? Here are three ways to make this cake your own. Vegan-Friendly Swap: Use plant-based butter, milk, and chocolate chips. The cake still bakes up soft and sweet. No one will guess the difference. Spicy Mint Kick: Add a tiny pinch of cayenne pepper to the ganache. The heat sneaks up behind the cool mint. It’s a grown-up surprise in every bite. Berry Burst: Layer fresh raspberries or chopped strawberries between the cake and the buttercream. The tart fruit cuts through the sweetness perfectly. Which one would you try first? Comment below!
Perfect Sips and Bites
This cake shines best with simple sides. Serve it with a handful of fresh mint leaves on top for color. A scoop of dairy-free vanilla ice cream on the side is always a hit. For a fancier look, dust the plate with cocoa powder before setting the slice down. For drinks, pour a tall glass of cold almond milk or a mug of peppermint tea. For the grown-ups, a small glass of chocolate stout beer is a dreamy match. Which would you choose tonight?
Storing Your Cake So It Stays Fresh
This cake keeps well in the fridge for up to five days. Just wrap it tight in plastic wrap or use an airtight container. I once left a slice out on the counter overnight. It was still good the next morning, but the frosting got a little soft. That is why I always chill it now. For longer storage, freeze the cake without the ganache drip. Wrap each layer in plastic, then foil. It will stay fresh for up to three months. When you want a slice, let it thaw in the fridge overnight. Batch cooking matters because you can make two cakes at once. Freeze one for a busy week. Have you ever tried storing it this way? Share below!
Three Common Problems and Easy Fixes
The first problem is a dry cake. This happens if you overbake it. I remember pulling a cake out too late once. It was crumbly and sad. Fix it by testing the center with a gentle pat. If it springs back, it is done. The second problem is runny buttercream. This means your butter was too soft. I once whipped it for ten minutes and it still looked soupy. Pop it in the fridge for fifteen minutes, then whip again. The third problem is a lopsided cake. You can fix this with a cake leveler or a sharp knife. Slicing off the dome makes stacking easy. These fixes matter because they save your dessert. They also build your cooking confidence. You will know what to do next time. Which of these problems have you run into before?
Your Top Five Questions Answered
Q: Can I use regular flour instead of gluten-free? A: Yes, just swap the gluten-free blend for the same amount of all-purpose flour. Q: Can I make this cake a day ahead? A: Absolutely. Bake and frost the cake one day early. Store it in the fridge. Q: What can I use instead of buttermilk? A: Mix one cup of plant-based milk with one tablespoon of lemon juice. Let it sit for five minutes. Q: Can I skip the cornstarch? A: Yes, but the cake will be denser. The cornstarch helps keep it light. Q: How do I scale this recipe for a smaller pan? A: Use a 6-inch pan and halve all the ingredients. Which tip will you try first?
*Fun fact: The cornstarch in this recipe acts like a secret helper. It makes gluten-free cakes feel fluffy and soft.
A Warm Send-Off From My Kitchen to Yours
I hope you love making this cake as much as I do. Every time I bake it, I think of my granddaughter’s smile when she first tasted that mint and chocolate combo. That is what cooking is about. It is about sharing small joys with the people we love. Please take a photo of your cake and share it. Have you tried this recipe? Tag us on Pinterest! I love seeing your creations. They make my day brighter. Happy cooking! —Chloe Hartwell.


Mint Chocolate Chip Cake (Gluten-Free & Dairy-Free Option): Gluten Free Dairy Free Mint Chocolate Chip Cake
Description
Indulge in a rich, moist gluten free dairy free mint chocolate chip cake. Perfectly refreshing dessert for allergies or clean eating.
Ingredients
Instructions
- Preheat oven to 350ºF and prepare two 8-inch cake pans with non-stick baking spray and parchment.
- Combine the flour, cornstarch, baking powder, salt, and baking soda in a bowl and whisk until combined. Set aside.
- Combine the egg whites, egg, milk, and vanilla in a bowl and whisk until well combined. Set aside.
- Cream together the butter and sugar on high until light and fluffy. This should take approximately 3-5 minutes.
- Add the dry ingredients in 3 different portions alternating with the liquid ingredients in 2 portions. Beginning and ending with the dry ingredients and mixing in between each addition. Scrape down the sides of the bowl when necessary.
- Combine the mini chocolate chips with the 1 tablespoon of flour and gently fold into the cake batter.
- Divide the batter between two pans, give them a few taps on the counter to release any air bubbles, and bake for approximately 25-30 minutes. The center should bring back to a gentle pat.
- Allow to cool for 15 minutes before removing from the pans.
- Cream the butter on high speed until light and fluffy. This should take approximately 5-10 minutes.
- Add the powdered sugar and salt and mix on low until combined.
- Add the mint extract and green food color (if using) and mix on low until combined. Turn to high and mix for another 5 minutes.
- Combine the chocolate chips and cream in a microwave-safe bowl and heat in 30-second intervals, stirring after each interval, until fully melted and smooth.
- Set aside to cool.
- Level each fully cooled cake layer with a cake leveler or knife if needed.
- Place one leveled layer of cake on a cake board, plate, and/or cake turntable and slather with approximately 2 cups of the mint buttercream.
- Pipe a buttercream border around the edge of the cake and fill with approximately ⅔ of the chocolate ganache.
- Top with the remaining cake layer and gently apply a thin coat of buttercream. Chill the cake for 20 minutes. *If the cake feels unstable or the buttercream becomes too soft at any point while stacking, stop and chill the cake and frosting for 15 minutes.
- Spread a final layer of buttercream on the cake and smooth the sides and top with a cake smoother and offset spatula. Chill in the fridge for another 10 minutes.
- Warm the remaining chocolate ganache in a microwave-safe bowl in 30-second intervals, stirring after each interval, until smooth and back in a liquid state.
- With a spoon, squeeze bottle, or piping bag, drip the chocolate ganache over the edges of the cake. Place back in the fridge until the drip sets.
- Fit a piping bag with a Wilton 1m piping tip and pipe swirls on top of the cake. Place an Oreo cookie between each swirl. Enjoy!
Notes
- Store leftover cake in an airtight container at room temperature for up to 2 days, in the fridge for up to 5 days, or in the freezer for up to 3 months.


Leave a Reply