
The First Time I Made a Tartlet
I remember my first tartlet. I was maybe ten years old, standing on a kitchen stool. My grandma let me press the graham cracker crust into the pan. I pressed too hard and the crumbs went everywhere. She just laughed and handed me a clean bowl. “Try again, sweet pea,” she said. I still laugh at that mess today.
That is why I love this recipe so much. It forgives little mistakes. Even if your crust is a bit crooked, it still tastes wonderful. Have you ever baked something with a family member? What did you make together?
Why Chocolate and Berries Are Best Friends
Dark chocolate and berries are like best friends who never fight. The chocolate is rich and a tiny bit bitter. The berries are sweet and tangy. Together, they make your taste buds do a happy dance. Doesn’t that smell amazing when you melt the chocolate?
Here is a little secret. The berries you use can be fresh or frozen. I have used frozen raspberries in a pinch, and nobody noticed. Just let them thaw a little first. This is why this recipe matters: you do not need fancy, perfect fruit. You just need fruit that tastes good.
The Magic of a Crunchy Crust
Every good tartlet needs a sturdy home. That home is the graham cracker crust. When you press the crumbs into the liner, think of making a little sandcastle. Pat it down gently but firmly. You want the sides to hold up like castle walls.
The egg white is the glue that holds everything together. It is like the friend who makes the team work. *Fun fact: Graham crackers were invented in the 1800s as a healthy snack. Now they make the best crust in the world.*
Whipped Cream That Makes You Smile
Whipping cream by hand is good for the soul. You watch it turn from liquid to fluffy clouds. It takes about three minutes with a whisk. Your arm might get tired, and that is okay. It just means you are working for that sweetness.
The vanilla is the quiet hero here. Just a tiny splash makes everything taste like a hug. Why does this matter? Because simple ingredients, when treated kindly, become something special. What is your favorite thing to put whipped cream on?
Patience Is the Hardest Ingredient
After you melt the chocolate and pour a little in the crust, you have to wait. The freezer does the work for thirty minutes. That can feel like forever when you are hungry. But trust me, this step is important.
The chocolate layer stops the crust from getting soggy. It acts like a waterproof floor for your berries and cream. I once skipped this step because I was in a hurry. The crust turned into a sad, mushy mess. I still laugh at that mistake, too. Have you ever ruined a recipe by rushing? Tell me about it.
How to Serve These Little Treasures
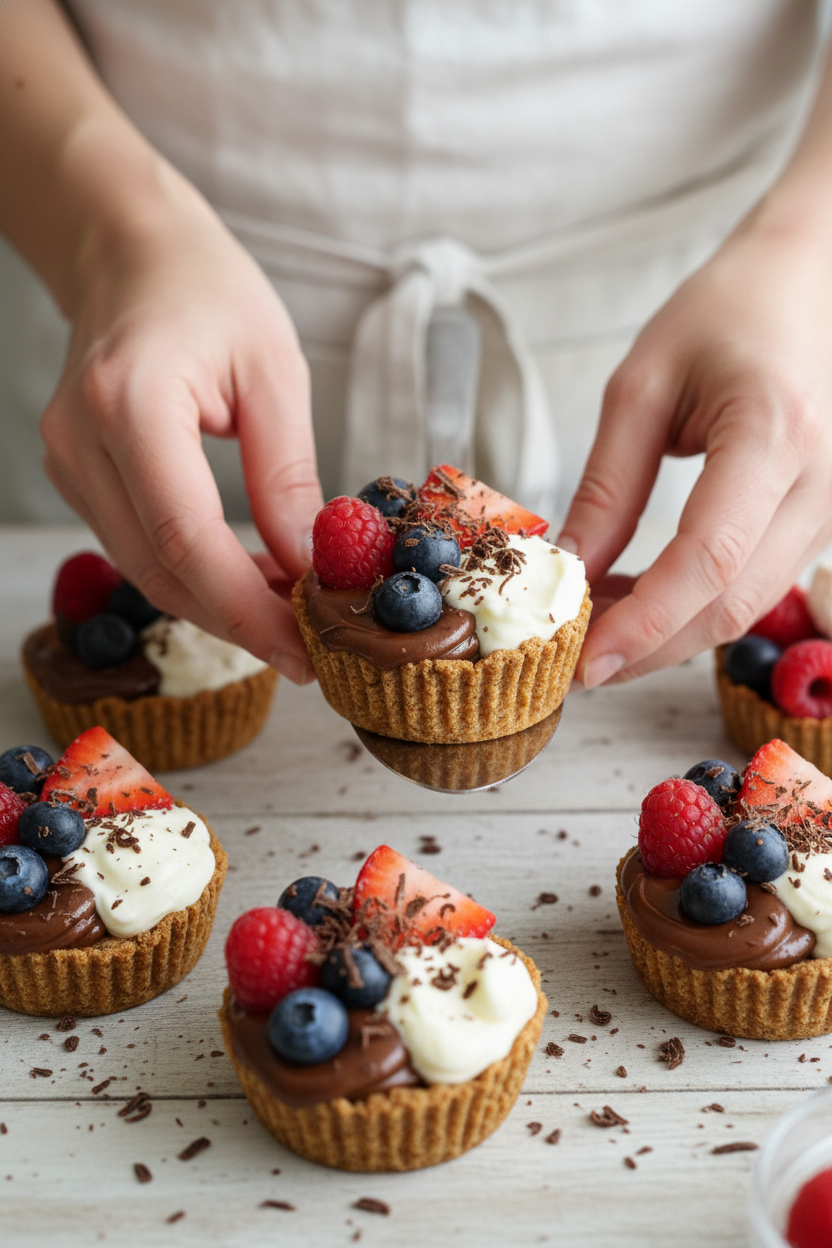
Once the chocolate is firm, you pile on the berries and cream. Add some chocolate shavings on top if you want to be fancy. But honestly, they taste just as good without them. Serve them right away, while the cream is cold and the crust is crunchy.
These tartlets are perfect for a birthday, a picnic, or a Tuesday afternoon. They are small enough to eat two without feeling guilty. Each one has only 124 calories, so you can enjoy a handful. I vote you make a double batch. What do you say? Are you going to try this recipe this week?
Ingredients:
| Ingredient | Amount | Notes |
|---|---|---|
| Graham cracker sheets | 10 whole (160g) | broken into 1-inch pieces |
| Egg white | 1 large | |
| Brown sugar | 2 tbsp | unpacked |
| Unsalted butter | 3 tbsp | melted and cooled |
| Kosher salt | pinch | |
| Heavy whipping cream | 1/4 cup | |
| Sugar | 1 tsp | |
| Vanilla extract | 1/4 tsp | |
| Good quality dark chocolate | 1 1/2 oz | |
| Mixed berries (strawberries, raspberries, & blueberries) | 2 cups | |
| Chocolate shavings | optional |
Little Tartlets That Made My Grandkids Smile
I still remember the first time I made these tartlets. My kitchen smelled like a bakery and a chocolate factory had a party. Doesn’t that sound amazing? The best part is how easy they are, even for a beginner. You will feel like a real chef by the time you are done.
My grandma used to say, “A good dessert starts with a happy crust.” I always laugh at that because she was right. These little graham cracker shells are so simple, but they taste like a hug. Plus, you get to use a food processor, which is always fun to watch. Let me walk you through it step by step.
Here is a little quiz for you: What is your very favorite berry to eat in summer? Share below! I am a big fan of raspberries myself, especially when they are warm from the sun. Now, grab your ingredients and let’s make some magic.
Making Your Tiny Dessert Shells
Step 1: First, heat your oven to 325 degrees. That is not too hot, just a warm hug for your tartlets. Line a 12-cup muffin tin with paper liners. I like to use the pretty foil ones for a fancier look. It makes me smile every time.
Step 2: Grab your food processor and dump in the broken graham cracker pieces. Pulse them until they are fine, even crumbs. (Hard-learned tip: If you do not have a food processor, put the crackers in a zip bag and crush them with a rolling pin. It is great for getting out frustration!) This step is very satisfying, I promise.
Step 3: In a medium bowl, mix the crumbs with the egg white, brown sugar, melted butter, and a pinch of salt. Use a fork to stir everything together until it feels like wet sand. It should hold together when you squeeze a little bit. If it is too dry, add a tiny drop more butter.
Step 4: Spoon about one and a half tablespoons of the mixture into each muffin cup. Press it down firmly into the bottom and up the sides of the paper liner. My grandson uses the bottom of a small glass to press it flat. That trick works like a charm every time.
Step 5: Bake the crusts for 10 to 12 minutes, until they start to turn golden brown. Do not forget to rotate the pan halfway through so they bake evenly. Let them cool completely when they come out. Patience is hard, but it is worth the wait.
Step 6: While the crusts cool, make your vanilla cream. Combine the heavy cream, one teaspoon of sugar, and the vanilla extract in a small bowl. Whip it with a whisk or hand mixer until it forms soft peaks. Pop it in the fridge while you work on the chocolate.
Step 7: Put the dark chocolate in a microwave-safe bowl. Heat it at half power for one minute, then stir. Keep heating it in 30-second bursts until it is smooth and melted. Be careful not to burn it, or the whole kitchen will smell sad.
Step 8: Once the crusts are cool, carefully peel away the paper liners. Spoon half a teaspoon of melted chocolate into the bottom of each one. Place them in the freezer for at least 30 minutes so the chocolate sets hard and firm.
Step 9: After the chocolate is set, it is time to decorate. Fill each little shell with fresh mixed berries. Spoon a dollop of whipped cream on top. Add some chocolate shavings for a pretty finish, if you like. Serve them right away before they disappear.
Here are the important details for your recipe box:
Cook Time: 12 minutes
Total Time: 1 hour (including freezing time)
Yield: 12 tartlets
Category: Dessert
Three Fun Ways to Change It Up
Berry Swap: Use sliced peaches and blackberries instead of the mixed berries. It tastes like summer in a bowl, especially when peaches are juicy and sweet.
White Chocolate Dream: Replace the dark chocolate with white chocolate. It makes the tartlets extra creamy and reminds me of birthday cake.
Lemon Twist: Add a tiny bit of lemon zest to the whipped cream. It gives a bright, tangy pop that goes perfectly with the berries.
Which one would you try first? Comment below!
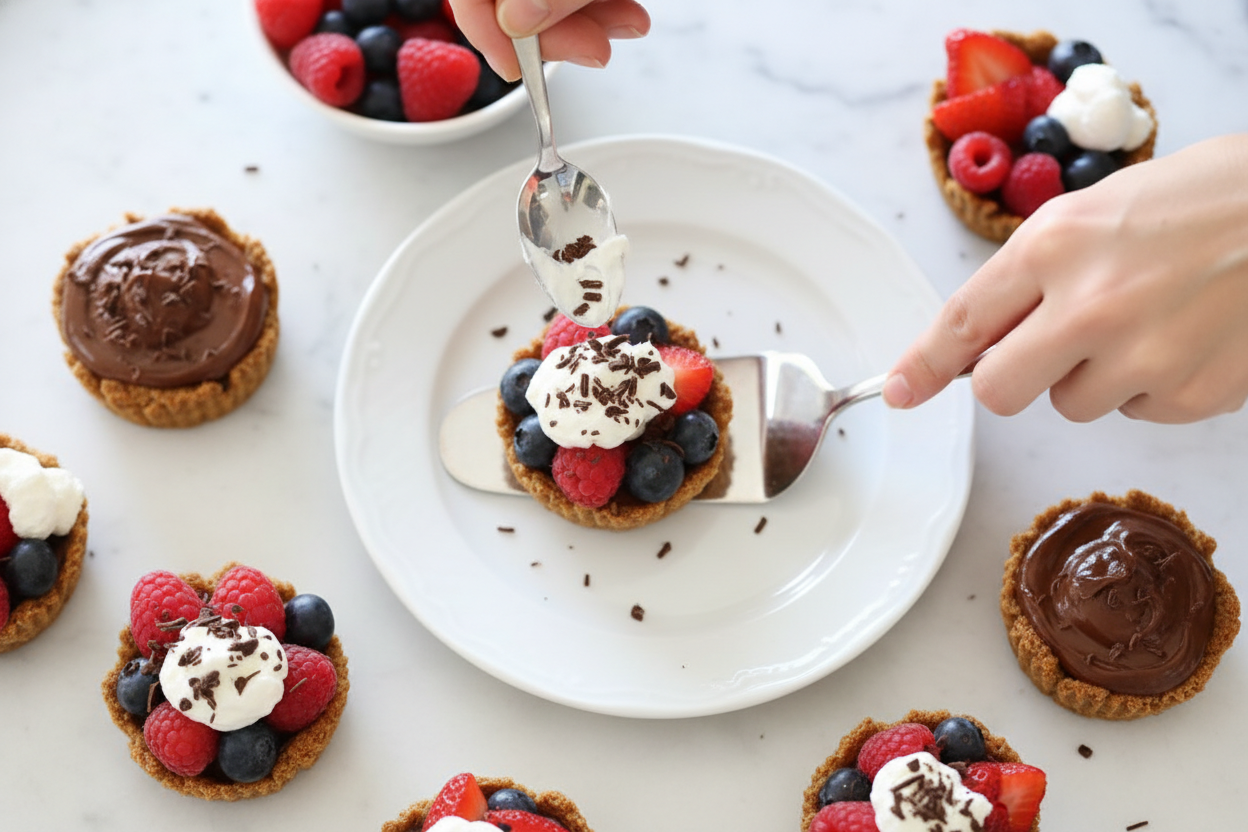
How to Serve Your Little Tartlets
I love placing these tartlets on a big white plate with a few extra berries scattered around. A tiny sprig of mint on top makes them look like they came from a fancy bakery. You can also dust them with a light snowfall of powdered sugar for a pretty finish.
For drinks, a tall glass of cold milk is my favorite way to enjoy them. Grown-ups might like a small cup of black coffee or a dessert wine like Moscato. The sweet berries and chocolate love a little bitter sip next to them.
Which would you choose tonight?
Keeping Your Tartlets Fresh and Tasty
These little tartlets are best eaten the same day you make them. The crust stays crispy, and the cream is fluffy. If you have leftovers, store them in the fridge. Cover them gently with plastic wrap so the berries don’t get squished.
You cannot freeze the finished tartlets. The cream and berries will turn watery and sad. I learned this the hard way when I made a big batch for a party. I popped them in the freezer, and they came out a mess. Have you ever tried storing it this way? Share below!
But you can bake the crusts ahead of time. Keep them in an airtight container at room temperature for two days. Then add the chocolate, berries, and cream just before serving. This makes party prep so much easier. Why does this matter? It saves you from rushing and lets you enjoy your guests.
Three Common Problems and Easy Fixes
First, the crust might crumble when you remove the liner. This happens if you did not press it firmly enough. Use the back of a small spoon to really pack the crumbs against the sides. Which of these problems have you run into before?
Second, the chocolate layer can look streaky. You just need to melt it slowly. I once rushed and burned a whole batch of chocolate. It smelled terrible. Use 50% power in the microwave and stir often. Why does this matter? Smooth chocolate makes the tartlets look fancy and taste richer.
Third, the whipped cream can get too stiff or turn to butter. Stop whipping when you see soft peaks that hold their shape. If you over-whip, add a tiny splash of cold cream and stir gently. This fix saves your dessert and your mood.
Your Questions, Answered
Q: Can I make these gluten-free?
A: Yes. Use gluten-free graham crackers or crushed cookies.
Q: Can I make them a day ahead?
A: Only the crust and chocolate layer. Add berries and cream the day you serve.
Q: What if I don’t have dark chocolate?
A: Use milk chocolate or white chocolate for a sweeter treat.
Q: Can I double the recipe?
A: Yes. Just use two muffin tins and bake one tray at a time.
Q: How do I get fancy chocolate shavings?
A: Run a vegetable peeler down the side of a chocolate bar. Which tip will you try first?
A Warm Goodbye from My Kitchen
I hope you love these little tartlets as much as my family does. They are perfect for a summer picnic or a cozy treat after dinner. Remember, cooking is about having fun and sharing joy. Have you tried this recipe? Tag us on Pinterest!
*Fun fact: A single tartlet has only 124 calories. That means you can have two without a worry!*
Keep your kitchen happy and your heart full. I would love to see your photos. Share them on Pinterest and tell me your story. Happy cooking!
—Chloe Hartwell.

Mixed Berry Tartlets with Chocolate and Vanilla Cream
Description
Mixed Berry Tartlets with chocolate and vanilla cream – easy dessert recipe for elegant treats. perfect for parties! berry tartlets, chocolate vanilla cream, easy dessert recipe, mini tartlets, party desserts
Ingredients
Instructions
- Heat the oven to 325F degrees. Line a 12-cup muffin tin with paper liners.
- In a food processor, breakdown the graham cracker pieces to fine, even crumbs.
- In a medium bowl, combine the graham cracker crumbs, egg white, brown sugar, butter and kosher salt. Mix with a fork until thoroughly and evenly combined.
- Evenly distribute the crumbs (about 1 1/2 tbsp each) among the muffin cups and press them into an even layer on the bottom and up 2/3 of the sides of the liner.
- Bake for 10 to 12 minutes until crust is beginning to brown, rotating the pan halfway through baking.
- Meanwhile, combine the cream, sugar and vanilla.
- With a metal whisk or hand mixer, whip the cream to medium peaks or desired stiffness.
- Set aside in refrigerator 2 to 3 minutes, or until ready to use.
- Place the chocolate in a microwave safe bowl and heat at 50% power for 1 minute. Stir the chocolate and continue to heat at 30 second intervals until melted.
- When crust is completely cool, carefully remove the paper liner.
- Spoon 1/2 tsp melted chocolate onto the bottom of the crust.
- Place the cups in the freezer for at least 30 minutes to set.
- Once the chocolate is set and crust is firm, top the chocolate with berries and whipped cream.
- Top with chocolate shavings, if using. Repeat with the remaining crusts. Serve immediately.
Notes
- Nutrition (per 1 tartlet): Calories: 124 kcal, Carbohydrates: 16 g, Protein: 1 g, Fat: 6.5 g, Cholesterol: 14 mg, Sodium: 85 mg, Fiber: 1 g, Sugar: 10 g


Leave a Reply